


Feedback
Last date modified: 2026-Mar-09
Building a short message search index
Before you can begin searching short message data, you must build a search index. The index enables you to perform more complex searches on RSMF documents processed in Relativity. It provides enhanced accuracy by storing and searching on the message-level and event-level metadata by using Elasticsearch.
Once the index is built, you can begin using the short message search feature. For more information on searching short message metadata, see Using short message search.
See related pages:
While Elasticsearch is similar to dtSearch and filtering, there are differences:
| Search type | Description | Example | Search precision |
|---|---|---|---|
| Elasticsearch | Searches on message-level and event-level metadata. |
If you enter a keyword without writing a field-specific query, Relativity searches all message-level fields, including the message body. Searching for "John" returns results that match that term everywhere Relativity finds it. Such as in the Sender Display Name and Message Body fields. |
High |
| dtSearch | Searches cannot search specific aspects. | If you searched "John Smith," the results would show that the phrase "John Smith" appears in the document, but not if John specifically sent a message, reacted, left the chat, and so forth. |
Medium |
| Filter | Searches on document-level fields only. | If you want to find documents that have a message sent by John Smith, the closest you can get is by checking the Participants field. The Participants field tells you if John Smith was in the DM or channel at any point in time. | Low |
Installing the Search AI application
The Search AI app must be installed in your workspace before using short message search index.
This functionality is not available to RelativityOne Government clients.
- Navigate to the workspace where you want to install the application.
- Navigate to the Relativity Applications tab.
- Click New Relativity Application to display an application form.
- Click the Select from Application Library radio button in the Application Type section.
- Click the ellipses
 icon next to the Choose from Application Library field.
 - Select Search AI in the Select Library Application list. This list only displays applications added to the Application Library. If Search AI is not included in the list,
- Click Ok to display the application in the Choose from Application Library field.
The application form also displays the following fields:- Schema Version—displays the version of the application that you are installing.
- User-friendly URL—displays a user-friendly version of the application's URL. This field may be blank.
- Application Artifacts—displays object types and other application components by clicking the plus icon.
- Map Fields—there are no fields available in Search AI for mapping.
- Click Import to install the Search AI app into the workspace.
- Review the import status of the application. Verify that the installation was successful or resolve errors.
The Search AI app is now installed in your workspace. You can begin building an index.
Building the full index
To build the full index, perform the following steps:
All RSMF documents processed in Relativity before May 8, 2025 must be republished before building the full index.
- Navigate to the Search Indexes tab.
- Select All Search Indexes from the View drop-down next to the New Search Index button.
- Select the Elasticsearch entry.
- Click Build Full Index located in the Build and Manage Index console.
The Status field shows Completed when the build finishes successfully. The build process includes all RSMF documents in the workspace, so you do not have to select a saved search or specific indexed fields.
Below are the possible statuses when building a short message index:
- In progress—states that the index is currently building.
- Completed—the build finished successfully.
- Failed—indicates 50% or more of the documents failed. Review the Retry Errors report for details. For more information, see Retry errors.
- Completed, Eventing active with errors—indicates an error on a message-level coding decision. Resolve the error before continuing. For more information, see Retry errors.
After the full index build is complete, you can run incremental index builds as needed instead of performing full builds. For more information, see Running incremental index builds.
Refer to Using short message search to start searching on the index results from the Documents list.
Running incremental index builds
After a full index build is completed, incremental builds can be performed. Incremental builds process only new RSMF documents added to the workspace and incorporate them into the index. Therefore, incremental builds typically require less time than a full build.
Consider the following items when running an incremental build:
- Incremental builds are only possible when the index status is Active.
- Incremental builds do not index any changes made to existing document data since the last full build.
- Canceling an incremental build before it finishes deletes the existing index data. As a result, you must run a full index before rebuilding.
To start an incremental build:
- Click Build Incremental Index located in the Build and Manage Index console.
- In the Incremental build confirmation window, select the checkbox if you want to activate the index once it's complete. Otherwise, leave it blank.
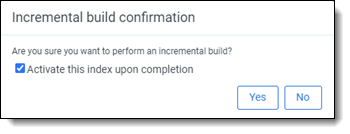
- Click Yes to begin the incremental build.
The Index Manager Agent will start indexing the job as soon as it becomes available in the queue.
Upon successful completion, the newly indexed files merge with the existing search index. If the job is unsuccessful, click Retry Errors located in the Errors and Details console. For more information, see Retry errors.
Automating incremental index builds using Automated Workflows
An automated workflow can be configured to trigger an incremental index build when new documents are added to a workspace using the New Documents Added trigger and the Build Elasticsearch index action.
Retry errors
When errors occur, you can first try to rebuild the index with the errored documents using the Retry Errors option in the Errors and Details console. This may resolve any system issues that have occurred, allowing the errored documents to index successfully.
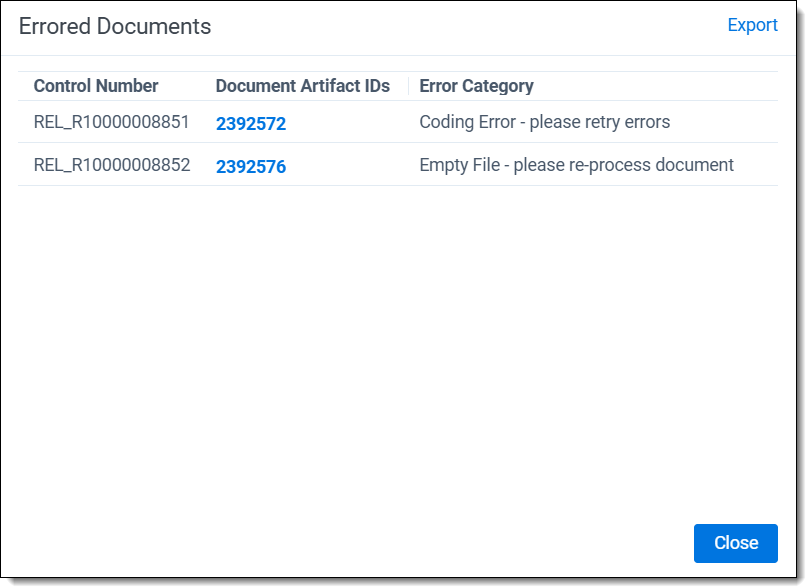
If there are still errors, click the Show document errors link to review each document and error. Error categories include:
- Indexing Error—a problem occurred while indexing documents. Click Retry Errors to re-index the failed documents.
- Coding Error—a problem occurred when updating a message-level coding field. Click Retry Errors to re-index the failed documents.
- Metadata Storage Errors—a problem occurred when trying to index the metadata. Click Retry Errors to re-index the failed documents.
- Empty File—the file has no data in it. The document file did not process correctly during Processing or an error occurred during data ingestion through Integration Points. Reprocess the document in Processing or Integration Points
You can export the document information to a .csv file using the Export link. Then, either create a saved search to exclude the documents or proceed with reprocessing them.
To view and retry index build errors, use the options in the Errors and Details console:
- Retry Errors—click to retry any documents that failed to index during the earlier build.
- Show Document Errors—click to see individual files and their errors on the Errored Documents modal. Click the Document Artifact ID link to display the document in the Viewer. Click the Export link to download a .csv file with the error details to proceed with fixing them and rebuilding the index.
- View Documentation—click to navigate to the RelativityOne documentation site.
Eventing
An event is triggered when a change is made to any of the fields below using message-level coding in the Viewer.
- Responsive—this field reflects any message-level coding decisions made on the Responsive field using the coding layout.
- Privileged—this field reflects any message-level coding decisions made on the Privileged field using the coding layout.
- Notes—this field reflects any message-level coding notes made in the Notes field using the coding layout.
Their data is automatically refreshed in the index. Events are searchable shortly after the time displayed in the "Last updated on" column of the Index list, so there is no need to build an index.
If an event fails to index, the index status becomes Completed, Eventing active with errors. Click the Show Document Errors link to review the documents in the Errored Documents modal. Then, click Retry Errors to start fixing the issue. For more information, see Retry errors.
Also, if one or more message-level coding decisions did not index, a banner displays on the Documents list page. Navigate to the index details page to retry the documents.