


Feedback
Last date modified: 2026-Jul-14
Manual markups with spreadsheet files
Redact allows you to apply manual markups to Excel or .csv files in the Viewer. You can apply markups to specific parts of an Excel file including the sheet names, charts, objects, and headers and footers. An audit of the markups applied to each document can be viewed at any time to make tracking markups easy. You can also quickly locate any markups in a document and approve or reject them as part of your quality control process by using the Redaction Navigation card.
Placing a markup on a document causes the coding layout to refresh. If you are editing a layout and place a markup, any unsaved edits to the layout fields will be lost. We recommend editing the fields on a layout and saving your changes before applying manual markups to a document.
If you would prefer to have markups applied automatically, see Automated spreadsheet markup project and Automated spreadsheet propagation.
Preparing Excel documents
We recommend running the Prepare Excel for Redact mass operation, formerly known as the Unhide Excel Content mass operation, on all Excel documents before applying markups with Redact. This preparation is done to ensure data is not lost after the markups are applied and also to prevent information that is covered by markups from being restored by third parties.
To prepare Excel documents:
- Navigate to the Documents tab.
- Select the desired Excel documents from the list.
- Click on the mass operations menu and select the Prepare Excel for Redact option.
- Click Confirm.
The selected Excel documents are ready to receive markups using Redact.
Excel file markup considerations
If a cell in a spreadsheet file contains more than 32,767 characters, applying a redaction causes the text in the cell to be truncated.
Excel files must be prepared for redaction prior to markup application. This preparation is done to ensure data is not lost after the markups are applied and also to prevent information that is covered by markups from being restored by third parties.
When you apply the first markup to an Excel file, the following will occur:
- All calculated fields are replaced with their original calculated values.
- All formulas are replaced with their calculated values.
- All pivot tables are replaced with their original calculated values.
- All change-history is removed from documents.
- All hidden and very-hidden rows, columns, and sheets are unhidden.
- All merged cells are un-merged.
Supported file types
To learn more about which file types are compatible with Redact, see Redact supported file types.
.csv file markup considerations
Since .csv files are text-based, they function differently than Excel files. A .csv file must display in table format in the Native Viewer before redaction options appear in the right-click menu. Only text or cell content redactions can be applied to .csv files.
Redact supports single and double quote characters as qualifiers.
The following delimiters are supported for .csv files, in order of highest to lowest priority:
- Comma
- Tab
- Semicolon
- Colon
- Space
If no delimiter is found, the .csv file will display in a single column. Redact provides warning messages that indicate which .csv files failed to match a delimiter to help you troubleshoot.
Applying markups to .csv files
If you apply a markup to a cell where the text overflows into empty neighboring cells, just as in the native application, the markup does not also overflow into empty neighboring cells. However, when the document is produced and the markup is burned in, the text from the original cell no longer overflows and is completely hidden by the markup.
You can apply redactions to a single cell or multiple cells by doing the following:
- Open the desired .csv file in the Native Viewer.
- Select the desired markup set in the bottom-left drop-drown menu. If None is selected, you will not be able to apply markups.
- Select the desired cell or click and drag your cursor to select multiple cells.
- Right-click on the highlighted area, hover your cursor over Relativity Redact in the right click-menu and then hover your cursor over Redact again, and select the desired redaction type.
A redaction is applied to the selected area.
Applying markups to Excel files
Markups can be applied to many different elements of an Excel file as needed.
Manually applying markups
If you apply a markup to a cell where the text overflows into empty neighboring cells, just as in the native application, the markup does not also overflow into empty neighboring cells. However, when the document is produced and the markup is burned in, the text from the original cell no longer overflows and is completely hidden by the markup.
You can apply markups to a single cell or a series of rows or columns by doing the following:
- Open the desired Excel file in the Native Viewer.
- Select the desired markup set in the bottom-left drop-drown menu. If None is selected, you will not be able to apply markups.
- Select either the desired cell, the desired row or column, or click and drag your cursor to select the area you wish to apply a markup to.
- Right-click on the highlighted area, hover your cursor over Relativity Redact in the right-click menu, and select the desired markup option from the menu.
A redaction or highlight is applied to the selected area.
Applying the same markup repeatedly
For your convenience, you can rapidly apply the same markup to a single cell or a series of rows or columns by doing the following:
- Select and apply a markup to the Excel document. See Manually applying markups for more information.
- Select the desired cell, row, or column that you wish to apply the same type of markup to.
- Right-click and select the Redact - name of the previously applied markup option. During a session, the name of this option updates to display the name of the markup type that was most recently applied.
A markup of the same type as was most recently applied is added to the currently selected cells, rows, or columns.
Cell Content redactions
You can also edit the text of a single cell on-the-fly with this markup option. When a cell content redaction is applied, background colors, patterns, and borders from the selected cell will be maintained. Additionally, the font, font size, and color of the first word in the cell will be maintained in the redaction and any other fonts, font size, or colors in additional words will not.
To edit the contents of a single cell using a cell content redaction, do the following:
- Open the desired Excel file in the Native Viewer.
- Select the desired markup set in the bottom-left drop-drown menu. If None is selected, you will not be able to apply markups.
- Select the cell you wish to apply a redaction to.
- Right-click on the highlighted cell and hover your cursor over Relativity Redact and then Redact, and finally, select Cell Content.
The Redact Cell Text modal displays. - Edit the cell's text as desired to create the redaction.
- Click Update Cell Content.
The Cell Content redaction is applied to the selected cell.
Sheet Name redactions
The name of a sheet within an Excel file can be redacted if it contains sensitive information.
To redact the name of a sheet, do the following:
- Open the desired Excel file in the Native Viewer.
- Select the desired markup set in the bottom-left drop-drown menu. If None is selected, you will not be able to apply markups.
- Click on the Sheet Names icon.
- Click Redact in the row of the sheet name you wish to apply a redaction to.
The Redact Current Sheet Name modal displays. - Edit the sheet's name as desired to create the redaction.Due to software requirements in Excel, each sheet name redaction you enter must be unique compared to the other sheet names. Additionally, the name cannot be blank, contain the following characters: / \ ? * : [ ], and cannot begin or end with an apostrophe.
- Click Redact.
The Sheet Name redaction is applied to the sheet.
Chart redactions
Due to limitations of the .xls file format, the Review Interface is unable to visually represent markups applied to either the full sheet chart or full sheet chart components. This does not impact Redact's ability to create markups for these components or the branding process. The Download Marked Up File button can be used to verify markup application.
To apply a redaction to a chart, do the following:
- Open the desired Excel file in the Native Viewer.
- In the bottom toolbar, click on the Redact Spreadsheet Markup Navigator icon to expand it.
- Click on the Chart icon to display a list of all the charts in the document.
- Click the Redact button on the right side of the chart's row you wish to redact.
A black box redaction is applied to the chart. - Optionally, to apply a redaction to either the chart title or labels, click on the name of the chart and then click on the Redact button on the right side of any chart contents' row you wish to redact.
Comment redactions
To apply a redaction to a comment, do the following:
- Open the desired Excel file in the Native Viewer.
- In the bottom toolbar, click on the Redact Spreadsheet Markup Navigator icon to expand it.
- Click on the Comment icon to display a list of all the comments in the document.
- Click on the comment you wish to redact.
The Redact Comment modal displays. - Edit the comment as desired to create the text redaction.
- Click Save.
The redaction is applied to the comment.
Header and footer redactions
Headers and footers in Excel files are not visible in the Viewer. However, you can apply redactions to them by doing the following:
- Open the desired Excel file in the Native Viewer.
- In the bottom toolbar, click on the Redact Spreadsheet Markup Navigator icon to expand it.
- Click on the Headers icon to display a list of headers in the document.
- Optionally, you can navigate to the header or footer you wish to redact by clicking the drop-down menu and selecting the desired option or clicking the Next or Prev links in the card.
- Click on the header or footer you wish to redact.
The Redact Header/Footer modal displays. - Edit the header or footer as desired to create the redaction.
- Click Save.
The redaction is applied to the header or footer.
Object redactions
Excel files may contain a variety of objects including:
- WordArt
- SmartArt
- Embedded documents (email, PowerPoint), images, equations, text boxes, and shapes
You can apply a black redaction to these objects, by doing the following:
- Open the desired Excel file in the Native Viewer.
- In the bottom toolbar, click on the Redact Spreadsheet Markup Navigator icon to expand it.
- Click on the Objects icon to display a list of objects in the document.
- Click the Redact button on the right side of the object's row you wish to redact.
A black redaction is applied to the object you selected.
Convert Spreadsheets Markup
If markups have been applied to one or more documents, you can change all of the redactions to highlights or vice versa using the Convert Spreadsheets Markup mass operation. To learn more visit, Convert Spreadsheets Markup.
Inverting markups
You can either select an entire markup or portions of a markup to remove it and restore the data that was hidden underneath the markup. Inverted markups only removes markups from the selected areas, it does not apply any markups to other portions of a document. Inverting markups also excludes areas of the document from branding. The ability to invert markups replaces the revert markups feature.
Inversions are recorded in the Redact Spreadsheet Markup Navigator as having the Inverse value for the Markup Type field. This makes inverted markups easy to find within a document. Alternatively, you can also apply inverted markups automatically using a Redact project.
To apply an inverted markup:
- Open the desired spreadsheet file in the Native Viewer.
- Select either the desired cell, the desired row or column, or click and drag your cursor to select the area with a markup that you would like to redact. Only cells that have markups will be inverted and cells without markups will be unaffected by this process.
- Right-click on the highlighted area and hover your cursor over Redact in the right-click menu and select Invert Selection.
The selected markups, whether applied manually or by a Redact project, are removed from the document. - Optionally, you can review inverted markups in the Redact Spreadsheet Markup Navigator. You can also remove an inverted markup to restore the previous markup by clicking the Reject icon in the Accept/Reject column.
Excel document keyboard shortcuts
The following options are available to help you conveniently navigate Excel documents using your keyboard:
| Keyboard Shortcut | Action |
|---|---|
| Page up / Page down | Scroll up or down one screen length in the document. |
| CTRL+End | Select the bottom-right cell and move it into view. |
| CTRL+SHIFT+End | Extend the current selection of cells to the bottom-right cell. |
| CTRL+Home | Select the top-left cell and move it into view. |
| CTRL+SHIFT+Home | Extend the current selection of cells to the top-left cell. |
| Arrow left / up / right / down | Move the current selection left / up / right / down by one cell. |
| CTRL+Arrow left / up / right / down | Move the current selection left / up / right / down by one cell. |
| CTRL+SHIFT+Arrow left / up / right / down | Extend the current selection left / up / right / down. |
| Tab | Move the current selection to the right by one cell. |
| Shift+Tab | Move the current selection to the left by one cell. |
| CTRL+A | Select the entire spreadsheet. |
| CTRL+Shift+Space | Select the entire spreadsheet. |
| CTRL+Space | Extend the current selection to include the full columns. |
| Shift+Space | Extend the current selection to include the foll rows. |
Reviewing markups
After markups have been placed, perform quality control on documents before they are produced. To learn more about how to do this using Redact, visit Reviewing markups to ensure accuracy.
Reviewing the original native document
When a spreadsheet document is prepared by Redact, there are changes made to the native file to facilitate markup application. The changes include unhiding hidden columns, rows, and sheets. By the end of the preparation process, the original document is backed up to an RDO and the native is replaced with the flattened document.
If you would like to validate what content was previously hidden in a spreadsheet file, you can use the Open Original Native button to compare the document both before and after Redact preparation.
To access the original native file directly from the Viewer:
- Navigate to the Documents tab and select a spreadsheet document from the list that has already been prepared for Redact.
- Click on the Open Original Native button.
A new browser window opens where you can click Native to view the native spreadsheet document or click Original Native Text to see the document before it was prepared for Redact.
Downloading and exporting marked up documents
You can download or export documents in the following ways:
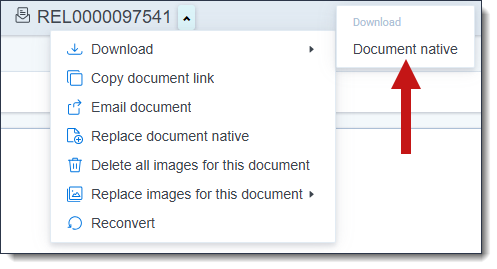
- To download a copy of the native file without any markups, click on the document actions menu in the Viewer, hover your cursor over the Download option, and then select Document native.
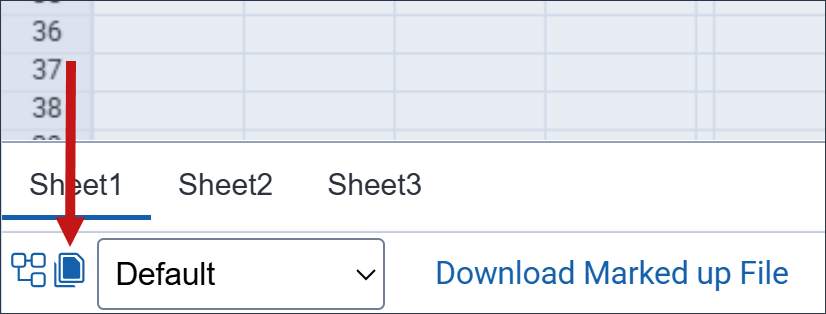
- To download a copy of a native spreadsheet file with the markups applied in the Native Viewer, click on the Download Marked Up File button.
- To export multiple documents that have markups applied, run a production that includes these documents and then export the production set using Import/Export.