Last date modified: 2026-Feb-05
Running the analysis
After setting up the project and developing the prompt criteria, you're ready to run the analysis against the prompt criteria.
To run the analysis:
- On the upper right of the dashboard, click Analyze [X] documents.
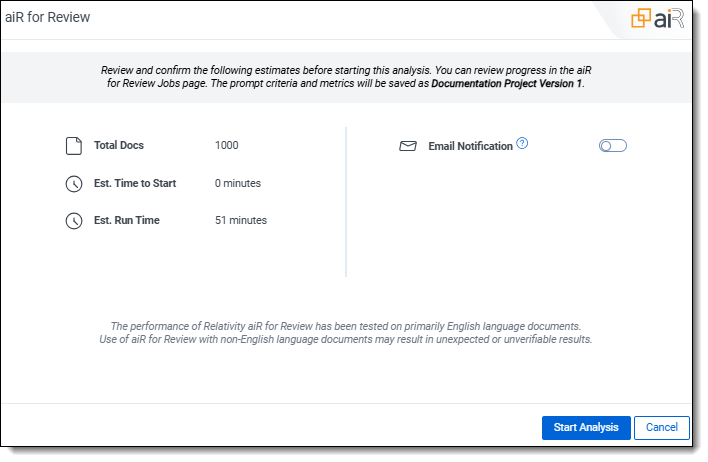
- Review the confirmation summary:

- Total Docs—number of documents to be analyzed.
- Est. Run Time—estimated time it will take to analyze and return the results of the documents selected. This does not include time waiting in the job queue.
- Est. Time to Start—estimated wait time from job submission to the start of the analysis process. Longer wait times occur when other jobs are queued across tenants.
- Email Notification—enable the toggle if you want to send email notifications when a job completes, fails, or is canceled. Your email address is automatically entered in the text box. Proceed with entering more recipient email addresses, separated by commas or semicolons. Email notifications are only sent when the toggle is enable.
- Click Start Analysis.
Once the analysis job starts, the results begin to appear beside each document in the Analysis Results panel of the dashboard. For more information on analyzing the results or seeing results in the Viewer, see Analyzing aiR for Review results.
The Analyze button is disabled during the analysis process, and a Cancel option appears. When the job completes, the Analyze button is active again.
If you try to run a job that is too large or when too many jobs are already running, an error appears. You can still save and edit the prompt criteria, but you will not be able to start the job. For more information, see Job capacity, size limitations, and speed.
After the first analysis completes, use the results to fine-tune the prompt criteria. For more information on:
- the dashboard, see Navigating the aiR for Review dashboard.
- the fine-tuning process, see Revising the prompt criteria
- the results fields, see Analyzing aiR for Review results.
On this page


