Upload transcripts
The new transcript upload feature replaces the functionality of Simple File Upload.
You can upload multiple transcript files in a single job from the Transcripts tab. The following transcript file formats are supported by upload transcript: .mdb, .rtf, .ptf, .txt, .trn, .lef, .xmef, and .xmptf. If you are uploading an .mdb file, a video file must be associated for the .mdb file to be supported in the Viewer. You can attach .mp4 video files and exhibit files to transcript files as part of the upload process.
Once you have uploaded transcripts, you can interact with them on the Transcripts tab. To learn more, see Transcripts tab.
Alternatively, you can upload .mdb transcripts using Import/Export. To learn more, see Importing transcript MDB data for Processing via Import/Export.
Permissions
This feature supports feature permission actions. Each action grants access to a specific task within the feature. You can grant groups access to individual actions, allowing them to perform only the tasks they need. To grant access to the entire feature, select all of its actions. Manage feature actions on the Features tab in a group's workspace permissions. For instructions, see
Setting workspace permissions. For more information about feature permissions, see
Feature permissions.
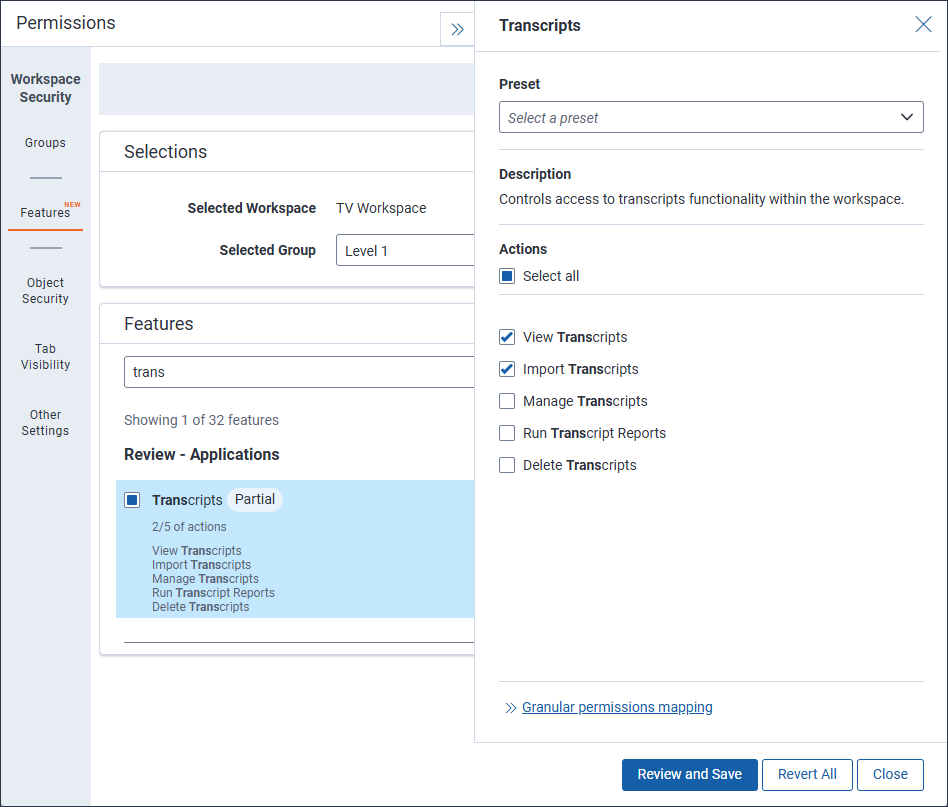
The following actions must be granted to users to upload transcripts:
- View Transcripts—Select to allow users in a group to open the Transcripts tab.
- Upload Transcripts—Select to allow users in a group to upload transcripts to Relativity.
Uploading transcripts
You can upload multiple transcript files at once by drag and dropping them into the upload area. Once this process is complete, you can optionally attach .mp4 video files and exhibit files associated with the transcript.
Once you start importing transcripts, you can navigate away from the Transcript tab and continue using Relativity while you wait. We do not recommend closing your internet browser when uploading transcripts because this disrupts data transfer. Once the upload process progresses to the import step, you can close your browser and the files will still import into the workspace.
To upload transcripts to Relativity:
- Navigate to the Transcripts tab.
- Click on Upload.
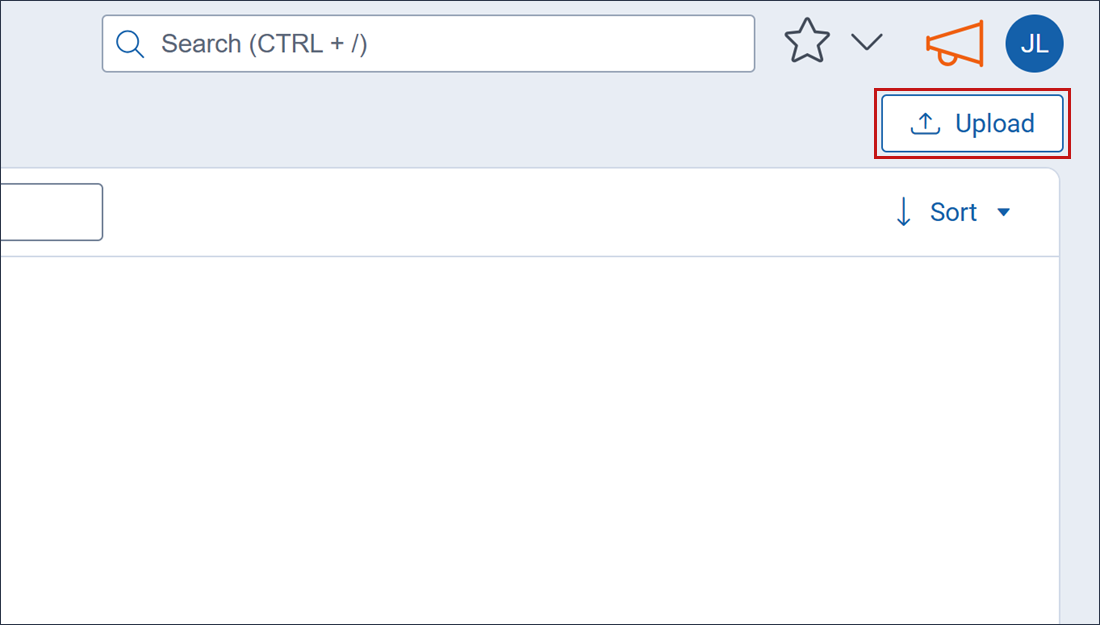
- Either drag and drop the transcript file on the Drop transcript files here or click on that area, choose the transcript file you wish to upload, and click Open.
- Once you are done selecting transcripts to upload, click Next.
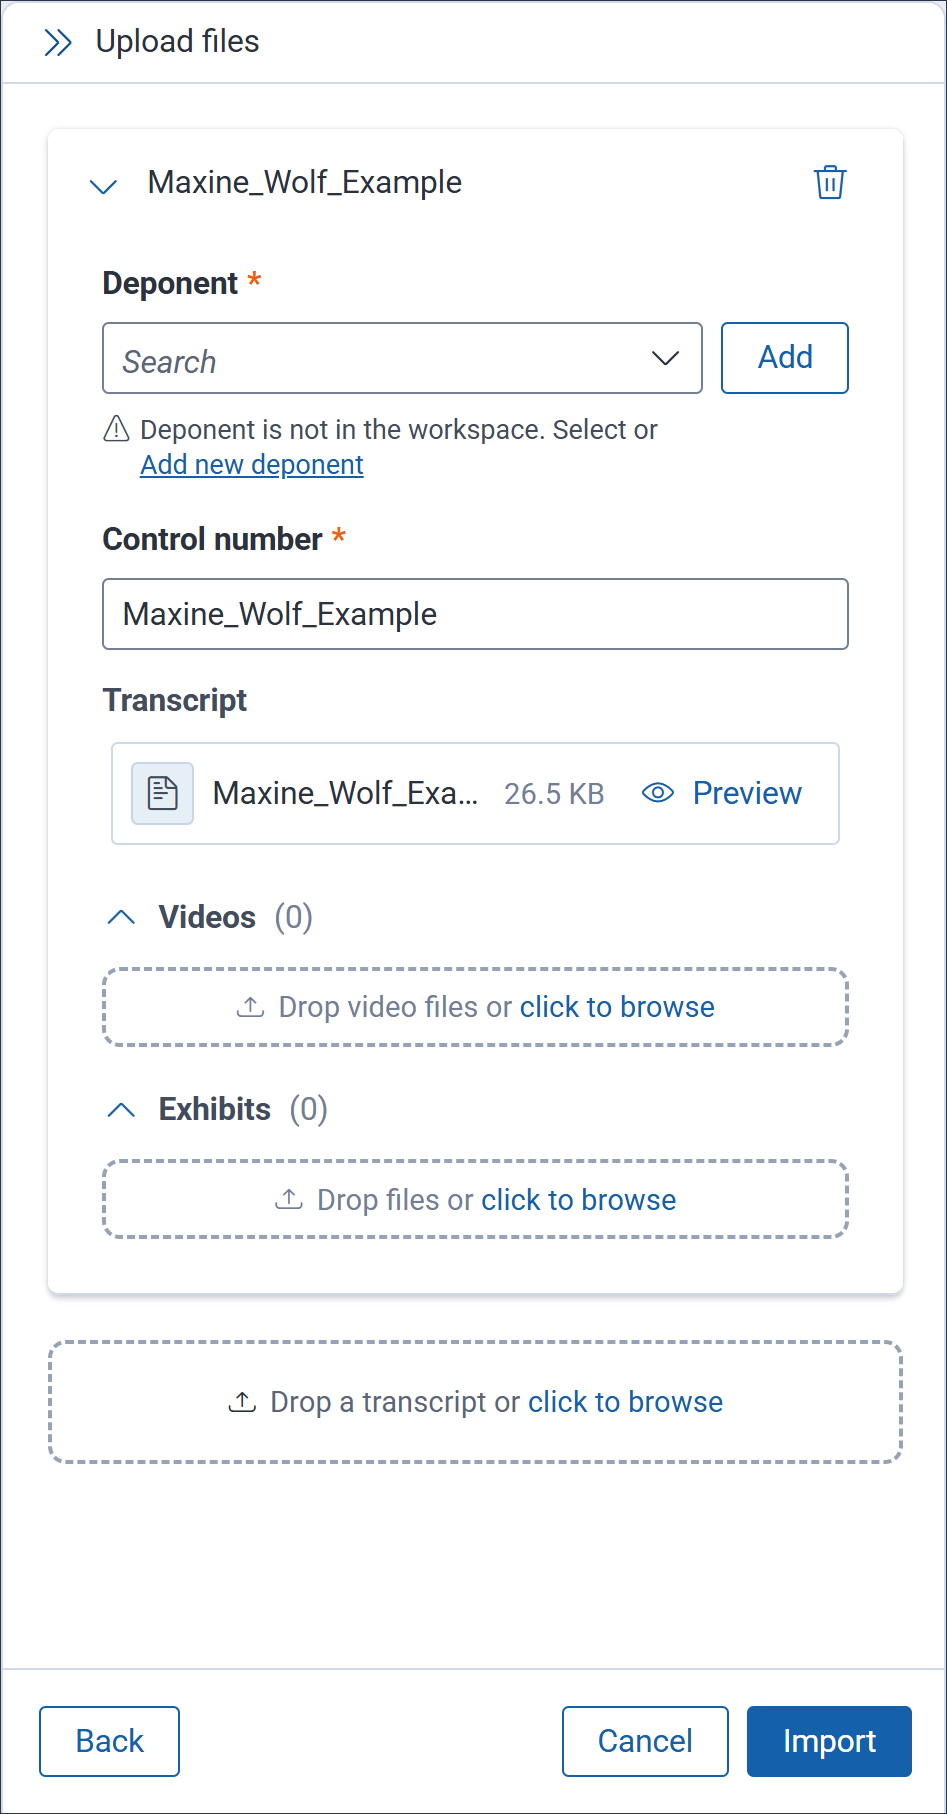
- Complete the following fields for each transcript you are uploading:
- Deponent—Either select an existing deponent from the drop-down menu or click Add, enter the deponent's first and last name using your keyboard, and click Add Deponent. Once a deponent has been added, it is available in the drop-down menu to use with other transcript files.
- Control number—The name of the transcript file populates in this field automatically. You can edit it to adjust the transcript file's control number. If a transcript file has a non-unique control number, (1) is automatically appended to their name. If another file already has (1) appended, then the next highest unique number is added instead. Once you click Import, you are notified if any transcript control numbers are not unique.
Any exhibit or video files that are uploaded are assigned the file name as a control number. If that results in a non-unique control number, (1) is appended to their name instead. If another file already has (1) appended, then the next highest unique number is added instead. - Transcript—The uploaded transcript file's original name and file type display here along with the file size. Optionally, click Preview to see what the transcript file looks like in the Viewer once the upload is complete.
- After clicking Preview, you can navigate to another transcript file that is being uploaded from the top drop-down menu.
- If you would like to adjust the formatting of the transcript compared to what was originally provided, you can adjust how the transcript displays by entering a value in the Lines per page field.
- Optionally, you can click on a line in the transcript to make it the new starting point in the document. All lines prior to the one you selected are transparent to help you visualize the new starting point.
- You can use the icons near the bottom of the page to navigate to different pages or the first or last page in the transcript.
- When you are done previewing transcript files, click Close Preview to return to the previous modal.
- Videos—Optionally, either associate .mp4 files to the transcript by dragging-and-dropping them on this field or click on the field, select the desired .mp4 files you wish to upload, and click Open. Multiple synced videos are currently only supported with .mdb transcripts.
- Exhibits—Any .lef or .xmef files that contain exhibits and are bundled with the transcript file are populated here along with their name and file size. These files are linked in-line with the transcripts as well. Optionally, you can click Remove to delete the exhibit.
To add an exhibit, either drag and drop each exhibit file on the field, drag and drop a folder that contains all of the exhibits grouped together, or click on the field, select the desired exhibit file you wish to upload, and click Open. Exhibits that are not part of the .lef or .xmef transcript bundle upload normally but these files are not linked in-line in the transcript document.
- Once you have completed the fields for each transcript file, click Import.
The process for uploading transcripts has two parts: upload to storage and import to workspace. You can continue using Relativity and navigate away from this tab once the process begins. Once the first step, upload to storage is complete, you can close your browser and the progress will not be disrupted. The Upload files panel displays information on the upload job so you can track progress. Once the upload is complete, you can click New to start a new upload job.
Viewing previously uploaded transcripts
You can view uploaded transcripts in two different places. Transcripts can be accessed on the Documents tab in the Transcripts folder. A folder for each deponent is automatically created by Relativity. Within each deponent folder, there are nested folders for transcripts, videos, and exhibits if they were imported alongside the transcript.
You can also view uploaded transcripts on the Transcripts tab. To learn more, see Transcripts tab.
Transcripts application
While everything described below is still accessible in Relativity, it is scheduled to be deprecated in the future. We recommend starting to use the new upload transcripts feature now so that you can prepare for the deprecation.
Special considerations
Special considerations include:
- The Transcripts application supports transcript files up to 10GB. The upload can be a mix of transcript files, exhibits and video files.
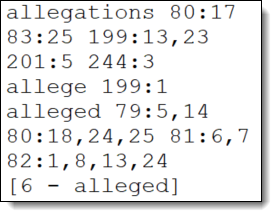
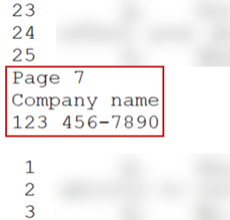
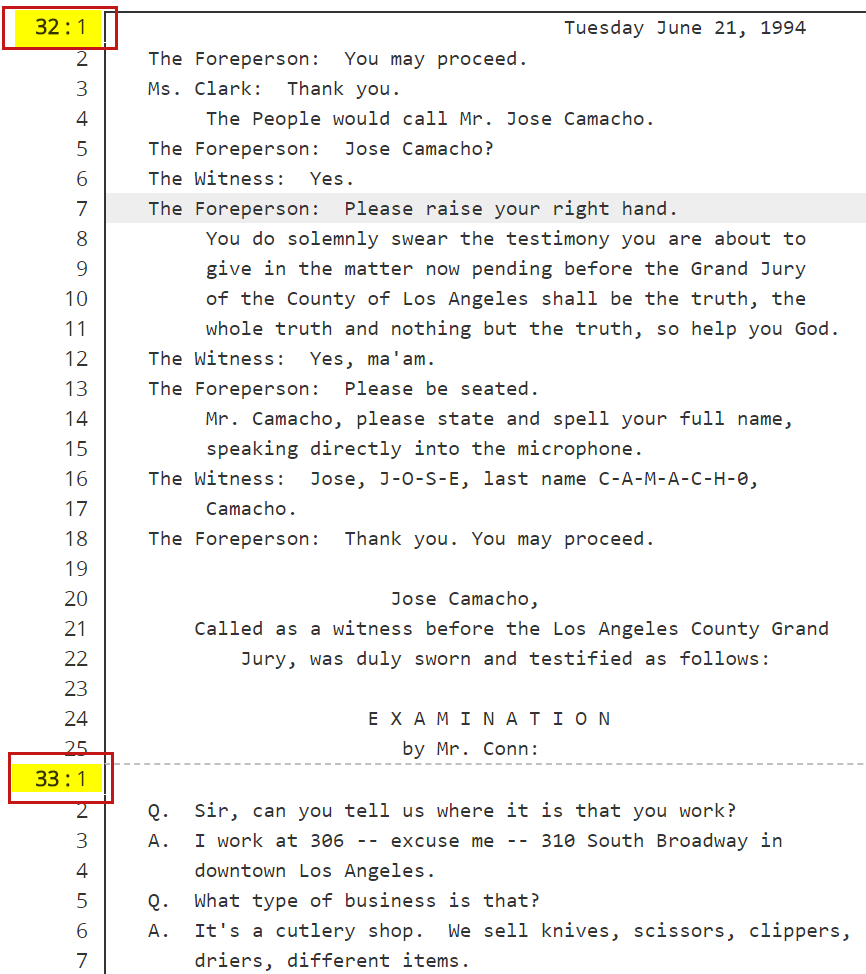
- The Transcripts application does not support transcript files that contain footers. For example, the .txt transcript file below is not supported because it contains a footer.
Upload a transcript from the Documents tab
Once uploaded, native files can be seen in the Viewer. All non-native files can be seen in the Extracted Text Viewer instead.
To upload a new transcript to a workspace from the Documents tab:
- Navigate to the Documents tab.
- Click the arrow on the right side of the Simple File Upload icon to open a drop-down menu, and then select New Transcript.

- Click Choose File or drag and drop your file to upload. When the transcript imports successfully, a green check mark appears.
If you uploaded a bundle of files, Relativity extracts the transcript file and displays the extra files as exhibits. Supported bundle file types include .lef and .xmef. See Transcript supported file types. To ensure the files are uploaded, the Transcript file name and the file extension must be 200 characters or less.
Once they are uploaded, you can find the exhibits as document references in the transcripts layout. They will not have a page or line number unless they are directly linked to a page and line on the transcript. Existing links to exhibits in transcripts files will be visible in the Viewer once they are uploaded to Relativity.
- Click Select File to upload exhibits. To upload and link additional exhibits to a transcript, use Simple File Upload and then link the exhibits using the Transcripts layout. For more information, see Simple File Upload and Linking to exhibits.
Only 20 exhibits can be linked to a transcript upon initial upload. By modifying the SFUMaxFilesToUpload instance setting, administrators can increase the number of files you can upload up to 100 files.
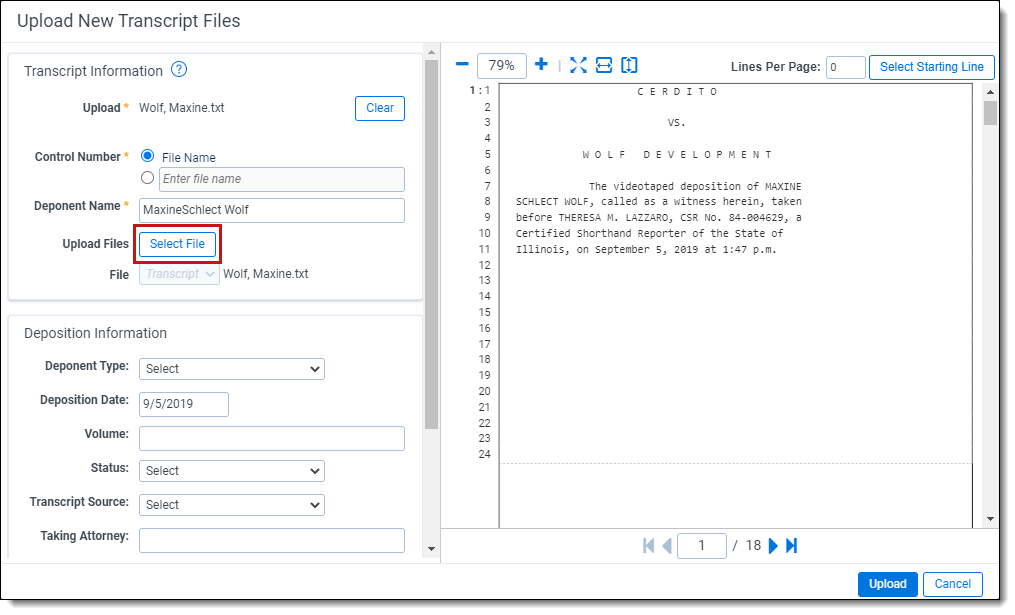
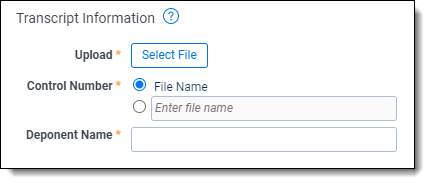
- Fill out the fields:
- Control Number - choose the file name or a enter a control number.
- Deponent Name - enter the name of the deponent.
- Upload Files - click Select to choose which exhibit files you would like to add along with the transcript.
- Deponent Type - select Fact, Expert, or Character deponent.
- Deposition Date - enter the date of the transcript's creation.
- Volume - enter the volume of the transcript you are reviewing.
- Status - select Draft or Final.
- Transcript Source - select Hearing, Trial, Or Deposition.
- Taking Attorney - enter the name of the taking attorney.
- Defending Attorney - enter the name of the defending attorney.
- Party - select Plaintiff or Defendant.
- Lines per page - enter the number of lines per page reflected on original transcript file taken by the respective court reporter.
- Comments - add custom comments to the transcript being imported in this custom field.
- (Optional) If you want to change the number of lines per page, type the number of lines per page that you want into the Lines Per Page box and then hit enter on your keyboard. Click Reset in the upper right corner to revert the number of lines per page.
- (Optional) If you want the transcript to have a different starting line, click Select Starting Line and then click the line of the transcript that you want to be the first line. Click Clear in the upper right corner to revert the starting line.
- Click Upload.
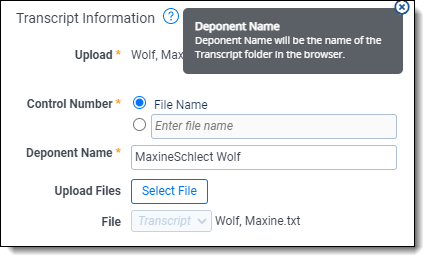
A tool tip indicates that the Deponent Name will be the name of the transcripts folder created.
Uploading a video of an interview
Transcripts load files often come with a video of the interview. The video can be played in the Viewer in sync with the text of the transcript. To learn more, see Supported file types for the Transcripts application.
You must import videos at the same time you are uploading transcripts or the video and transcript cannot sync.
To upload a video using a .txt file:
- Click New Transcript. A pop-up appears.
- Click Choose File or drag and drop your .txt file to upload.
- Multiple attachments will appear uploaded along with the transcript. Make sure that you keep the .mp4 check box selected.
- Fill out the relevant fields. See Uploading transcripts with Simple File Upload.
- Click Upload.
To upload a video using a .mp4 file:
- Click New Transcript. A pop-up appears.
- Upload your transcript file.
- Next to Upload Files click Select.
- Navigate to your .mp4 file and upload it.
- Fill out the relevant fields. See Uploading transcripts with Simple File Upload.
- Click Upload.
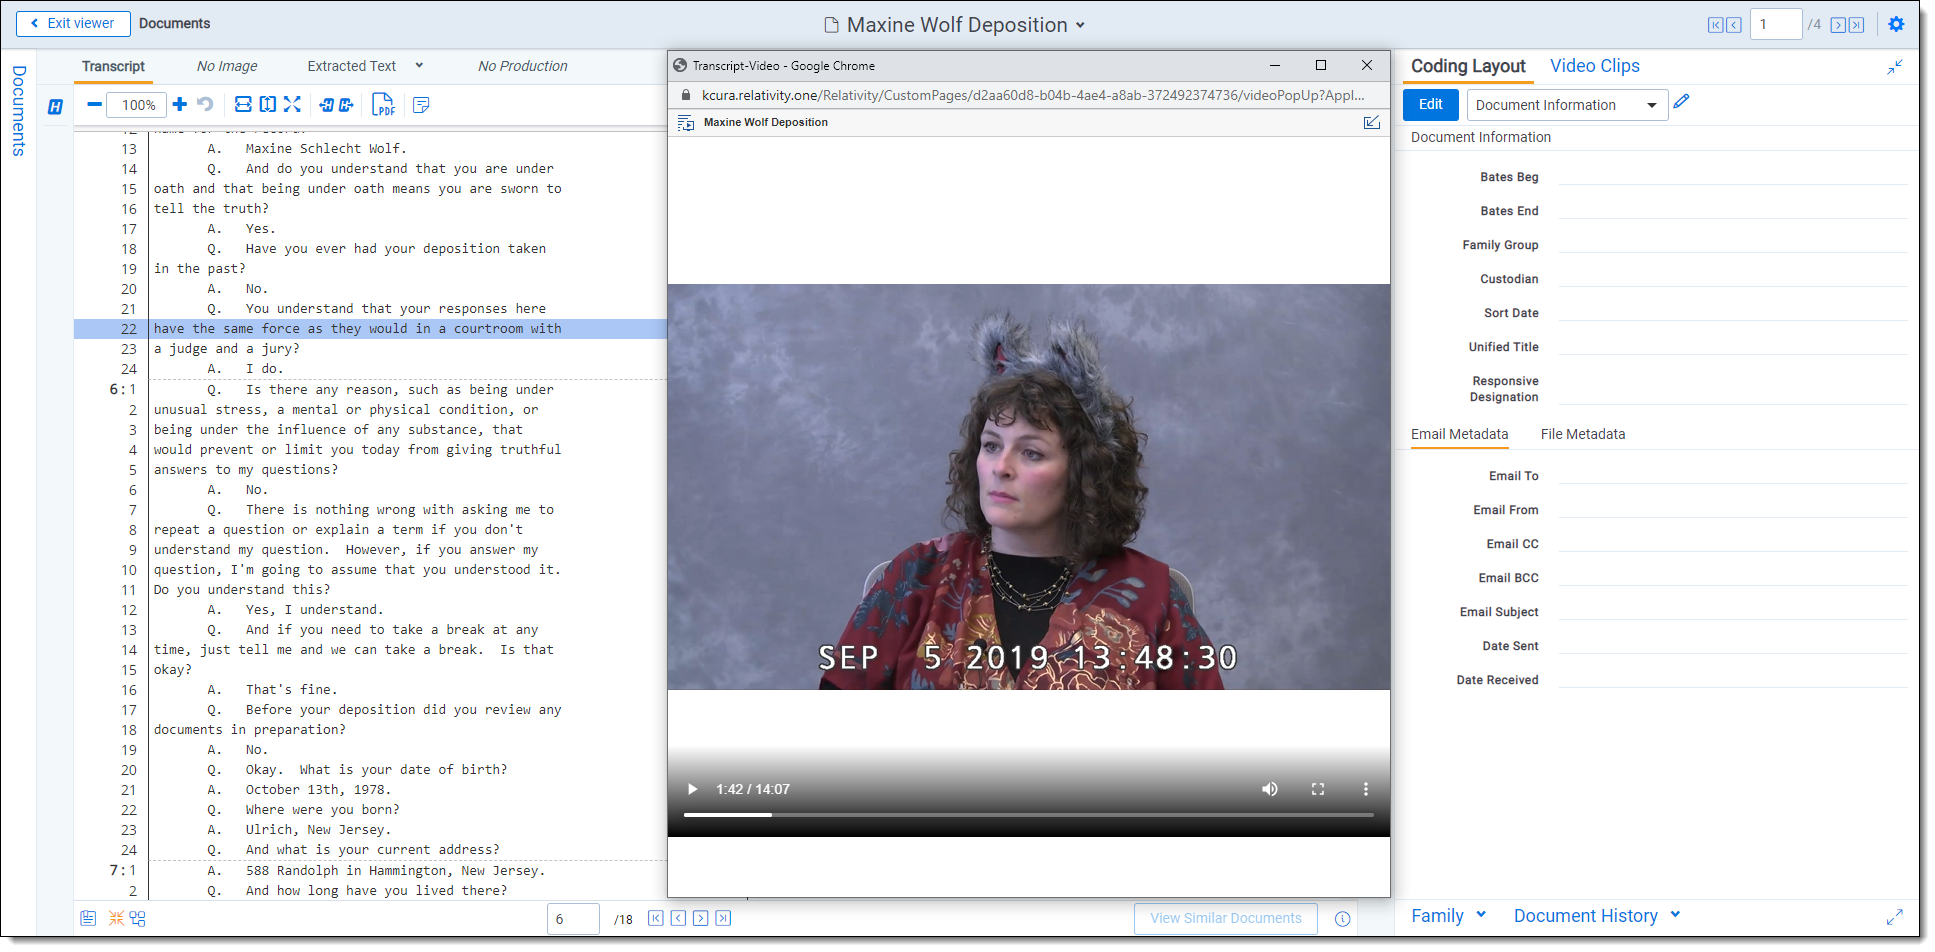
Videos are not documents and are not stored in the document list in Relativity. Videos are stored as a file field within a transcript. To access a video, you will need to open it from the Viewer or find it in the folder browser. To distinguish videos from transcripts, videos will have the Video Sync icon next to them.
To open the video player in the Viewer, click on the video icon in the bottom, left side of the Viewer.
To go directly to a specific line of the transcript in the video:
- Hover your cursor over the desired line number.
- Right-click and select Go to video from this line.
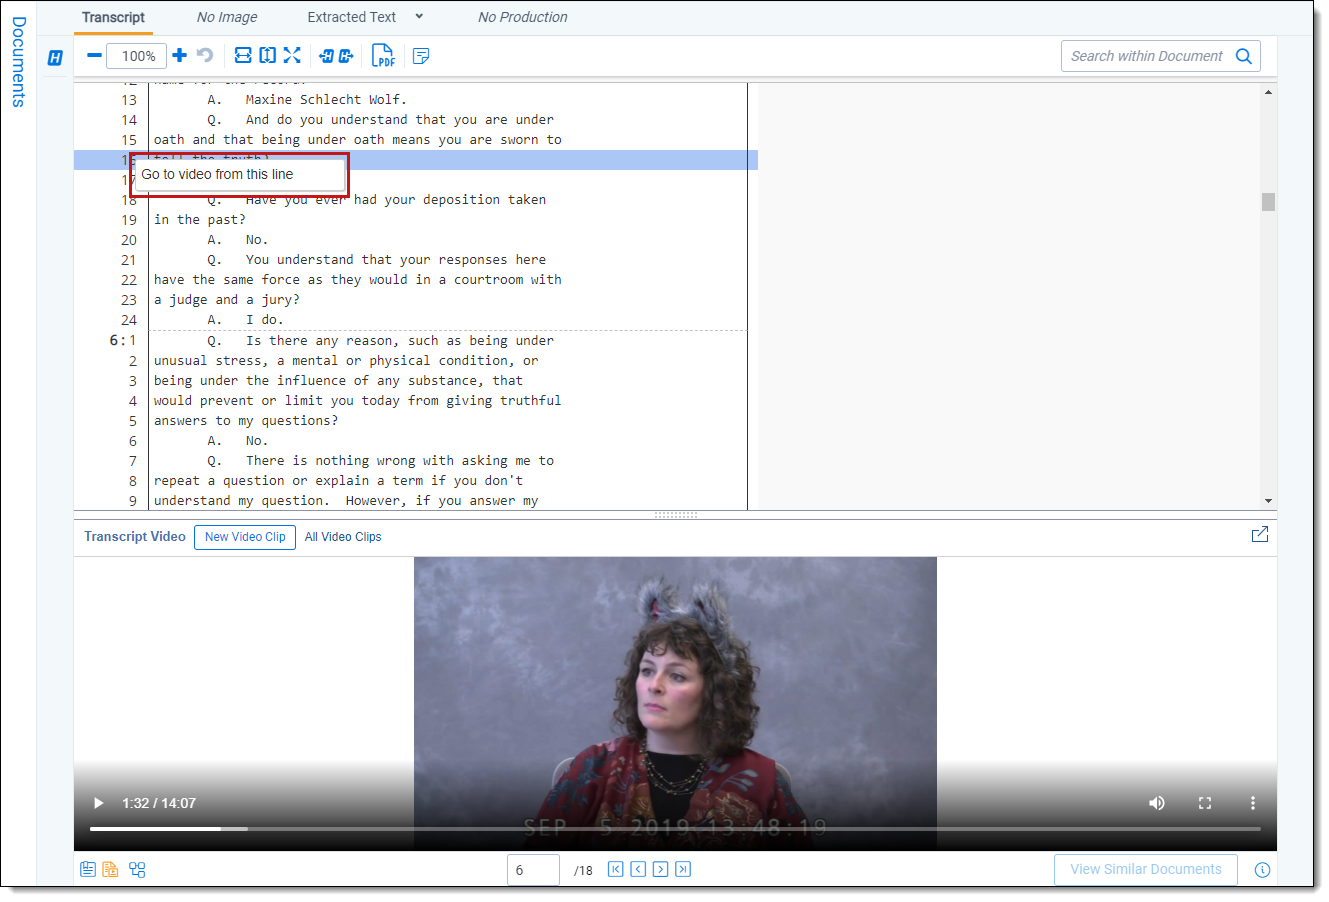
To give yourself more room to annotate the transcript, click on the PopIn Transcripts Video, which will pop the video player out of the Viewer. To pop the video player back in the Viewer, click on the Popout Transcripts Video icon.
Mass importing transcripts with Import/Export
Since a transcript is a document file, you can efficiently mass import transcripts using Import/Export. To learn more about Import/Export, see Import/Export overview.
Before you begin
- Ensure that Import/Export is installed in the workspace where you would like to import transcripts.
- Create a .zip folder that contains your transcript files and any related exhibits.
Importing transcripts with Import/Export
To import transcripts into a workspace:
- Navigate to the Import/Export Job tab.
- Click on New Import/Export Job.
The Import/Export modal displays.
- Select Raw (Unprocessed) Data.
- Select and upload the .zip folder that contains your transcript files.
- Complete the required fields in the modal, select the transcript files as data sources, and assign custodians. To learn more about the fields in this modal, see Importing raw unprocessed data for Processing via Import/Export.
- Click Run Job.
- Process the transcripts to prepare them for review in Relativity. To learn more, see Processing.
Reading transcripts with page number
There may be situations where you only upload a portion of a transcript, or split up a witness transcript in volumes.
Page numbers will appear on transcripts to indicate the page number for the whole transcript, and not the imported portion. The Viewer will still show page number based on the uploaded amount of pages.
Supported file types
The Transcripts application supports a number of different file types. To learn more, see Transcript supported file types.
Editing the Transcripts Import Layout
To edit the Transcripts Import Layout:
- Navigate to the Layouts tab.
- Click on the Transcripts Import Layout.
- Click Build Layout.
- Customize your layout by dragging and dropping fields into the Transcript Fields category. Certain fields will not display as options when you're customizing the Transcripts Import Layout because they are set during the import process of a transcript file. These fields include:
- Control Number
- Extracted Text
- File Extension
- File Name
- File Size
- Is Transcript
- Transcript Bundle
- Transcript Deponent Name
- Transcript Document Type
- Transcript Metadata
- Transcript Name
- Transcript OI Metadata
- Transcript Viewer Text
- Transcript Word Index
See Layouts.
- Click Save.
The Transcript Information category does not change and includes the following fields:
- Control Number
- Deponent Name
If you upgrade, your customized layout does not change.