


Feedback
Last date modified: 2026-May-28
Simple File Upload
Simple File Upload, formerly Single File Upload, gives users the ability to add new documents to Relativity.
Special considerations
Keep the following considerations in mind:
- When you upload a document using Simple File Upload, Relativity imports the following metadata:
- ArtifactID
- Control Number
- Extracted Text
- Relativity Folder Name
- Has Images
- Has Native
- Relativity Native Type
- Supported By Viewer
- System Created By
- System Created On
- System Last Modified By
- System Last Modified On
- File Name
- File Size
- Simple File Upload does not support operations for encrypted documents, such as uploading and replacing encrypted documents. You may use Import/Export for that purpose.
- The direct upload of EXE, DLL, and HTML files is prohibited in Simple File Upload for security reasons. An error message will be displayed if you attempt to upload them.
- You can search extracted text with keyword search. However, if Data Grid is enabled on a field, keyword searching is disabled.
Workspace security permissions
To configure workspace security permissions for Simple File Upload:
- Navigate to the Relativity Utilities console on the Workspace Details tab.
- Click Manage Workspace Permissions.
- Click Edit Permissions for a group on the Group Management tab.
- Grant access to the workspace security permissions listed in the table.
Object Security Tab Visibility Other Settings - Document - View, Add
- New Document (child)
- Documents
- Admin Operations: Allow Import
- The New Document button will appear in all workspaces. You can only remove the button by removing the Add Document permission from individual users.
- If you are upgrading from Relativity 9.6 or below, the New Document permission is disabled upon upgrade.
Accessing Simple File Upload
Access Simple File Upload within a workspace in the Documents tab. The application functions on the Folders, Clusters, and Field Tree browsers.
You need to have the Add Document permission to access the New Document button.
Uploading new documents
To upload a new document to a workspace:
- Click New Documents icon (
 ), which is located to the left of the View bar. The New Documents pop-up window appears.
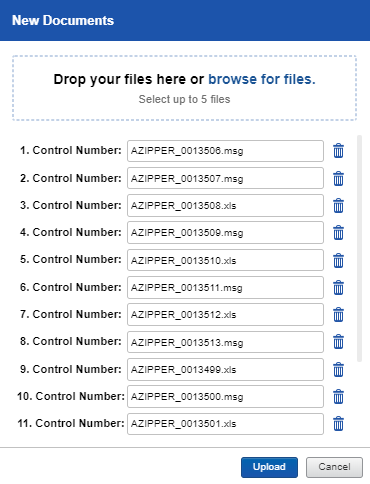
 - On the New Documents dialog, drag and drop or browse for files that you want to upload. The default value is 20 files. See the Note below for how your Admin can increase the default value, if needed.
 The selected files will be displayed in a list. If you choose not to upload one of the selected files, click the delete icon next to the file's name in the pop-up.
- The SFUMaxFilesToUpload instance setting determines the maximum number of documents you can upload using Simple File Upload. Admins can set the maximum number of documents that you can upload at one time up to 100. When the instance setting is set to 100, you can only upload up to 100 files at one time with Simple File Upload. If you select more than 100 files, Relativity will only upload the first 100 files you selected. Any files after the first 100 will not upload. A warning message will be displayed in the pop-up if more than 100 files are selected.
- When uploading transcripts via Simple File Upload, Relativity automatically creates a folder to house all transcripts with sub folders named after the Deponent Name field. Transcripts are stored in these folders, along with any corresponding attachments. When exhibit folders are uploaded with a transcript, the naming convention includes an underscore (_). If there are no exhibits, an exhibit folder is not created.
- The direct upload of EXE, DLL, and HTML files is prohibited in Simple File Upload for security reasons. An error message will be displayed if you attempt to upload them.
- Click Upload. When a document uploads successfully, a green check mark appears next to the file name. A progress bar tracks the progress of all the files selected.
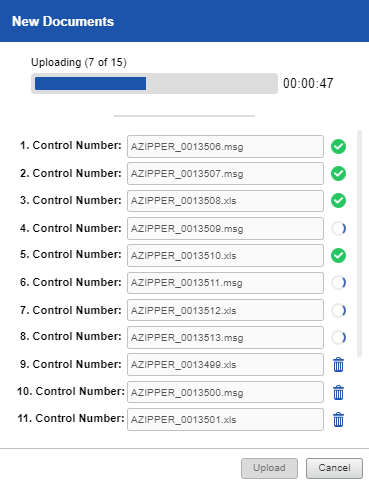
You cannot upload a document that shares a Control Number with a document that already exists in Relativity. If you want to replace a document, use the Replace document native icon in the Review Interface. See Replacing documents .
Replacing documents
The Viewer supports the ability to replace natives and images as an option in the Document Actions drop-down menu.
You need edit, add, and delete document permissions as well as to access the Replace document native icon.
To replace a document in the viewer:
- Open a document.
- Navigate to the layout and click Replace document native. The Replace Document pop-up widow opens.
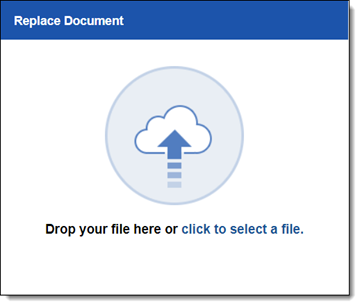
- Drag and drop or select the document that you would like to replace the current document in the viewer with.
On replace, the following meta data is uploaded:
- ArtifactID
- Control Number
- Extracted Text
- Folder Name
- Has Images
- Has Native
- Relativity Native Type
- Supported By Viewer
- System Created By
- System Created On
- System Last Modified By
- System Last Modified On
- FileName
- FileSize
- FileExtension
If you replace a document with a document that shares the same control number, Relativity overwrites the following fields:
- FileName
- FileSize
- FileExtension
- Extracted text
- Supported By Viewer
- Relativity Native Type
- Has Native
- System Last Modified On
- System Last Modified By