


Feedback
Last date modified: 2026-Jun-30
Using Migrate (Files first workflow)
You can use the Files first migration workflow for large and active workspaces. This workflow will give you the flexibility to schedule workspace downtime for an active case. At a high level, the first step in the Files first workflow requires copying over the workspace repository files from the server instance over to RelativityOne. This reduces the size of the archive, transfer, and restoration. As a result, this reduces the overall workspace downtime. Once the files are transferred, the Migration job can be started, which will make the workspace inactive until restoration is complete.
For instructions on Migrate setup and configuration, go to Migrate setup page.
If you are registering your Relativity Server instance with Relativity One for the first time or want to mange the migration source, refer to Registering your Relativity Server instance with RelativityOne for the first time.
Preparing server instance for migration
Step 1 - Pre-migration file validation
Check if any files are missing using the File Validation application. For details, see File validation.
Step 2 - Installing and launching RelativityOne Staging Explorer on the server instance
For detailed instructions, go to
Step 3 - Copying workspace files to the RelativityOne environment
Complete the following steps:
- On a server that has direct access to the file share for the Relativity on-premise instance, install the Staging Explorer or other file copy tool that has permissions to write in the RelativityOne environment.
- If you choose to use Staging Explorer, the appropriate ports will need to be opened for the appropriate endpoint.
- If you choose to use Staging Explorer, you will need to have the most recent version installed on this server.
- If using Staging Explorer, ensure that the file share is mapped on your machine.
- Move the EDDSXXXXXXX folder that is located inside the Files directory into the following location in the RelativityOne file share: for example, \\files.TXXX.xxxxXXXXXX.relativity.one\TXXX\ARM\FilesFirst\. If the EDDSXXXXXXX folder is split across multiple file servers, you can combine the files into one EDDSXXXXXX folder because the files have unique identifiers.
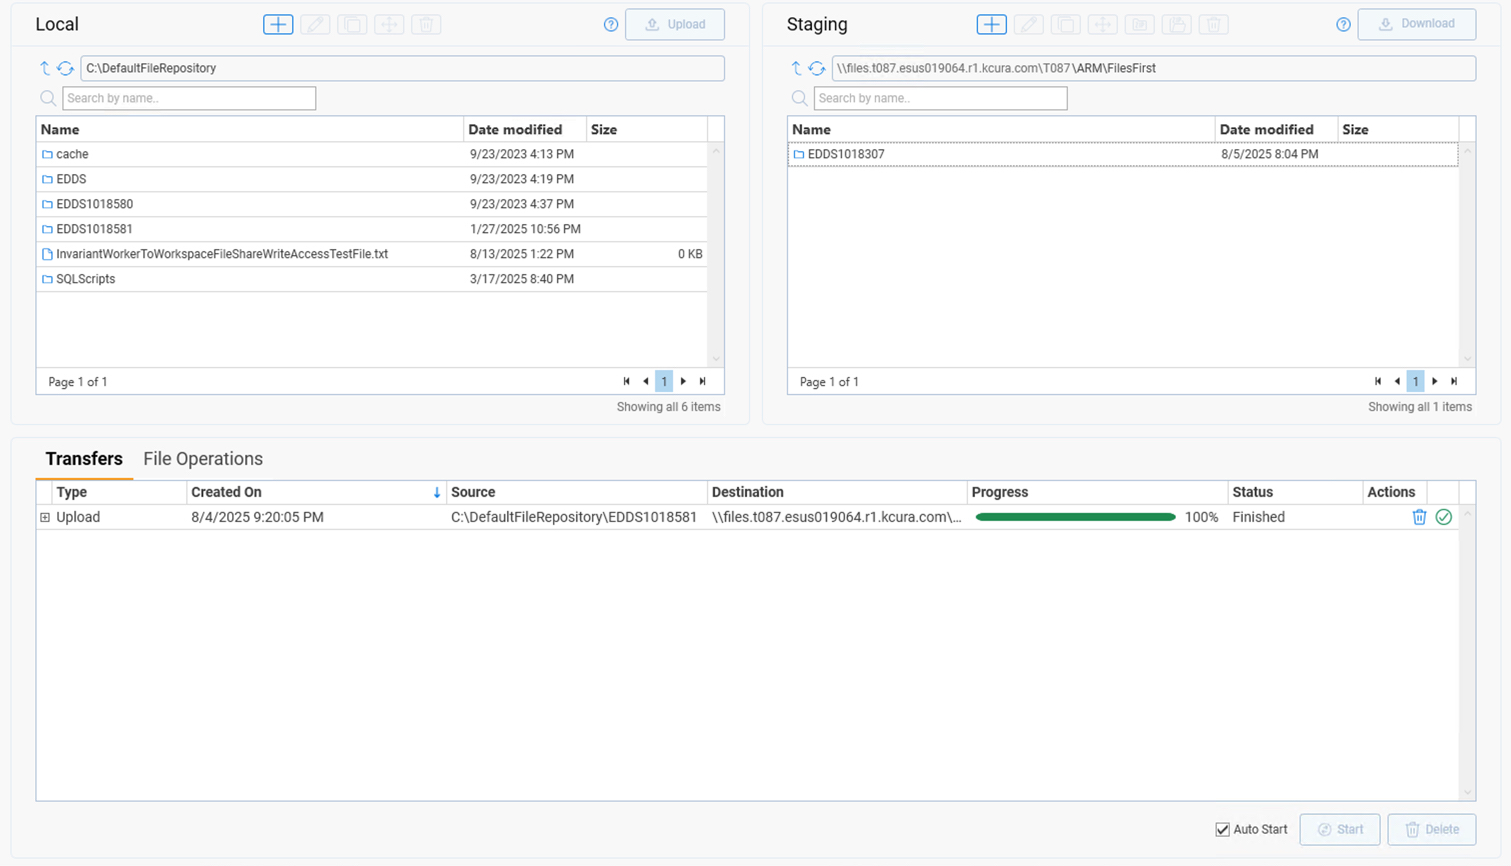
- Verify that the folder is transferred to the RelativityOne instance. You can check the file count in your on-premise instance by checking the count on the File table in the workspace.
Preparing RelativityOne instance for migration
Step 1 - Configuring ARM Archive Location
Complete the following steps:
- Use tabs, search, or the quick nav bar to navigate to the ARM Jobs page.
- Select the Configuration tab and click Edit.
- In the ARM Archive Locations section, click Add for a new ARM archive location.
- Enter the parent directory under which you place your Repository files folder. For example, if your workspace repository files were copied to \\files.TXXX.xxxxXXXXXX.relativity.one\T001\ARM\FilesFirst\EDDSXXXXXXX, you need an ARM Archive Location to be created for \\files.TXXX.xxxxXXXXXX.relativity.one\T001\ARM\FilesFirst.

Step 2 - Configuring Migration
- If using the New Migration button—the migration will only succeed if the workspace is migrated with the No Files profile.
- If using the New Migration (Custom Configuration) button—the migration will only succeed if the workspace is migrated with Include Repository Files and Include Processing Files options unchecked and Include Database Backup option checked.
Complete the following steps:
- Use tabs, search, or the quick nav bar to navigate to the Migrate page.
- Add a new migration:
- Click New Migration if you are planning to use Migrations fixed profiles. Next, complete the following options:
- Select the migration source. Unassigned workspaces list will be populated with workspaces from the server instance.
- Select the checkbox by the desired workspace.
- Assign the No Files profile.
- Select Preview Migration—this will give you information on workspace count, data size, and file count.
- When ready, click Migrate Workspaces. The workspace will become inactive at this time so we recommend pausing activity in it.Migration will begin and you will be taken to the status page until the process is complete. For more information on tracking the ongoing migrations, see Step 3 - Tracking migrations.
- Click New Migration (Custom Configuration) if you are planning to use Migrations custom configurations. Next, complete the following steps:
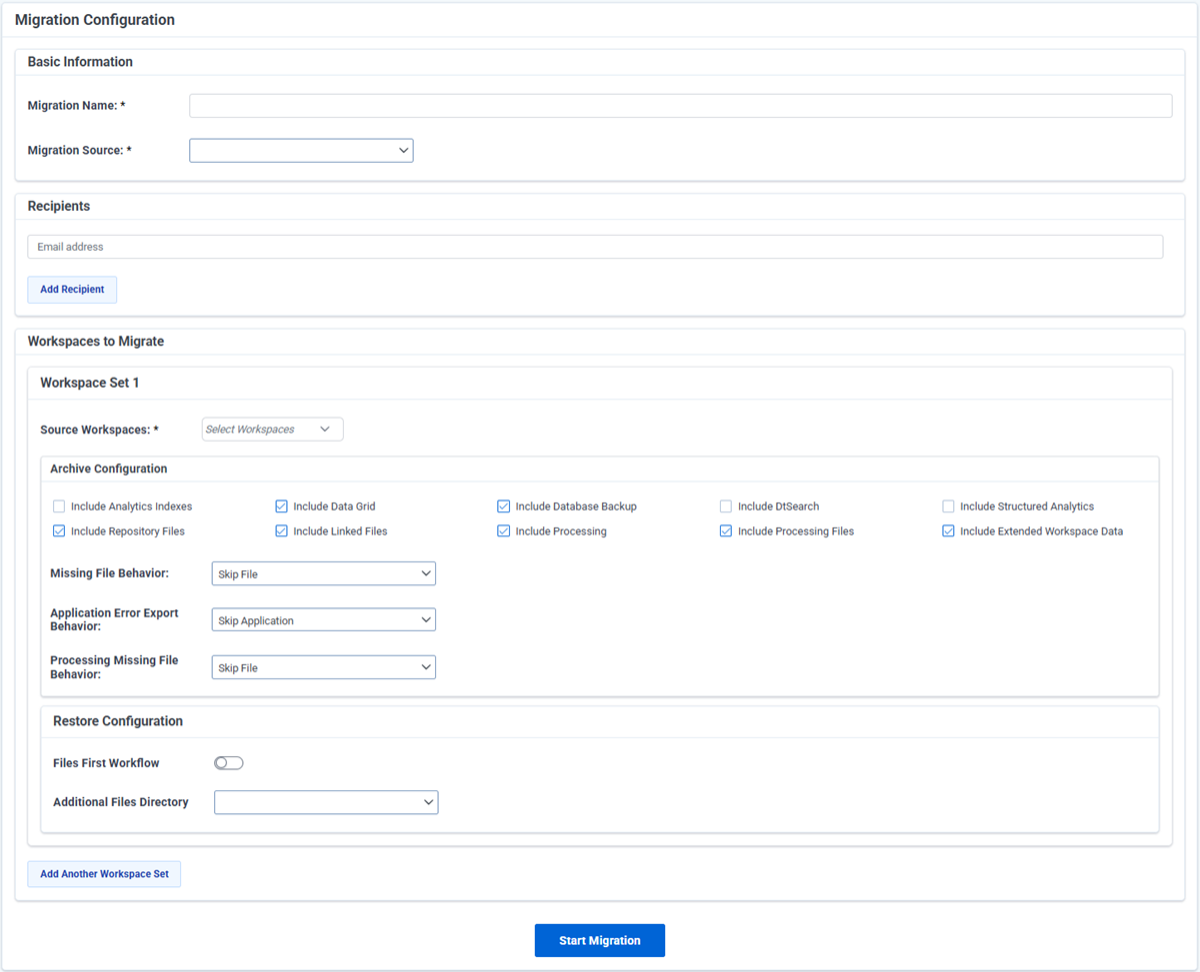
- Enter name for the Migration in Migration Name field.
- Select Migration Source from the drop-down list.
- (Optional) In Recipients section, enter email address of a person that will be notified of the Migration status.
- Complete the following fields:
- Source Instance Identifier (GUID)—populate this field with the server instance identifier.
- Source Workspace Artifact ID—populate this field with the source workspace artifact ID.
- Uncheck the following options in the Archive Configuration section:
- Include Repository Files
- Include Processing FilesIf a workspace is going through the Files first workflow, Include Repository Files and Include Processing Files options must be unchecked and Include Database Backup option must be checked.
- Make sure Include Database Backup option is checked. Selecting this option includes the workspace database in the archive. The database will be backed up, compressed, and placed in the archive directory.
- Select other options in the Archive Configuration section. For more information, see Archive Configuration options.
- If you are going through the Files first workflow, turn Files First Workflow toggle on. Note that the files must have been transferred and have landed in the workspace's ARM archive directory. If the toggle is on, Additional Files Directory drop-down will be auto populated with the file directory for the selected workspace going through the files first workflow. This will be the file location where the workspace files need to be already be transferred before restoring the case.
- If you want to add other workspaces to the Migration, click Add Another Workspace.
- When ready, click Start Migration.
To check the Migration status, navigate to the Migrate page and select the desired Migration. For more information on tracking the ongoing migrations, see Step 3 - Tracking migrations.
- Click New Migration if you are planning to use Migrations fixed profiles. Next, complete the following options:
Archive Configuration options
- Include Analytics Indexes—select this checkbox to include Analytics indexes in the archive directory.
- You cannot archive a workspace from RelativityOne to Relativity Server.
- If Analytics indexes or Structured Analytics sets exist in the workspace, but you do not select the option to include them, when the workspace is restored, these will cease to function and will need to be removed and recreated. It is very important to archive these if you want to keep them.
- Include Data Grid—select this checkbox to include Data Grid application data if present. If you are using any of the Data Grid features such as Audit or storing long text, we recommend selecting this checkbox.When Include Data Grid is unselected, a warning will appear alerting you that this action may create an incomplete archive of Relativity audits or long text document fields. It is recommended this option be selected if Data Grid or Audit is included in the workspace.
- Include Database Backup—select this checkbox. The database will be backed up, compressed, and placed in the archive directory.
- Include DtSearch—select this checkbox to include dtSearch indexes in the archive directory. If dtSearch indexes exist in the workspace, but you do not select the option to include them, when the workspace is restored, those indexes will cease to function and will need to be removed and recreated from scratch. It is very important to archive dtSearch indexes if you want to keep them.
- Include Structured Analytics—select this checkbox to include structured analytics sets such as email threading, language identification, etc.
- Include Repository Files—deselect this checkbox.
- Include Linked Files—select this checkbox to include files that are linked to the workspace, but that are not located in the workspace file repository, in the archive directory.
- Linked files included in the archive will be placed into the restored workspace repository after a successful restore.
- Linked files will be any files marked as InRepository=0 in the File table which include files loaded with pointers.
- Include Processing—select this checkbox to include Invariant/Processing data in the archive directory.
- When you enable this, ARM takes all information from both the Store database and the primary Invariant database relevant to the jobs in the Store. It also packages all discovered files, including non-repository files, from the Invariant data source location.
- You must have the Processing Migration Agent installed and enabled in order to use this option. If that agent is disabled, you will receive an error when you attempt to archive.
- You should not have any processing jobs, such as inventory, discovery, or publish, running in the workspace you are archiving while performing the processing archive job.
- If you receive an authentication error during the archive job, verify that the IdentityServerURL entry in the Invariant AppSettings table contains a valid address with a fully qualified domain name.
When Include Processing is not selected, be aware that ARM will not archive Invariant database or discovered files, and published files will be treated as Linked files. Also, you will not be able to process any data, such as documents, sets, profiles, from the source workspace in the restored workspace because it was not included when archived. Additionally, if you do not plan to use Processing after restoring, but you need a copy of published files, then do not select Include Processing and select Include Linked Files under the Options section. - Include Processing Files—deselect this checkbox.
- Include Extended Workspace Data—select this checkbox to include all admin scripts, non-core applications, and standalone resource files as exports in the archive directory. This option should be selected to preserve the status of a Repository workspace when restored.The Repository Workspace application will be included in the archive created when you select Include Extended Workspace Data.
- Missing File Behavior—select from the drop-down menu whether to skip missing repository files and complete the job or to stop the job when a missing file is encountered.
- Skip File—if you select to skip missing files to keep the job running, a CSV file is provided after the job has completed so that you can review the files that were skipped.
- Stop Job—if the job is set to stop on missing files, the first missing file will immediately stop the job, and that file must be placed in the expected location before the job can resume.
- Application Error Export Behavior—if Include Extended Workspace Data is selected, this field appears.
- Skip Application—this is the default selection. This option keeps running the job even if it encounters multiple errored applications. After the job has completed, a CSV file is provided so you can review the applications that errored and were skipped.
- Stop Job—select this option to stop the job on the first errored application.
- Processing Missing File Behavior—select from the drop-down list whether to skip missing files and complete the job or to stop the job when a missing file is encountered.
- Skip File—if you select to skip file, the job will continue.
- Stop Job—if you select to stop the job, the first missing file will immediately stop the job, and that file must be corrected before the job can resume.
Step 3 - Tracking migrations
You can track migrations in the following ways:
- Viewing all migrations
- Viewing migration status
- Viewing migration wave progress information
- Viewing workspace status
Viewing all migrations
View All Migrations is a list of all in progress or completed, regardless of the status, migrations on RelativityOne instance.
To view all migrations, during workspace assignment or migration step, click View All Migrations in the upper right corner.

When on the Select & Assign step, View All Migrations is only available before selecting a workspace. When at least one workspace is selected View All Migrations is not available.
Viewing migration status
Migration statuses include the following:
- Scheduled—the first migration status right after clicking Migrate Workspaces.
- In Progress—when migration is in progress.
- Completed—all the workspaces are successfully migrated or some workspaces are canceled.
- Completed With Warnings—failed workspaces are abandoned. For more information, see Abandon Failed Workspace Migrations.
- Completed With Errors—at least one workspace is in any failed status and all the others are in Migrated status.
- Canceled—all the workspaces are canceled.
Viewing migration wave progress information
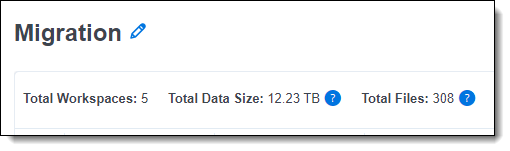
Migration wave progress information includes the following:
- Total Workspaces—presents current migrated workspaces count out of the total workspaces count
- Total Data Size—presents current migrated data size out of the total data size
- MDF File Size
- LDF File Size
- Image File Size
- Native File Size
- Production File Size
- Total Files—presents current migrated files count out of the total files count
- Processing Files
- Repository Files
- Failed Workspaces—presents failed workspaces count
- Abandon Workspaces—presents abandon workspaces count
Viewing workspace status
Workspace status properties include the following:
- In Queue—workspace is scheduled and waiting to be archived.
- Cancel Requested—workspace was requested to be cancel.
- Cancel Request Failed—workspace failed on cancel request.
- Canceling—workspace is being canceled.
- Canceling Failed—workspace failed on cancel.
- Canceled—workspace is successfully canceled.
- Archive Requested—workspace was requested to be archived.
- Archive Request Failed—workspace failed on archive request.
- Archiving—workspace is being archived.
- Archiving Failed—workspace failed on archive.
- Archive Created—workspace has been archived.
- Transfer Requested—workspace was requested to be transferred.
- Transfer Request Failed—workspace failed on transfer request.
- Transferring—workspace is being transferred.
- Transfer Failed—workspace failed on transfer.
- Transfer Completed—workspace has been transferred.
- Restore Requested—workspace was requested to be restored.
- Restore Request Failed—workspace failed on restore request.
- Restoring—workspace is being restored.
- Restoring Failed—workspace failed on restore.
- Migrated—workspace is successfully migrated.
- Abandon Requested—failed workspace was requested to be abandoned.
- Abandoned—failed workspace has been abandoned.
- Abandon Failed—failed workspace failed on abandon.
Viewing workspace progress details
To see detailed information about workspace progress:
- Click the details icon (within Details column). The following Workspace Progress Details modal opens.
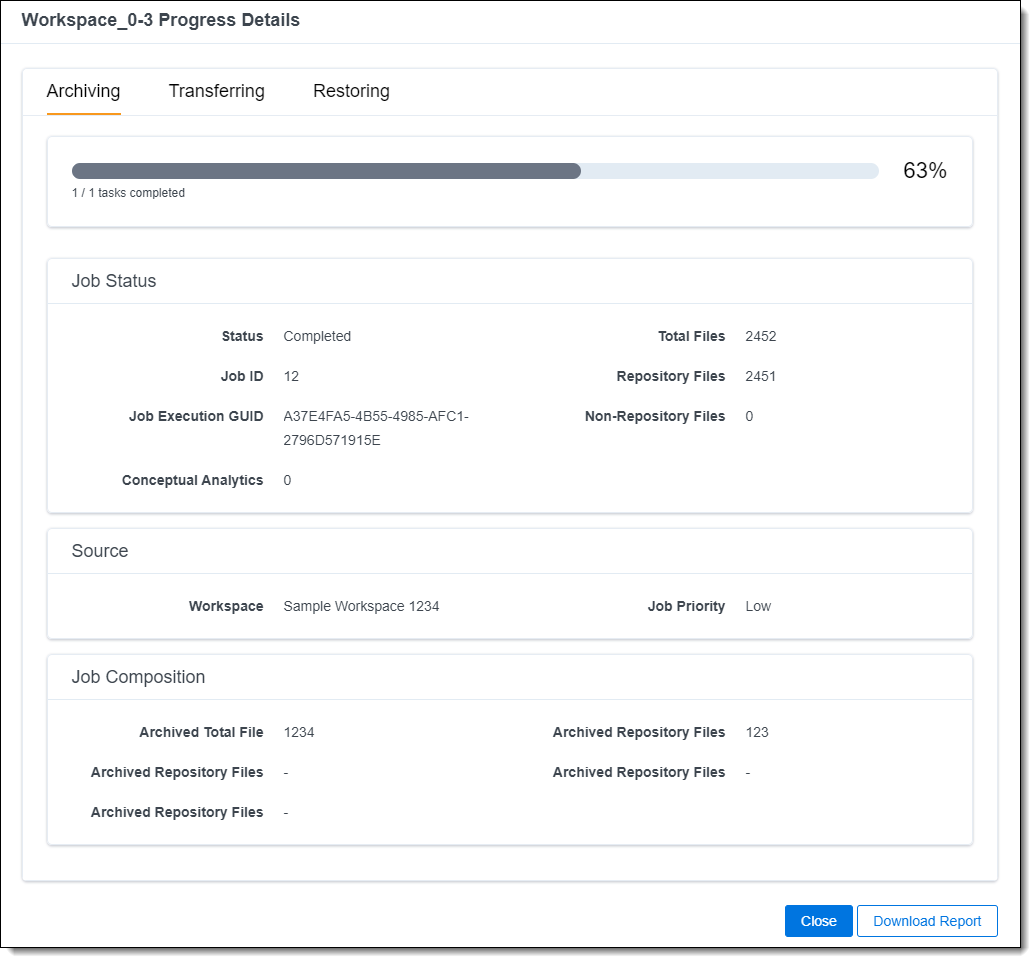
You can track migration progress on each step of its migration workflow, for example, archiving, transferring, restoring.
Move between the tabs to learn more detailed information about a step. The content of the tabs can vary workspace by workspace. - Click Download Report to download a detailed report of Workspace Progress details.Currently this report is a JSON format. The report file will be in the following format: <workspace name>_details_<timestamp>.json. For example, Sample Workspace_details_2020-12-01-10-28-27.json.
Step 4 - Post-migration file validation
Check if any files are missing after the migration using the File Validation application. For details, see File validation.
Other available actions
Changing the migration name
You can change the migration name on Preview, Migrate and View All Migrations page.
- To edit the migration name, click the Edit icon (pencil) next to Migration.
- Edit the name as needed, then click Save. The default migration name is “Migration[migration consecutive number]”, for example Migration, Migration1, Migration2, etc.
Canceling migration setup
You can cancel a migration setup at Select & Assign and Preview step.
- To cancel migration setup, click Cancel at the Select & Assign or Preview step.
- On the confirmation modal that appears, click Yes, Cancel Setup.You will start over from the assigning workspaces step.
Canceling workspace migration
You can cancel a migration of a workspace at In Queue, Archiving, and Transferring status.
- Click the circled X
 icon next to the workspace status on the Migrate step.
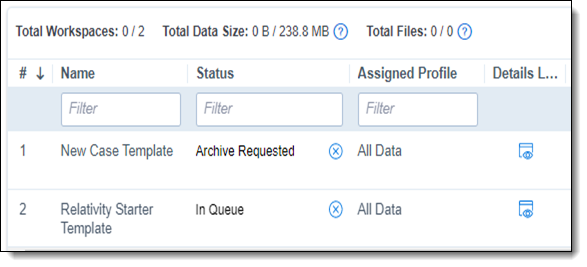
- On the confirmation modal that appears, click Confirm. The status of the workspace will change to Canceled and the workspace will not be migrated.
Managing email notifications
You can use email notifications to keep your team informed about ongoing migrations. To manage email notifications:
- Click Manage Notifications during the Preview step. The following modal will appear.
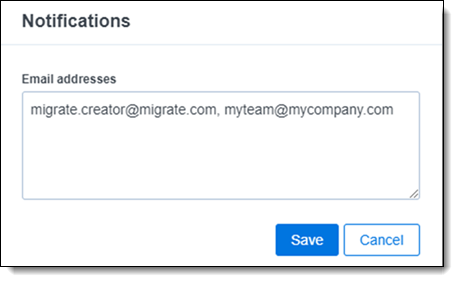
- Insert the necessary email addresses separating them with comma, then click Save.The Migration creator is added to notifications for the migration by default. A maximum of 25 email addresses can be added.
The following statuses will trigger the email notifications:
- Migration Status: In Progress; right after the start of migration
- Migration Status: Completed
- Workspace Status: Failed
- Migration Status: Completed With Errors
- Migration Status: Completed With Warnings
Subject
- [Migrate] - <RelativityOne instance>; <Migration Name>: In Progress
Message
MIGRATION DETAILS
- Migration Name
- Migration Source
- Migration Created By
- Start Time
- Migration Status In Progress
- Total Workspaces
- Total Data Size
- Total Files
Subject
- [Migrate] - <RelativityOne instance>; <Migration Name>: Completed
Message
MIGRATION DETAILS
- Migration Name
- Migration Source
- Migration Created By
- Start Time
- Migration Status Completed
- Total Workspaces
- Total Data Size
- Total Files
Subject
- [Migrate] - <RelativityOne instance>; <Migration Name>: Completed after Abandon
Message
MIGRATION DETAILS
- Migration Name
- Migration Source
- Migration Created By
- Start Time
- Migration Status Completed
- Abandoned Workspaces
Subject
- [Migrate] - <RelativityOne instance>; <Migration Name>; Failed Workspace: <Workspace Name>
Message
MIGRATION DETAILS
- Migration Name
- Migration Source
- Migration Created By
- Start Time
- Workspace Name
- Workspace Migration Status
- Error message
Subject
[Migrate] - <RelativityOne instance>; <Migration Name>: Completed With Errors
Message
MIGRATION DETAILS
- Migration Name
- Migration Source
- Migration Created By
- Start Time
- Migration Status Completed With Errors
- Total Workspaces
- Total Data Size
- Total Files
Verifying instance settings when restoring to client domains
When you use Migrate to restore workspaces into client domains, you must verify that certain instance settings are correctly configured before you start the restore. Confirm that the following instance settings in the Relativity.Migrate section align with the client domain you are restoring to:
- FileRepositoryID—determines where files are stored during the restore.
- ResourcePoolID—determines which resource pool is used during the restore.
If either setting points to a different client domain, the restore fails.
To verify the instance settings before restoring a workspace:
- Navigate to Instance Settings.
- Locate the Relativity.Migrate section.
- Confirm that both the FileRepositoryID and ResourcePoolID values correspond to the target client domain.
Migrate validates instance settings at restore time. When you migrate workspaces across multiple client domains, incorrect values cause the restore to fail until you correct those instance settings.
Troubleshooting errored workspace migrations
When migration is in Completed With Errors status and there are workspaces in Failed status, you cannot start a new migration. In addition, a warning message will be displayed in a notification bar.
There are two options to solve this issue:
- Retry failed workspace migrations to retry migration of selected workspaces, one at a time. See Retrying failed workspace migrations.
- Abandon failed workspace migrations to complete the migration without workspaces with errors. All the workspaces in any failed status will be changed into Abandoned and migration will be completed without errors with status Completed With Warnings. This will allow to set up another migration if needed. See Abandoning failed workspace migrations .
Retrying failed workspace migrations
You can retry failed workspace migration after migration has completed with errors. You can only run one retry at a time. To retry other failed workspace migrations, you must wait for the retry of the previous workspace to complete.
- To retry a workspace migration, click the Retry icon next to workspace Status.

- On the confirmation modal that appears, click Yes, Retry Workspace.The migration status will change from Completed With Errors to In Progress, and workspace migration will resume from the place it has failed.
When retrying a workspace migration, Retry icons for other failed workspaces will not be available until the retry of the migration is completed.
Abandoning failed workspace migrations
- Click Abandon (#) Failed Workspace Migrations.
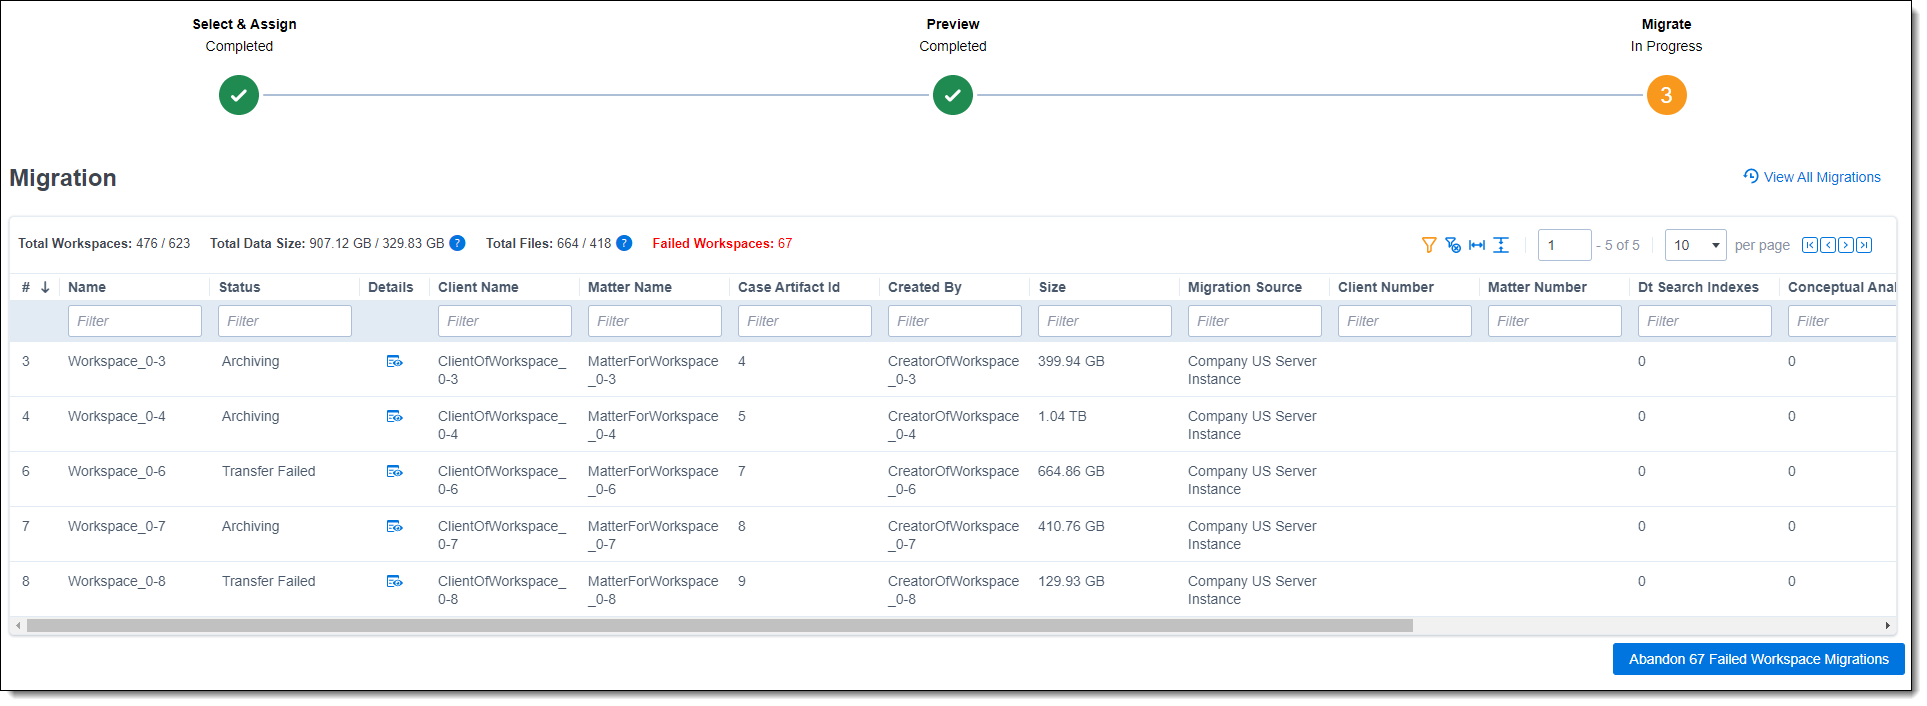
- On the confirmation modal that appears, click Yes, Abandon all. All the workspaces in any Failed status will be requested to be abandoned. When successful, their status will be changed into Abandoned , and the migration will be completed without errors and with a status of Completed With Warnings.
Workspace migrations during RelativityOne maintenance window
Migrate carries out a few actions during a workspace migration. The response during a maintenance window will depend on the step of the process Migrate is in:
| Migration step | Maintenance window effect |
|---|---|
|
Archiving on Relativity Server |
The maintenance window will have no effect on the archive process. |
| Transferring to RelativityOne | If the maintenance window starts during the transfer, it may stop or fail the transfer, and this step will need to be restarted from the Migrate tab. |
| Restoring in RelativityOne | If the maintenance window starts during the restore phase, this may stop the current restore step. You will be able to restart it from the Migrate tab or the ARM tab within the RelativityOne instance. |