


Feedback
Creating an aiR for Review project
The instructions you give aiR for Review are called Prompt Criteria. Prompt Criteria often mimic a traditional review protocol or case brief in that they describe the matter, entities involved, and what is relevant to the legal issues at hand. For best results, we recommend analyzing a small set of documents, tweaking the Prompt Criteria as needed, then finally analyzing a larger set of documents. Starting with a small set lets you see immediately how aiR's coding compares to a human reviewer's coding and adjust the prompts accordingly.
See Best practices for more information.
See these additional resources in Community:
Choosing an analysis type
aiR for Review supports three types of analysis. Each one is geared towards a different phase of a review or investigation. You'll need to determine which type of analysis is needed before starting a project.
For each aiR for Review job, choose one analysis type:
- Relevance—analyzes whether documents are relevant to a case or situation that you describe, such as documents responsive to a production request.
- Relevance and Key Documents—analyzes documents for both relevance and whether they are “hot” or key to a case.
- Issues—analyzes documents for whether they include content that falls under specific categories. For example, you might use this to check whether documents involve coercion, retaliation, or a combination of both.
Based on the analysis type you choose, you will need the following fields:
- Relevance—one single-choice results field. The field must have at least one choice.
- Relevance and Key Documents—two single-choice results fields. These should have distinct names such as "Relevant" and "Key," and each field should have at least one choice.
- Issues—one multi-choice results field. Each of the issues you want to analyze should be represented by a choice on the field.Currently, aiR for Review analyzes a maximum of ten issues per run. You can have as many choices for the field as you want, but you can only analyze ten at a time. To analyze more, run multiple jobs.
aiR for Review does not actually write to these fields. Instead, it uses them for reference when reporting on its predictions.
Choosing the data source
Before setting up the project, create a saved search that contains a small sample of the documents you want reviewed.
For best results:
- Include roughly 50 test documents that are a mix of relevant and not relevant.
- Have human reviewers code the documents in advance.
For more information about choosing documents for the sample, see Selecting a Prompt Criteria Iteration Sample for aiR for Review on the Community site.
For more information about creating a saved search, see Creating or editing a saved search.
Overview of setting up an aiR for Review project
Setting up a project for the first time has three basic parts:
At any point in this process, you can save your progress and come back later.
See Best practices for tips and workflow suggestions.
Step 1: Creating an aiR for Review project
To create an aiR for Review project:
- On the aiR for Review Project tab, select New aiR for Review Project.
- Fill out the following fields:
- Project Name—enter a name for the project.
- Description—enter a project description.
- Data source—select the saved search that holds your document sample.
- Project Prompt Criteria—select one of the following:
- Start blank—select this if you plan to write new Prompt Criteria from scratch.
- Copy existing—select this to choose a previously created set of Prompt Criteria and copy it for this project.
- Prompt Criteria Name—either leave as the default or click the Edit (
 ) icon to rename the Prompt Criteria. This name must be unique.
- Analysis Type—select one of the following. For more information, see Choosing an analysis type
- Relevance—analyzes whether documents are relevant to a case or situation that you describe, such as documents responsive to a production request.
- Relevance and Key Documents—analyzes documents for both relevance and whether they are “hot” or key to a case.
- Issues—analyzes documents for whether they include content that falls under specific categories.
- Project Use Case—choose the option that best describes the purpose of the project.
- If none of the options describe the project, choose Other to type your own description in the field. It will only be used for this project. Keep this description generic and do not include any confidential or personal information.
- This field is used for reporting and management purposes. It does not affect how the project runs.
- Click Create Project.
After the project is created, the aiR for Review project dashboard appears.
Step 2: Writing the Prompt Criteria
The Prompt Criteria are a set of inputs that give aiR for Review the context it needs to understand the matter and evaluate each document. Writing the Prompt Criteria is a way of training your "reviewer," similar to training a human reviewer. See Best practices for tips and workflow suggestions.
The Prompt Criteria have an overall length limit of 15,000 characters.
Depending which type of analysis you chose, you will see a different set of tabs on the left-hand side of the aiR for Review dashboard. All Prompt Criteria include the Case Summary tab.
When you start to write your first Prompt Criteria, the fields contain grayed-out helper text that shows examples of what to enter. Use this as a guideline for crafting your own entries.
For information on building prompt criteria from existing case documents, like requests for production or review protocols, see Using prompt kickstarter.
For more guidance on prompt writing, see the following resources on the Community site:
- aiR for Review Prompt Writing Best Practices—downloadable PDF of writing guidelines
- aiR for Review example project—detailed example of adapting a review protocol into Prompt Criteria
- AI Advantage: Aiming for Prompt Perfection?—on-demand webinar discussing Prompt Criteria creation
Case Summary tab
The Case Summary gives the Large Language Model (LLM) the broad context surrounding a matter. It includes an overview of the matter, people and entities involved, and any jargon or terms that are needed to understand the document set.
Limit the Case Summary content to 20 or fewer sentences overall, and 20 or fewer each of People and Aliases, Noteworthy Organizations, and Noteworthy Terms.
To fill out the Case Summary tab:
- On the aiR for Review dashboard, click the Case Summary tab.
- Fill out the following:
- Matter Overview—provide a concise overview of the case. Include the names of the plaintiff and defendant, the nature of the dispute, and other important case characteristics.
- People and Aliases—list the names and aliases of key custodians who authored or received the documents. Include their role and any other affiliations.
- Noteworthy Organizations—list the organizations and other relevant entities involved in the case. Highlight any key relationships or other notable characteristics.
- Noteworthy Terms—list and define any relevant words, phrases, acronyms, jargon, or slang that might be important to the analysis.
- Additional Context—list any additional information that does not fit the other fields. This section is typically left blank.
- Click Save.
Depending on which Analysis Type you chose in Step 1: Creating an aiR for Review project, the remaining tabs will be called Relevance, Key Documents, or Issues. Fill out those tabs according to the guide sections below.
Relevance tab
If you chose either Relevance or Relevance and Key Documents as the Analysis Type, you will see the Relevance tab. This defines the fields and criteria used for determining if a document is relevant to the case.
To fill out the Relevance tab:
- On the aiR for Review dashboard, click the Relevance tab.
- Fill out the following:
- Relevance Field—select a single-choice field that represents whether a document is relevant or non-relevant. This selection cannot be changed after the first job run.
- Relevant Choice—select the field choice you use to mark a document as relevant. This selection cannot be changed after the first job run.
- Relevance Criteria—summarize the criteria that determine whether a document is relevant. Include:
- Keywords, phrases, legal concepts, parties, entities, and legal claims.
- Any criteria that would make a document non-relevant, such as relating to a project that is not under dispute.
- Issues Field (Optional)—select a single-choice or multi-choice field that represents the issues in the case.
- Choice Criteria—select each of the field choices one by one. For each choice, write a summary in the text box listing the criteria that determine whether that issue applies to a document. For more information, see Issues tab.
aiR does not make Issue predictions during Relevance review, but you can use this field for reference when writing the Relevance Criteria. For example, you could tell aiR that any documents related to these issues are relevant. - Click Save.
For best results when writing the Relevance Criteria:
- Limit the Relevance Criteria to 5-10 sentences.
- Do not paste in the original request for production (RFP), since those are often too long and complex to give good results. Instead, summarize it and include relevant excerpts.
- Group similar criteria together when you can. For example, if an RFP asks for “emails pertaining to X” and “documents pertaining to X,” write “emails or documents pertaining to X.”
Key Documents tab
If you chose Relevance and Key Documents as the Analysis Type, you will see the Key Documents tab. This defines the fields and criteria used for determining if a document is "hot" or key to the case.
To fill out the Key Documents tab:
- On the aiR for Review dashboard, click the Key Documents tab.
- Fill out the following:
- Key Document Field—select a single-choice field that represents whether a document is key to the case. This selection cannot be changed after the first job run.
- Key Document Choice—select the field choice you use to mark a document as key. This selection cannot be changed after the first job run.
- Key Document Criteria—summarize the criteria that determine whether a document is key. Include:
- Keywords, phrases, legal concepts, parties, entities, and legal claims.
- Any criteria that would exclude a document from being key, such as falling outside a certain date range.
- Click Save.
For best results, limit the Key Document Criteria to 5-10 sentences.
Issues tab
If you chose Issues as the Analysis Type, you will see the Issues tab. This defines the fields and criteria used for determining whether a document relates to a set of specific topics or issues.
To fill out the Issues tab:
- On the aiR for Review dashboard, click the Issues tab.
- Fill out the following:
- Field—select a multi-choice field that represents the issues in the case. This selection cannot be changed after the first job run.
- Choice Criteria—select each of the field choices one by one. For each choice, write a summary in the text box listing the criteria that determine whether that issue applies to a document. Include:
- Keywords, phrases, legal concepts, parties, entities, and legal claims.
- Any criteria that would exclude a document from relating to that issue, such as falling outside a certain date range.
The field choices cannot be changed after the first job run. However, you can still edit the summary in the text box. - Click Save.
For best results when writing the Choice Criteria:
- Limit the criteria description for each choice to 5-10 sentences.
- Each of the choices must have its own criteria. If a choice has no criteria, either fill it in or remove the choice.
Removing issue choices
aiR for Review analyzes a maximum of 10 choices. If the issue field has more than 10 choices:
- Select the choice you want to remove.
- Click the Remove Choice button on the right.
- Repeat with any other unwanted choices.
These choices cannot be changed after the first job run.
Step 3: Running the first analysis
After filling out the Setup, Case Summary, and other tabs, review the job and run the analysis.
To run the analysis:
- On the upper right of the dashboard, click Analyze [X] documents.
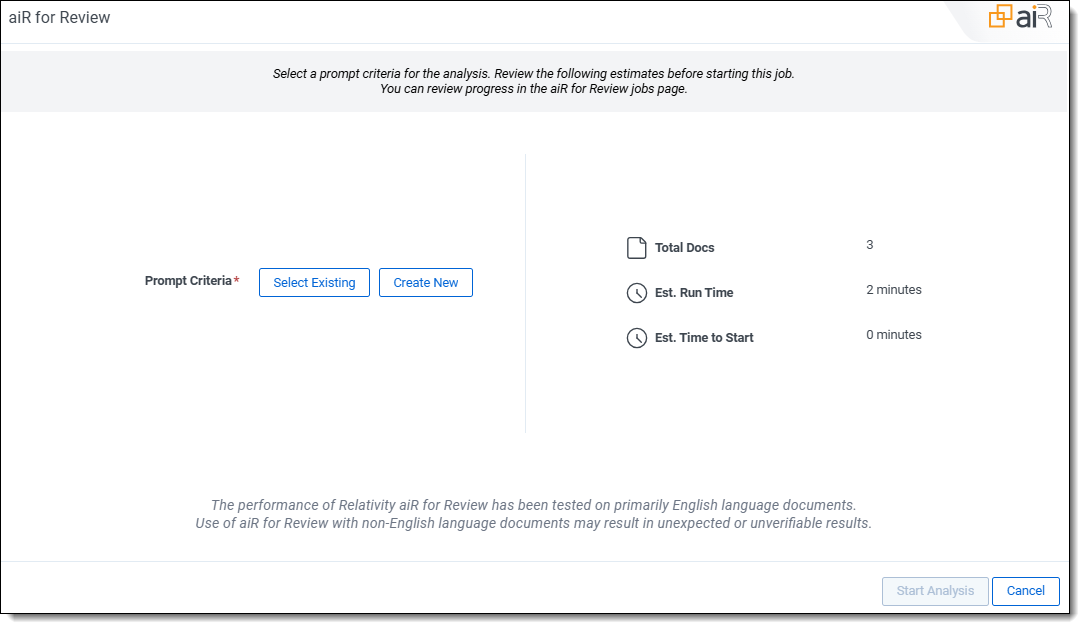
A confirmation modal appears. - Review the confirmation summary:
- Total Docs—number of documents to be analyzed.
- Est. Run Time—estimated time it will take to analyze and return the results of the documents selected. This does not include time waiting in the job queue.
- Est. Time to Start—estimated wait time from job submission to the start of the analysis process. Longer wait times occur when other jobs are queued across tenants.
- Enable the Email Notification toggle to send email notifications when a job completes, fails, or is canceled. Your email address is automatically entered. Proceed with entering more recipient email addresses, separated by commas or semicolons. You receive a notification email only when the toggle is enable.
- Click Start Analysis.
Once the analysis job starts, the results begin to appear beside each document in the Analysis Results panel of the dashboard. The Analyze button is disabled, and a Cancel option appears.
When the job completes, the Analyze button is re-enabled.
If you try to run a job that is too large or when too many jobs are already running, an error will appear. You can still save and edit the Prompt Criteria, but you will not be able to start the job. For more information, see Job capacity and size limitations.
After the first analysis completes, use the results to fine-tune the Prompt Criteria.
- For information on the dashboard and the fine-tuning process, see Iterating on the prompt criteria.
- For information about the results fields, see Analyzing aiR for Review results.
Running aiR for Review as a mass operation
If you want to run previously refined Prompt Criteria on a set of documents, you have the option of running the job as a mass operation from the Documents list page.
To run aiR for Review as a mass operation:
- From the Documents tab, select the documents you want to analyze.
- Under Mass Actions, select aiR for Review. A modal appears.
- For Prompt Criteria, select one of the following:
- Select Existing—select and load a set of previously created Prompt Criteria from your workspace. This only shows Prompt Criteria that have been run at least once, and it selects the most recent version of them.
- Create New—this closes the modal and redirects you to the aiR for Review Projects tab. Keep in mind this option does not save the previously selected documents in the first step.
- After you have loaded a set of Prompt Criteria, click Start Analysis.
A banner appears at the top of the page, confirming that the analysis job has been queued. This banner also updates to show when the job is complete. - To view and manage jobs that are not part of an existing project, use the aiR for Review Jobs tab. For more information, see Managing aiR for Review jobs.
Editing and collaboration
If two users are editing the same Prompt Criteria version at the same time, the user who last saves their work will have that work override the other one's changes. Because of this, we recommend having only one user edit a project's Prompt Criteria at a time. You may find it helpful to define separate roles for users when iterating on prompt changes.
Job capacity and size limitations
Based on the limits of the underlying large language model (LLM), aiR has size limits for the documents and prompts you submit, as well as volume limits for the overall jobs.
Size limits
The documents and Prompt Criteria have the following size limits:
- Prompt kickstarter allows you to upload 5 documents of total length of 150,000 characters. See Using prompt kickstarter for more information on using the prompt kickstarter feature.
- The Prompt Criteria have an overall length limit of 15,000 characters.
- We recommend only including documents whose extracted text is between 0.05KB and 150KB. Although the LLM can handle some larger or smaller documents, most will receive an error.
The size of a job encompasses both the document size and the Prompt Criteria size. If the combined total exceeds the per document limit, the job will be too large to process.
If a document receives an error, your organization will not be charged for it. For more information, see How document errors are handled.
Volume limits
The per-instance volume limits for aiR for Review jobs are as follows:
| Volume Type | Limit | Notes |
|---|---|---|
| Max job size | 250,000 documents |
A single job can include up to 250,000 documents. |
| Total documents running per instance | 600,000 documents | Across all jobs queued or running within an instance, there is a maximum of 600,000 documents. |
| Concurrent large jobs per instance | 10 jobs | For jobs with over 200 documents, only 10 jobs can be queued or running at the same time within an instance. |
| Concurrent small jobs per instance | No limit | Jobs with 200 or fewer documents have no limit to how many can queue or run at the same time. |
Speed
After a job is submitted, aiR analyzes on average 10,700 documents per hour globally. Job speeds vary widely depending on the region, the number and size of documents, the overall load on the LLM, and other similar factors.
Understanding documents and billing
For billing purposes, a document unit is a single document. The initial pre-run estimate may be higher than the actual units billed because of canceled jobs or document errors. To find the actual document units that are billed, see Cost Explorer .
A document will be billed each time it runs through aiR for Review, regardless of whether that document ran before.
Customer may not consolidate documents or otherwise take steps to circumvent the aiR for Review Document Unit limits, including for the purpose of reducing the Customer's costs. If Customer takes such action, Customer may be subject to additional charges and other corrective measures as deemed appropriate by Relativity.