Last date modified: 2026-Jan-29
Project pipeline steps
Each aiR for Privilege project has a dedicated set of pipeline steps that must be completed in sequential order to generate document results.
Pipeline steps should be performed by a Project Manager. For more information see Roles and security permissions.
The pipeline steps are as follows:
- Prepare Project
- Classify Domains
- Match Equivalent Domains
- Validate Entities
- Confirm Privilege Status
- Populate Privilege Results
The Action buttons on each pipeline step let you both Run and Apply Annotations for each pipeline step. Most pipeline steps function similarly:
- Perform a Run action to kick off the AI to analyze and identify certain content.The completion of a prior step will automatically kick off the Run action for the following step.
- You and your team annotate the predictions made by the AI. See Perform annotations.
- Perform an Apply Annotations action so the AI can learn where it was correct and wrong to make final calls and act on them.
For example,
- You would Run Classify Domains to locate all domains.
- Confirm that each Domain identified matches its prediction by performing annotations.
- Use Apply Annotations to lock in the annotator decisions.
Pipeline step throughput benchmarks
Following are estimated times for the system to complete a Run action and an Apply Annotations action for each pipeline step. We gathered these numbers from an average 50,000 document project.
| Pipeline step | System Run Time | System Apply Annotations Time | Notes |
|---|---|---|---|
| Prepare Project | 58 minutes | N/A | |
| Classify Domains | 5 minutes | 1 minute | |
| Match Equivalent Domains | 25 minutes | 1 minute | Run time for this step can vary greatly. |
| Validate Entities | Varies |
20 minutes |
aiR analyzes on average 10,700 documents per hour globally. Job speeds vary widely depending on the region, the number and size of documents, the overall load on the LLM, and other similar factors. |
| Confirm Privilege Status | N/A | 1 minute | 1 minute |
| Populate Privilege Results | Varies | N/A |
Once this step has started, Privilege results will begin to steadily populate across documents. aiR analyzes on average 10,700 documents per hour globally. Job speeds vary widely depending on the region, the number and size of documents, the overall load on the LLM, and other similar factors. |
If you have any questions or concerns about the expected speed for your project, please reach out to support@relativity.com.
Pipeline step notifications
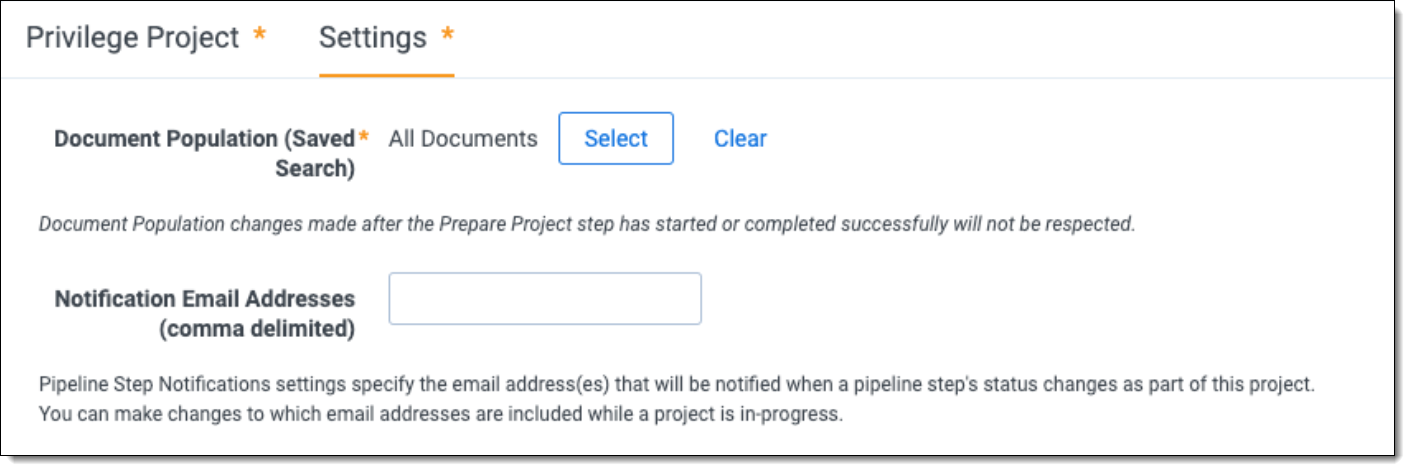
You can specify email addresses that will receive notifications when a pipeline step's status changes by entering Notification Email Addresses. You can enter Notification Email Addresses when creating a project or add them when a project is in progress.
To add Notification Email Addresses to an existing project:
- From the Privilege Project page, select Settings.
- Select Edit.
- Add email addresses that should receive notifications to the Notification Email Addresses (comma delimited) field.
- Click Save.

Abandon a project
Only one privilege project can be In-Progress at a time within a workspace. If a project becomes blocked during any of the pipeline steps it may be necessary to abandon the blocked project and start a new one.
To abandon a project:
- Navigate to the Projects (Priv) tab and select a project from the list.
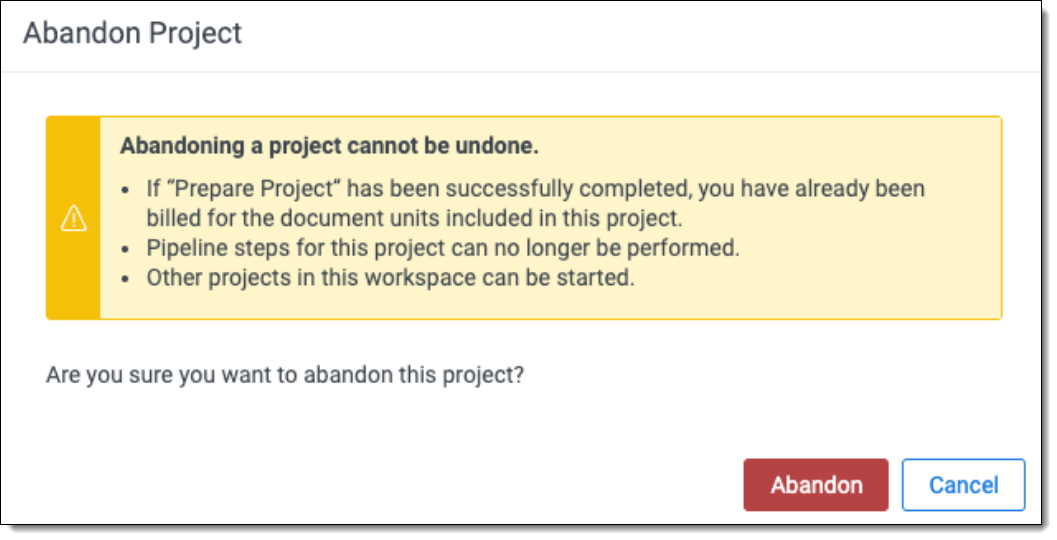
- Click the Abandon button at the top of the Privilege Project page.
- The Abandon Project pop-up will appear. Click Abandon to confirm that you want to abandon the project.

Abandoning a project causes the system to unlink any documents associated with the project so that you can run them through a new project. Once all documents have been unlinked the project status will change to Abandoned. You can no longer perform pipeline steps for the abandoned project and can run a new project.


