


Feedback
Last date modified: 2026-Jun-22
Index Management
The Index Manager provides centralized access to indexes created in aiR Assist or aiR for Case Strategy. An index within aiR Assist consists of a collection of documents that the system searches to generate responses to prompts. Each index is constructed from the extracted text of documents available in public saved searches within a workspace. Users may select the appropriate index for their prompts to ensure relevant and informed responses. Additionally, they can switch between indexes when submitting prompts, facilitating exploration of varied subjects or collections within the current workspace.
Designated users who are responsible for index management have the authority to create, rebuild, and delete indexes as needed must be granted the Index Management permission. Individuals with Prompting permission may access the index manager list to select an index for their prompt. See Permissions for details on the Index Management and Prompting permissions.
Refer to Best practices for recommendations on preparing your data for indexing.
ARM is not supported for aiR Assist. aiR Assist permissions, indexes, conversations, and metadata mapping cannot be archived, restored, or moved using ARM.
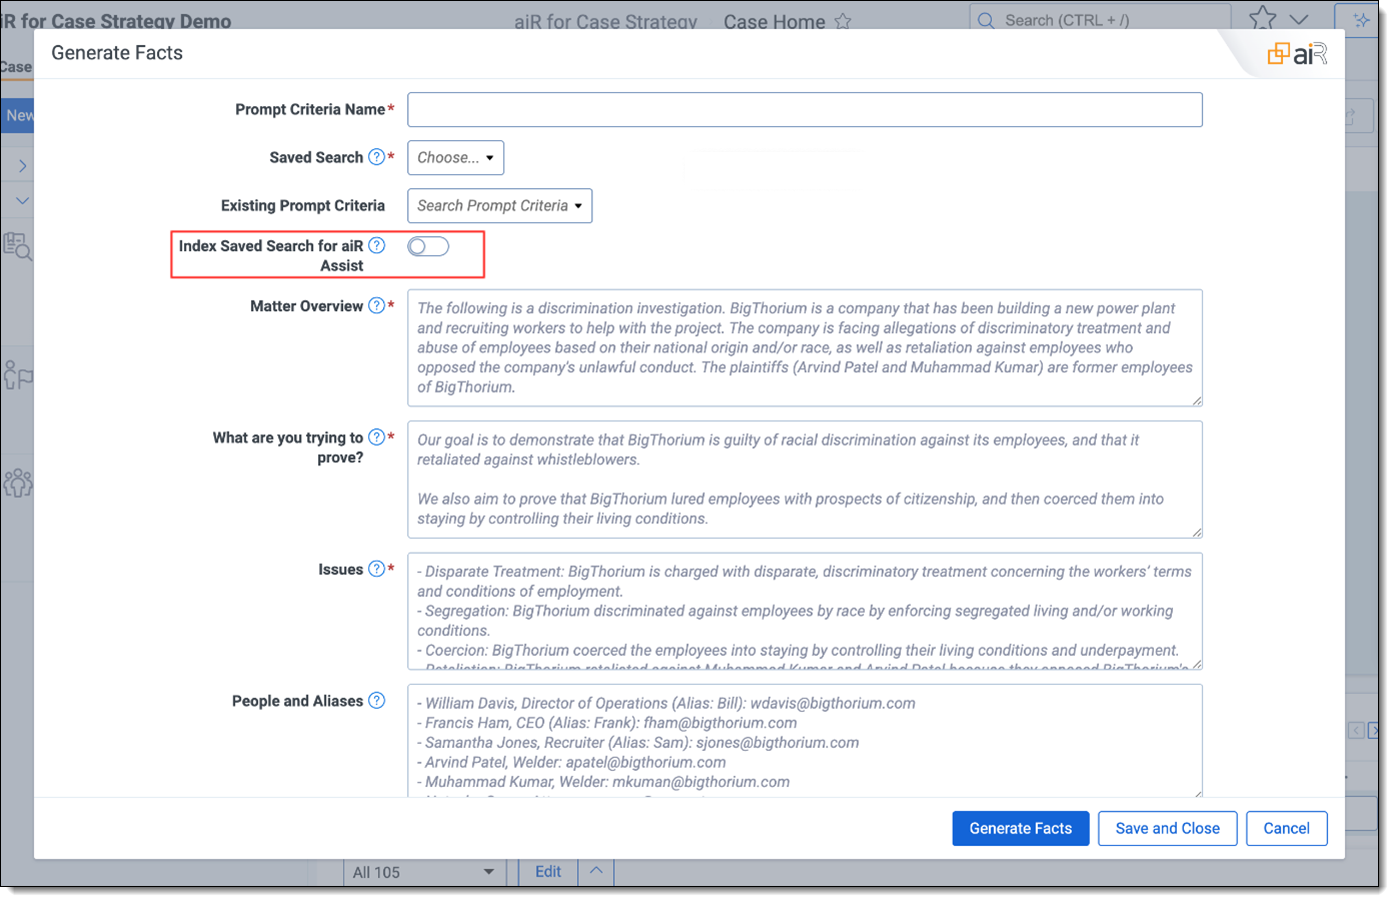
Indexes created in aiR for Case Strategy
A Case Home index can be created within aiR for Case Strategy as part of the facts generation process (shown below). It enables aiR Assist to support case strategy development by leveraging the same document set used in Case Strategy analysis.
- The Case Home index cannot be rebuilt or deleted from Index Manager because it is managed by the aiR for Case Strategy application.
- Metadata mapping is not supported for the Case Home index. It is only supported for indexes created using aiR Assist. See Metadata Mapping for more information.
Indexes created within aiR Assist
Indexes can be created manually within aiR Assist from public saved searches within the workspace.
- Each index can include up to 300,000 documents.
- A maximum of five (5) built indexes can be created per workspace. This can be from a combination of the Case Home document set (aiR for Case Strategy) and public saved searches.
- The indexes define the datasets from which aiR Assist retrieves and generates answers.
Throughput expectations
- Indexing speed varies by dataset size, document complexity, and available workspace resources. While typical cases are optimized, larger or complex datasets may take more time, possibly up to 12 hours, to finish with either a "Successfully build" or "Partially build" status.
- Index creation is a background process that progresses automatically once initiated. While exact durations vary, it is recommended to allow sufficient processing time for workspaces containing large volumes of documents or complex extracted text.