


Feedback
Last date modified: 2026-Jun-23
Register Purview Sync with Azure
Purview Sync uses the Microsoft Graph API. For more information on Microsoft Graph API, see Microsoft's documentation.
This documentation contains references to third-party software, or technologies. While efforts are made to keep third-party references updated, the images, documentation, or guidance in this topic may not accurately represent the current behavior or user interfaces of the third-party software. For more considerations regarding third-party software, such as copyright and ownership, see Terms of Use.
To access the API, you must register an application in Azure Active Directory. Authentication requires referencing a dedicated Azure AD application that has the necessary permissions. This configuration must be performed on the client side by an Azure user with sufficient administrative rights.
At different times in this guide, you will be instructed to take note of certain values and tokens. We recommend opening a text editor or Word document during this process to copy and paste these values, so they are readily available to paste into RelativityOne.
There are two ways to register Purview Sync application with Azure:
- Automated script—run a PowerShell script as an Azure administrator. This script will create the app registration and configure all required permissions automatically.
- Manual setup—sign in to the Azure portal as an administrator and complete the app registration manually, including assigning the necessary permissions.
The person completing the application registration process needs to be an Azure Administrator with sufficient privileges. Refer to Microsoft’s documentation for more details.
When registering the Purview Sync app in Azure:
- Authority URI specifies the Microsoft tenant that handles authentication. It ensures sign-in is processed by your organization’s trusted identity provider—Microsoft Entra ID.
- Redirect URI defines the secure endpoint where Microsoft sends the authentication response after sign-in. This allows Purview Sync to receive authorization tokens and complete the login process.
After completing the app registration process, whether automated or manual, collect the final values required for configuring RelativityOne Purview Sync. Store these values securely for future use. The following are examples of those values:
- Client ID: 1234567890abcdef1234567890abcdef
- Authority URI: https://login.microsoftonline.com/abcdef1234567890ab1234567890abcd
- Redirect URI: https://kcura.relativity.one/Relativity/CustomPages/4985c522-5931-41ba-bf67-7d58ee96e6d1/index.html
- Client Secret: w7X...<onlyshownonce>...
Automating Purview Sync registration in Azure Active Directory with a script
You can automate your Purview Sync registration in Azure Active Directory using the provided PowerShell script: PvS-MSFT-Automation-Script.ps1. After you run the script, the registration process will complete automatically. If your organization restricts script execution, check with your IT or Security team to ensure you have the required permissions.
Requirements
You must have the following before automating the Purview Sync registration:
- You must be an Azure AD Global Administrator.PowerShell 5.1+ with execution policy allowing local scripts.
- Internet access to login.microsoftonline.com and graph.microsoft.com.
- The script auto-installs Microsoft.Graph modules if missing. This requires install-module privileges.
Automating the registration
To register the app with the PowerShell script, follow the steps:
- Download the PvS-MSFT-Automation-Script.ps1 file.
- Open PowerShell Window.
- Run the following command. Change TenantRoot to your Relativity instance name and AppName to the name you want to use for the Azure App Registration.
.\PvS-preReq-v1.ps1 -TenantRoot "https://kcura.relativity.one" -AppName "RelativityOne Purview Sync" - After the script is run, copy the values from the PowerShell output to a safe location. You will need them to configure Purview Sync in RelativityOne later.

For more details, refer to the Community article RelativityOne - Purview Sync: Azure Active Directory Registration Script.
Registering an Azure application and credentials manually
Complete the steps in this section to create an app registration for email integration and syncing with Microsoft Entra ID.
To generate your Application (Client) ID and Client Secret, you must have Application Administrator privileges to sign in to the Azure portal and register the application. Store the Application ID and Client Secret securely, as you will need them in RelativityOne.
To register your app:
- Open your Azure Portal.
- Click Microsoft Entra ID.
Alternatively, search for Microsoft Entra ID using the search bar on top of the page.
- In the left-navigation menu, select App registrations.
- Click New Registration.
This will open the Register an application page.
- Enter an application name in the Name field. For example, RelativityOne Purview Sync.
- Select Accounts in this organizational directory only - Single tenant as the supported account type.
- In the Redirct URI section, select Single-page application (SPA) from the drop-down menu.
- In the Redirect URI field, enter https://[RelativityOne URL up to the word relativity forward slash] + CustomPages/ 4985c522-5931-41ba-bf67- 7d58ee96e6d1/index.html for the Redirect URI field.
For example, https://company.relativity.one/Relativity/CustomPages/4985c522-5931-41ba-bf67-7d58ee96e6d1/index.html.You add this index.html URI to the Single-page application section in Azure. Later, in the Authentication section, you add the ms-auth-popup-redirect.html URI to the same section. When you finish both sections, both URIs appear under Single-page application in Azure. You also enter this index.html URI in the Redirect URI field when you set up Purview Sync in RelativityOne. - Click Register.
When you complete the application registration, take note of the Application (client) ID field and Directory (tenant) ID field. These will be later used in Relativity.

Authentication
For authentication, you must add a redirect URI. This allows Purview Sync to receive authorization tokens from Microsoft and complete the login process.
To add a redirect URI:
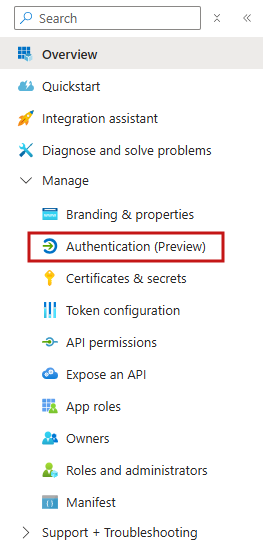
- Select Authentication (Preview) from the left-side menu.
- Locate the Single-page application box and select Add URI.
- In the new Redirect URI field, enter the ms-auth-popup-redirect.html URI using this pattern::
https://[RelativityOne URL up to the word relativity forward slash] + CustomPages/ 4985c522-5931-41ba-bf67-7d58ee96e6d1/ms-auth-popup-redirect.html.
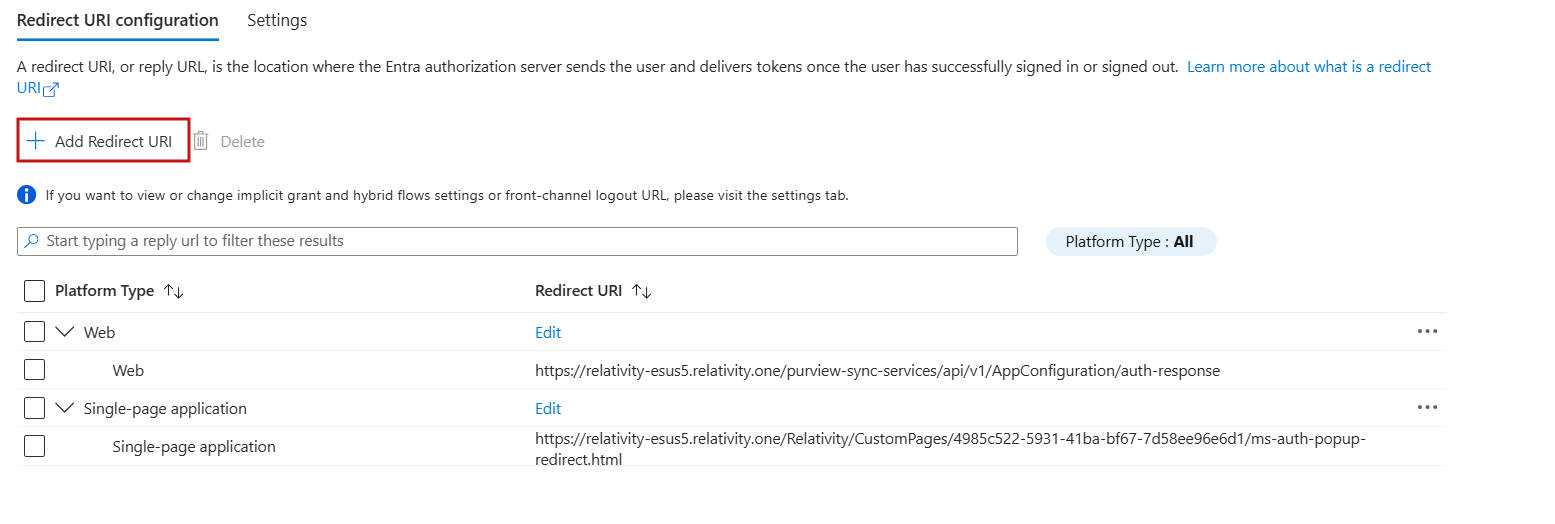
For example, https://company.relativity.one/Relativity/CustomPages/4985c522-5931-41ba-bf67-7d58ee96e6d1/ms-auth-popup-redirect.html. - Locate the Web box and select Add URI.If you do not see the Web box, you need to create a new platform. Select Add Redirect URI and then select Web platform. Then, continue to step 5.
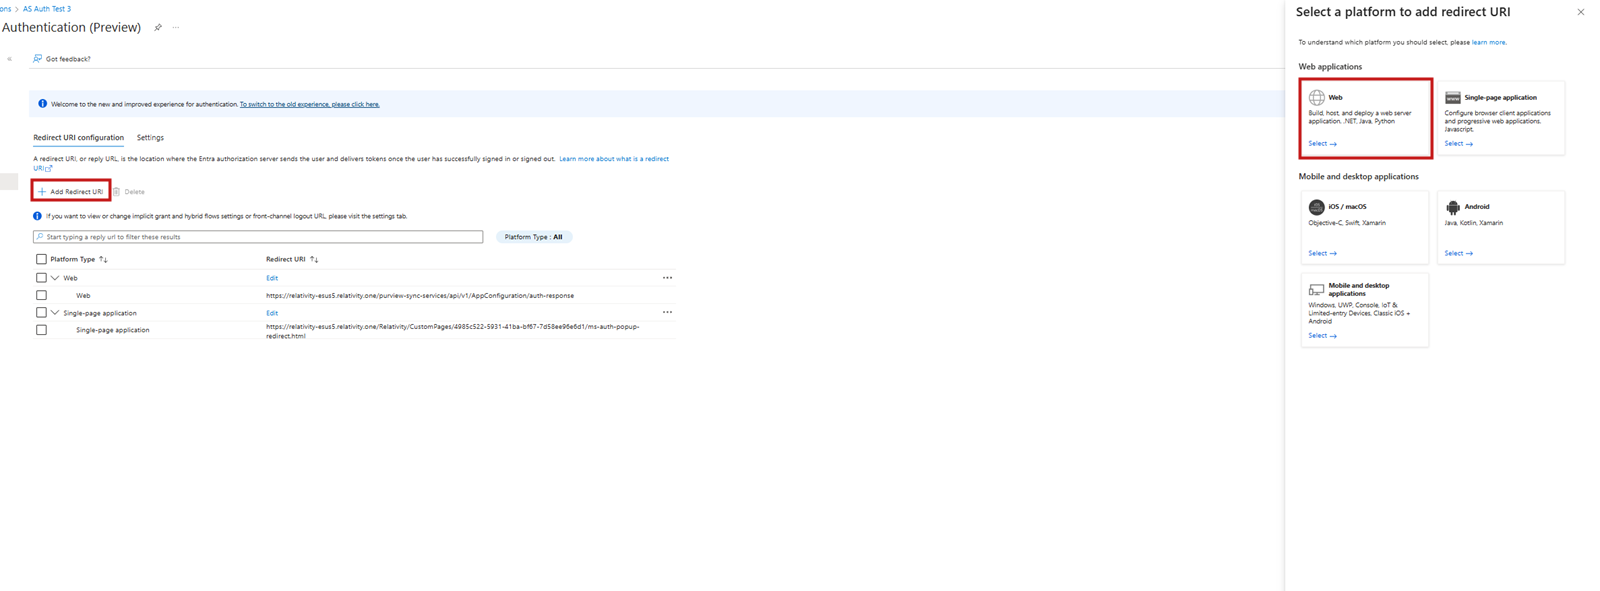
- In the Redirect URI field, enter:
https://[RelativityOne URL without including the word relativity forward slash] + purview-sync-services/api/v1/AppConfiguration/auth-response.
For example, https://company.relativity.one/purview-sync-services/api/v1/AppConfiguration/auth-response.
- Click Save.
Exemplary added URIs look as follows.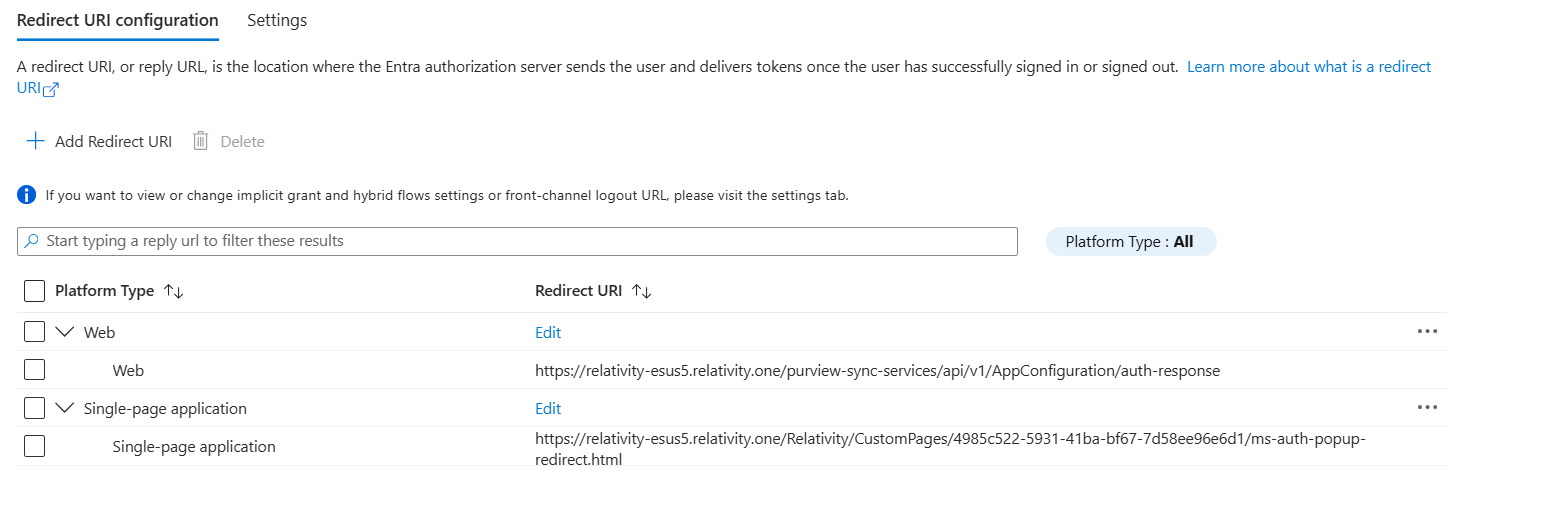
- If you plan to use the same app registration on another tenant, add another two corresponding redirect URIs—Single-page URI and Web URI—for that tenant in this section.
After saving, confirm Azure lists the following redirect URIs:
- Single-page application: index.html URI and ms-auth-popup-redirect.html URI
- Web: auth-response URI
If a URI is missing or listed under the wrong platform type, select Add URI in the correct section and re-enter the value before proceeding.
Creating a client secret
A client secret from Microsoft Azure AD is needed to integrate Microsoft and Relativity.
To create a client secret:
- In the left-navigation menu, click Certificates & secrets.
- Navigate to the Client secrets tab.
- Click the New Client Secret button.Do not navigate away from the page once the client secret is created.
- Populate the Description and Expires fields. You can leave the default, or recommended, values.
- Click the Add button.
If the client secret was successfully created, Microsoft will display the Client Secret on the table and the Value field in plain text. - Copy the Value field and securely store it.
Microsoft hides the Value field if you leave the page and then come back to get the value. At this point, you cannot copy it.
You can repeat steps 4-5 to generate a new client secret.
Setting API permissions
Open the application to view the application's homepage. From the application's page, add permissions to the web API.
To add permissions:
- Click API permissions.
- Click + Add a permission.

- Click Microsoft Graph.
- Select Delegated Permissions.
- Select the eDiscovery.ReadWrite.All option from the Delegated Permissions section.
- Click Add Permissions.

- Click Grant admin consent for [Tenant Name].You need the Global Administration role to complete this action.
At this point the Application should be fully configured. It can take a few minutes to update.
Create the service principal
There is a special permission not available in an application registration by default. This is the eDiscovery.Download.Read permission that allows the transfer of data. It becomes available once you create a Service Principal for your Azure tenant. For more information, see Microsoft's Service Principal documentation.
We recommend using Microsoft Graph Explorer to do this.
Before using Microsoft Graph Explorer, you need an account that has Application.ReadWrite.All permission. If you are not sure what this means, ask someone in your organization with the Global Administrator role in your Azure tenant. For more information on the required permissions, see Microsoft's Service Principals documentation.
Creating the service principal steps:
- Navigate to https://developer.microsoft.com/en-us/graph/graph-explorer.
- Click on the avatar icon on the top right.
This opens a login window, where you can login with your credentials.
- Click on the blue GET button. Select POST as the query method.
- Enter https://graph.microsoft.com/v1.0/servicePrincipals in the URI field.
- Under Request body, enter: { "appId": "b26e684c-5068-4120-a679-64a5d2c909d9" }.Do not forget the curly brackets.
- Press the Run query button.

- Confirm you received a Created – 201 response.If it’s already set up, you will see a 409 error. Both responses, 201 and 409, are acceptable. Created - 201 means you created without issue. Conflict - 409 means it already exists.
If you do not have the required permissions to run the query, you will see Permissions not granted - 406. The Global Administrator has the necessary permissions to run the query.
Configure permissions
Now you need to add the eDiscovery.Download.Read permission we made available by adding the service principal in the Create a Service Principal section.
Navigate back to Microsoft Azure Portal, to the application registration you set up earlier.
- Click the API permissions in the left-hand side menu.
- Click + Add a permission.
- Select the APIs my organization uses tab.
- In the search bar, enter MicrosoftPurviewEDiscovery.
- Select the application MicrosoftPurviewEDiscovery search result.

- Select the Delegated Permissions box.
- Select eDiscovery.Download.Read.
- Click Add permissions.
- Click Grant admin consent for [TENANT NAME].You need the Global Administration role to complete this action.
- In the pop-up modal that appears, click Yes.
You completed configuring the application registration with Azure. Now onto Relativity.
Grant users eDiscovery permissions in Microsoft Purview
There are two distinct permissions sets to use the Purview Sync app:
- Permissions for the admin configuring access—required only by the person who sets up the role groups described below.
- Permissions for Purview Sync users—the minimum scope required by users who actually run Purview Sync jobs in RelativityOne.
These are kept separate so that Purview Sync users do not receive broader access than they need.
Considerations
Be aware of the following when granting users eDiscovery permissions.
- If there is already a custom role group with Case Management, Export, and Review sub-roles configured for Purview Sync users, you can skip this section and move to Configure the Connection between RelativityOne and Purview eDiscovery Premium.
- If you see a screen that the Microsoft compliance portal is retired, it might mean that you are using the old Microsoft compliance portal that was disabled in November 2024. Navigate to the new Microsoft Purview instead.
Permissions for the admin configuring access
The person performing the configuration steps below must hold:
- Compliance Administrator (Microsoft Entra ID role)—to read, configure, and manage compliance permissions in Microsoft Purview.
- Compliance Data Administrator (Microsoft Entra ID role)—to create and manage compliance content in Microsoft Purview.
These roles are required only for the configuration steps below. They are not required for users running Purview Sync jobs and should not be assigned to them.
If you see a screen that the Microsoft compliance portal is retired, it might mean that you are using the old Microsoft compliance portal that was disabled in November 2024. Please navigate to the new Microsoft Purview instead.
Setting up Compliance Admin roles
To set up Compliance Admin roles to use Azure AD:
- Navigate to https://purview.microsoft.com and log in.
- Click Settings > Roles and scopes > Role groups.
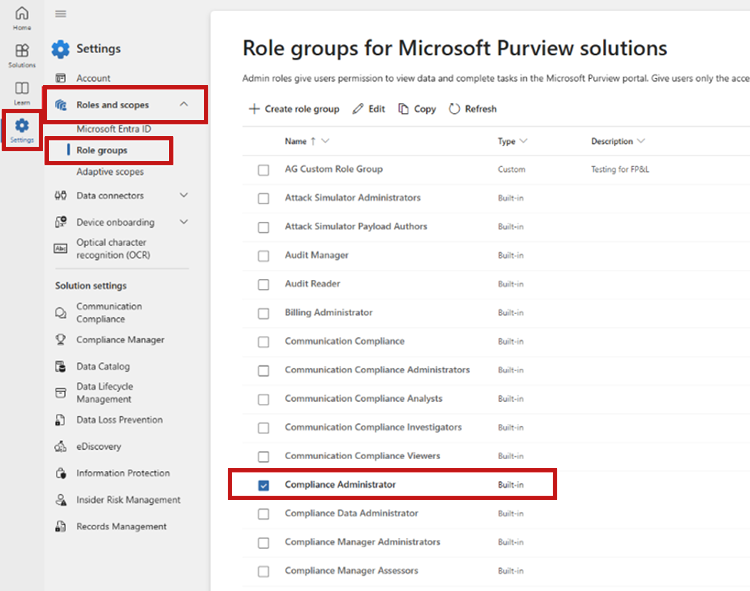
- Click the Compliance Administrator role > Edit > Choose users.
- Ensure all users, including service accounts that will be using Purview Sync in RelativityOne, are assigned this role.
- If there are users that need to be added, click the Add assignments button to add them.
- Close the Assignments page once all the appropriate users have been added.
- Click the Compliance Data Administrator role > Edit > Choose users.
- Ensure all users, including service accounts that will be using Purview Sync in RelativityOne, are assigned this role.
- If there are users that need to be added, click the Add assignments button to add them.
- Close the Assignments page once all the appropriate users have been added.
[Role groups for Purview solutions.]
Permissions for Purview Sync users
Purview Sync only lists review sets, creates exports from them, and downloads the exported files. It does not manage cases, custodians, holds, searches, tags, or any other eDiscovery functionality.
The minimum eDiscovery sub-roles required are:
- Case Management—base role required to access eDiscovery cases.
- Export—creating exports from review sets and downloading the exported files.
- Review—listing and accessing review sets within a case.
Purview Sync does not use the following eDiscovery sub‑roles: Communication, Compliance Search, Custodian, Hold, Manage Review Set Tags, Preview, RMS Decrypt, Search And Purge.
The built-in eDiscovery Manager and eDiscovery Administrator role groups also work, but they grant broader access than Purview Sync needs.
Grant Purview Sync users access (Broader)
Follow the steps to grant Purview Sync users access:
- Navigate to https://purview.microsoft.com and login.
- Click Settings > Roles and scopes > Role groups under the Microsoft Purview solutions section.
- Click eDiscovery Manager.
- Select Edit.
- Assign that user to the eDiscovery Manager role by following these sub-tasks if you want a user to be able create cases in Purview eDiscovery Premium, but not see other cases.
If not, skip to step 6:- Click the Choose users button.
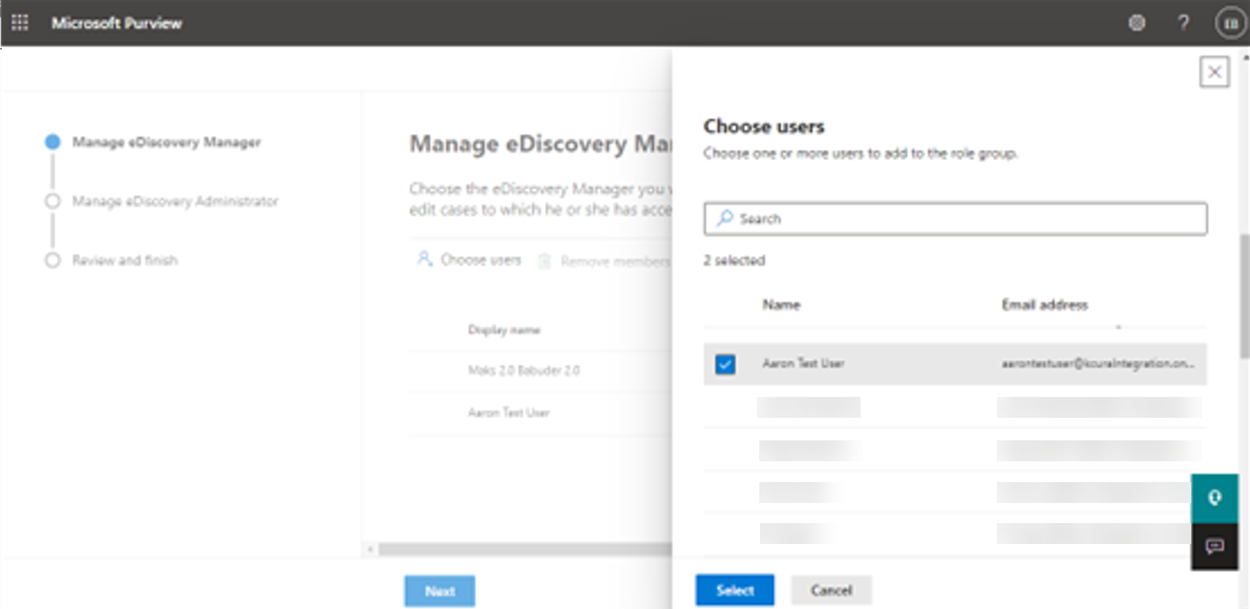
- Select the users to add to the eDiscovery Manager role in the right-side menu.
- Click the Select button.
- Click the Next button at the bottom of the page until you navigate through Manage eDiscovery Administrator and Review and finish options.
- Click the Save button.
- Click the Choose users button.
- If you want to allow a user the capability to create cases and see cases that other users have created, then assign that user to the eDiscovery Administrator role by following these sub-tasks, otherwise skip to the next section.
- Click the Next button to navigate to the Manage eDiscovery Administrator options.
- Click the Choose users button.
- Select the users to add to the eDiscovery Administrator role in the right-side menu.
- Click the Select button.
- Click the Save button.
You have now granted a service or user eDiscovery permissions in Microsoft Purview.
Grant Purview Sync users access (Minimum)
Follow the steps to grant Purview Sync users access:
- Navigate to https://purview.microsoft.com and log in as the configuring admin.
- Click Settings > Roles and scopes > Role groups.
- Click Create role group.
- Add the following sub-roles to the group: Case Management, Export, Review.
- Save the role group.
- Edit the new role group and add the Purview Sync users, and any service accounts, as members.
- Add those users as members of the specific eDiscovery cases they will work with.
You have now granted Purview Sync users the minimum required access in Microsoft Purview.