


Feedback
Last date modified: 2026-Jul-14
Imaging profiles
An imaging profile controls the settings used to image a group of documents. You can convert documents to black and white TIFF files or colored JPEG files. After you create a profile, you can use it in multiple imaging sets, update the profile settings, and set permissions on it. Imaging profiles, as well as any updates to the default profile, are included in workspace templates.
For more information about editing permissions on imaging profiles, see Editing toolbar.
Relativity includes a default imaging profile that has the recommended default settings preset. It's best practice to make a copy of this default profile and make changes as appropriate when creating additional profiles. The mass image and the image-on-the-fly functionality defaults to this profile, but you can select any other profile when converting documents to images.
Base your imaging profile selection on your case needs, such as document type or production format requirements. Imaging profiles do not map directly to Relativity user roles—no single profile type is better suited for a case manager, reviewer, or litigation support specialist than any other.
There are two main options for creating an imaging profile:
- Basic Imaging Engine Options—provides a select number of simple settings for creating the profile.
- Native Imaging Engine Options—provides an expanded range of settings for creating a profile.
Creating and editing an imaging profile
To create or edit an imaging profile:
- Navigate to the Imaging Profiles tab in a workspace.
- Click New Imaging Profile.
- Complete the required fields. See Fields for details.
- Click Save.
When you create a new profile from scratch, no default values exist for any profile fields. To start with default values already in place, copy the Default profile, assign it a unique name, and use it as a base for your imaging job.
Relativity propagates native file types to imaging profiles only when the profile is created.
Fields
Expand the below drop-downs to view the fields and their descriptions associated with each section of the imaging profile.
* indicates fields that are set automatically with default settings. You can change these settings as needed.
- Name—the name of the imaging profile.You can not rename the default profile.
- Imaging Method—sets the type of imaging for the profile. The imaging engine options appear for the selected imaging method.
- Basic—uses a select number of user-specific settings to image documents using Oracle.
- Native—uses an expanded range of user-specific settings to image documents.A warning appears if you cannot perform native imaging.
- Basic Image Output Quality (DPI)*—controls the resolution and density of an image in dots per inch. A higher DPI value produces more image detail. The typical range is 200–600. The default value is 300, which matches the Default profile.
- Basic Image Format*—sets the image format for files sent to the basic imaging engine for the profile, the default for this field is set to TIFF. The options are:
- JPEG—renders the image as a color JPEG file. Selecting this can possibly decrease imaging performance because JPEGs have larger file sizes than TIFFs and therefore require more disk space.
- TIFF—renders the image as a black and white TIFF file. This is recommended; this is the value in the Default profile.
- Basic Image Size*—sets the image size for all images rendered with the basic imaging engine profile, the default for this field is set to Original setting. The options are:
- Original setting—renders the image with the original document settings.
- Letter (8.5 in x 11 in)—renders the image in standard letter size.
- A4 (8.27 in x 11.69 in)—renders the image in A4 size.
- Legal (8.5 in x 14 in)—renders the image in legal paper size.
- Custom—sizes the image by using either or both values in the Maximum Image Width and Maximum Image Height fields. When you enter a value in either or both of these fields, Relativity converts the document to an image size that fits within these parameters, while maintaining the aspect ratio. If both of these fields are empty, Relativity displays an error message indicating that you must enter a value in one of them.
- Maximum Image Height (Inches) and Maximum Image Width (Inches) specify the largest allowable size for the generation of custom images. Relativity converts the document to an image size that fits within these parameters, while maintaining the aspect ratio. Only the Custom option references these fields, requiring you to enter a value in at least one of them.
Select the Include cover sheet toggle to include or exclude a cover sheet.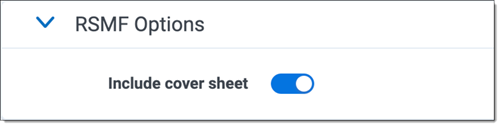
- Native Image Output Quality (DPI)*—controls the resolution and density of an image in dots per inch. A higher DPI value produces more image detail. The typical range is 200–600. The default value is 300, which matches the Default profile.
- Native Image Format*—sets the image format for files sent to the native imaging engine for the profile, the default for this field is set to TIFF. The options are:
- JPEG—renders the image as a color JPEG file. Selecting this can possibly decrease imaging performance because JPEGs have larger file sizes than TIFFs and therefore require more disk space.
- TIFF—renders the image as a black and white TIFF file. This is recommended and is the value in the Default profile.
- Automatically detect and render color pages to JPEG*—(Overrides ‘Native Image Format’ selection of TIFF) auto-detects and images color pages as JPEG files even if you selected TIFF as the Native Image Format. If you select Yes, Relativity overrides the TIFF Native Image Format for color pages only. If you select No, color pages remain as TIFFs. The default for this field is set to No.
- Maximum pages imaged per file—a native global setting for all document types that sets the maximum number of document pages that are imaged. For example, if you set this value to 50 and have a 100-page document, Relativity only images the first 50 pages of the document. Use this option to image only the number of pages entered in this box.
- Dithering Algorithm*—the procedure the native imaging engine uses to convert images from color to black and white TIFFs. This setting is only used if Native Image Format is set to TIFF, the default for this field is set to Floyd Steinberg. The algorithm options are:
- Clustered 6x6—groups pixels into clusters of 6x6.
- Clustered 8x8—groups pixels into clusters of 8x8.
- Clustered 16x16—groups pixels into clusters of 16x16.
- Dispersed 4x4—disperses pixels in a 4x4 matrix.
- Dispersed 8x8—disperses pixels in an 8x8 matrix.
- Dispersed 16x16—disperses pixels in a 16x16 matrix.
- Floyd & Steinberg—diffuses the difference between the actual analog value and quantized digital value of a pixel to its neighboring pixels.
- Threshold—compares each pixel value against a fixed threshold. During this process, individual pixels in an image are marked as object pixels if their value is greater than the threshold value. If their value is less, they're marked as background pixels. If you select this, you must provide a value between 0-255 in the Dithering Threshold field.
- Dithering Threshold—sets the threshold against which all pixels are compared. This is required if you chose Threshold for the Dithering Algorithm field above. You can provide any value between 0 - 255. The recommended default threshold is 128. When the pixel RGB color model in an image is greater than the threshold, it's converted to black. When less, it's converted to white.
- See Native imaging - dithering algorithm options for details on the various dithering algorithms available within Relativity native imaging, as well as use cases for each algorithm, including the size and clarity of images you create.
- See Native imaging - dithering algorithm options for details on the various dithering algorithms available within Relativity native imaging, as well as use cases for each algorithm, including the size and clarity of images you create.
- Native Image Time Zone—determines the time zone used to display dates and times in a document image. This field updates the date sent when native imaging an email, but the native document and metadata remain unchanged. Native Image Time Zone supports MSG and EML files only.For Native Image Time Zone to apply, you must select Date Sent in the Native Image Date field. If you do not make a selection, Native Image Time Zone does not apply and defaults to the current date.
To set the time zone value, click the drop-down next to Native Image Time Zone and select a time zone. If you do not select an option, the time zone defaults to Coordinated Universal Time (UTC).
To add an option to the Native Image Time Zone picker list:Navigate to the Fields tab and click New Field.
- Set these fields:
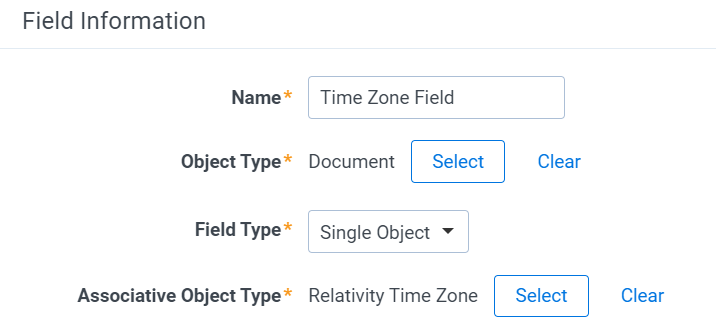
- Name—type the name of the Native Image Time Zone option.
- Object Type—select Document.
- Field Type—select Single Object.
- Associative Object Type—select Relativity Time Zone.
- Click Save.
- Native Image Date - select any document-level date field available in the pop-up picker as the current date used when rendering date-related document field codes. If no selection is made here, the Native Image Date defaults to the current date (today’s date). Microsoft Visio documents are incompatible with Native Image Date. If you configure this field on a profile that has linked time and date Application Field Codes, the linked Application Field Codes override the Native Image Date setting.
- Paper size/orientation*—specify a paper size and orientation for your spreadsheet, the default for this field is set to Original setting. The options are:
- Original setting
- Letter (8.5 in x 11 in)
- Letter (11 in x 8.5 in)
- Tabloid (11 in x 17 in)
- Ledger (17 in x 11 in)
- Page Order*—determines the order used to render spreadsheets when data exceeds one page, the default for this field is set to Original setting. Options include:
- Original setting—renders a spreadsheet based on the spreadsheet's original page setting.
- Down, then over—renders a spreadsheet first from the top of the page to the bottom and then from the left to the right.
- Over, then down—renders a spreadsheet first from the left of the page to the right and then from the top to the bottom.
- Print Area*—override any pre-defined print area in an Excel file. When you select Ignore Print Area, Relativity images the entire document, the default for this field is set to Ignore print area. The options are:
- Original setting—uses the original print area settings of the document.
- Ignore print area—ignores the original print area settings of the document.
- Hide and page break after _ consecutive blank rows and columns*—sets a maximum value for consecutive blank rows or columns. By default, the native imaging engine checks for a run of 10 blank rows or columns and compresses them to limit the number of pages rendered for a spreadsheet. The default for this field is set to 10.
- Show track changes in spreadsheet*—displays any modifications made to the document through the Track Changes option in Excel, the default for this field is set to Yes. The options are:
- Yes—shows track changes.
- No—doesn't show track changes.
- Include row and column headings*—renders row and column headings (the number assigned to rows and the letters assigned to columns). The options are:
- Original setting - uses the original row and column headings of the document.
- Yes - renders the row and column headings.
- No - doesn't render row and column headings.
- Include comments*—determines whether Relativity renders comments found in the spreadsheet, the default for this field is set to Yes. The options are:
- Yes—renders comment found in the spreadsheet. This is the value used in the Default profile.
- No—doesn't render comments found in the spreadsheet.
- Include headers and footers*—renders headers and footers in the spreadsheet. The printing of these items interferes with the ability of the native imaging engine to detect blank pages – for this reason, it's recommended that you leave this set to No, the default for this field is set to Yes. The options are:
- Original setting—uses the original header and footer settings of the document.
- Yes—renders the headers and footers of the document.
- No—doesn't render the headers or footers of the document.
- Include gridlines*—renders the gridlines between rows and columns in the spreadsheet, the default for this field is set to Yes. The options are:
- Original setting—uses the original gridline settings of the document.
- Yes—renders the gridlines between rows and columns in the spreadsheet.
- No—doesn't render the gridlines between rows and columns in the spreadsheet.
- Include borders*—renders the borders of the spreadsheet, the default for this field is set to Yes. The options are:
- Yes—renders the borders of the spreadsheet.
- No—doesn't render the borders of the spreadsheet.
- Unhide hidden worksheets*—displays hidden worksheets, the default for this field is set to Yes.
- Limit spreadsheet rendering to _ pages—images only the whole number value of pages entered in this field’s textbox. This value must be less than or equal to the maximum pages imaged per file value entered in the Native Imaging Options section above.
- Zoom Level % resets the zoom level for a spreadsheet. This value overrides the default settings internally stored in the file. The zoom level range is 10% - 400%.
- Fit to _ pages wide—resets the page width for a spreadsheet. This value overrides the default settings internally stored in the file.
- Fit to _ pages tall—reset the page height for a spreadsheet. This value overrides the default settings internally stored in the file.
- Formatting—determines the formatting of the spreadsheet with the following options:
- Auto-fit rows—expands the dimensions of rows to accommodate their content. When you select these options, Relativity displays any hidden rows. This option is selected by default.
- Auto-fit columns—expands the dimensions of columns to accommodate their content. When this option is selected, any hidden columns display. This option is selected by default.
- Clear formatting in empty rows—clears the formatting from entire rows that do not have content in any of their cells and whose adjacent rows are both empty. This option does not remove the formatting from an empty cell that is a part of a row that has cells with content. With this option, the number of pages rendered is reduced.
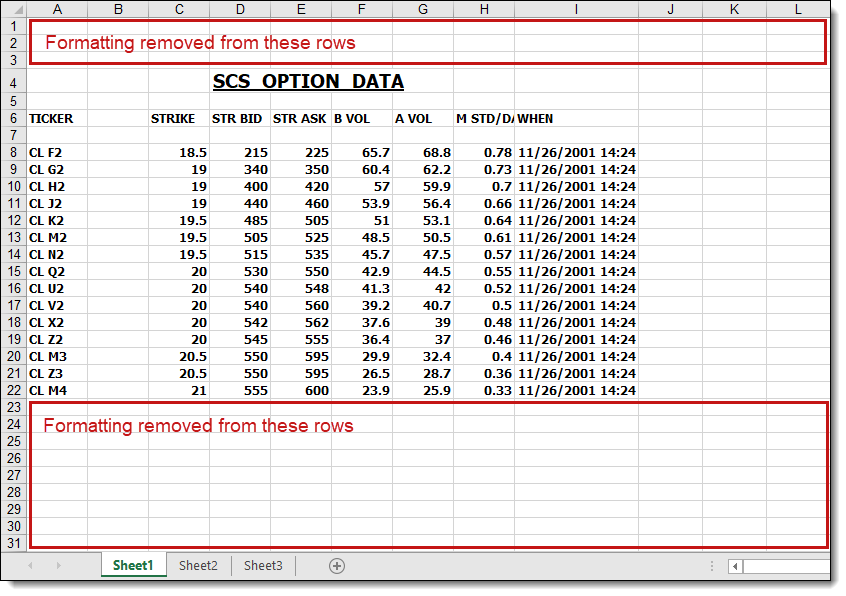
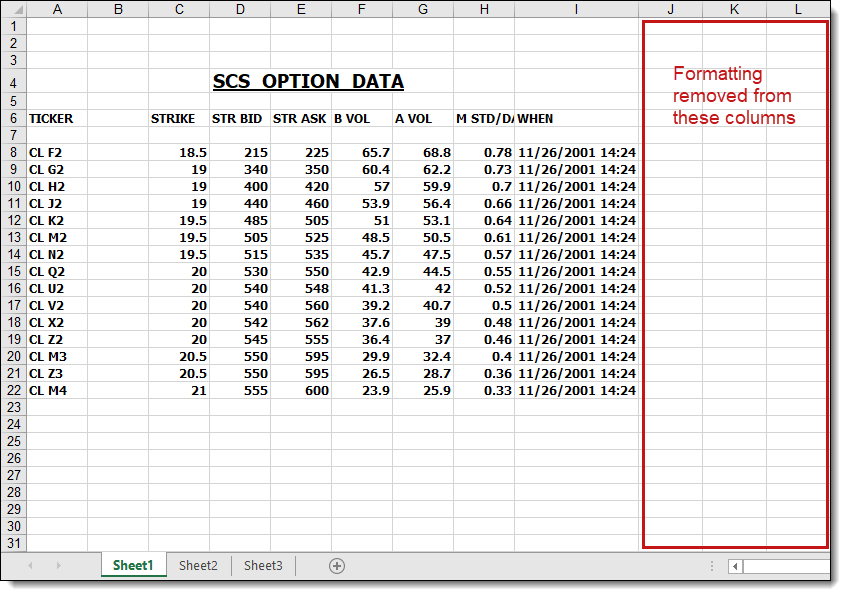
- Clear formatting in empty columns—clears the formatting from entire columns that do not have content in any of their cells and whose adjacent columns are both empty. This option does not remove the formatting from an empty cell that is a part of a column that has cells with content. With this option, the number of pages rendered is reduced.
- Text Visibility—determines the visibility of the text in a spreadsheet through the following options:
- Remove background fill colors—removes background color and ensures that any hidden text or rows formatted to match the background color appear.
- Set text color to black—displays the font color of text as black and ensures that any hidden text appears, such as text with a white font on a white background.
If an Excel spreadsheet contains comments, those comments appear on a separate page after Relativity renders the spreadsheet. Also, native imaging clears any filters set in a spreadsheet.
- Orientation*—determines the orientation of the email when it's rendered, the default for this field is set to Portrait. The options are:
- Portrait—selects a standard portrait display in which the height is greater than the width.
- Landscape—selects a standard landscape display in which the width is greater than the height.
- Resize images to fit page*—modifies the image sizes to make them compatible with the page size. Select Yes for resizing. Select No to prevent resizing. The default for this field is set to Yes.
- Resize tables to fit page*—modifies the table sizes to make them compatible with the page size. Select Yes for resizing. Select No to prevent resizing. The default for this field is set to Yes.
- Split tables to fit page*—wide tables are split and re-printed on a new line when they are imaged, so no content is lost. Select Yes to split tables. Select No to prevent table splitting. The default for this field is set to Yes.
- Download images from Internet*—download images from the Internet. This option also applies for Word files. The default for this field is set to Yes.
- Clear indentations*—removes the tabs from e-mail threads to improve their display. Select Yes to prevent the entries in the thread from aligning too far to the right. Select No to keep tabs in email threads. The default for this field is set to No.
- Detect character encoding*—analyzes text in the email body to determine the best language encoding to use during imaging. Select Yes for the native imaging engine to determine the language encoding to use during imaging. Select No for the character encoding specified in the email header metadata to set the language encoding used during imaging. The default value is set to Yes.
- Display SMTP addresses*—renders SMTP addresses for To, Cc, and Bcc fields instead of Microsoft Exchange information. Select Yes for rendering. Select No to prevent rendering. The default for this field is set to No.
- Show message type in header*—adds text in the header identifying the image as a message, appointment, distribution list, etc. Select Yes for the addition of text. Select No to prevent the addition of text. The default for this field is set to No.
MHT emails do not use Imaging Profile configurations. This is a known limitation of the format. MHT emails may not render correctly when imaged.
- Show track changes*—renders any markups added to the document through the Track Changes feature in Word, the default for this field is set to Yes. The options are:
- Yes—renders the document’s markups.
- No—doesn't render the document’s markups. No is the default.
- Page Orientation*—determines the rendered page orientation of Word files, the default for this field is set to Original setting.
- Original setting—retains the original page orientation.
- Portrait—renders the imaged Word file in portrait mode.
- Landscape—renders the imaged Word file in landscape mode.
- Show—determines which additional document attributes to render. The options are:
- Full comments page —appends an additional page at the end of the imaged document containing the complete list of all comments with their full text. Use this option to ensure no comment content is lost due to truncation in the side margin view. This option can be used alongside or instead of the Comments option.
- Comments—renders any comments added to the document through the Review feature in Word. Comments appear in the side margin view.Long comments may be shortened in the side margin view. To display complete comment text, enable the Full comments page option.
- Field codes—renders the field that Microsoft Word used as a placeholder for potentially changing data rather than the actual data in the document. Selecting Show Field Codes shows all field codes when imaging Word documents with the native imaging profile. If any Word field codes associate with a rendering option other than Show Field Codes or Document Default are linked to the native imaging profile, that behavior overrides this setting. See Microsoft Word field code considerations.
- Hidden text—renders any comments or directions added to the text of a document through the Hidden text feature in Microsoft Word. Selecting this makes the hidden text specified in the Microsoft Word file visible in the same manner as the normally-entered text.
Native imaging for Word documents generally replicates whatever Microsoft Word's Print Preview displays. This means that the imaged output may differ from what you see in the Native Viewer or Word's Print Layout view. For example, comments in Word documents may appear with full commenter names in the Native Viewer but display only initials or anonymized labels (such as "Comment") in the imaged output, depending on the document's internal privacy and metadata settings.
For some options, Relativity applies custom rendering logic rather than relying solely on Word's default Print Preview behavior. For example, when the Full comments page option is enabled in the native imaging profile, Relativity renders comments at the end of the document as separate pages.For some imaging options, Relativity applies custom rendering logic rather than relying solely on Word's default Print Preview behavior. For example, when you enable the Full comments page option in Word Processing Options, Relativity renders comments at the end of the document as separate pages..
- Show Comments—renders any comments added to the document through the Review feature in Word.
- Show track changes—renders any markups added to the document through the Track Changes feature in Word, the default for this field is set to No. The options are:
- Yes—renders the document’s markups.
- No—doesn't render the document’s markups.
- Show speaker notes*—renders the slide at the top of the page and the speaker’s notes at the bottom. If you select Yes, the orientation of the presentation is portrait. If you select No, the orientation is landscape with the slide only. The default for this field is set to Yes.
- Include PowerPoint Comments—comments included in the original presentation will be rendered below each slide.
- Slide Orientation*—determines the rendered page orientation of slide files. If you have "show speaker notes" selected, the image orientation is in portrait mode to accommodate the notes. The default for this field is set to Original setting.
- Original setting—retains the original page orientation.
- Portrait—renders the imaged PowerPoint file in portrait mode.
- Landscape—renders the imaged PowerPoint file in landscape mode.
Native imaging unhides any hidden slides in a presentation.
- Show speaker notes*—renders the slide at the top of the page and the speaker’s notes at the bottom. If you select Yes, the orientation of the presentation is portrait. If you select No, the orientation is landscape with the slide only. The default for this field is set to Yes.
- Comments—renders any comments added to the document through the Review feature in PowerPoint.
- Comments—renders any comments added to the document through the Review feature in PowerPoint.
- Remove non-breaking space (NBSP) codes*—removes long rows of non-breaking spaces (NBSP) codes. These prevent the text from wrapping properly. Native imaging automatically formats page breaks without cutting text or margins when rendering HTML as PDF. The default for this field is set to No.
- PDF Include Comments*— allows comments to be automatically captured during PDF imaging.
Native file imaging profile validation
Native imaging profiles must follow specific validation guidelines. Imaging profile validation reviews the following rules for all Native Imaging Engine Options:
- Valid numerical values—numerical values fit within a designated range based on individual numerical field requirements
- Configuration specific to format type—option selections and requirements vary based on the Native Image Format selection
- Field dependencies—specific fields require additional field configurations to satisfy groups of settings available for native imaging, and specific fields are ignored based on the configuration of a related field
Native File Imaging profile validation only runs when using the default Native Imaging Profile Layout for new imaging profiles.
Numerical Field Values
The following table provides valid numerical value ranges and recommended values for select numerical configuration fields. Valid value ranges include the minimum and maximum values provided.
| Field | Minimum Value | Maximum Value | Recommended Value |
|---|---|---|---|
| Native Image Output Quality (DPI) | 0 | 2400 | 300 |
| Dithering Threshold | 0 | 255 | 128 |
Format Specific Requirements
The following table states whether a field is set required or ignored based on the selected Native Image Format. If applicable, select the required field value.
| Native Imaging Format | Field | Field Required/Ignore | Required Field Value (if applicable) |
|---|---|---|---|
| JPEG | Images/Dithering Algorithm | Ignored | |
| JPEG | Dithering Threshold | Ignored | |
| JPEG | Render color pages to JPEG | Ignored | |
| TIFF | Images/Dithering Algorithm | Required | |
| TIFF | Render color pages to JPEG | Required | Yes |
Field Dependencies
The following table lists field dependencies and required field values if applicable. The Field 1 and Field 1 Value columns list fields and values that require you to configure the fields and values listed in the Required Field 2 and Required Field 2 Value columns.
For example, if Images/Dithering Algorithm is set to Threshold, you must configure a value for the Dithering Threshold field.
| Field 1 | Field 1 Value | Required Field 2 | Required Field 2 Value |
|---|---|---|---|
| Images/Dithering Algorithm | Threshold | Dithering Threshold | <any> |
| Dithering Threshold | <any> | Images/Dithering Algorithm | Threshold |
| Fit to ___ pages wide | <any> | Fit to ___ pages tall | <any> |
| Fit to ___ pages tall | <any> | Fit to ___ pages wide | <any> |
When fields in the Field Set column are configured, values set for fields listed in the Field Ignored column are ignored:
| Field Set | Field Ignored |
|---|---|
| Zoom Level % | Fit to pages ___ wide |
| Zoom Level % | Fit to pages ___ tall |
| Fit to ___ pages wide | Zoom Level % |
| Fit to ___ pages tall | Zoom Level % |
With validation rules you can only configure Zoom Level % or the set of Fit to ___ pages fields. Don't set values for all three fields.
Viewing imaging profile details
On the Imaging Profile Details page, Relativity displays profile settings and a list of restricted native type files.
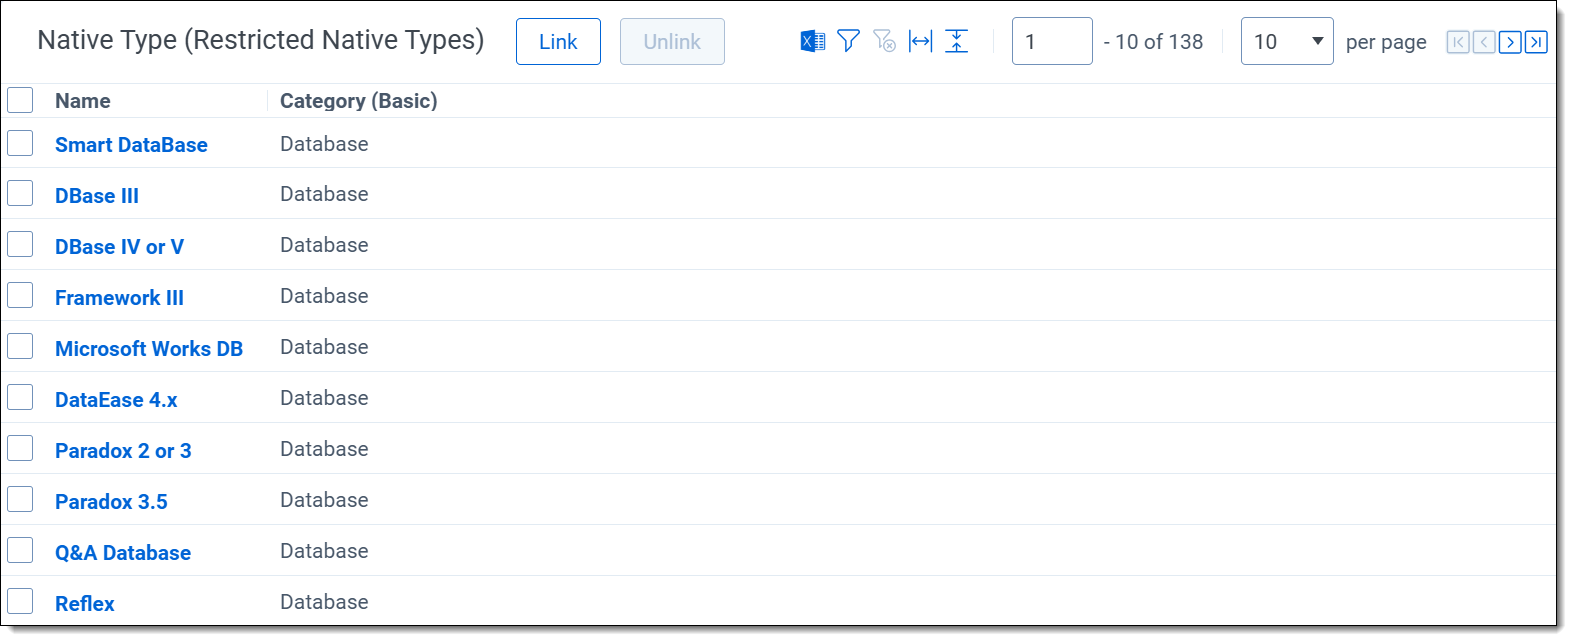
Restricted native types
The Restricted Native Types section lists the file formats that Relativity won't convert into images. It also includes features that you can use to modify this list. You see the following columns and options displayed in the Restricted Native Types section:
- Name—lists file formats.
- Category (Basic)—indicates a grouping of related file types or formats. For example, Word Processor is the category for common word processing formats such as Word, WordStar, WordPerfect, and others. (Additional super types are Database, Spreadsheet, Graphic, Multimedia, and Other.)
- Link—adds existing native types to the restricted list through the Select Items pop-up.
Select one or more file types in the Available Items list, click Add to include them in the Select Items list, and then click Set to link them to the profile.
You can't add new native file types to Relativity. For a list of native types that Relativity supports, see the Native Types tab or Viewer-supported file types. Contact Support if you have additional questions about supported native types.
- Unlink—removes restricted native types from the list. When you use this profile, Relativity images these documents.
Select one or more file types, and click Unlink. - Resize, export, filter—
 —resize columns, export, and filter the list of restricted native types. These features function similarly to those available on views.
 - Export the list
 —creates a list of restricted native types in Excel.
Application field codes
Application Field Codes is how Relativity refers to fields that Microsoft documents use to store document data. For example, [Date] is a field code in Microsoft that shows the date of document creation. Excel and PowerPoint refer to these fields as header and footer, Word refers to them as field codes, and Visio refers to them as fields. But for simplicity, Relativity refers to them as field codes, regardless of which Microsoft application document you’re viewing.
When imaging Microsoft application documents in Relativity, field codes embedded within a document can contain incorrect or irrelevant information. The imaged field code functions as it should, but instead of using the original Date, for example, the field code captures the date the document was imaged within Relativity instead of the date the document was actually created. By creating Application Field Codes in Relativity, however, you can determine how various field codes appear on imaged documents.
Relativity comes with 17 of the most commonly-used field codes automatically linked to the default native imaging profile with the most common rendering options supported. You can edit these linked field codes or remove them from the default native imaging profile based on your rendering preferences. You can also add additional field codes to Relativity beyond the 17 we include.
Application Field Codes are only configurable with native imaging.
For more information on Application Field Codes and how to link them to native imaging profiles, see Application Field Codes.