


Feedback

Last date modified: 2026-Sep-16
The Search phase consists of data collection, verifying the data, and workspace linking.
 Navigating the Search screen
Click the Search step in the workflow panel to open its details.
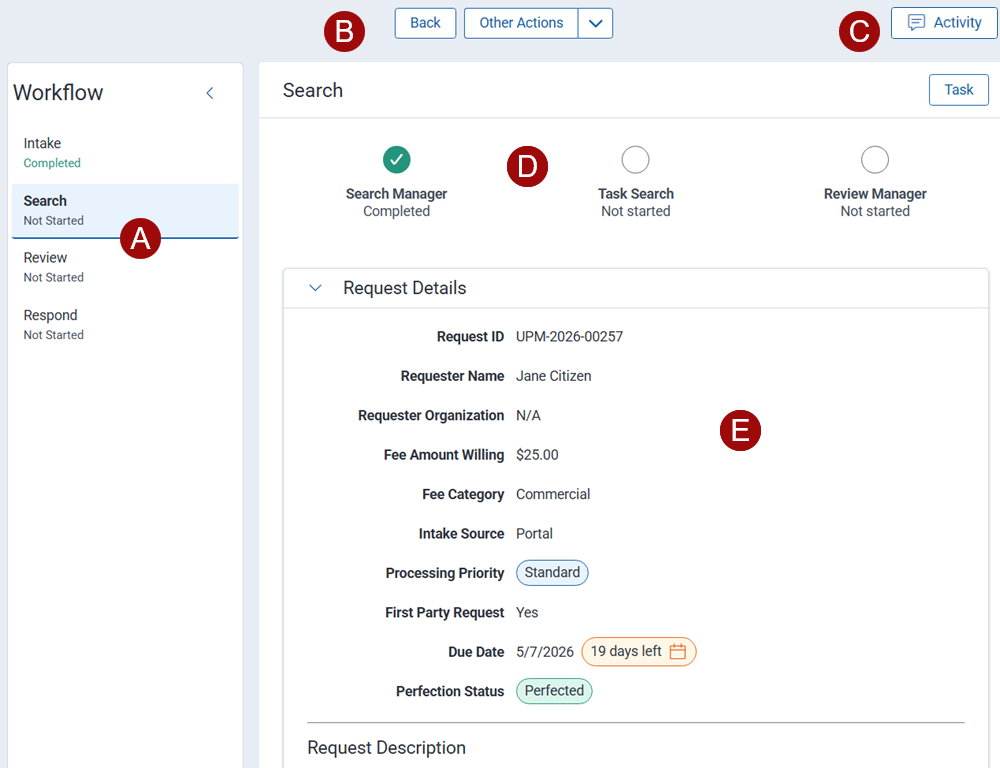
Noteworthy navigational points:
A. Workflow steps—the Relativity FOIA workflow consists of four steps: Intake, Search, Review, and Response. As you complete the tasks for a step, the workflow automatically advances you to the next. You can also click from one step to another to view details.
B. Navigation buttons—navigate to the last screen, previous record or next record.
C. Activity—opens the Activity History panel. The panel displays a list of activities for the request.

Options include:
1. Log Communication—manually log activity for the request. For example, you might log an email you received outside of the FOIA environment that is relevant to the request. Fields include:
2. Add Notes—add comments, questions, and notes.
3. Export CSV—export the activity list in CSV format.
4. Filters—search or filter the activity list.
D. Quick Actions—quick access to:
E. Progress bar—indicates the status of workflow sub-steps. A green circle indicates the sub-step is complete for the workflow step. This may be because the request did not warrant further review, such as not requesting a fee waiver, or the agency reviewer completed all of the tasks within the sub-step. A blue circle indicates the task is partially completed.
F. Request details—the request details including requester input, attachments, and reviewer actions.
G. Custom Fields—this section displays the Request Type field, which defines the type of request and how it is processed.
Options include:
H. Request description—contains the original request description, along with an AI-generated case summary. You can edit the case summary to add your own narrative or additional notes.
I. Attachments—lists attachments provided throughout the workflow.
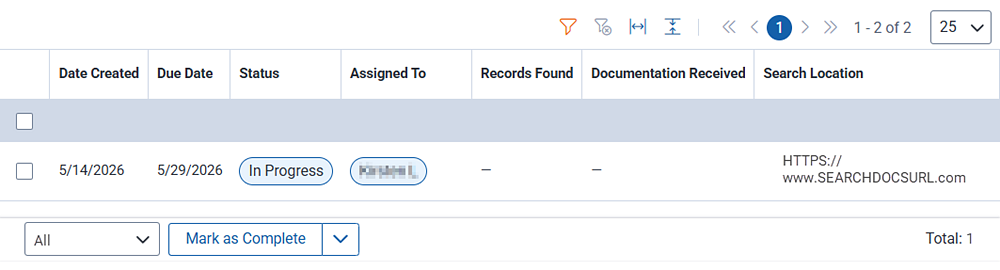
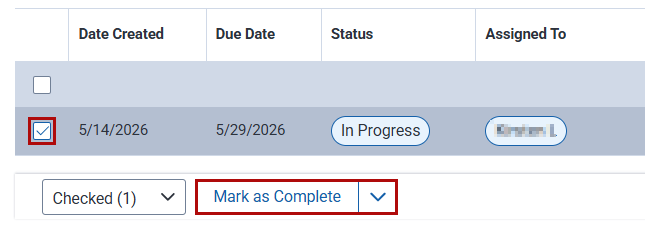
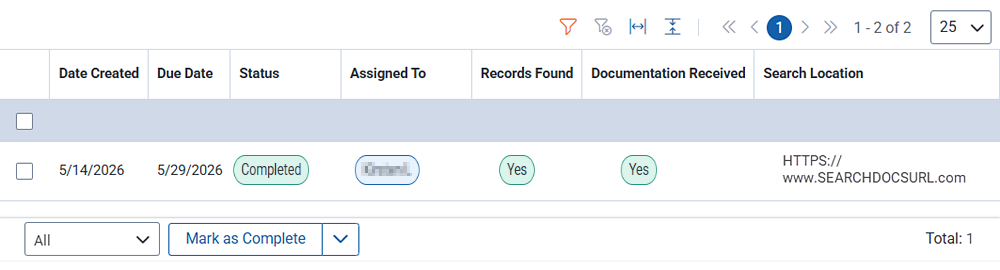
J. Search tasks—displays a table of tasks assigned during the workflow step, along with the status. You can use the mass action control to update the task status, for example, marking it complete.
As a search coordinator, you create and assign search tasks to appropriate offices or users. You communicate with search custodians, track progress, and mark the search task complete once you receive confirmation.
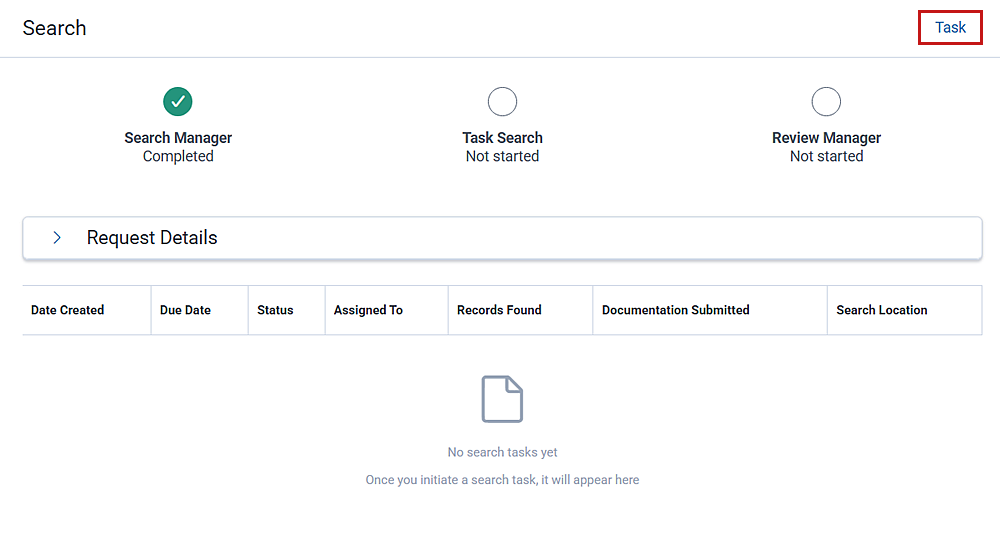
There is one sub-step for Search: Task.
Click the Task button to open the search task modal.
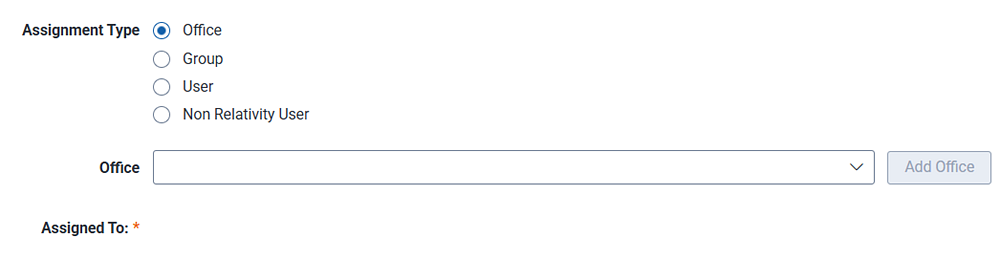
Begin by assigning the task to an office, group, or user.
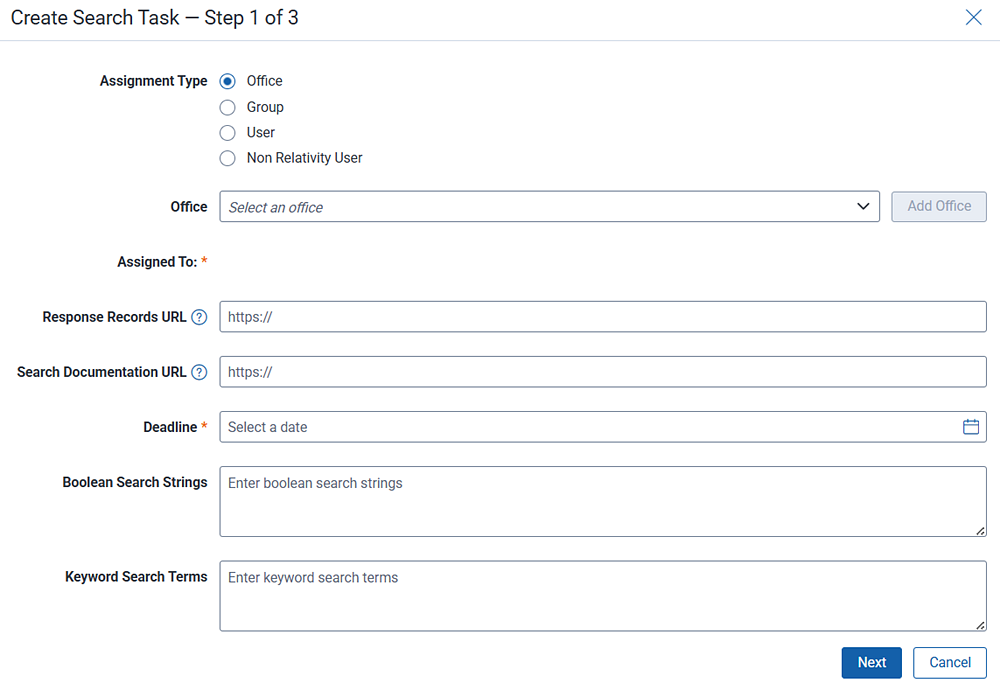
Step 1 of 3:
In the next few steps, you will provide basic information for the assigned custodians including the URL for uploading search results and search criteria.
Step 2 of 3:
In this step, you will use an email template to draft an email to the search custodian(s). Relativity provides a default template that includes merged fields, or fields that are populated with details from the original request. Merged fields are contained in brackets with the field name. For example [ASSIGNED_TO]. You can also change the email template to another Relativity-provided template, or a custom template if your Relativity administrator created one. See Letter Template Management for more information on custom templates. You can also edit the email content to further customize it to fit your needs.
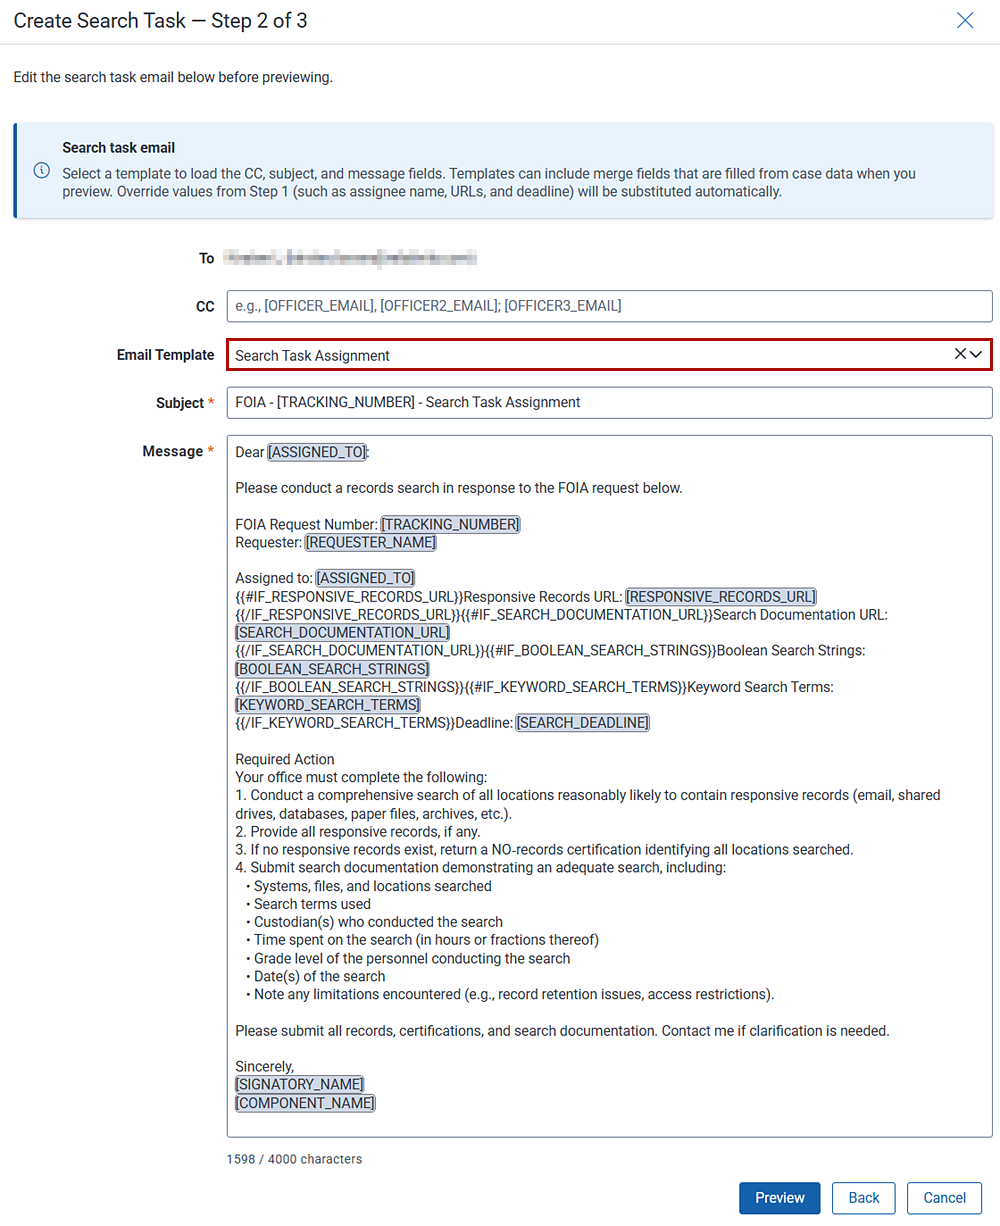
The following steps are optional:
Step 3 of 3:
In this step, you can review the email before sending it.
You are returned to the Search landing page where the Task Search button is now blue, indicating the step is partially complete. The blue changes to green after you confirm that the task(s) you created are completed.
Assign a review manager, or the entity responsible for reviewing the search results.
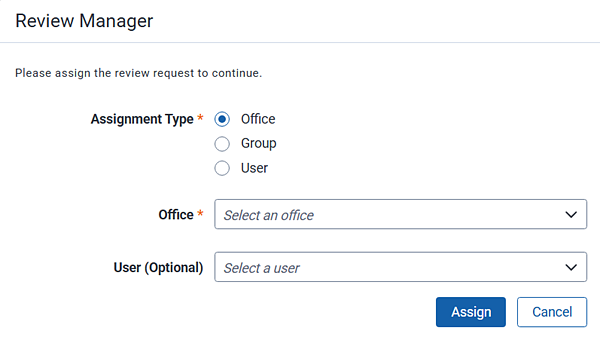
Click the Review Action Office step to get started. The Review Action Office modal opens.
Steps:
You are returned to the Search landing page. Notice now there is a task listed that indicates the current status of the search effort. Depending on how many custodians you assigned, you may see more than one task listed. The Status shows In Progress and will not change until the task is marked complete.
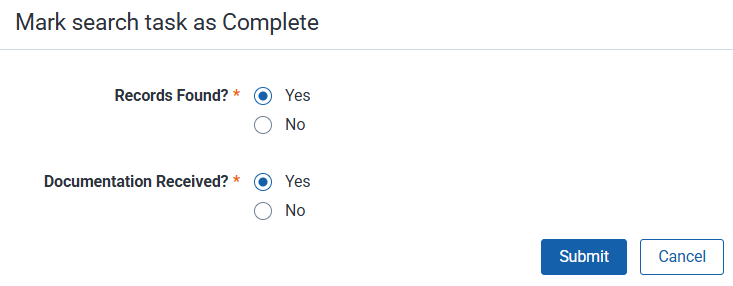
To mark a task as complete:
Document review leverages the aiR Review product to identify records relevant to FOIA disclosure. aiR Review applies FOIA-specific logic to accelerate response times, reduce backlog, and enhance compliance by scoring documents as either relevant or not relevant for initial disclosure consideration. For more information about this product and its features, see aiR Review.
At this point, Search is complete and the workflow moves to the Review step.
