


Feedback
Last date modified: 2026-May-06
Unstructured document review
Unstructured documents contain unlabeled or otherwise unorganized data. The content in these files typically consists of natural language. Examples include emails, word processing documents, PDFs, and forms.
When you review unstructured documents in aiR for Data Breach Response, the goal is to validate the PI predictions that aiR highlights in each document. aiR uses the context of the document to differentiate types of Personal Information (PI) and automatically links detected PI to individuals. PI detections identified by aiR are indicated by a sparkle (✦) icon.
For information on reviewing structured documents such as spreadsheets and CSVs, see Structured document review.
aiR for Data Breach Response analyzes only extracted text. Information in metadata, images, or other non-text elements is not analyzed. For a list of supported unstructured document types and size limitations, see aiR for Data Breach Response.
Review PI
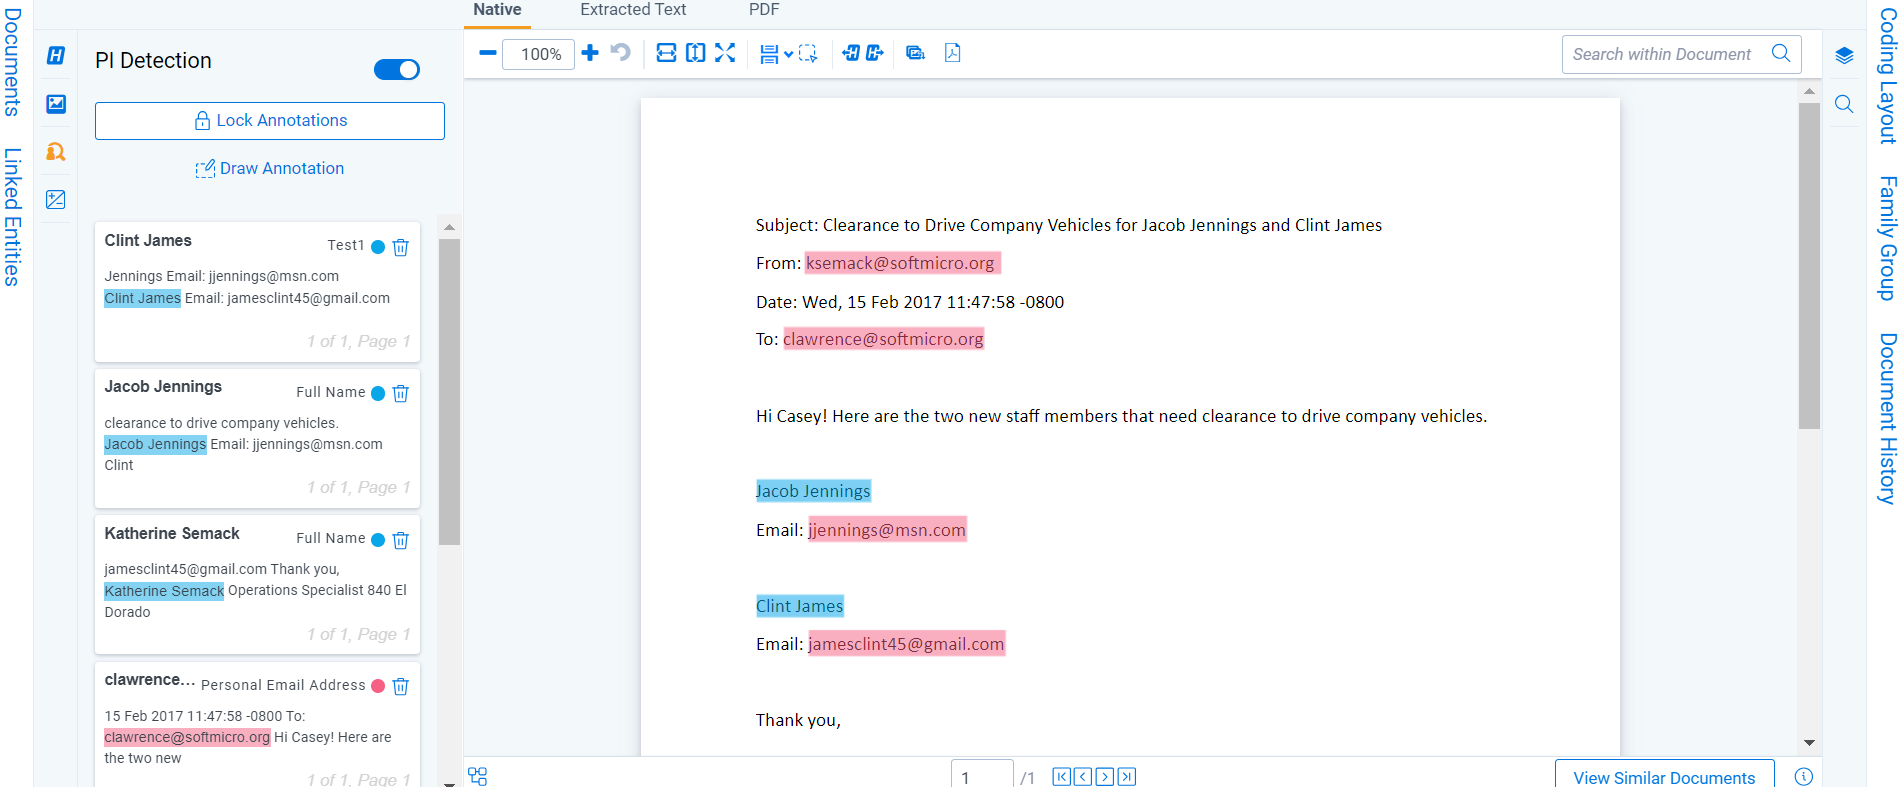
To view identified PI in a structured document, open the PI Detection pane and toggle on PI Detection.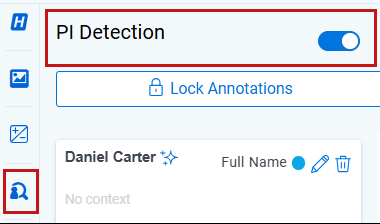
A sparkle (✦) icon appears next to all PI detected by aiR in the PI Detection pane.
Names of people and organizations will appear with blue highlights. Identified PI types will appear with pink highlights.

Capture PI
When you encounter one‑off PI for a single entity or need to adjust auto‑detected PI, you can manually assign or edit the detected information. Follow the steps below to add or remove PI as needed.
Add PI
To add PI:
- Select the text for annotation using the cursor.
- Right click on the document to open the Context Menu.
- From the Context Menu, select Personal Information. Click Add.
- From the Add PI Detection modal, select the PI type for the auto-filled PI value. You cannot change this text without re-highlighting it.
- Click Save.
Edit PI
To edit PI in the document viewer:
- Right click the highlighted PI to edit.
- From the Context Menu, select Personal Information. Click Edit.
- From the Edit PI Detection modal, update desired value in the PI Value field.
- From the Edit PI modal, update desired type in the PI Type dropdown
- Click Save.
To edit PI in the coding panel:
- Click Edit icon (pencil) on the PI Annotation card you want to edit.
- From the Edit PI modal, update desired value in the PI Value field.
- From the Edit PI modal, update desired type in the PI Type dropdown.
- Click Save.
Remove PI
To remove PI from the document viewer:
- Right click the highlighted PI to remove it.
- From the Context Menu, select Personal Information. Click Remove.

- Click Remove on the confirmation modal.
To remove PI from the PI Detection panel:
- Locate the PI you would like to remove from the list in the PI Detection panel.
- Click the trash can icon next to the PI.

- Click Remove on the confirmation modal.
Add drawn annotations
In some cases, PI detections cannot be made on a document due to poor OCR quality. In these instances, PI can be recorded by doing the following:
- Drawn annotations can be applied to most unstructured document types.
- Because of the way email documents are rendered, only selected text annotations can be added.
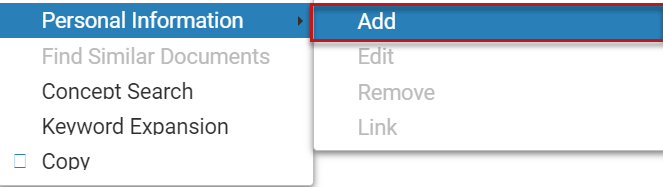
- In the PI Detection panel, select Draw Annotation.
- Draw a box over the text that contains the PI to record.
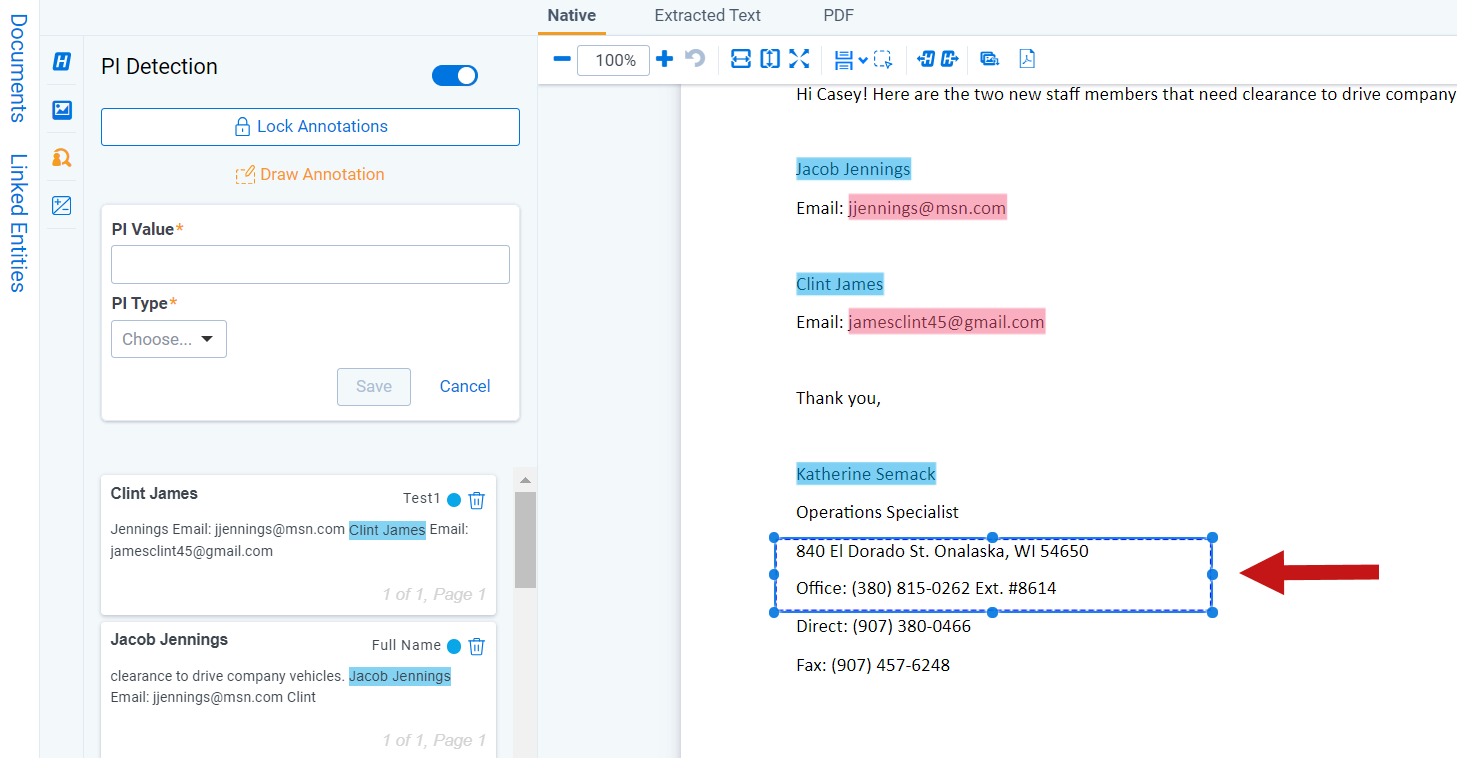
- A panel will appear in the Draw Annotation section of the PI Detection panel.
Enter the PI Value and PI Type.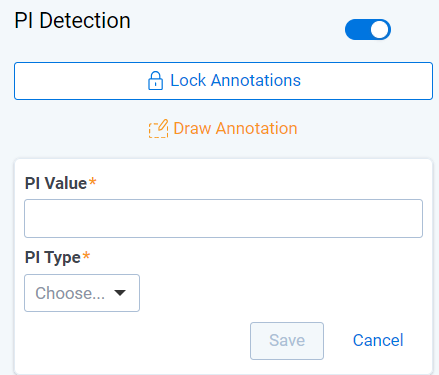
- Click Save.
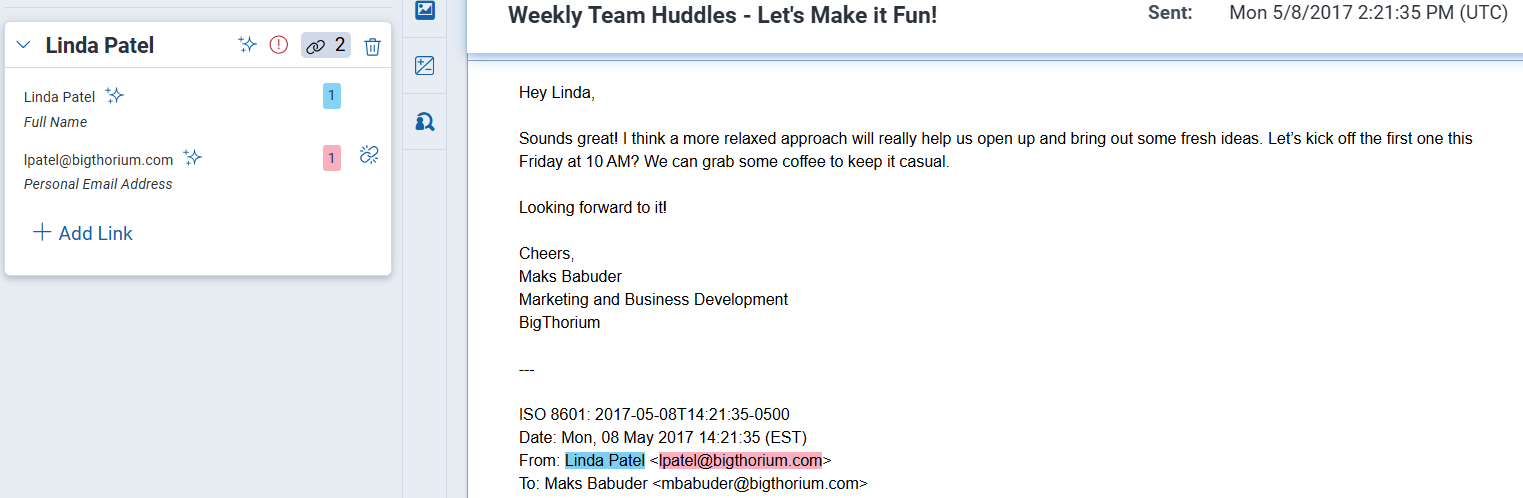
Entity links
Links are relationships between names and other personal information in a document. For example, in the image below, there is a link between the annotation for Linda Patel (person), and her email address. It is important to note that for information to appear in the Entity Report, it is not enough to only tag the personal information within the document. To appear on the Entity Report, individuals and their personal information must be linked in the viewer.
Autolinking PI to individuals
For unstructured documents, aiR for Data Breach Response automatically identifies PI values and links them to individuals mentioned in the document. This eliminates the need to manually associate each PI value with a name.
Auto-linking applies to out-of-the-box PI types. Custom PI types are detected but not automatically linked.
During review, verify that the auto-linked associations are correct. If a PI value is linked to the wrong individual, you can edit the linked entity directly from the Linked Entities panel.
Add links from the Viewer
To add links from the document viewer:
- Multi-select the name and PI you want to link using CTRL.
- From the Context Menu select Link.
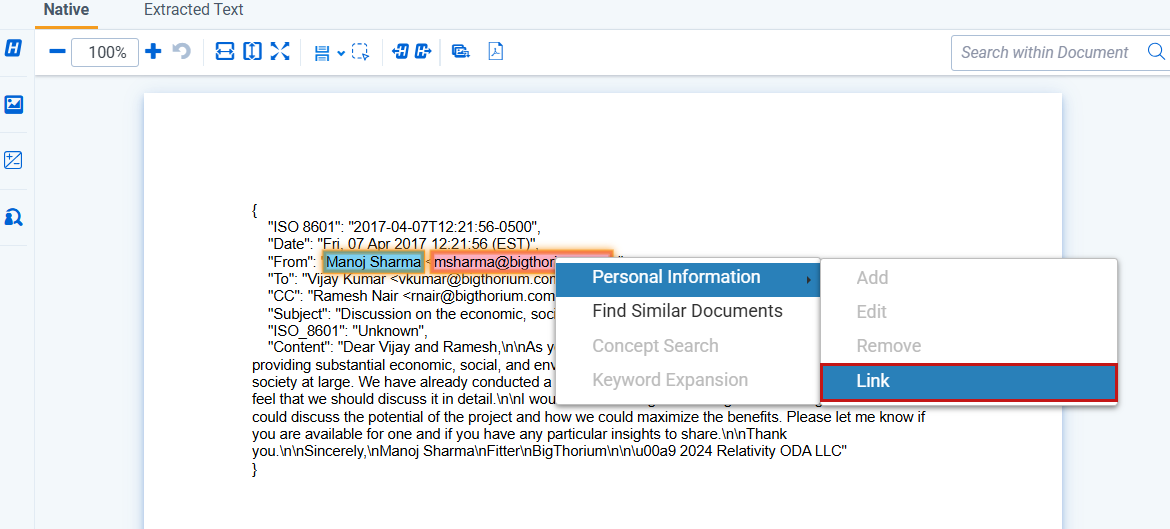 If the Link action is not available, try clearing your browser's cache and refreshing the page.
 - The newly linked information appears in the Records panel.

Add links through the Records panel
For projects initiated before September 2025, the interface will display a Linked Entities panel in place of the Records panel. The panel’s functionality and usage instructions remain unchanged.
To add links through the Records panel:
- Select the + icon in the Records panel.
- Select the individual from the Entity drop-down menu.
- Add the PI Value and Type of the value to link.
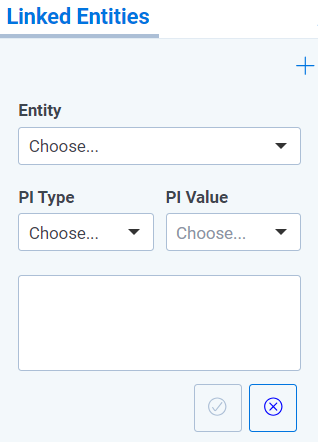
- Repeat Step 3 for each additional PI to link to that entity.
- Click the Checkmark button when done.
Remove links
To remove links:
- Navigate to the entity to remove links for in the Records panel.
- Select the Unlinkicon next to the PI value to unlink.
Lock detections
For PI detections to be preserved on a document when Data Analysis is rerun, PI must be saved before moving on to the next document when reviewing.
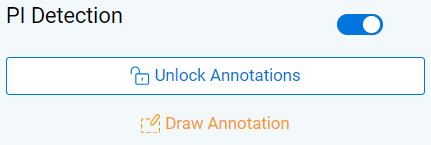
To save PI detections before Data Analysis is run, click the Lock Annotations button in the PI Detections panel. You can continue to make changes and Add/Edit/Remove PI after a document is locked. Those updates will remain on the document.
Changes can not be made while Data Analysis is running.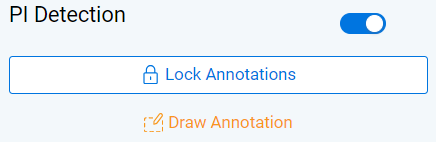
If you do not want to preserve any manual PI Detections that were added on the document, select Unlock Annotations.
Errors
Personal information will not appear in the PI Detection panel under the following circumstances:
- Data Analysis has not been run.
- Data Analysis is in progress.
- Detections will be available in the PI Detection panel once Data Analysis is complete. While Data Analysis is in progress, the panel will display the following message:
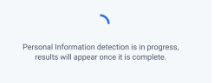
- Detections will be available in the PI Detection panel once Data Analysis is complete. While Data Analysis is in progress, the panel will display the following message:
- Data Analysis has failed.
- If an error has been encountered during PI detection or it has failed, the following message will appear in the PI Detections panel:
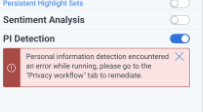
- If an error has been encountered during PI detection or it has failed, the following message will appear in the PI Detections panel:
- No PI was detected after Data Analysis was run.
- If a document does not contain PI, the PI detection panel will display a messaging indicating this.
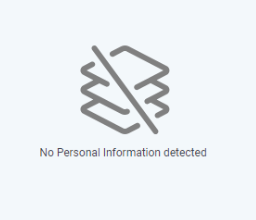
- If a document does not contain PI, the PI detection panel will display a messaging indicating this.