


Feedback
Last date modified: 2026-Jul-17
Monitoring a Review Center queue
The Review Center dashboard provides a centralized location to track, manage, and edit all Review Center queues. In addition, you can track reviewer coding decisions through a variety of methods.
See these related pages:
- Creating a Review Center queue
- Reviewing documents using Review Center
- Review Center security permissions
Review Center dashboard
After creating a queue, navigate to the Review Center tab. This tab contains a dashboard showing all queues, their statistics, and controls related to queue progress.
The Review Center dashboard contains the following sections.
Queue tab strip
The queue tab strip contains a tab for each queue that has been created. To make the dashboard show details for a queue, click on its name in the tab strip.

Below the queue name, each queue shows its status. The possible statuses are:
- Not Started—the queue has not been prepared or started.
- Preparing—the queue is refreshing the saved search for the first time. If it is a prioritized review queue, this also trains the classifier.
- Prepared—the queue has finished preparing for the first time, but it has not been started. It may or may not have a reviewer group assigned.
- Starting—the admin has started the queue, and the queue is becoming active for reviewers. During this phase, the queue also refreshes the saved search and retrains the classifier if needed.
- Active—the queue has started, and reviewers can start reviewing.
- Paused—the admin has paused the queue.
- Canceling—the admin has canceled the process of starting or refreshing the queue.
- Complete—the admin has marked the queue as complete, and it is no longer available to reviewers.
- Errored—an error occurred. When this happens, the error details will appear in a banner at the top of the dashboard.
- Ready for Validation—a linked validation queue has been created, but not started.
- Validation Pending—all documents in the validation queue have been reviewed, and it's ready for you to accept or reject the results.
In addition, if any of the statuses have the word "Validation" added to them (such as "Validation Paused"), this means the status applies to a linked validation queue. For more information, see Review validation.
At the right of the strip, the Add Queue button lets you quickly create new queues. For instructions, see Creating a new queue from a template.
Filtering the queue tab strip
If you have a large number of queues, you can filter them according to their assigned labels in the Queue Label field.
To filter the queue tab strip:
- Click into the search bar above the queue tab strip.
A drop-down list of labels appears. - Select the labels you want to filter by. You can also type in the search bar to narrow the list, then press Enter to select or deselect a label.
- Close the list using the arrow at the right end of the bar.
The queue tab strip now only shows queues whose labels are listed in the search bar. If several labels are listed, queues that match any one of them will appear.
The queue tab filters only apply to the tab strip. They do not affect any of the charts or statistics on the rest of the page.
If you have Active Learning installed in your workspace, an icon appears for the Active Learning History tab. For more information, see Viewing archived Active Learning projects.
Queue Summary section
The Queue Summary section shows the reviewer group, saved search, coding fields, and controls for actions such as pausing or refreshing the queue. The "<X> Active" statistic under the reviewer group shows how many reviewers currently have documents checked out to them. Additionally, clicking on the saved search name or the coding field name takes you to that saved search or field.
To view all settings for the current queue, click on the arrow symbol on the left side. This expands the Queue Summary panel and shows the detailed setting list.

The Queue Summary section holds controls for common actions. For detailed information on each, see:
Review Progress section
The Review Progress section shows statistics for the current queue's progress.

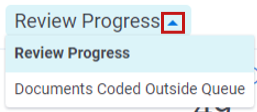
By default, the section shows a set of statistics that are calculated for all documents in the queue. By clicking the triangle next to the section name, you can select another view.
Review Progress view
The default Review Progress view shows statistics for all documents in the queue's data source. If a document has been coded more than once, it counts the most recent coding decision.
The Review Progress statistics are:
- Total Docs—the total number of documents currently in the queue's data source. To be counted, the queue must have been prepared or refreshed after the documents were added or removed. The "100%" in smaller print underneath it indicates that this is the total document set.
- Docs Coded—the number of documents in the data source that have a value in the review field. This includes documents coded outside the queue. The smaller percentage underneath it shows the percentage of Docs Coded divided by Total Docs.
- <Positive Choice>—the number of documents coded with the positive choice on the review field. This includes documents coded outside the queue. The smaller percentage underneath it shows the percentage of <Positive Choice> divided by Docs Coded.
- <Negative Choice>—the number of documents coded with the negative choice on the review field. This includes documents coded outside the queue. The smaller percentage underneath it shows the percentage of <Negative Choice> divided by Docs Coded.
- Neutral—the number of documents coded with a neutral choice on the review field. This includes documents coded outside the queue. The smaller percentage underneath it shows the percentage of Neutral documents divided by all Docs Coded.
- Relevance Rate—the total percentage of documents coded positive. This is calculated by counting the number of documents coded positive, then dividing it by the total number of coded, non-skipped documents. The bold percentage shows the relevance rate including documents coded either inside or outside of the queue, while the smaller percentage underneath it shows the relevance rate only for documents coded inside the queue.
- Uncoded—the number of documents in the data source with no value in the review field. This includes documents that were skipped or had their coding decision removed. The smaller percentage underneath it shows the percentage of Uncoded documents divided by Total Docs.
- Skipped—the number of documents that were skipped within the queue. The smaller percentage underneath it shows the percentage of Skipped documents divided by all Uncoded documents.
- Predicted <Positive Choice> (Prioritized Review only)—the number of documents in the data source with no review field value and a relevance rank greater than or equal to the Positive Cutoff. The smaller percentage underneath it shows the percentage of Predicted <Positive Choice> documents divided by all Uncoded documents.
- Predicted <Negative Choice> (Prioritized Review only)—the number of documents in the data source with no review field value and a relevance rank less than the Positive Cutoff. The smaller percentage underneath it shows the percentage of Predicted <Negative Choice> documents divided by all Uncoded documents.
The Predicted <Positive Choice> and Predicted <Negative Choice> fields only show their predictions after 50 or more documents have been coded.
Documents Coded Outside Queue view
If you select Documents Coded Outside Queue from the Review Progress drop-down, this shows an alternate view. These statistics count documents that are part of the queue's saved search, but that were coded through some means other than the selected Review Center queue.
The Documents Coded Outside Queue statistics are:
- Docs Coded—the number of documents in the data source that were coded outside of the queue. The smaller percentage underneath it shows the percentage of documents coded outside the queue divided by all documents coded.
- <Positive Choice>—the number of documents that were coded positive outside of the queue. The smaller percentage underneath it shows the percentage of documents coded positive outside the queue divided by all documents coded.
- <Negative Choice>—the number of documents that were coded negative outside of the queue. The smaller percentage underneath it shows the percentage of documents coded negative outside the queue divided by all documents coded.
- Neutral—the number of documents that were coded with a neutral choice outside of the queue. The smaller percentage underneath it shows the percentage of documents coded neutral outside the queue divided by all documents coded.
Charts and tables
The dashboard includes two visualization panels. Both panels have the same options for charts and tables to show, which lets you choose which visualization to show on which panel, in any order.
To navigate the visualization panel:
- To select a different visualization, click the visualization's name. This opens a drop-down menu with all other visualizations.
- To switch from the chart view to the table view, click the Chart drop-down in the upper right corner and select Table. This shows a table with the same information as the selected chart.
- To zoom in or out on a chart, hover the cursor over it and scroll. All charts reset to their default zoom when you reload the page.
- To download the panel contents, click the Export symbol on the upper right. Charts download as .png images, and tables download as .csv files.
- The charts and tables only reflect documents coded inside the queue.
- If any documents were coded by reviewers who are not part of this Relativity instance, those reviewers will be listed as Unknown User 1, Unknown User 2, and so on. This can happen if a reviewer was removed from the workspace or if the workspace has been archived and restored into a different instance.
General charts and tables
Some charts and tables are available for any type of queue. These include:
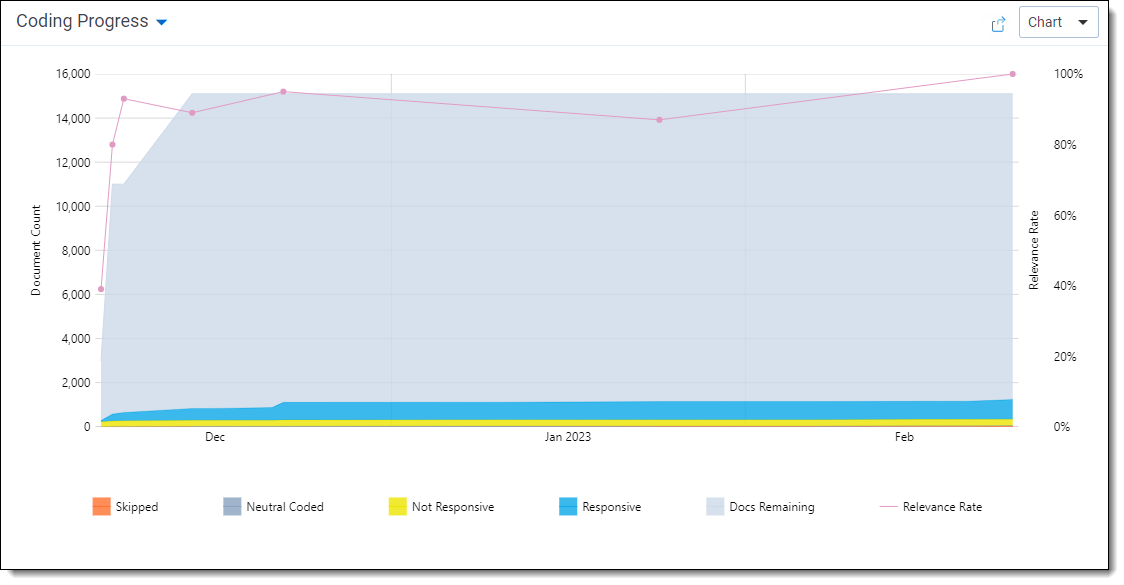
Coding Progress
The Coding Progress tab shows the count of documents that have been coded in the queue over time. Coding data is reported in 15-minute increments.
The numbers for Est. Total Docs and Est. Docs Remaining are updated every time the queue refreshes. Because they update at a different time than the coding data, these numbers are estimates.
Relevance Rate
The Relevance Rate tab shows the relevance rate over time. This can be shown overall or by user.
Each solid data point represents 100 documents, and a hollow data point represents any remainder. For example, if 201 documents have been coded, there will be 3 points: 2 solid points for each set of 100, and 1 hollow point for the final document.
Other details about the data points include:
- If you have more than one data point in a 15 minute increment, the chart shows them as two points on a vertical line. This can happen if many reviewers are coding quickly.
- The Date field for a data point is the date the last document in the set of 100 was logged.
- If a document has been coded more than once, the overall relevance statistics reflect the most recent decision. However, the per-user statistics show the most recent decision for each user. For example, if User 1 skipped a document and User 2 coded it as relevant, User 1's statistics will still reflect the skip.
For prioritized review queues, the relevancy rate usually declines over time. However, the relevance rate may spike if lots of new documents are added to the queue or if the definition of relevance changes during review. For saved search queues, the shape of the relevancy rate graph varies depending on the saved search being used.
Review Speed
The Review Speed tab shows the number of documents coded per hour. Data is reported in 15-minute increments.
Other details about the data points include:
- The Review Speed data can be shown overall or by user. When it's set to show all reviewers, the line chart shows a weighted average of the review speeds of the reviewers. It does not report their aggregate review speed.
- If a reviewer has coded the same document more than once, each time counts as a separate coding decision.
Queue History
The Queue History tab shows the state of the queue at every previous refresh. This is shown only as a table, not a chart.
The columns vary depending on the queue type. For saved search queues, it also depends on whether positive and negative choices are selected for the review field.
Possible columns include:
- Refresh Start Time
- Refresh End Time
- Total Items—the total number of documents in the data source.
- Refresh Type—this can be either Auto or Manual.
- Coded <Positive Choice> (optional for saved search queues)
- Coded <Negative Choice> (optional for saved search queues)
- Uncoded Predicted <Positive Choice> (prioritized review queues only)
- Uncoded Predicted <Negative Choice> (prioritized review queues only)
- Coverage Mode (prioritized review queues only)—whether the queue was in Coverage Mode during the refresh.
All document counts show the number of documents in that category at the Refresh End Time.
Prioritized review charts
The Rank Distribution chart is available for prioritized review queues. This chart helps you compare the model's predictions to reviewer's actual coding decisions. It shows the number of documents at each rank, from 0 to 100, color-coded by the reviewers' coding decisions on those documents.
A low relevance rank means that the model predicts that the document is more likely to be coded negative, and a high relevance rank means that the model predicts the document is more likely to be coded positive.
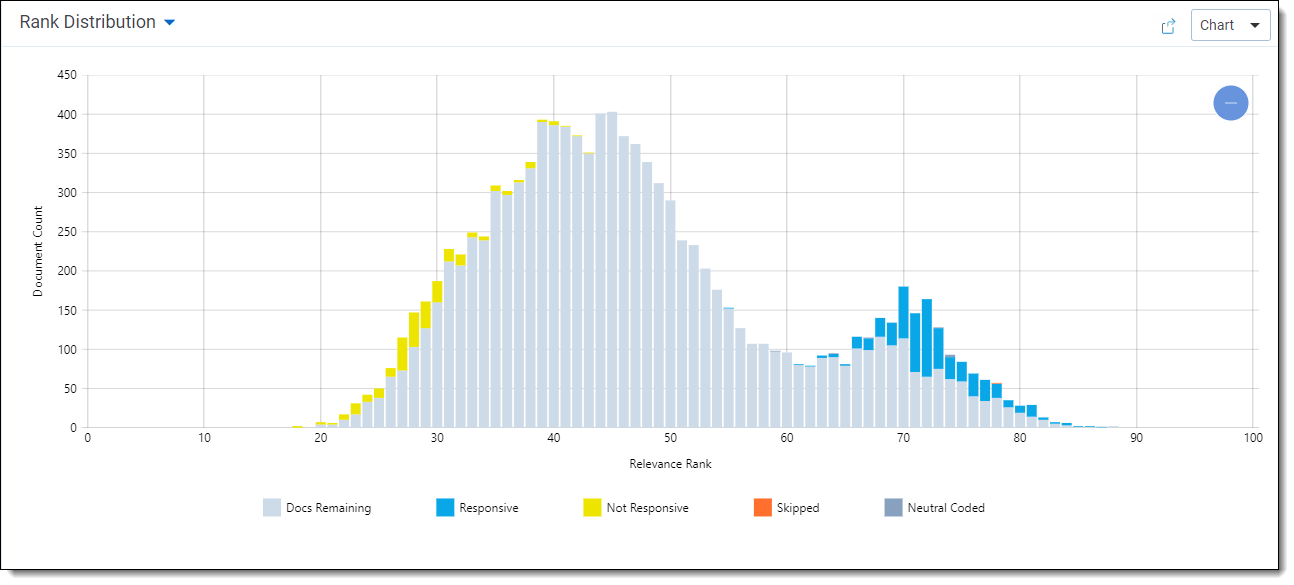
If you zoom out on the Rank Distribution chart, you may see documents with ranks below zero. These are documents that could not be classified. For more information, see Understanding document ranks.
Reviewed Documents table
The Reviewed Documents table shows which reviewer coded each document, how long the reviewer took, and how it was coded. This only shows coding that takes place within the Review Center queue.
For saved search queues, the columns depend on whether a review field is set, as well as if positive and negative choices are selected.
Possible columns include:
- Control Number—the control number of the document.
- Reviewer—the assigned reviewer's name.
- Coded Time—the check-in time for the document.
- Coding Duration—how much time passed between the reviewer opening a document in the review queue and saving a coding decision. This includes clicking Save, Save & Next, or Skip. The time is reported in hours, minutes, and seconds (HH:MM:SS).
- Queue Coding Decision (optional for saved search queues)—how the document was coded when the reviewer checked it back in. If the document was skipped, this is blank.
- <Review Field Name> (optional for saved search queues)—the current coding designation of the document.
- Random Doc (prioritized review queues only)—whether the document was randomly chosen, or served up according to its rank. For more information, see Including random documents in the queue.
Preparing or refreshing the queue
In order for a queue to function, Review Center has to run the saved search, check for any outside-coded documents, and perform other actions. If it is a prioritized review queue, it also needs to periodically retrain the classifier. This collection of actions is referred to as refreshing the queue.
Depending on your settings, the refresh button may say several things:
- Prepare Only—appears when the queue has not been started. This runs the saved search and trains the classifier for the first time, but it does not start the queue. Alternately, you can click Prepare and Start to perform both actions together.Preparing a new queue in advance makes the Start Review action take only a few seconds. This can be helpful if your data source is very large or if you have a complicated saved search. For example, you might prepare a new queue overnight, then start it in the morning.
- Refresh Queue—appears during a review that does not use auto-refresh. Clicking this refreshes the queue.
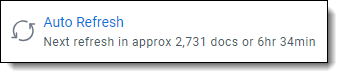
- Auto Refresh—appears during a review that uses auto-refresh. Clicking this starts an immediate refresh of the queue. For more information, see Auto-refreshing the queue.
After you click Confirm, a Cancel option appears. For prioritized review queues, you may also see a confirmation modal with the option to refresh the cache. For more information, see Caching text in prioritized review queues.
If you edit a queue's settings when the queue is partway through refreshing, the refresh will automatically cancel. Any edits that affect the queue refresh will take effect during the next refresh.
Checking refresh status
When you prepare or refresh a queue, the button displays the refresh progress as a series of steps. Step 1 has several phases, and it typically takes the longest. The system updates the status every 5 minutes.
The steps are:
- Step 1 of 5—initiates background processes and collects the documents. This has different phases depending on the queue type.
- Prioritized review queue phases: Initiating, Ingesting, Model training, and Ranking docs. During the Ingesting phase, a banner appears below the Queue Summary section showing how many documents have been ingested.
- Saved search queue phases: Initiating and Running Search.
- Validation queue phases: Initiating and Creating Sample.
- Step 2 of 5: Retrieving—takes the results of Step 1 and prepares them for processing.
- Step 3 of 5: Processing—processes the documents. This includes updating ranks for prioritized review queues and retrieving document families.
- Step 4 of 5: Capturing Stats—records document statistics.
- Step 5 of 5: Finalizing—completes the job, finalizes metrics, and sends any requested email notifications.
To see what time the queue began preparing or refreshing, see the Queue History table. You can also use the Queue History table to check how long previous builds took. For more information, see Queue History.
Auto-refreshing the queue
If Queue Refresh is set to On in the queue settings, the queue will automatically refresh at specific intervals. The interval length depends on the queue type and the coding activity. These refreshes only happen after the queue has been started, and you can change this setting at any time.
Saved search queues refresh every 15 minutes if there is coding activity within the queue.
Auto-refresh timing for prioritized review queues
Prioritized review queues refresh when there has been a 20% change in the total number of coded documents in the queue. For example, if 100 documents were previously coded, you would need to code 20 more to trigger a refresh.
As the total number of coded documents grows higher, the auto-refresh triggers less frequently, because 20% change requires more documents. The following table shows an example of how this grows at the beginning of a project.
| Total documents coded positive or negative at the last refresh | Number of documents needed to trigger next refresh (rounded up) |
|---|---|
| 50 (coded before queue started) | 10 |
| 60 (50 plus 10) | 12 |
| 72 (60 plus 12) | 15 |
| 87 (72 plus 15) | 18 |
A prioritized review queue will also auto-refresh if there is coding activity within the queue and it has been 8 hours since the last refresh, regardless of whether 20% more documents have been coded. For example, if there are 1000 coded documents in the queue and a reviewer codes 1 more, the queue will auto-refresh after 8 hours. However, if the queue were to sit completely inactive for 8 hours, with no reviewer coding, the queue would not auto-refresh.
Auto-refresh only triggers after coding within the Review Center queue. It does not trigger if the documents are coded elsewhere in Relativity.
Viewing auto-refresh estimates
For prioritized review queues, the Auto Refresh button shows an estimate of how many documents must be coded to trigger the next auto-refresh. When that number have been coded positive or negative, the next auto-refresh will start within about five minutes.
Manually triggering or canceling auto-refresh
If you need to trigger an immediate refresh, click on the words Auto Refresh to trigger an additional manual refresh. For example, if new documents have been added to the saved search, you can click this to add them to the queue quickly instead of waiting until the next auto-refresh.
While the queue is auto-refreshing, a Cancel option appears. If you cancel the current auto-refresh, the queue will still try to auto-refresh again later.
Canceling the queue preparation can take some time. If you need to remove reviewer access immediately while canceling, edit the queue and remove the reviewer group.
Reviewer access during refreshes
Reviewers can still review documents in an active queue while it refreshes. Clicking the refresh button, running an auto-refresh, or canceling a refresh makes no difference to reviewer access.
Similarly, if the queue was paused before the refresh, it will stay unavailable. Active queues stay active, and paused queues stay paused.
Auto-refreshing in Coverage Mode
If your prioritized review queue has automatic refreshes enabled and Coverage Mode turned on, the refreshes trigger at a different time. The queue will automatically refresh each time 100 documents are coded within the queue, or when 5% of the documents have been coded positive or negative, whichever occurs first. The "Next refresh" document count reflects this change whenever you turn on Coverage Mode.
For example, if the queue has 1000 total documents, coding 50 positive or negative would trigger the next auto-refresh. If the queue has 2000 or more documents, coding 100 would trigger the next auto-refresh.
Whenever you turn Coverage Mode on or off, manually refresh the queue. This updates the document sorting for reviewers. For more information, see Turning Coverage Mode on and off.
Caching text in prioritized review queues
The first time you prepare a prioritized review queue, Review Center caches the text of the documents in the queue and stores the documents' data at the workspace level. This significantly speeds up later refreshes, because Review Center references the cache instead of re-analyzing the text. This also speeds up the creation of any other queues in the workspace with the same documents.
By default, Review Center caches the Extracted Text field of each document. If you selected a different field to analyze when you set up your queue, it will cache that text instead.
When you click to manually refresh the queue, a modal appears with an option to refresh the workspace cache:
- If the text of documents in the queue's data source has not changed, leave the box unchecked. This makes the refresh process much faster.You do not need to refresh the cache if you are simply adding or removing documents from the queue.
- If the text of documents in the queue's data source has changed, check the box. This tells Review Center to clear the cached fields for all documents in this workspace. It then re-caches the text of documents in this queue. Choosing to re-cache the text may add significant time to the queue refresh, as well as the next refresh for queues with other cached documents.
If the Text Precedence fields you selected for your queue are Data Grid enabled, preparing the queue for the first time may run up to three times faster than for fields that store data in SQL. After the text has been cached, refresh times are typically equal between both types of fields.
For more information on using Data Grid, see
Starting the queue
The Start Review button makes the queue available for review. If the queue has never been prepared before, it will say Prepare and Start. This also runs the saved search and trains the classifier for the first time.
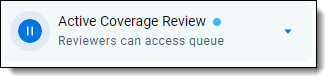
After the queue has finished starting, the symbol beside this option changes to a pause button. Clicking this pauses the queue and stops reviewers from checking out more documents.
Before starting a queue, you must have a reviewer group assigned.
Editing queues and other actions
To edit the queue or perform other less-frequent actions, click on the three-dot menu on the right of the Queue Summary section.

The menu options are:
- Edit—opens a modal to edit any of the queue settings.
- For information on general edits, see Editing recommendations.
- For information on Coverage Mode, see Turning Coverage Mode on and off.
- Release Checked Out Documents—releases all documents that are checked out by reviewers. If a reviewer falls inactive and does not review the last few documents in a queue, this frees up those documents for reassignment.
- To see the number of currently checked out documents, look at the main ribbon for the Queue Summary section.
- If you release documents while a reviewer is actively reviewing, that person will be able to finish coding, but their documents may get checked out by another reviewer at the same time. To prevent this, ask any active reviewers to exit and re-enter the queue after you click the link.
- Release Skipped Documents—adds skipped documents back into the document pool as uncoded documents. They will be available for reviewers, and all metrics will show them as Uncoded instead of Skipped. The coding records tied to the document will still show that it was skipped, as well as any later coding decisions.
- Save as New Model (prioritized review queue only)—opens the options to save the relevance training from this queue for re-use with another queue. For more information, see Reusing saved models.
- Set up Validation (prioritized review queue only)—opens the options to create a review validation queue. For more information, see Review validation.
- Mark as Complete—sets the queue's status to Complete and moves it to the far right of the queue tab strip. This also removes the queue from the Review Queues tab, and reviewers can no longer access it. After the queue has been marked Complete, this option changes to Re-enable. Clicking this sets the queue's status to Not Started and returns it to the Review Queues tab.
Editing recommendations
Many edits are minor, and you can make them without pausing the queue. However, if you make a major change such as changing the data source, we recommend:
- Pause the queue before editing.
- Release any checked out documents.
- Edit the queue.
- Refresh the queue.
- Restart the queue.
For descriptions of the editable fields, see Creating a Review Center queue.
Turning Coverage Mode on and off
When you turn Coverage Mode on or off for a prioritized review queue, this changes the order in which the documents will be served up. Before the new order will take effect, though, you must refresh the queue.
To turn Coverage Mode on or off:
- On the right side of the Queue Summary section, click the three-dot menu.
- Select Edit.
- Click the Coverage Mode toggle to enable or disable it.
- Click Save.
- Manually refresh the queue. For more information, see Preparing or refreshing the queue.
On the right of the Queue Summary section, the start or pause button reflects whether Coverage Mode is turned on. If it is turned On, it will refer to the queue as "Coverage Review."
If Coverage Mode is turned Off, the button will refer to the queue as "Prioritized Review."

On the Queue History table, you can also see if your queue was in Coverage Mode or not during each queue refresh. For more information, see Queue History.
Deleting a queue
Queues can be edited or deleted from the Review Library tab.
To delete a queue:
- Navigate to the Review Library tab.
- Click on the queue you want to delete.
- Click Delete.
A confirmation pop-up will appear. - Click Delete again.
After the process completes, you will return to the main Review Library tab.
Deleting a queue does not remove any of the coding decisions or rank values that have been assigned to the documents.
If you delete a main queue that has a validation queue linked to it, it also deletes the validation queue. For more information on validation queues, see Review validation.
Fixing a misconfigured queue
If a required field or object that a queue relies on is deleted or moved, this puts the queue into a warning state. Any queue preparation or auto-refresh stops, and a message appears at the top of the Review Center tab directing you to the field or object that needs to be fixed. Your reviewers also see a warning at the top of the Review Queue page telling them which queue is misconfigured and that they should alert their administrator.
When this happens, we recommend pausing the queue and checking its settings. For example, if the saved search was deleted, you may need to link the queue to a new saved search. If a required field was deleted, you may need to create a new one.
If you have checked the queue's settings and still see warnings, contact Product Support.
Understanding document ranks
During prioritized review, the AI classifier assigns a rank to each document. These ranks are stored in the Rank Output field, and they determine the order in which reviewers will see documents.
Most document ranks range from 0 to 100. The higher the score, the stronger the prediction that the document will be coded on the positive choice. The AI classifier recalculates ranks every time the queue refreshes, and the highest-ranking documents are served up to reviewers.
In order to improve efficiency and performance, Relativity reserves the right to update the prioritized review queue's AI classifier during software upgrades. Although we work hard to minimize disruptions, these upgrades can cause minor differences in document ranking. As a result, administrators may occasionally see minor variations in document ranks after a queue is refreshed, even without any new document coding.
If the classifier cannot classify a document, it will assign the document a value below zero. These values are:
| Negative rank | Document error |
|---|---|
| -1 | An error occurred while processing the data through the classifier. |
| -2 | The extracted text field or other selected text field is empty. If you see this rank, consider making a saved search queue to review these documents separately. |
| -3 | The document's extracted text field or other selected text field is larger than the limit of 30MB. If you see this rank, we recommend filtering out large documents from your saved search to improve the performance of the classifier. |
Tracking reviewer decisions
You can view coding decisions made by each reviewer in the Reviewed Documents table. For more information, see Reviewed Documents table.
Alternatively, you can also use the following methods.
Using the Documents tab
The Review Center Coding fields track the reviewer names, decisions, and dates. You can add these to views and saved searches from the Documents tab.
The field names are:
- Review Center Coding::Coding Duration—how much time passed between the reviewer opening a document in the review queue and saving a coding decision. This includes clicking Save, Save & Next, or Skip. The time is reported in hours, minutes, and seconds (HH:MM:SS).
- Review Center Coding::Field Name—the name of the Review Field for the queue.
- Review Center Coding::Queue—the name of the Review Center queue that contains the document.
- Review Center Coding::Reviewed By—the name of the reviewer who made the coding decision.
- Review Center Coding::Reviewed On—the date of the coding decision. Dates are based on the UTC time zone.
- Review Center Coding::Value—the reviewer's coding decision.
-
Review Center Coding::Was Outside Coded—whether the document was coded through some means other than the selected Review Center queue.
If a document has been coded multiple times, each coding decision appears as a sub-item within the row.
For more information on creating views and saved searches, see
Using the Field Tree
The Field Tree helps you get a quick overview of document coding decisions. Unlike creating a view or saved search, it does not show which reviewer made each decision.
To view coding decisions using the Field Tree:
- Navigate to the Documents tab.
- In the browser panel, click on the tag symbol to open the Field Tree.
- Scroll to the folder labeled Review Center and expand it.
- Click on your queue's name. This shows all documents currently in the queue, plus any documents that were coded in the queue but later removed.
Depending on your queue's history, there may also be other tags nested underneath it:
- <queue name> Validation <#>—this lists documents in an attached Validation queue. If the queue has several attached Validation queues, each one will have its own tag.
- Removed—this lists any documents that were coded in the queue, but later removed from the data source.
If you rename or delete a queue, this renames or deletes the matching Field Tree tags also.
Using the Track Document Field Edits by Reviewer application
The Track Document Field Edits by Reviewer application lets you see which reviewer made each coding decision. You can set up the application individually for each of your queues.
Install the application using the instructions from Track document field edits by reviewer.
When configuring the application:
- Put the Reviewed On and Reviewed By fields you create into a saved search or view for monitoring.These fields should be created from scratch when setting up the application. Do not use the preexisting Review Center Coding::Reviewed On or Review Center Coding::Reviewed By fields. For full instructions, see Track document field edits by reviewer.
- Set your queue's review field as the Field to Monitor.
- Set Track Initial Change Only? as follows:
- If this is set to Yes, the application tracks only the first reviewer of the document. It does not track any later edits.
- If this is set to No, the application updates the Reviewed On and Reviewed By fields every time a user edits the document.
If you set up the application after starting your queue, you can still see previous coding decisions by following the steps under Populating Historical Records.
Moving Review Center templates and queues
Review Center templates and queues are Relativity Dynamic Objects (RDOs), which typically can be moved across workspaces or instances with Relativity Integration Points. However, because of the complexity of an active queue, we do not support moving active queues. Doing so could damage your Review Center environment.
We do support moving queue templates across workspaces or instances using Relativity Integration Points. This process is safe for your environment.
Viewing archived Active Learning projects
If your workspace includes projects from the older Active Learning application, you can view read-only statistics and results for those projects from the Active Learning History tab.
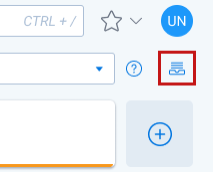
To access the tab, click the Active Learning History icon on the right side of the queue tab strip filter.
Make sure the Active Learning application is still installed in the workspace. Uninstalling Active Learning removes the project data.
For detailed information on the Active Learning History tab, see Active Learning application history.