


Feedback
Last date modified: 2026-Jun-02
Review validation
Review validation evaluates the accuracy of a Review Center queue. The goal of validation is to estimate the accuracy and completeness of your relevant document set if you were to stop the queue immediately and not produce any unreviewed documents. The primary statistic, elusion rate, estimates how many uncoded documents are actually relevant documents that you would leave behind if you stopped the queue. The other statistics give further information about the state of the queue.
- For a practical overview of how the validation statistics are calculated, see Review validation statistics.
- For detailed equations, see Review Center Validation Deep Dive on the Community site.
- For validating aiR for Review Prompt Criteria, see aiR for Review prompt criteria validation.
Review validation does not check for human error. We recommend that you conduct your own quality checks to make sure reviewers are coding consistently.
Key definitions
The following definitions are useful for understanding review validation:
- Discard pile—the set of documents that are uncoded, skipped, or coded as neutral. This also includes documents that are being reviewed when validation starts, but their coding has not been saved yet.
- Already-coded documents—documents that have already been coded as either positive or negative. These are counted as part of the validation process, but they will not be served up to reviewers a second time. Neutral-coded documents are considered part of the discard pile instead, and those may be served up a second time.
Determining when to validate a Prioritized Review queue
When a Prioritized Review queue is nearing completion, it can become more difficult to find additional relevant documents. As you monitor your queue, the following dashboard charts can help you determine when the queue is ready for validation:
- Rank Distribution—look for few or no unreviewed documents with a rank of 50 or higher.
- Relevance Rate—you should see a decline in the relevance rate progress line indicating that very few responsive documents are being found.
When you believe you have found most of the relevant documents, run validation to estimate the accuracy and completeness of your relevant document set.
For more information on the dashboard charts, see Charts and tables.
Starting a validation queue
When you are ready to validate your progress in a Review Center queue, you can start a linked validation queue that samples documents from the discard pile and serves them to reviewers.
To set up the validation queue:
- From the Review Center tab, click on the queue you want to validate.
- Pause and stabilize the queue:
- If auto-refresh is turned on, turn it off.
- If the queue is in the middle of refreshing, wait until the refresh has finished before starting validation.
- Click the Pause button.
- Release any documents that are currently checked out to reviewers. For more information, see Editing queues and other actions.
- On the right side of the Queue Summary section, click on the three-dot menu and select Set up Validation.
An options modal appears. - In the options modal, set the following:
- Validation Reviewer Groups—the user groups you want reviewing the queue.
- Cutoff—enable this to set a cutoff for the validation queue. For more information, see How setting a cutoff affects validation statistics.
- Positive Cutoff—if Cutoff is enabled, enter a custom cutoff value between 0 and 100 in this field. This rank will be used as the dividing line between documents predicted positive and documents predicted negative. Setting this value also adds a Precision statistic to the validation results and affects the Margin of Error Estimate (Elusion).
- Set the sample size using these fields:
- Sample Size—sets a fixed number of documents for the sample size. By default, this field is set to 1000 documents. The sample size must be larger than 5 and smaller than the size of the discard pile.
- Richness—the estimated percentage of relevant documents in the data source. By default, this field is set to 10%. We recommend leaving this set to 10% unless you know the richness of your data source. Entering a higher Richness value lowers the Margin of Error Estimate (Recall).
- Margin of Error Estimate (Elusion)—how accurate the Elusion statistic will be based on the current sample size. Entering a lower margin increases the Sample Size and the Margin of Error Estimate (Recall).
- Margin of Error Estimate (Recall)—how accurate the Recall statistic will be based on the current sample size. Entering a lower margin increases the Sample Size and the Margin of Error Estimate (Elusion).Each of these fields affects the others. For more details, see Choosing the validation settings.
- Click Save.
Choosing the validation settings
When you set the sample size for validation, each of these fields affects the others:
- If you have a Positive Cutoff, raising it increases the number of documents in the sample below the cutoff, which decreases the Margin of Error Estimate (Elusion). Raising this cutoff generally increases the Elusion rate, but the margin of error goes down.
- Increasing the Sample Size lowers both Margin of Error estimates.
- Increasing the Richness percent lowers the Margin of Error Estimate (Recall).
- Lowering the Margin of Error Estimate (Elusion) increases the Sample Size and the Margin of Error Estimate (Recall).
- Lowering the Margin of Error Estimate (Recall) increases the Sample Size and the Margin of Error Estimate (Elusion).
If you know a specific sample size or margin of error is more important than the others for your review process, set that value manually. The other fields will auto-adjust as needed.
The final margin of error estimates may be slightly different from the ones chosen at setup, depending on the documents found during validation. All validation statistics will have 95% confidence intervals alongside the margin of error.
For more information on how validation statistics are calculated, see Review validation statistics.
Inherited settings
Each validation queue inherits these settings from the main queue:
- Queue Display Options
- Reviewer Document View
- Reviewer Layout
- Email Notification Recipients
To change them, edit the validation queue after creating it. For more information, see Editing a validation queue.
Coding in a validation queue
Reviewers access the validation queue from the Review Queues tab like all other queues.
During review:
- Have reviewers code documents from the sample until all documents have been served up.
- Sample documents that are coded outside the Review Queues tab will still count towards the validation statistics, but they might not be reflected in dashboard charts and tables.
- For best results, we strongly recommend coding every document in the validation queue as positive or negative. Avoid skipping documents or coding them as neutral. For more information, see How validation handles skipped and neutral documents.
Have reviewers code documents from the sample until all documents have been served up.
Monitoring a validation queue
Validation statistics are reported on the Review Center dashboard like any other queue. You can cancel validation from the three-dot menu, and you can pause validation by clicking the Pause button. All data in the charts and tables reflect the validation queue.
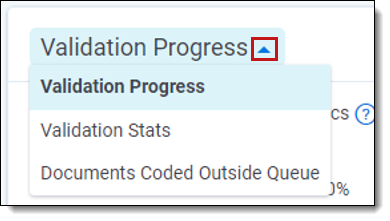
During validation, the Review Progress section changes to become a Validation Progress section, which shows the progress of the validation queue. To view validation statistics instead, click the arrow next to the section name, then select Validation Stats.
Viewing formulas for validation statistics
In the Validation Stats section, you can click on each statistic to show how the statistic is calculated. This includes the formula used, plus a table listing the variables and their values.

For more information on the validation statistics, see Reviewing validation results.
Editing a validation queue
You can change some of the queue settings at any time during validation.
To edit the validation queue:
- On the right side of the Queue Summary section, click on the three-dot menu and select Edit.
- Edit any of the following settings:
- Reviewer Groups
- Queue Display Options
- Reviewer Document View
- Reviewer Layout
- Anonymize Reviewer Names
- Email Notification Recipients
- Click Save.
For descriptions of the queue settings, see Creating a Review Center queue.
Releasing unreviewed documents
If a reviewer falls inactive and does not review the last few documents in a validation queue, you can release those documents through the Queue Summary section of the dashboard. For more information, see Editing queues and other actions.
To see which documents are checked out to a reviewer, filter the Reviewed Documents table by the reviewer's name. Any documents that are still checked out will show the Coded Time as blank. For more information, see Reviewed Documents table.
Tracking sampled documents
If you want to run your own calculations or view documents in the validation sample, you can track the sampled documents from the Document list page. This process is optional.
To view sampled documents:
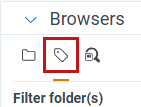
- From the Documents tab, click on the Field Tree icon.
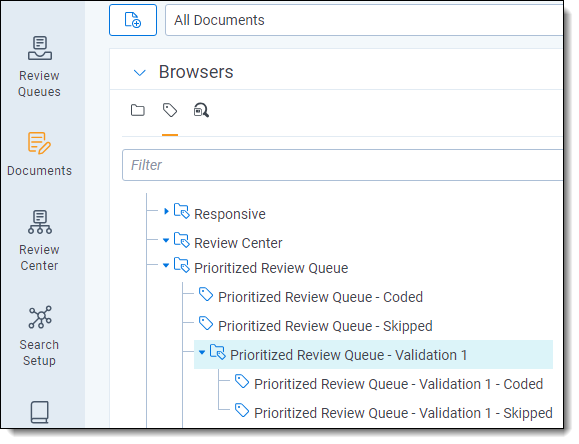
- Expand the Review Center folder.
- Expand the folder for the queue you're validating.
- Several subfolders appear.
- Expand the folder titled [Queue Name] - Validation [Current Round Number]. If you have only run validation one time, the round number will be 1.
Each validation folder contains the documents selected for the sample. It also holds a sub-choice that shows all documents removed from that sample.
To view coding decisions for each document, add Review Center Coding::Value to the document view. For other optional fields, see Tracking reviewer decisions.
Accepting or rejecting validation results
After all documents in the validation queue have been reviewed, a ribbon appears underneath the Queue Summary section. This ribbon has two buttons: one to accept the validation results, and one to reject them.
If you click Accept:
- The main queue status changes to Validation Complete.
- The model remains frozen. Any future coding decisions will no longer be used to train the model, and the Review Progress statistics will not reflect any new coding.
- The Validation Progress strip on the dashboard displays the final validation statistics.
If you click Reject:
- The validation queue status changes to Rejected, and the main review queue changes to Paused.
- The main review queue re-opens for normal coding, and you can build the model again at any time. Any documents coded since validation began, including those from the validation queue itself, will be included in the model build.
- The Coding Progress strip on the dashboard displays the main queue's statistics.
You can run validation on the queue again at any later time, and you can reject validation rounds as many times as needed. Even if you reject the results, Review Center keeps a record of them. For more information, see Viewing results for previous validation queues.
Manually rejecting validation results
If you change your mind after accepting the validation results, you can still reject them manually.
To reject the results after accepting them:
- On the right side of the Queue Summary section, click on the three-dot menu and select Reject Validation.
- Click Reject.
After you have rejected the validation results, you can resume normal reviews in the main queue.
Reviewing validation results
After reviewers code all documents in the sample, the validation results appear in the Validation Progress strip on the Review Center dashboard.
The results include:
- Relevance Rate—percentage of sampled documents that were coded relevant by reviewers, out of all coded documents in the sample. If any documents were coded as neutral, this statistic also counts them as relevant.
- Elusion Rate—the percentage of unreviewed documents that are predicted as non-relevant, but that are actually relevant. The range listed below it applies the margin of error to the sample elusion rate, which is an estimate of the discard pile elusion rate.
- If you do not set a cutoff for your validation queue, this is calculated as the percentage of all unreviewed documents that are actually relevant.
- Documents that are skipped or coded neutral in the validation queue are treated as relevant documents when calculating Elusion Rate. Therefore, coding all documents in the elusion sample as positive or negative guarantees the statistical validity of the calculated elusion rate as an estimate of the entire discard-pile elusion rate.
- Eluded Documents—the estimated number of relevant documents that have not been found. This is calculated by multiplying the sample elusion rate by the number of documents in the discard pile. The range listed below it applies the margin of error to the document count.
- Precision—the estimated percentage of documents that would be responsive in a production that includes all documents coded positive, plus all uncoded documents at or above the Positive Cutoff. This statistic is only calculated if you set a cutoff when creating the validation queue.
- Recall—percentage of documents that were coded relevant out of the total number of relevant documents, both coded and uncoded. The range listed below it applies the margin of error to the percentage.
- Richness—the percentage of relevant documents across the entire review queue. The range listed below it applies the margin of error to the percentage.
For more information about how these statistics are calculated, see Review validation statistics.
Recalculating validation results
If you have re-coded any documents from the validation sample, you can recalculate the results without having to re-run validation. For example, if reviewers had initially skipped documents in the sample or coded them as neutral, you can re-code those documents outside the queue, then recalculate the validation results to include the new coding decisions.
When Review Center detects that documents have been coded outside the queue and it's ready for completion, a banner appears with a button to calculate statistics. You can also manually recalculate them at any time.
To recalculate validation results:
- On the right side of the Queue Summary section, click on the three-dot menu and select Recalculate Validation.
- Click Recalculate.
Viewing results for previous validation queues
After you have run validation on a queue, you can switch back and forth between viewing the statistics for the main queue and any linked validation queues that were completed or rejected. Viewing the statistics for linked queues does not affect which queue is active or interrupt reviewers.
To view linked queues:
- Click the triangle symbol near the right side of the Queue Summary section.

A drop-down menu listing all linked queues appears. - Select the queue whose stats you want to view.
When you're done viewing the linked queue's stats, you can use the same drop-down menu to select the main queue or other linked queues.
How adding or changing documents affects validation
Typically, review validation is linear: The administrator sets up the validation sample, the reviewers code the sample, and the results are calculated from those documents. However, if documents are added or removed, coded documents are re-coded, or other things happen to change the queue being validated, this can affect the validity of the results.
Scenarios that require recalculation
The following scenarios can be fixed by recalculating statistics:
- Changing coding decisions on documents within the validation sample
- Changing already-coded documents outside the sample from positive to negative or negative to positive
- Adding already-coded documents to the queue after validation starts
In these cases, the sample itself is still valid, but the numbers have changed. For these situations, recalculate the validation results to see accurate statistics.
For instructions on how to recalculate results, see Recalculating validation results.
Scenarios that require a new validation queue
The following scenarios cannot be fixed by recalculation:
- Adding uncoded or neutral documents to the queue after validation starts
- Changing positive- or negative-coded documents outside the sample to skipped or neutral
In both of these cases, this means that the validation sample is no longer a random sample of all uncoded or neutral documents. For these situations, we recommend starting a new validation queue.