


Feedback
Last date modified: 2026-Jun-03
Transcript Summary
You can create a summary of a transcript using Generative AI to quickly find relevant information for your case. Once a Transcript Summary has been created, it can be viewed in the Viewer or if you have aiR for Case Strategy installed, you can also view a more detailed summary on the Case Home tab.
Summaries are supported for MDB transcripts with the Relativity.Transcripts application and summaries of ptf, .xmptf, .rtf, .trn, .lef, .xmef, .txt transcripts are supported with the installation of the Transcripts application.
If you are trying to create a summary for a ptf, .xmptf, .rtf, .trn, .lef, .xmef, or .txt file that was not brought into Relativity using Simple File Upload, we recommend opening that file in the Viewer first so that it is converted to a file type that can be summarized. Then you can create a summary of the transcript using the instructions below.
Before you begin
- We recommend installing aiR for Case Strategy to maximize the functionality of the Relativity.Transcripts application.
- Import/Export utilizes Processing to capture transcript metadata, create a transcript document, link the attached audio/video files, and publish the transcript family to the workspace for MDB files. The Viewer utilizes the Family Group field in order to properly display the transcript alongside the audio/video content. Please ensure that the Family Group field is mapped to your workspace before Publish commences.
Permission
Each user can view transcript summaries regardless of permissions.
To create, cancel, or clear a transcript summary, a user must have the Add permission. To edit a Transcript Summary on the Case Home tab, a user must have the Edit permission.
| Object Security |
|---|
|
Relativity.Transcripts billing and usage
A workspace fee is charged when you run the first successful Fact Chronology job using aiR for Case Strategy or Transcript Summary job. To learn more about Transcript Summary, see Transcript Summary. You receive a quota of documents, and after exceeding that quota, billing transitions to a per-document rate. The workspace fee also provides 150 GB of .mp4 deposition video hosting and unlimited witness summaries and deposition outlines. Any video storage beyond the 150 GB is charged at your contractual Review rate.
Creating a Transcript Summary
You can create a Transcript Summary from the Case Home tab. This method of summary creation is compatible with the most transcript file formats. Alternatively, you can also create a Transcript Summary from the Viewer, depending on the document's file format.
To create a summary of a transcript document from the Case Home tab:
- Navigate to the Case Home tab.
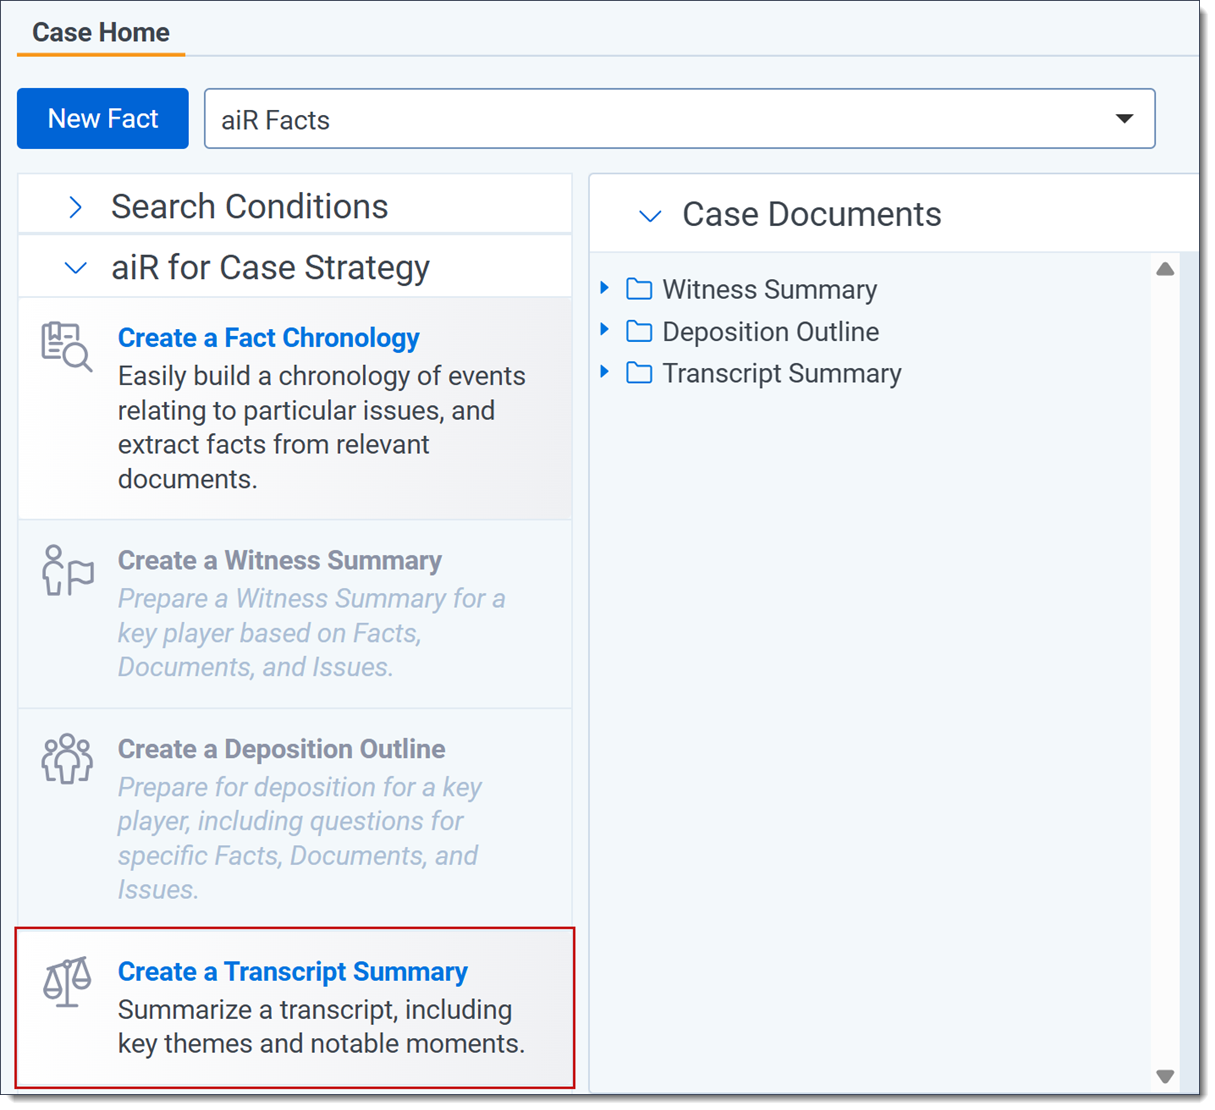
- On the aiR for Case Strategy panel, click Create a Transcript Summary.
- Click on the Transcript Document field and select the desired document from the drop-down menu.
- Complete the remaining prompt criteria to determine how the summary is generated. The Matter Overview and Summarization Goal fields are required. In most cases, the more prompt criteria you can complete, the better the results are. To learn more about the prompt criteria, see Transcript Summary prompt criteria.
- Click Generate Summary.
The Transcript Summary job begins. Once the job is complete, an email is sent to the user that started Transcript Summary job.You can monitor the progress of a Transcript Summary job by opening the document that is being summarized in the Viewer and expanding the Transcripts Summary Panel.
To create a summary of a transcript document from the Viewer:
- Navigate to the Documents tab.
- Select a transcripts document from the list.
The transcripts document opens in the Viewer. - Click on the Transcripts Summary icon to expand the panel.
![]()
- Complete the prompt criteria to determine how the summary is generated. The Matter Overview and Summarization Goal fields are required. In most cases, the more prompt criteria you can complete, the better the results are. To learn more about the prompt criteria, see Transcript Summary prompt criteria.
- Click Generate Summary.
The Transcript Summary job begins. Once the job is complete, an email is sent to the user that started Transcript Summary job.You can monitor the progress of a Transcript Summary job by opening the document that is being summarized in the Viewer and expanding the Transcripts Summary Panel.
Viewing a Transcript Summary
There are two ways to view a Transcript Summary. You can view a Transcript Summary from the Viewer to conveniently review the summary or if you have aiR for Case Strategy installed, you can view it from the Case Home tab and if desired, edit the summary.
If a Transcript Summary was previously edited on the Case Home tab, the edited summary only displays on that tab and not in the Viewer.
To view a Transcript Summary from the Viewer:
- Navigate to the Documents tab.
- Select a transcript from the list that has a summary created.
- Click on the Transcripts Summary icon to expand the panel.
Citation navigation
Once you have opened an MDB transcript document in the Viewer, you can click on a citation hyperlink to navigate to the relevant text in the Transcript Text panel. You can also access citation hyperlinks on the Case Home tab and clicking on a link from there opens the transcript document in the Document Preview panel.
Citation navigation from the Viewer
If you open an MDB transcript document in the Viewer and expand the Transcript Summary panel, citations display in many of the Transcript Summary sections. Click on a hyperlinked citation to navigate in the Transcript Text panel to the location that generated this part of the Transcript Summary. The relevant transcript text is also highlighted to make it easy to reference.
Citation navigation from the Case Home tab
On the Case Home tab, if you open a Transcript Summary in the Case Documents section, hyperlinked citations display in the document. Click on a citation hyperlink to open the document in the Document Preview panel with the relevant text highlighted.
Downloading a Transcript Summary
You can download a .docx version of a Transcript Summary to your workstation from the text editor. The downloaded document is text-based and includes hyperlinks. If you click on a link, you are prompted to login to Relativity and then the Viewer opens with the linked document highlighting the text referenced by the citation.
To download a Transcript Summary:
- Navigate to the Case Home tab and select the Transcript Summary you wish to download in the Case Documents widget.
- Click on the Download Word Document icon in the text editor toolbar.
A copy of the Transcript Summary is downloaded to your workstation.
Editing a Transcript Summary
Editing a document's Transcript Summary only affects the summary that displays on the Case Home tab and not the summary that displays in the Viewer for that document.
To view and edit a Transcript Summary from the Case Home tab:
- Navigate to the Case Home tab.
- Optionally, click on the Case Documents widget to expand it.
- Click on Transcript Summaries to display the list of transcript summaries.
- Select the desired summary from the list.
- Optionally, edit the Transcript Summary as desired with the text editor.
- Either click Save or enable Autosave to save any edits you made.If you have unsaved changes and try to navigate away from the Transcript Summary, a pop up displays. Click OK to discard any unsaved edits and navigate away from the current document or click Cancel to stay on the current Transcript Summary so that you can save your edits.
Clearing a Transcript Summary
You can remove a Transcript Summary from a document so that you can create a new one. If you clear a Transcript Summary, it will no longer display in the Viewer for that document but it can still be accessed on the Case Home tab.
To clear a summary of a transcript document:
- Navigate to the Documents tab.
- Select the transcript document from the list where you wish to clear a Transcript Summary.
The document opens in the Viewer. - Click on the Transcripts Summary icon to expand the panel.
- Click Clear Summary.
The Clear Summary modal displays. - Click Clear.
The Transcript Summary is cleared and you can now create a new one for this document.
Transcript Summary prompt criteria
The prompt criteria in transcript summaries give the large language model (LLM) the broad context surrounding a matter. This includes an overview of the matter, people and entities involved, detail on the legal issues that facts must relate to, and any jargon or terms that might help in understanding the deposition.
The Matter Overview and Summarization Goal fields are required to create a transcript summary.
Most fields display information which can guide the voice and tone of what you write. Further description of the fields for transcript summaries are provided below.
- Transcript Document—This option is only available if you are creating a Transcript Summary from the Case Home tab. Click on the drop-down menu and select a transcript file from the list to summarize. You can select either MDB transcript files or file formats such as .txt, .ptf, .lef, .xmptf, .rtf, .trn and .xmef from this drop-down menu.
- Matter Overview—Enter a concise overview of the case. Include the names of the parties involved, the nature of the dispute, and other important case characteristics.
- Summarization Goal—Outline your side of the argument and what you are trying to achieve in the case. This helps the generative AI determine what information is useful to your case.
- Issues—Enter a list of issues in your case and their descriptions.
- People and Aliases—Enter the names and aliases of key individuals in the case. Include their role and any other affiliations.
- Deposition Intent—Enter why this deposition is being carried out and why the person being deposed is relevant to the case. Additionally, provide information on whether the person is a key witness, providing expert testimony, or providing factual background for the case.
- Witness Credibility—Enter how credible the witness is and include information such as their employment history, criminal record, or any conflicts of interest.
- Additional Context—Enter any additional information that does not fit the other fields. This section is typically left blank.