Last date modified: 2026-Feb-05
Express Transfer Connectivity check
Connectivity check ensures that the Express Transfer desktop application authenticates and successfully accesses the Internet, the necessary ports, and the Import/Export application to transfer data. This check executes automatically when you activate Express Transfer from the Import/Export application within RelativityOne. You can also manually perform a connectivity check anytime, even when there are active transfers.
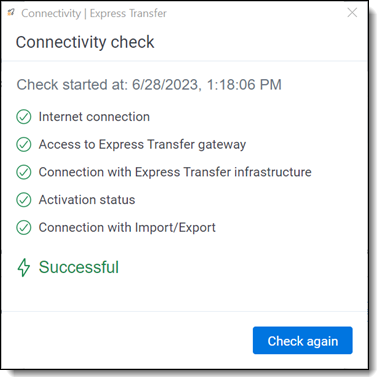
The following checks occur during the connectivity check process:
| Connectivity Check | Description |
|---|---|
| Internet connection | This step confirms your system is connected to the internet. If this step fails, there is either no internet connection available or the proxy or firewall is blocking the connection for Express Transfer. Please contact your IT department for help. |
| Access to Express Transfer gateway | This step confirms Express Transfer successfully set up all ports needed to connect to your specific region. If this step fails, please contact your IT department for help. |
| Connection with Express Transfer infrastructure | This step confirms Express Transfer successfully connected to the infrastructure specific to your RelativityOne region. If this step fails, please contact your IT department so they can verify the correct port configuration. For more information, refer to Data Transfer Tools: Required Port Considerations for RelativityOne (Import/Export, Express Transfer, ROSE and Migrate) article in Community. |
| Activation status | This step confirms Express Transfer is active. If it fails, see Activating and deactivating Express Transfer for more information on reactivating it. |
| Connection with Import/Export | This step confirms Express Transfer is communicating with Import/Export in RelativityOne. |
If you perform a connectivity check before activating Express Transfer in Import/Export, only the Internet connection is checked and the others display the no connectivity  icon. Express Transfer must be active to perform the full connectivity check.
To manually run a connectivity check, use any of these methods:
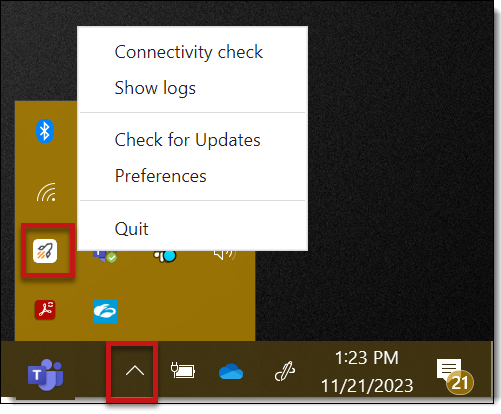
- From the System tray: Right-click on the icon in the desktop system tray and choose Connectivity check from the pop-up menu.

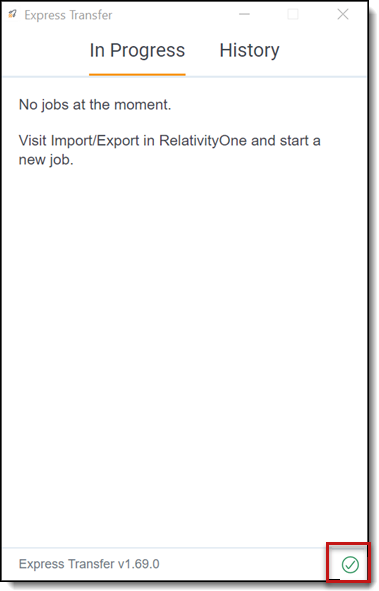
- From within Express Transfer: Click the circled check mark icon at the bottom of the Express Transfer application.

The test results are displayed after each process completes. The word "Successful" appears when all connections are working properly. If any of the system checks fail, Express Transfer will not work.
Click the Check again button to refresh the connection in the event you lose connectivity.
If the "Activation status" test fails, the Activate button will appear next to an inactive Check again button. Click the Activate button to try to activate Express Transfer again.

Icon legend:
 icon indicates the connectivity test was successful.
 icon indicates the connectivity test failed.
 icon indicates the connectivity test is in progress.
 icon indicates the connectivity test was not performed on this item. Tip: If this is displayed, double check to be sure Express Transfer is active in Import/Export.
Network Throughput Check
If there are issues with your network speeds and connectivity, a notice is displayed next to the Connectivity check icon to notify you that the network connection is poor and this may cause slow transfer speeds. Check your internet connection or consult your IT department for further assistance.


