


Feedback

Last date modified: 2026-Sep-08
Once a FOIA request is received, the Intake step begins. During this phase, the agency reviews the request and decides whether it passes FOIA submission policies (perfection). The agency assigns a category to further define the request and provides a first response to the request submitter. If applicable, fees are also collected during this phase.
 Navigating the Intake screen
Click the Intake step in the workflow panel to open its details.
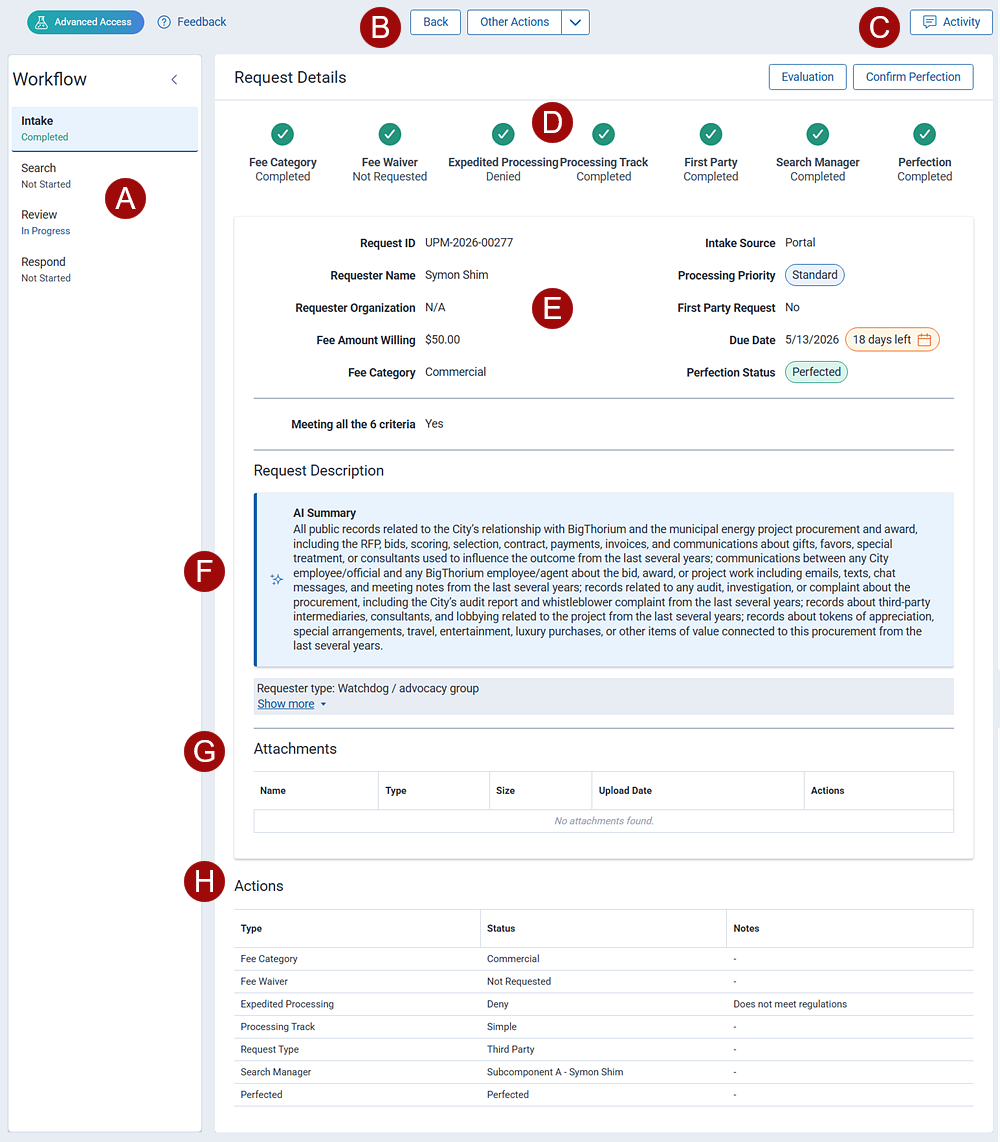
Noteworthy navigational points:
A. Workflow steps—the Relativity FOIA workflow consists of four steps: Intake, Search, Review, and Response. As you complete the tasks for a step, the workflow automatically advances you to the next. You can also click from one step to another to view details.
B. Navigation buttons—navigate to the last screen, previous record, or next record.
C. Activity—opens the Activity History panel. The panel displays a list of activities for the request.

Options include:
1. Log Communication—manually log activity for the request. For example, you might log an email you received outside of the FOIA environment that is relevant to the request. Fields include:
2. Add Notes—add comments, questions, and notes.
3. Export CSV—export the activity list in CSV format.
4. Filters—search or filter the activity list.
D. Quick Actions—quick access to:
E. Progress bar—indicates the status of workflow sub-steps. A green circle indicates the sub-step is complete for the workflow step. This may be because the request did not warrant further review, such as not requesting a fee waiver, or the agency reviewer completed all of the tasks within the sub-step. A blue circle indicates the task is partially completed.
F. Request details—the request details including requester input, attachments, and reviewer actions.
G. Custom Fields—this section displays the Request Type field, which defines the type of request and how it is processed.
Options include:
H. Request description—contains the original request description, along with an AI-generated case summary. You can edit the case summary to add your own narrative or additional notes.
I. Attachments—lists attachments provided throughout the workflow.
As an intake coordinator, you start the FOIA workflow by evaluating the public request and then determining if it meets all agency requirements. After you confirm agency requirements, you mark the request as perfected, where it is routed to the next workflow step.
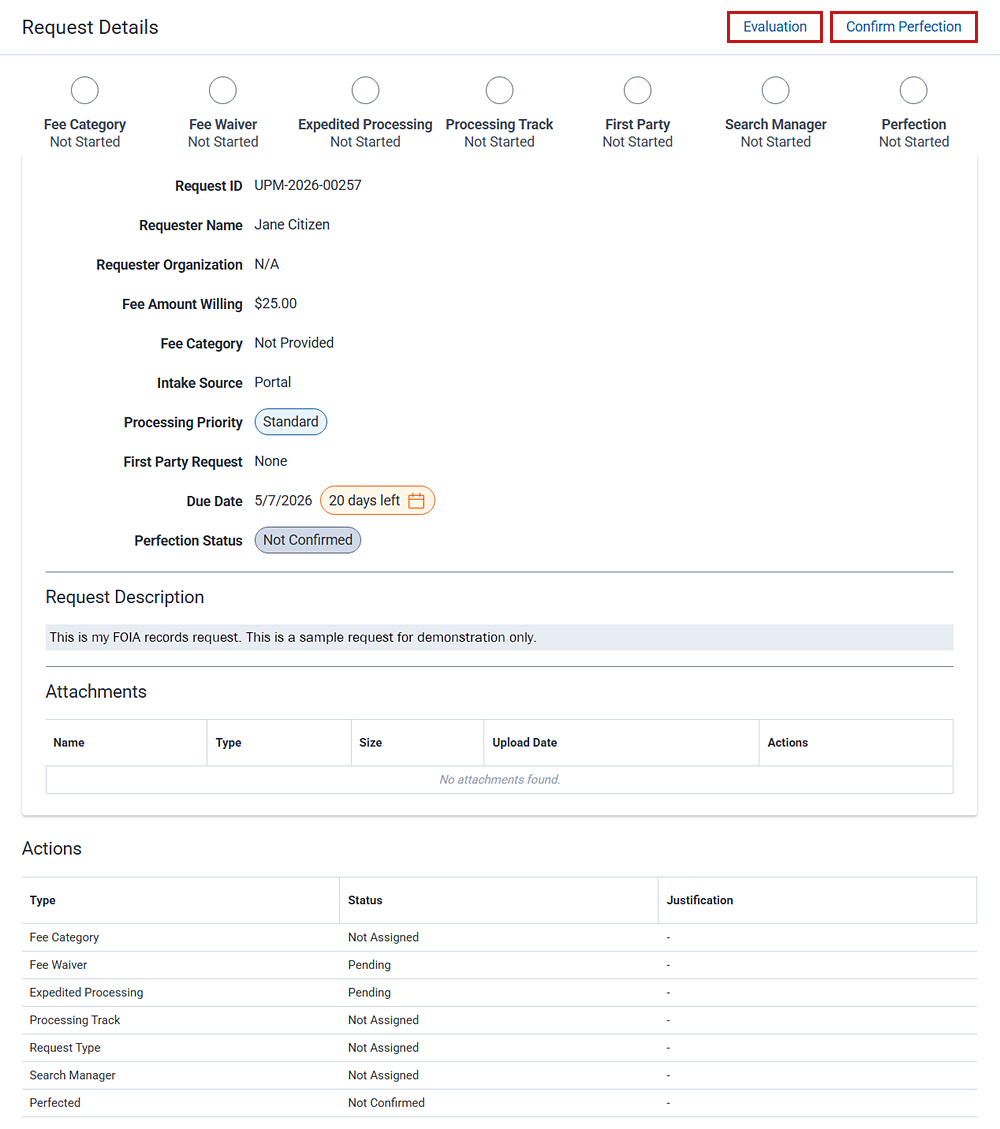
There is one sub-step for Intake: Evaluation.
During the evaluation phase, you review the original form entries and determine if the request type, fees, and expedited settings are correct for the scope of this request. You then set the track level (for example, simple or complex) then make the appropriate assignments for processing the records. You will also determine if the request is perfected, and if so, ready for processing.
Click Evaluation to get started. The Evaluation modal opens.
The Request Type field categorizes the request by its legal authority. This, in turn, drives how the records are processed, exempted, and released. The requester selects the request type they feel best fits their situation at form submission. You can change their selection so that it reflects how you will process the request.
Options include:
If you agree with the original selection, no action is required. Otherwise, select the type that best fits this request and how it will be processed.
The requester assigned a fee category to their request. Their options were:
During evaluation, you can agree or disagree with the requester's selection. If you disagree, you must reassign the category to one of the remaining options.
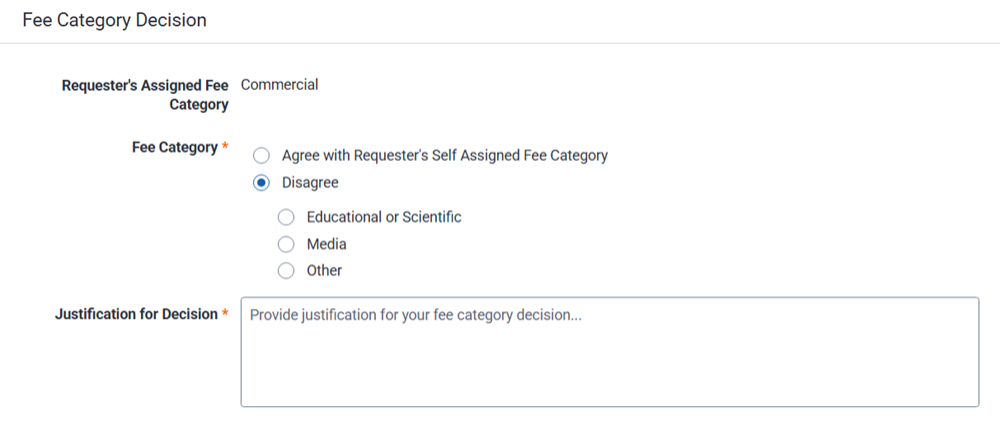
Steps:
If the requester asked for a fee waiver, review their justification, then either grant, moot, or deny the waiver.
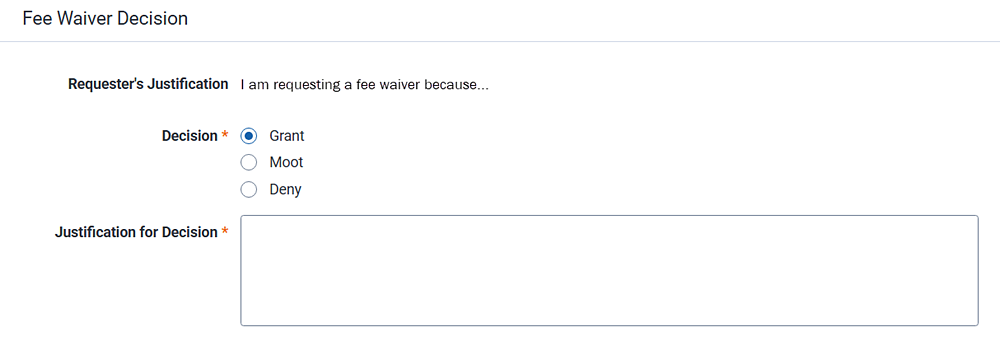
Steps:
If the requester asked for expedited processing, review their justification, then either grant, moot, or deny the expedited processing request.
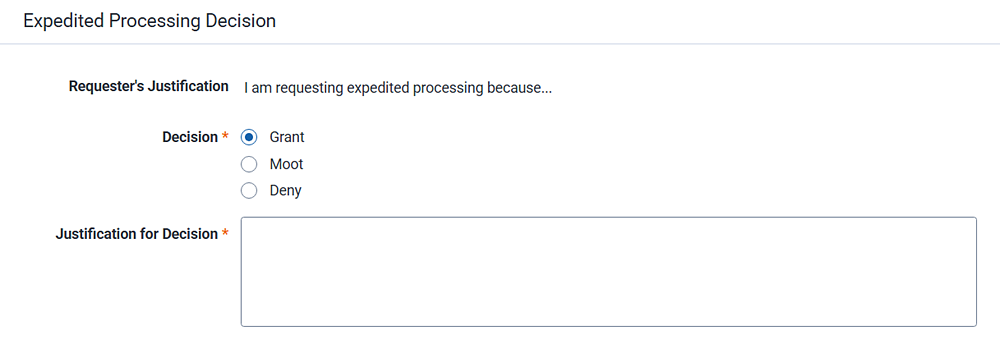
Steps:
Track assignment is the expected effort and urgency required to complete the request.
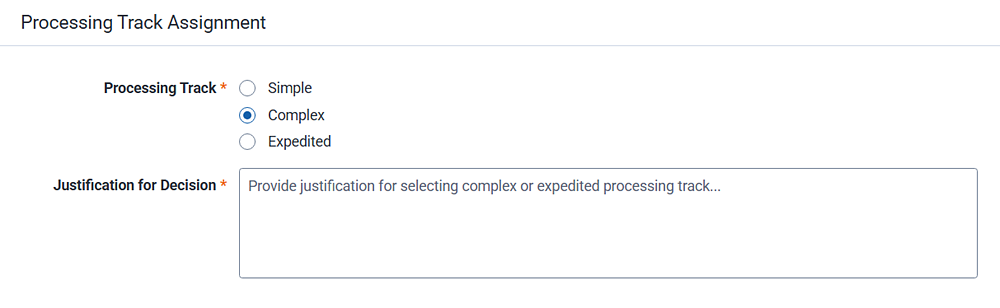
Steps:
In this section, you assign the request to the appropriate office, group, or person responsible for reviewing and processing the request.

Steps:
1. Select a Component from the drop-down menu.
Perfection means all of the components of the request have been met according to policy and the request can be routed to the agency responsible for researching documents.
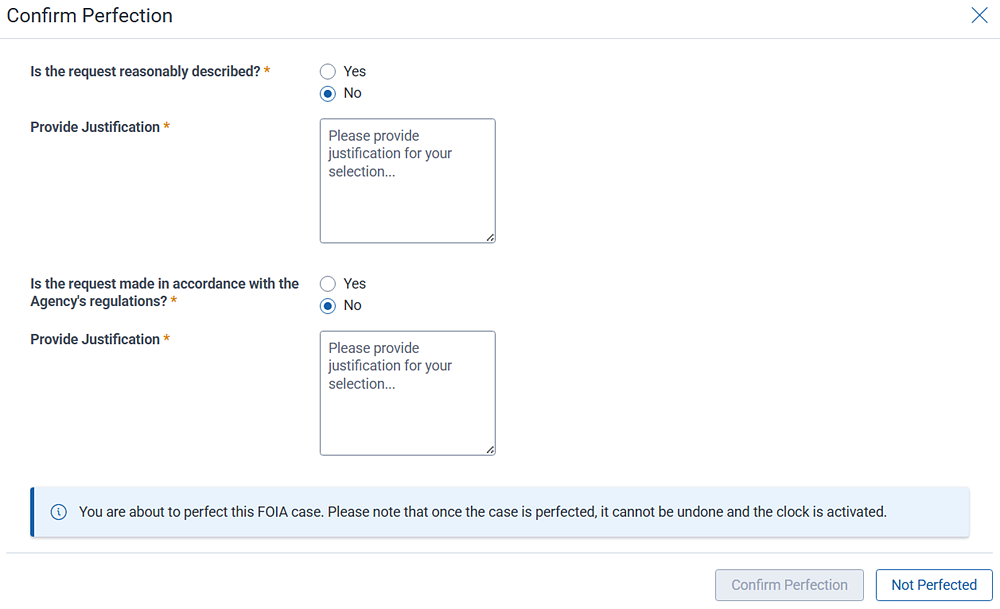
Steps:
See Acknowledgement letter templates for detailed steps on using the templates.
In this section, you assign the request to the appropriate office responsible for search actions.

Steps:
Now that you have completed the evaluation steps, click Save at the bottom of the modal to commit your responses.
The next step is to communicate the status of the request with the requester. There are two default templates, depending on the perfection value.
Use this email template to customize a response to the requester, letting them know their request is being processed.
The template contains prompts that you can use to customize your email, along with merged fields that pull data directly from the existing record. You can use the template as is or edit it to suit your specific need.
You can edit email templates to customize them for your agency. See Letter Template Management for details.
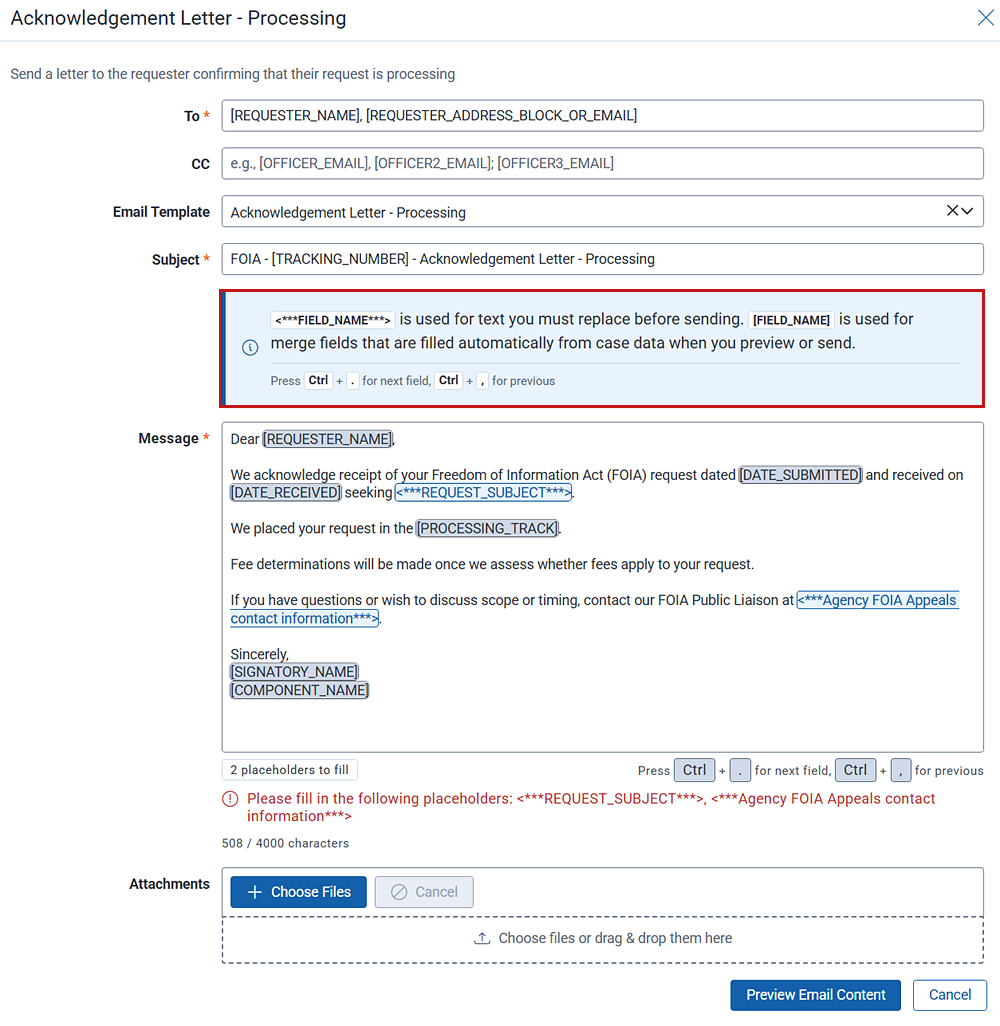
Click the Acknowledgement step to get started. The Acknowledgement Letter - Processing modal opens.
Steps:
Use this template to customize a response to the requester letting them know additional information is required to process the request.
The template contains prompts that you can use to customize your email, along with merged fields that pull data directly from the existing record. You can use the template as is or edit it to suit your specific needs.
You can edit templates to customize them for your agency. See Letter Template Management for details.
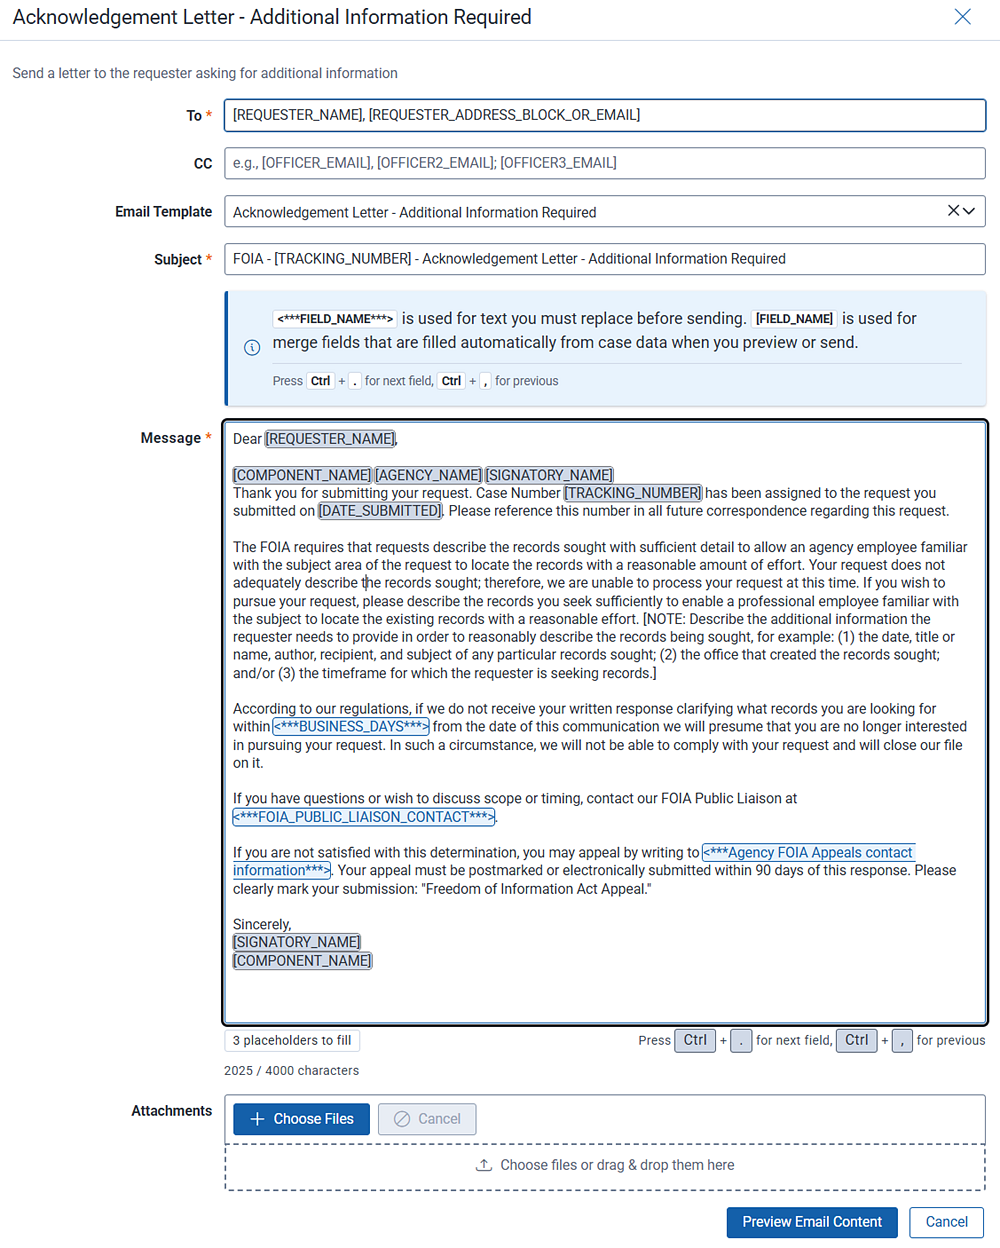
Click the Acknowledgement progress step to get started. The Acknowledgement Letter - Additional Information Required modal opens.
Steps:

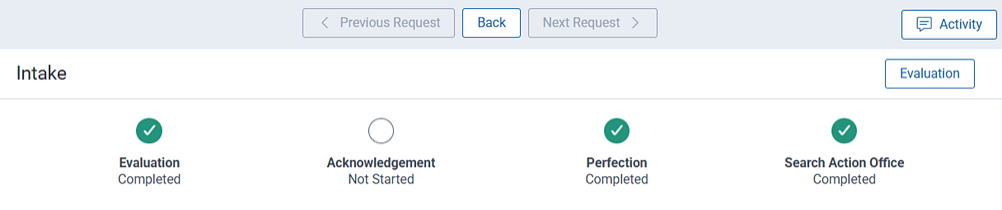
On the Intake screen, notice that the progress button colors reflect your progress. Green indicates the step is complete, blue indicates the step is partially complete, and white indicates the step is not complete.
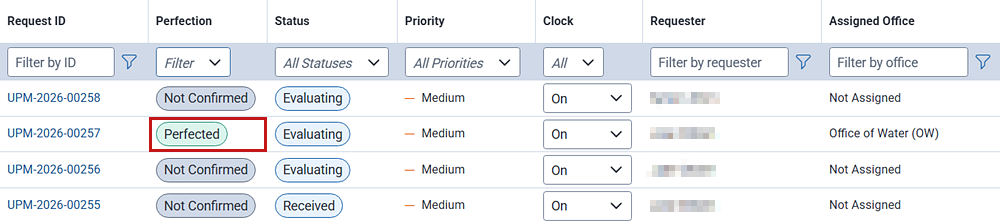
To return to the FOIA landing page, click the Back button at the top of the screen. On the FOIA landing page, the Perfection and Status columns display the progress.
After Intake, the workflow moves to the Search step.
