


Feedback
Last date modified: 2026-Jul-14
Federated instances
Federated instances provide a way for reviewers to easily switch to other Relativity environments. In Relativity, links to federated instances appear in the User drop-down.
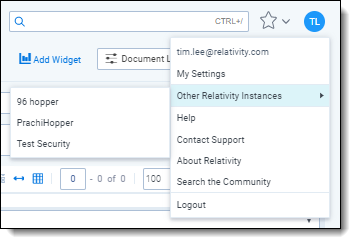
For more information, see User options.
You can use federated instances in combination with OAuth2 clients and authentication providers to enable single sign-on for multiple environments in your Relativity ecosystem.
Customers utilizing the same third-party OIDC provider (e.g., Okta, EntraID) in both instances can use the Authentication provider's HRD hint to streamline the connection process, eliminating the need for manual linking.
See these related pages:
Creating or editing a federated instance
To create a federated instance or edit information for an existing federated instance:
- Open the Federated Instances tab.
- Click New Federated Instance to create a new federated instance, or click Edit next to the federated instance you want to edit. The Federated Instance Information form appears.
- Complete the following fields:
- Name – the name of the federated instance. Enter a name that makes the instance easy for users to recognize, like RelativityOne Reviewer. You can't change the name of an existing federated instance.
- Instance URL – the URL address of the instance you want to create a link to. To obtain this URL, navigate to the Relativity instance you want to appear in the drop-down menu. Copy and paste the URL from that instance into this field.
You can also choose to add the Home Realm Discovery (HRD) parameter to mimic single sign-on experience inside your Relativity cluster. HRD is a redirect URL to a configured authentication provider for the federated instance. It is supported for OpenId Connect.
Locate the Home Realm Query Hint (HRD parameter value) within the provider-specific details section of the Authentication Provider tab.
To establish a link to a specific instance, return to that instance and input the Home Realm Query Hint (HRD parameter value) within the designated Instance URL field.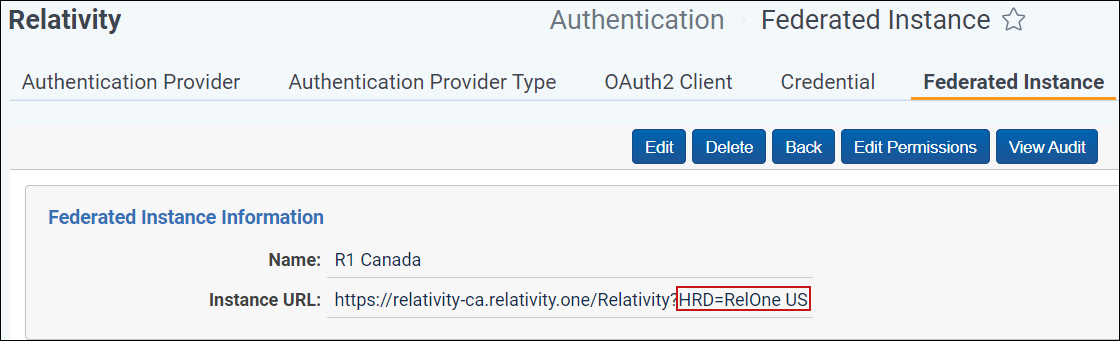
- https://mycompany.com/Relativity?HRD=<Provider Name>You cannot connect more than one authentication provider using the Federated Instances feature. The authentication provider must be set up correctly for single sign-on to work. If the authentication by the provider fails, the user will be presented with the login screen of the Federated Instance.
- Name – the name of the federated instance. Enter a name that makes the instance easy for users to recognize, like RelativityOne Reviewer.
- Click Save.
The federated instance will appear in the User drop-down menu.
You can restrict access to the federated instances you create using the padlock icon and assigning the appropriate groups access to the instance. If you restrict access to a federated instance, it doesn't appear in the User drop-down menu.
Deleting a federated instance
To delete a federated instance:
- Navigate to the Federated Instance tab.
- Locate and open the federated instance you wish to delete.
- Click Delete.
- From the confirmation dialog, click Ok.
The federated instance is removed.
Updating a federated instance after an instance URL change
When a RelativityOne instance URL changes, Relativity does not automatically update federated instance records in other instances that reference the old URL. You must update them manually.
After a URL change, complete these steps for each instance that has a federated instance record pointing to the changed instance:
- Open the Federated Instances tab on the instance that contains the record.
- Click Edit next to the federated instance that points to the changed URL.
- Update the Instance URL field to the new URL.
- Click Save.
If the connection uses RelativityOne Connect, also update the Redirect URL on the OAuth2 client in the connected instance.
Note: If multiple instances maintain federated links to the changed instance, update the federated instance record in each of those instances.
Viewing a federated instance audit history
Use the federated instance audit history to view all actions taken on a record. Use this information to view what the values were prior to a change.
To view a federated instance's audit history:
- Navigate to the Federated Instance tab.
- Locate and click the federated instance for which you wish to view its history.
- Click View Audit. A dialog appears, listing all actions taken on that federated instance.
- (Optional) Using the Export to File drop-down list at the bottom of the dialog, click Go to export the following audit history details in a .CSV file:
- User Name
- Action
- Timestamp
- Close the dialog when finished viewing the audit.