Last date modified: 2026-Feb-11
Relativity OpenID Connect
Relativity can be set up as an OpenID Connect authentication provider to log users into a different Relativity instance. For example you can set up a Relativity Server environment (primary instance) to act as authentication provider for a RelativityOne cloud instance (secondary instance).
Pre-requisites
Before you begin you must have the following items completed.
- Ensure that the primary instance is set up to use HTTPS.
- Verify that the secondary instance can resolve the host address of the primary instance.
- Confirm that the authenticated users are defined in both systems.
Configuring Relativity OpenID Connect
To configure an OpenID Connect provider for Relativity:
- Navigate to the primary instance and set up an OAuth2 client. You must specify Implicit as the OAuth2 Flow.
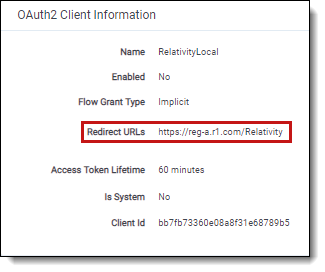
Note that initially you don't have the redirect URL value (you get it when you set up the Authentication Provider on the secondary instance), so specify any placeholder URL instead. For more information, see OAuth2 clients.After you save the OAuth2 client, note the generated value of the Client Id. This is required to set up the authentication provider in the secondary instance.
- Navigate to the secondary instance and configure a new OpenID Connect authentication provider using the Client Id value from the previous step. Note that the OAuth2 Flow values must also be Implicit, and the Authority URL must point to the Relativity Identity service of the primary instance. An example of a Redirect URL is https://mycompany.relativity.one/Relativity/Identity.
- After you save the provider, note the generated value of the Redirect URL. It is required to complete the OAuth2 client setup in the primary instance.
- Set up the user(s) to use the Authentication Provider as the Login Method, specifying the user's email (Relativity user ID) as the OpenID Connect Subject field value. For more information, see Managing user authentication methods.
- Navigate back to the primary instance and update the OAuth2 provider with the Redirect URL.

- In the primary instance, set up a federated instance pointing to the secondary Relativity instance. Note the use of the Home Realm Discovery (HRD) URL parameter to provide a single sign-on experience. The Home Realm discovery URL is generated when the Authentication Provider is created and can be found in the Authentication Provider Information section of the Authentication Provider page. For more information, see Federated instances.
- Navigate back to the secondary instance and set up a federated instance pointing to the primary Relativity instance. Don't set up the HRD redirect for that federated instance.
- Log out of the secondary instance.
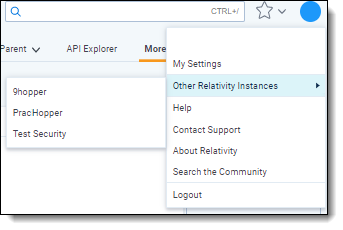
- Use the federated instance link to log in to the secondary instance from the primary instance.

- Use the federated instance link in the secondary instance to return to primary instance.
You have now configured a Relativity environment to serve as an authentication provider for another Relativity instance.


