Last date modified: 2025-Oct-24
Search panel
The search panel is available for the Document list and for many other tabs in Relativity.
Using the search panel, you can build complex searches using drag-and-drop to rearrange and visualize nested conditions. You can easily set conditions and drag and drop them into logic groups. The logic display at the top of the panel updates automatically to reflect your drag-and-drop changes. You can access your dtSearch and keyword search indexes and fields in the workspace when creating your search.
See these related pages:
Permissions
Search panel functionality is controlled by security permissions. If neither permission below is present, the search panel buttons will not appear.
- To access search indexes (Keyword search, dtSearch, Analytics) from the Add Conditions drop-down menu, you must have the View permission enabled for Search Index.
- To view and select fields from the Add Conditions drop-down menu, you must have the Edit permission enabled for Search.
Collapsing, expanding, and moving the search panel
You can collapse the search panel by clicking the down arrow and expand it again by clicking the right arrow (>) next to the collapse panel.
To move the search panel to either side of the document list, click on and hold the top of the panel until the cross arrows appear ( ) and drag it to the new location.
Condition card icons
The condition card features the following icons and menu options:

| Name | Icon | Description |
|---|---|---|
| Grabber |

|
Click this icon to drag the condition card to a new location. |
| Expand/Collapse |

|
Click this icon to expose all of the filters and conditions for the card. Collapse the card to return to the summary display. |
| Clear |

|
Click this icon to clear all of the card's filters and conditions. |
| Copy |

|
Click this icon to copy the card's filters and conditions. You can paste the card within the pane, then make your adjustments. |
| Enable/Disable |

|
Click this box to enable the card's filters and conditions. Uncheck this box to disable the card's filters and conditions without actually deleting the card itself. |
Using the auto-run search setting
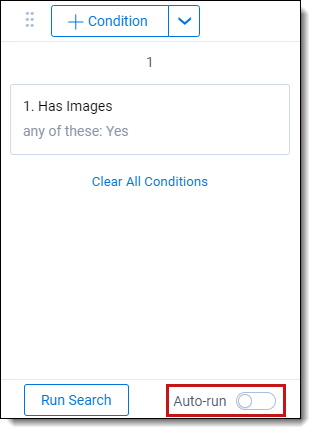
Enable the auto-run setting at the bottom of the searching panel to automatically update your data when you select new conditions.
With Auto-run search set to On, each condition that you select from the searching panel will cause the page to auto-refresh and display updated data based on the new condition. You can leave Auto-run Search set to Off if you prefer to manually apply any new conditions as you add them to your search.
Creating a search in the search panel
To create a search using the search panel:
- Expand the search panel from the item list by clicking the
 icon in the upper left corner of your screen.
 - Click Add Condition in the search panel.If a related items condition has been set for the saved search, the related items condition also applies to any conditions that are added to the saved search via the search panel.
- Do one of the following:
- Enter or select the field to which you want to apply the condition from the drop-down menu.
- If you have previously linked fields to a field category, you can alternatively select the desired field category from the drop-down menu and then enter or select the field to which you want to apply the condition from the list. To learn more, visit Field Categories.
- Depending on the field, you will be prompted to specify the conditions to add.For single object and multiple object fields, the name of the objects acts as hyperlinks in the filter condition card. You can quickly navigate to the named object instance by clicking on it. For example, if you have a search condition that names the "First pass review" batch set, you can navigate directly to that batch set. from the filter condition card.
- (Optional) Add additional conditions.
- (Optional) Apply logic groups to your conditions. See Applying logic groups.
- Click Run Search if auto-run search is toggled off). To cancel a long running search, click Cancel.
The search will be automatically saved and you can reference it later as a saved search.
To remove all conditions from the search panel click Clear All Conditions.
If you want to edit a condition, click on the search card.
When you search on a user-created date field using a relative date, Last 7 Days for example, you may see different results between a saved search and a search from the search panel if you are not in the same timezone as your Relativity instance.
Applying logic groups to search conditions
Logic groups act as visual parentheses for your search query. The criteria within logic groups are evaluated first before evaluating against other search conditions or logic groups. When creating logic groups, the logic display at the top of the search panel updates automatically to reflect your drag-and-drop changes.
To apply logic groups to search conditions:
- Click Add Logic Group.
A green frame appears. - Click the handle on the top of the filter condition card you want to add to a logic group.
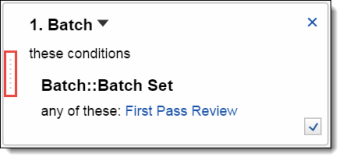
- Drag the condition into the logic group frame.
- Add other conditions to the logic group as needed. You can also create a logic group automatically by dragging one condition onto another.
- Click the AND or OR drop-down menus to set your operators inside your logic group.
- (Optional) Add additional logic groups and repeat steps 3-5 for the logic groups you add.
- Click Run Search if auto-run search is toggled off. To cancel a long running search, click Cancel.
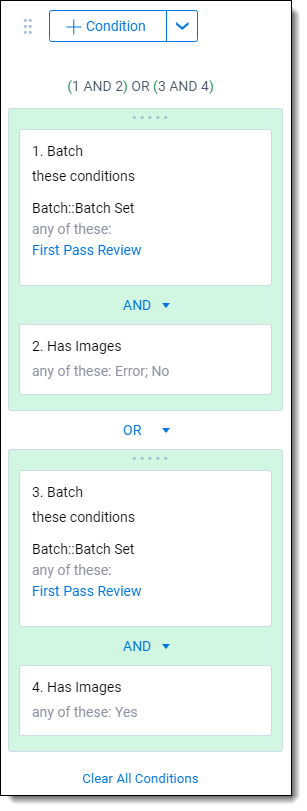
To remove all conditions from the search panel, click Clear All Conditions.
Navigating the search panel
Within the search panel you can expand and collapse your search conditions, in addition to toggling the conditions on and off. By using these options you can better visualize data and make quick changes.
Copying conditions
To copy a condition, click the Copy  icon in the search panel card.
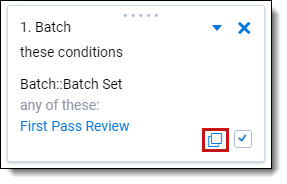
A pop-up modal opens. In the modal, click Apply to copy the same search condition. Edit the operator and the search before clicking Apply for a variation of the original search card. Click Add Condition to add another condition to your new search card.
Toggling conditions on and off
You can toggle conditions within the search panel to change the documents the search returns. To toggle conditions on and off click the checkbox in the lower-right corner of the condition box. If the box is checked the condition is on; if the box is unchecked the condition is off.
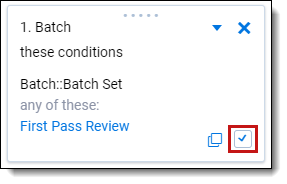
Click Run Search to update the toggled conditions (if auto-run search is toggled off).
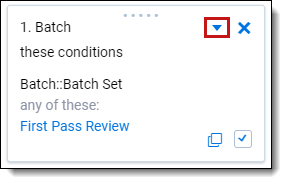
To collapse and expand filter condition cards in the panel click the arrow next to the name of the field applied in the condition.
Expanding/collapsing cards
If you have a very long search panel card, you can collapse the card. To collapse a card, click  in the top right corner of the search panel card.
Removing conditions
To remove a condition, click X in the upper right corner of the condition box.
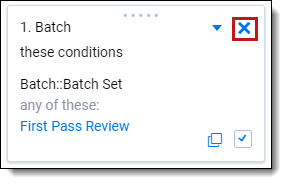
Click Run Search to update the toggled conditions (if auto-run search is toggled off).


