


Feedback
Last date modified: 2026-Jul-14
Automated PDF markup project
Creating a PDF markup project allows you to apply markups to the text of PDF files automatically saving you time. Redact can apply markups to any part of a PDF file that has searchable text including: page text, headers, footers, text-based annotations, form data, and field properties. You can create a project manually by entering words, terms, phrases, or regular expressions that you would like Redact to apply markups to. Alternatively, you can enter the rules in a .csv file and upload it to Relativity to create the rules for the PDF markup project. Once the project is created and run, markups will be applied automatically based on your selected options.
Before you begin
Consider creating a saved search with the documents you wish to apply markups to and a markup set that contains the markups you wish to apply to your PDF files before starting the PDF markup project creation process.
Supported file types
To learn more about which file types are compatible with Redact, see Redact supported file types.
Creating a PDF markup project manually
To create a PDF markup project using rules that you manually set, do the following:
- Navigate to the Redact Projects tab.
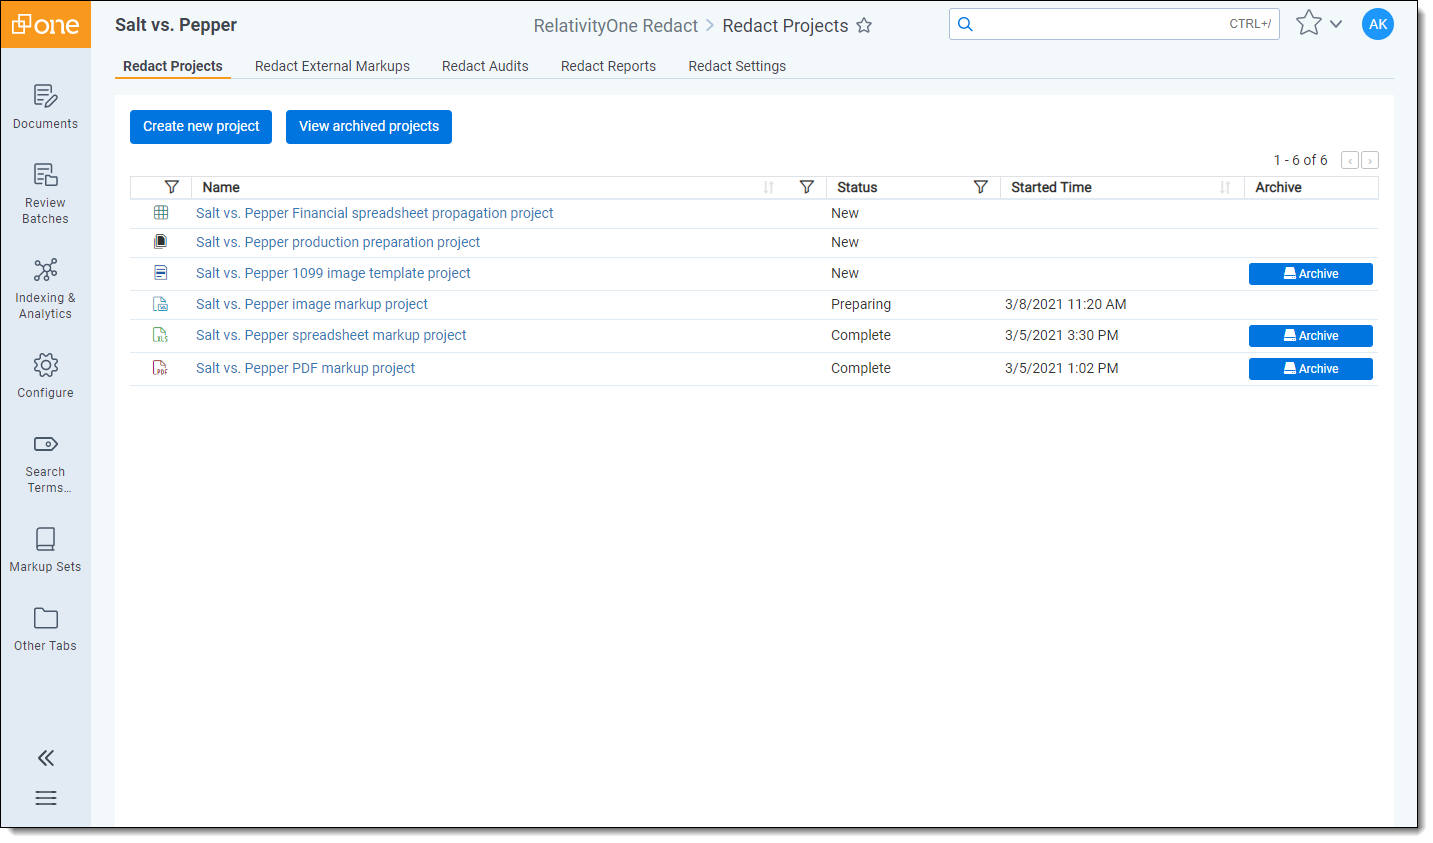
- Click Create new project in the upper-left.
- Select the PDF project option.
- Complete the Create PDF markup project section fields. To learn more, visit Fields below.
Using the same or similar documents, the same or similar rules, and the same markup sets in more than one project can lead to duplicate markups being applied. To learn more see Redact project best practices.
- Complete the Rules section fields. This section is optional and if you complete these fields, they will determine how the PDF project applies markups. To learn more, visit Fields below. Alternatively, you can leave these fields blank and upload a .csv file. To learn more, visit the Creating a PDF markup project using .csv rules section below.
- Click Save.
Creating a PDF markup project using .csv or .xlsm rules
While a project can be created manually, if you plan on running multiple kinds of projects with similar rules and terms, you can save time by using the same copy of .csv or .xlsm rules for each project. Please note that you may still need to adjust the scope in the rules based on which project you are running.
You can upload up to 100,000 rules in a .csv file though it is worth noting that the more rules are included in a .csv or .xlsm file, the longer a project will take to run. Rules that are uploaded with a .csv file cannot be viewed in the Redact interface and instead, you will need to download a copy of the .csv file and view it outside of Relativity.
To create a PDF markup project using rules generated by a .csv file, do the following:
- Navigate to the Redact Projects tab.
- Click Create new project in the upper-left.
- Select the PDF project option.
- Enter a Project Name and select a Saved Search and Markup Set. Leave all other fields blank. For more information on these fields, visit Fields below.
- Click Save.
- Click on Upload rules csv.
- Select the desired .csv or .xlsm file from your workstation and click Open.
The file is uploaded and the rules will be created and added to the project.
.csv or .xlsm rules
Guidance for how to configure rules using a .csv or .xlsm file is provided below. To learn more about the functionality of the rules, visit Rules section below.
- Word/Phrase—Enter the desired word or phrase. There are no formatting requirements.
- RegEx Name—Enter name of the regular expression. There are no formatting requirements.
- RegEx—Enter the regular expression syntax. There are no formatting requirements.
- Markup Type—Enter one of the following options: Redaction or Highlight. The options are case sensitive.
- Markup Subtype—Enter one of the following options: Redactions, Black, Text, or White. The options are case sensitive. If Highlight is selected for the Markup Type, you can select Yellow, Green, Blue, Orange, Pink, or Purple. These options are also case sensitive.
- Markup Text—Enter the desired redaction text. This rule is only needed if Text is selected as the Markup Subtype. There are no formatting requirements.
- Markup Scope—Enter one of the following options: Character, Word, or Line. The options are case sensitive.
- Markup Reason—Enter text to describe the reason for a markup's application. The text you enter is stored in the Markup Navigator. There are no formatting requirements.
- DtSearch—Enter the desired DtSearch style syntax. This rule is case sensitive.
Fields
The following sections and fields display while creating a PDF project:
Create PDF markup project section
The following fields display in this section:
- Project Name—enter the name for this new project.
- Saved Search—click on the drop-down menu and select the saved search that contains the documents you wish to apply markups to. Optionally, you can enter a term or terms into search box at the top of the menu to help narrow results and find the desired saved search.Selecting a nested search can cause performance issues with Redact and may result in a project that does not successfully complete.
- Markup Set—click on the drop-down menu and select the markup set that you wish to use to apply markups.
- PDF Version—select an option to determine which type of PDF file to apply markups to.
- Native—if selected, markups are applied to the original document and they are visible in the Native Viewer.
- Stored—is selected, markups are applied to the stored PDF generated by the PDF application and the markups are visible in the PDF Viewer.
- Remove All Attachments—check to remove all attachments from each document in your selected saved search.
Rules section
The Rules section is optional and these fields determine how the PDF project will apply markups once it is run. After completing the fields in this section, a new group of fields will appear below it so that you can create multiple rules in a PDF project if desired.
If you are uploading a .csv file, this section should be left blank. To learn more, visit Creating a PDF markup project using .csv rules.
The following fields display in this section:
- Redaction/Highlight toggle—determines which type of markup you will be applying for this rule.
- Markup Reason—enter a description of why the markup in this group will be applied to make it easy to track when reviewing markups in the Redact Navigation card.
- Markup Scope—determines the markup behavior when the project matches content in a document with a rule. Select one of the following options:
- Character—places the markup on the exact match even if the match is part of a word. For example, if Character is selected and you enter jane.smith for the rule, the project will match and apply a markup to Jane's name in jane.smith@domain.com, however, it will not apply a markup to @domain.com.
- Word—places the markup on the entire word, even if only part of the word is matched. For example, if Word is selected and you enter jane.smith for the rule, the project would apply a markup to the entire email address when it matches jane.smith@domain.com.
- Line—places a redaction that spans the entire horizontal line for the given match.
- Markup SubType—select the style of markup you would like to place for this rule. The options available in this drop-down menu are determined by the Redaction/Highlight toggle.
- Word/Phrase—enter the words, phrases, and text that you would like to apply a markup to for this rule. Multiple words or phrases can be added to a single rule group. The words, phrases, and text you enter are case sensitive. This field does not support dtSearch or wildcard syntax.
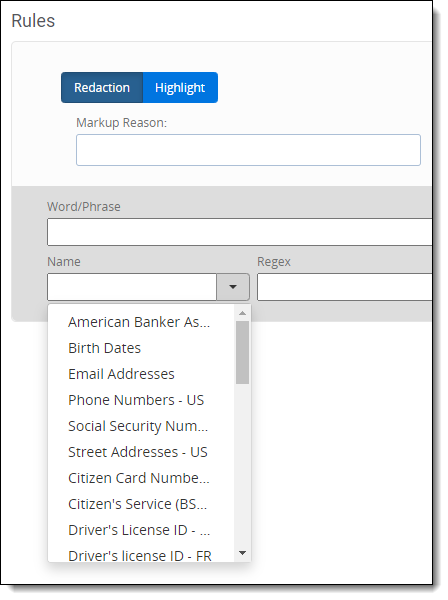
- Name—enter a name for this rule. Optionally, click on the drop-down menu to view a list of commonly used regular expressions as well as custom regular expressions users have created and select one to populate both the Name and Regex fields. These commonly used regular expressions are a starting point and not intended be all-inclusive of every variation of these patterns. Variations in document type, text quality, and pattern variability should be considered when using regular expressions.
- Regex—enter a regular expression which can be used to identify important patterns like email addresses, social security numbers, credit card numbers, and any other content that may appear in a regular pattern throughout the documents in the selected saved search. Regular expressions require a name and the expression to be valid. After saving the PDF project, the regular expressions you entered can be selected by name on other Redact projects within the same workspace. To see examples of commonly used regular expression terms, see Regular expression examples. If you use regex101.com to help form regular expressions to enter in Redact, ensure that you set it to /gmi (global, multi-line, case insensitive) to help you better achieve the desired results in Relativity.When using regular expressions, the scope of markups applied is based on word. When a regular expression matches the word, it uses spaces to determine where to start and stop applying the markup. So if a set of words do not have spaces between them, a markup will be applied to the entire set and not just the word that matches your entered term(s).
The following table includes potential terms that can be searched using regular expressions and an example of a word or phrase that will be completely covered by a markup to illustrate this behavior:Regular Expression Terms Marked up content jane, smith, relativity jane.smith@relativity.com police, woman policewoman mother, in, law mother-in-law - DtSearch—enter a dtSearch syntax where you would like to apply markups to any matches based on the Markup Scope and Markup SubType options selected. By default, Redact will apply markups to every term in a search syntax. dtSearch uses cross-cell matching so if a rule has text that would span multiple cells, all cells that contain a match will be redacted.
Optionally, you can apply markups to part of a dtSearch syntax. For example, apple w/2 pear causes both apple and pear to receive markups. If you would like to apply a markup to one of the terms, in this case, apple, use the following syntax: (?<redact>apple) w/2 pear.
Noise words and the alphabet list are not compatible with this field. We recommend using W/N operator for proximity matches instead.Combining special characters or operators may lead to inaccurate results. We recommend using Regex in these situations instead.The following syntax options are available with this field:Special characters or operators DtSearch functionality AND, OR, NOT Boolean operators ?,* Wildcards W/N (or WI) W/N operators PRE Proximity with terms order xfirstword, xlastword Built-in search words () Operator precedence "" Search words that are operators % Fuzzy searching ~ Stemming (<?redact> {term}) Partial redaction !"#$&'()*+,./:;<=>?@{|}^{|}~˜ Special characters recognized as spaces that cause word breaks # Phonic searching = Numerical patterns
Running the project
Once you have created a project, you can run it to apply markups. To learn more, visit Running and reverting a Redact project.
If you run a project and would like to edit the rules to get different results, we recommend reverting the project before editing the rules and rerunning it to prevent duplicate markups. To learn more, see Redact project best practices.
If a document that is too large is included in a project, it may not receive markups. The maximum file size for documents that can be opened in the Viewer and receive markups is determined by the MaximumNativeSizeForViewerInBytes instance setting. Increasing this instance setting's value can negatively impact Relativity's performance.
Removing a markup applied by a project
To remove a markup that was automatically applied to a PDF document, do the following:
- Open the desired document in the Viewer.
- Click on the Redact PDF Markup Navigator icon to expand it.
- Ensure the Annotations icon is selected.
- Hover your cursor over the Redact button in the row of the markup you wish to remove and select Undo.
The selected markup is removed.
Reviewing markups
After markups have been placed, it is a best practice to perform quality control on documents before they are produced. To learn more about how to do this using Redact, visit Reviewing markups to ensure accuracy.