


Feedback
Last date modified: 2026-Mar-20
Inventory overview
Use Inventory to narrow down your files before discovering them by eliminating irrelevant raw data from the discovery process through a variety of preliminary filters. With inventory you can exclude certain file types, file locations, file sizes, NIST files, date ranges, and sender domains. Doing this gives you a less-cluttered data set when you begin to discover your files.
This page provides an overview of the inventory process. For information on running an inventory job, applying filters, and managing inventory exceptions, see Inventory processing.
The following graphic depicts how inventory fits into the basic workflow you would use to reduce the file size of a data set through processing. This workflow assumes that you’re applying some method of deNIST and deduplication.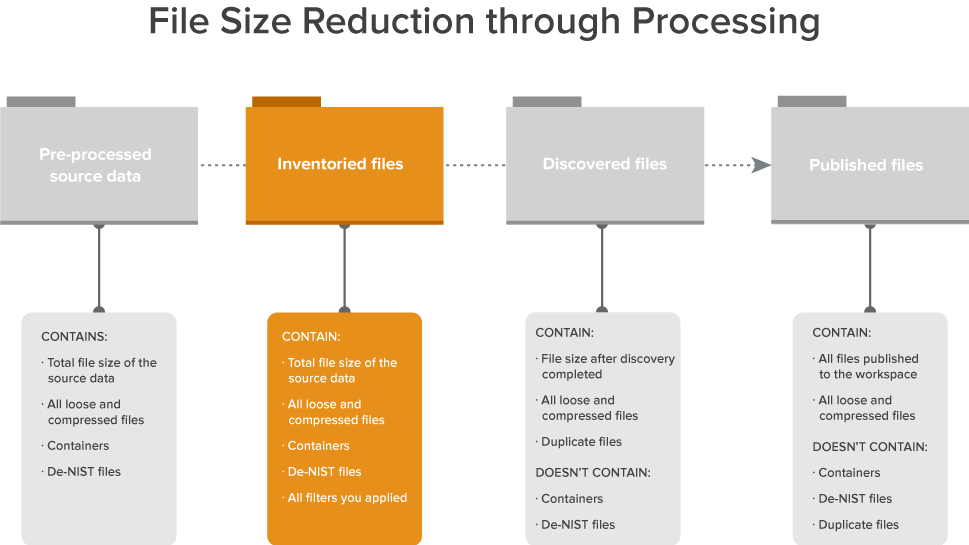
Inventory reads all levels of the data source, including any container files, to the lowest level. Inventory then only extracts data from first-level documents. For example, you have a .ZIP within a .ZIP that contains an email with an attached Word document, inventory only extracts data up to the email. Deeper level files are only extracted after you start Discovery. This includes the contents of a .ZIP file attached to an email and the complete set of document metadata.
You are not required to inventory files before you start file discovery. Note, however, that once you start file discovery, you can’t run inventory on that processing set, nor can you modify the settings of an inventory job that has already run on that set.
The following is a typical workflow that incorporates inventory:
- Create a processing set or select an existing set.
- Add data sources to the processing set.
- Inventory the files in that processing set to extract top-level metadata.
- Apply filters to the inventoried data.
- Run discovery on the refined data.
- Publish the discovered files to the workspace.
To do this, you inventory your data sources, click Filter Files on the processing set console, load the inventoried set in the filtering files, and apply a Location filter to exclude the location of the 2012 Backup.PST container.
You can then move on to discover the remaining files in the set.
Inventory process
The following graphic and corresponding steps depict what happens behind the scenes when you start inventory. This information is meant for reference purposes only.
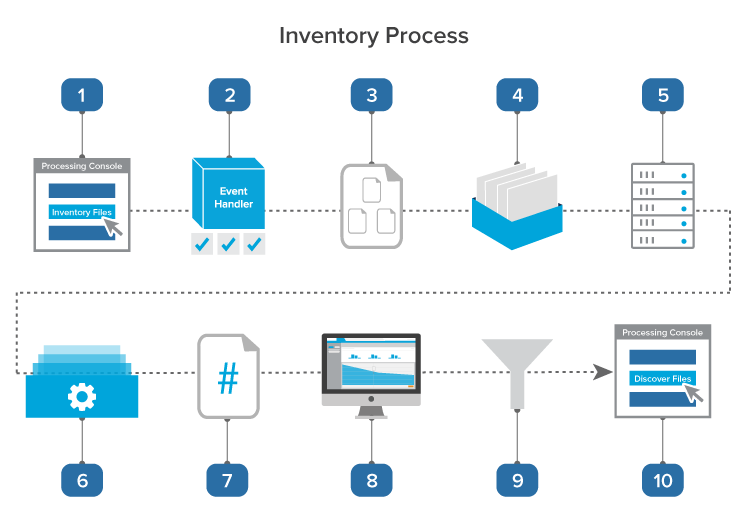
- You click Inventory Files on the processing console.
- A console event handler checks to make sure the processing set is valid and ready to proceed.
- The event handler inserts the data sources to the processing queue.
- The data sources wait in the queue to be picked up by an agent, during which time you can change their priority.
- The processing set manager agent picks up each data source based on its order, all password bank entries in the workspace are synced, and the agent inserts each data source as an individual job into the processing engine. The agent provides updates on the status of each job to Relativity, which then displays this information on the processing set layout.
- The processing engine inventories each data source by identifying top-level files and their metadata and merges the results of all inventory jobs. Relativity updates the reports to include all applicable inventory data. You can generate these reports to see how much inventory has narrowed down your data set.
- The processing engine sends a count of all inventoried files to Relativity.
- You load the processing set containing the inventoried files in the Inventory tab, which includes a list of available filters that you can apply to the files.
- You apply the desired filters to your inventoried files to further narrow down the data set.
- Once you’ve applied all desired filters, you move on to discovery.
Monitoring inventory status
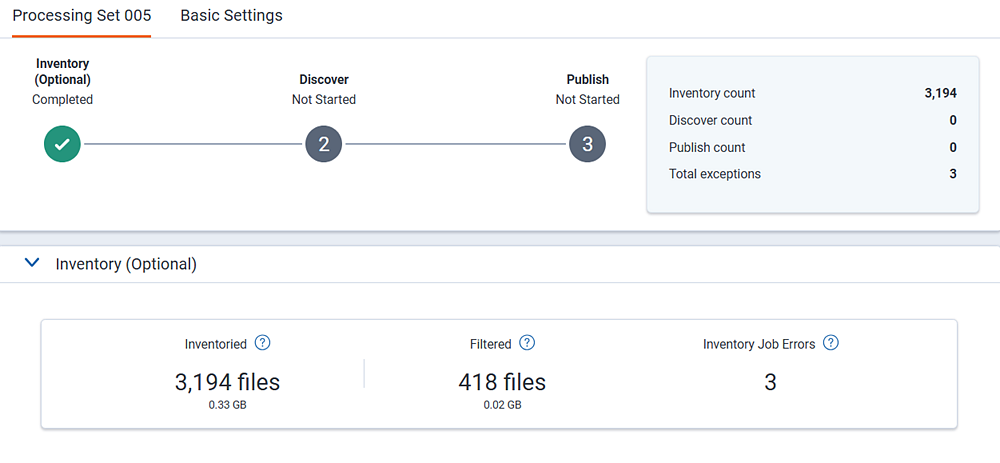
You can monitor the job's progress on the Processing Set Details page. This page breaks down each of the processing phases (Inventory, Discover, Publish) into their own sections that include dashboard summaries, sub-job details, and counts.
Inventory job details
Dashboard numbers
- Inventoried—the number of non-container, top level files identified.
- Filtered—the number of file filtered from Inventory filters.
- Inventory Job Errors—the number of errors that occurred during Inventory. You cannot retry these errors. You should re-run Inventory to resolve the issues.
Progress bars
Each processing phase—Inventory, Discover, and Publish—consists of distinct sub-jobs that execute sequentially until the phase is complete. Progress for each job is visually represented by progress bars that appear under the dashboard. Once all sub-jobs within a phase are finished, the progress bars are no longer displayed.

- File expansion—Relativity expands all source files to the first non-container level and extracts select data for pre-discovery filtering.
- Updating Processing Set fields—Relativity updates associated fields in the processing set with the job results.
See Exception and error resolution for details.
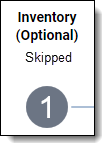
If you skip inventory, the status section displays a Skipped status throughout the life of the processing set.
Once inventory is complete, the status section displays a Complete status, indicating that you can move on to either filtering or discovering your files.
Inventory filters
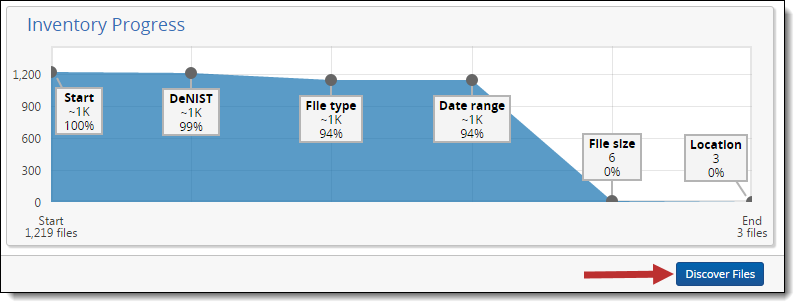
You can view the filters applied to the processing set in real-time as the job runs. Access this screen through the Inventory tab in the navigation bar, or by clicking the Filter Files button on the processing details screen. Hide or show the filters panel by clicking the arrow on the upper left side of the graph. See Filtering Files on the Inventory Processing page for details on how to apply and use filters.

This graph provides the following information to help you gauge the progress of your filtering:
- Start # files—lists the number of files in the data set before you applied any filters to it. This value sits in the bottom left corner of the pane.
- End # files—lists the current number of files in the data set now that you have excluded documents by applying filters. This value sits in the bottom right corner of the pane.
- ~#K—lists the approximate number of files that remain in the data set under the filter type applied.
- #%—lists the percentage of files that remain from the data set under the filter type applied. If a filter excludes only a small number of files from the previous file count, this value may not change from the value of the preceding filter type.
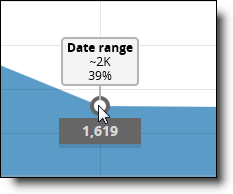
You can view the exact number of files that remain in the data set by hovering over the gray dot above or below the file type box.
At any time before you discover the files reflected in the Inventory Progress pane, you can reset or delete any filters you already applied.
Once you determine that the filters you have applied have reduced the data set appropriately, you can discover the remaining files.
Discovering files from Inventory
You can discover files from the Inventory tab using the Discover Files button in the bottom right corner of the layout.
Clicking Discover Files puts the discovery job in the queue and directs you back to the processing set layout, where you can monitor the job's progress.
The same validations that apply when you start discovery from the processing set layout apply when discovering from the Inventory tab.