


Feedback
Last date modified: 2026-Mar-20
Inventory processing
This page provides details on inventory processing, applying filters, and managing inventory errors. For an overview of the inventory process, see Inventory overview.
Running inventory
To inventory the files found in a processing set's data source(s), click Inventory Files on the processing set console. This option is only available if you have added at least one data source to the processing set.
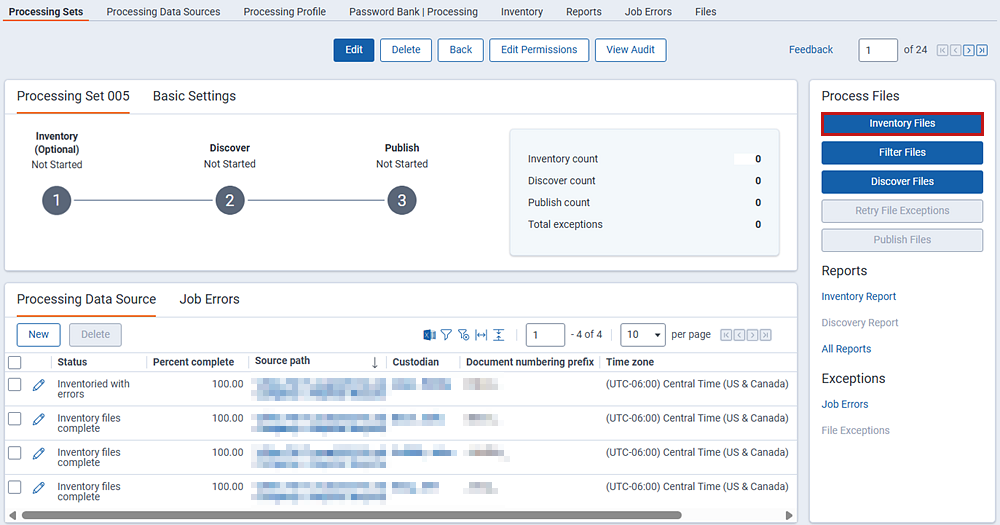
The Inventory Files button on the console is disabled in the following situations:
- There are no data sources associated with the processing set.
- The processing set is canceled.
- The processing set has already been discovered or published.
- A discovery, retry discovery, publish, republish, or retry publish job is in the queue for the processing set.
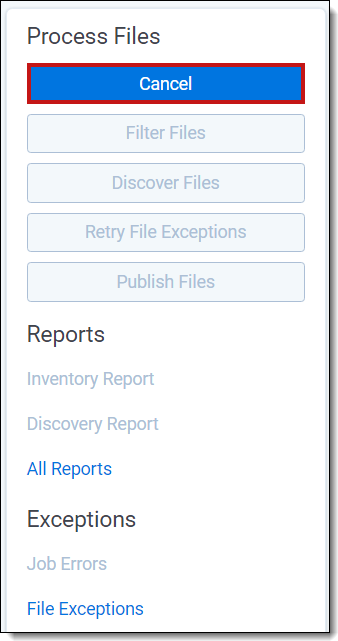
When you start inventory, the Inventory Files button changes to Cancel. You can use this to cancel the processing set. For more information, see Canceling inventory.
The processing set manager agent sends the password bank to the processing engine when you start inventory. If a custodian is associated with a Lotus Notes password bank, that custodian's information is sent with the inventory job.
You can re-inventory files any time after the previous inventory job is complete. For more information, see Re-inventory.
Canceling inventory
If the need arises, you can cancel inventory before it is complete. To cancel the job, click Cancel in the Process Files console.
Consider the following regarding canceling inventory:
- If you click Cancel while the status is still Waiting, you can re-submit the inventory job.
- If you click Cancel after the job has already been sent to the processing engine, the entire processing set is canceled, meaning all options are disabled and it is unusable. Deduplication is not run against documents in canceled processing sets.
- Once the agent picks up the cancel inventory job, no more errors are created for the processing set.
- Errors that result from a job that is canceled are given a canceled status and cannot be retried.
Filtering files
When inventory is complete you have the option of filtering your files in the Inventory tab before moving to discovery.
Note that Relativity only filters on the files that you have inventoried. Everything else that cascades down from the files that were discovered is not subject to the inventory filters that you set.
To do this, click Filter Files in the Process Files console. You are redirected to the Inventory tab. Use the arrow icon to the left of the charts to hide or show the Filters pane.

A processing set is not eligible for use in the Inventory tab if:
- You canceled the set.
- You already discovered or published the set.
- You have not yet run inventory on the set.
- A discovery, retry discovery, publish, republish, or retry publish job is in the queue for the set.
If no processing sets are eligible for use in the Inventory tab, you are directed to the Processing Sets tab to create a new set or check on the progress of an existing set.
The following considerations apply to all processing sets in Inventory:
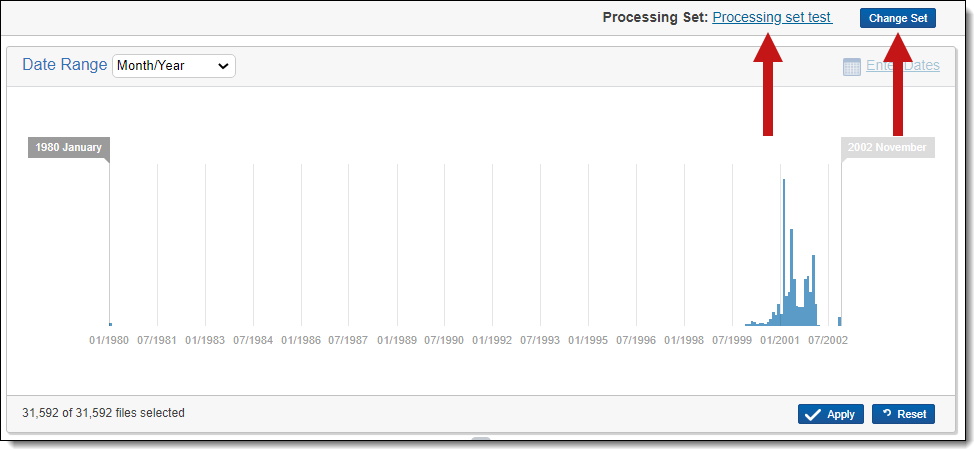
- If you need to load a different processing set, click Change Set to display a list of other available sets.
- You can click the processing set name link in the top right to return to that set's layout.
If you leave the Inventory tab after having loaded a processing set, that set and any filters applied to it are preserved for you when you return to the Inventory tab.
You can add filters to the inventoried data and see how those filters affect the data in your processing set. You cannot add filters if inventory is not complete or if the processing set has already been discovered.
There are six different filters you can apply to a processing set. You can apply these filters in any order; however, you can only apply one filter of each type. This section describes how to apply file location, file size, file type, and sender domain filters.
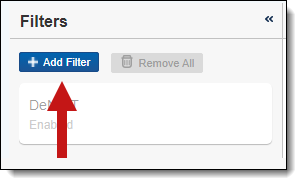
To add a new filter, click Add Filter.
Filters affect the data set only at the time at which you apply them. This means that if you apply a filter to exclude a certain file type from your data but someone from your organization adds more files to the set, including instances of the excluded type, then the recently added files are not actually removed when you start discovery. In order to exclude the added file types, you must first re-inventory the files in the updated data set. You can then run discovery and expect to see all instances of that file type excluded.
Clicking Add Filter displays a list of the following available filters:
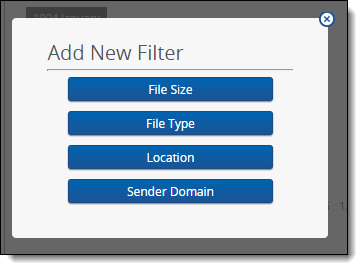
- File Size—exclude files that are smaller and/or larger than the size range you specify. This filter uses a range graph, in which you click and drag range selectors to exclude files.
- File Type—include or exclude certain files based on their type. For example, you may want to remove all .exe or .dll files since they typically have no relevance in the review process. This filter uses a two list display, in which you choose which files to exclude by moving them from the Included list to the Excluded.
Renaming a file extension has little effect on how Relativity identifies the file type. When processing a file type, Relativity looks at the actual file properties, such as digital signature, regardless of the named extension. Relativity only uses the named extension as a tie-breaker if the actual file properties indicate multiple extensions.
- Location—include or exclude files based on their folder location. This filter uses a two list display, in which you choose which files to exclude by moving them from the Included list to the Excluded.
- Sender Domain- include or exclude email files sent from certain domains. For example, you may want to rid your data set of all obvious spam or commercial email before those files get into your workspace. This filter uses a two list display, in which you choose which files to exclude by moving them from the Included list to the Excluded.
The following considerations apply to all filter types:
- If the applied filter conditions have excluded all files from the set, then there are no results for you to interact with and you cannot add or apply more filters.
- If a filter is already applied to the data, the corresponding button is disabled.
- The Inventory Progress graph displays the effect each filter has on your overall file count. The points on the graph indicate which filters you applied and the number of remaining files in your processing set.
- When you change the parameters of the filter, the number of documents automatically updates to reflect the change.
- Filters operate progressively, with each additional filter further narrowing down the total data set. For example, if you choose to include a certain file type and later filter out all file locations that contain those types of files, the discoverable data set does not ultimately include files of that type.
- To cancel a filter before you apply it, click Cancel. If you cancel, you lose all unsaved changes.
- You cannot save and reuse filters from one inventory set to another.
Applying a Date range filter
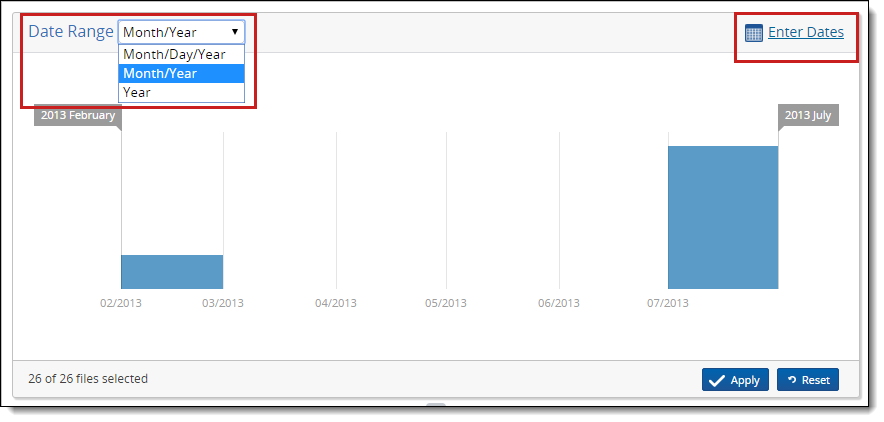
When the selected processing set loads, no filters are applied to the files by default; however, a graph displays the date range for all files in the processing set.
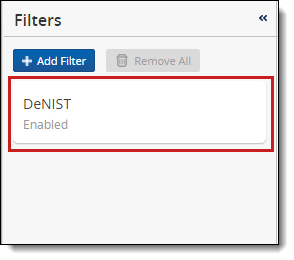
The deNIST filter is applied by default if your processing profile has deNIST field set to Yes.
When you filter for dates, you are filtering specifically on the Sort Date/Time field, which is taken from the file's Sent Date, Received Date, and Last Modified Date fields in that order of precedence. This happens on email messages repeated for the parent document and all child items to allow for date sorting.
You have the following options for applying a date range filter:
- Use the Date Range menu in the top left to select from Month/Day/Year, Month/Year, and Year. When you move the range selectors to a particular point on the graph, they will snap to the nearest whole number. Change the units of measurement to smaller denominations for more precise filter settings.
When processing documents without an actual date, Relativity provides a null value for the following fields: Created Date, Created Date/Time, Created Time, Last Accessed Date, Last Accessed Date/Time, Last Accessed Time, Last Modified Date, Last Modified Date/Time, Last Modified Time, Primary Date/Time, and Sort Date/Time. The null value is excluded and not represented in the filtered list.
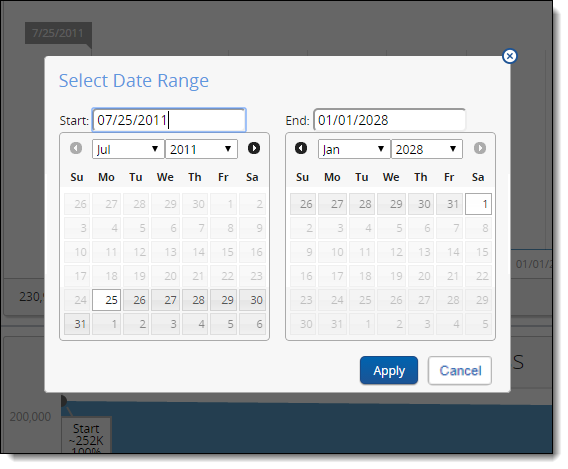
- The Enter Dates link in the top right, when clicked, displays a window in which you can select a Start and End date from the two calendars. Click Apply after specifying the new dates.
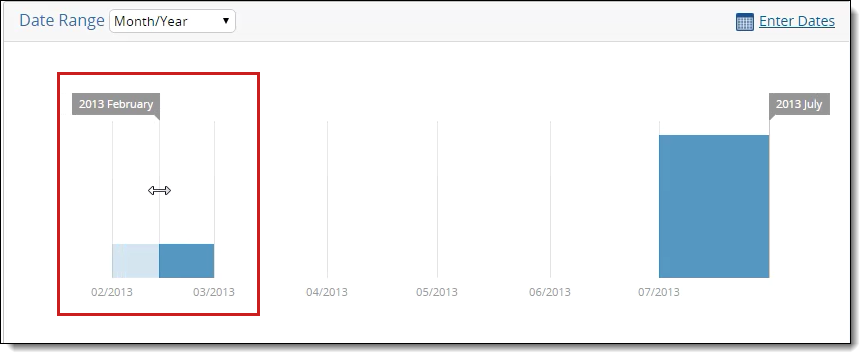
- Drag the right and left limits of the graph until you have a visualization of the desired range. When you do this, the areas that you have designated to exclude are light blue. Click Apply after dragging these limits to their appropriate spots.
- To reset the parameters of a filter after you apply it, click Reset.
If you run a re-inventory job on a processing set to which you have already added the date range filter, the date range display does not update automatically when you return to the Inventory tab from the processing set layout. You have to re-click the date range filter to update the range.
Applying a File Size filter
To filter your processing set files by size:
- Click Add Filter.
- Select File Size from the filter list.
- Use the available options on the File Size range graph filter to specify how you want to apply the file size filter to your files.
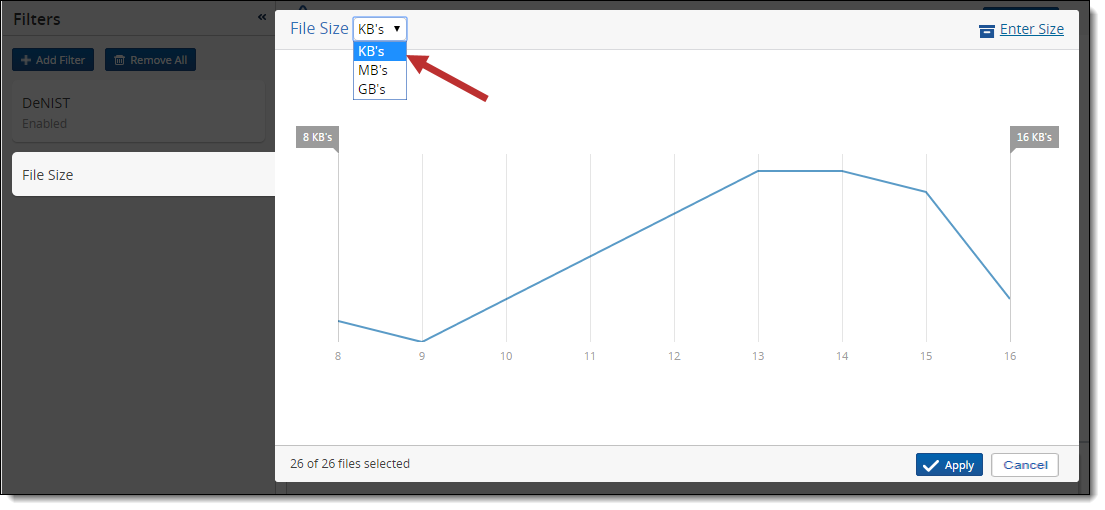
- Use the File Size menu in the top left of the graph to select from KB's, MB's, and GB's. If all files in the current data set are from the same file size, for example 0 GB's, you cannot get a visualization for that size. When you move the range selectors to a particular point on the graph, they will snap to the nearest unit of measurement selected. Change the units of measurement to smaller denominations for more precise filter settings.
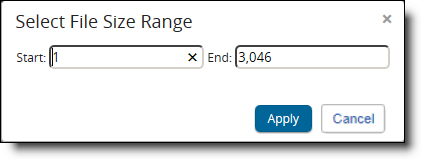
- Use the Enter Size link in top right of the graph to select Start and End values for the size range. By default, the lowest value in the data set appears in the Start field and the highest value appears in the End field.
- Click Apply once you have designated all the file sizes you want to exclude. The Inventory Progress pane reflects the addition of the file size filter, as well as the percentage and number of files that remain from the original data set.
Applying a deNIST filter
You can toggle the deNIST Filter on or off to exclude commonly known computer system files that are typically useless in e-discovery. You will do this on the processing profile, and the selection you make there is reflected in the Inventory interface.
If the DeNIST field is set to No on the processing profile, the DeNIST filter does not appear by default in Inventory, and you do not have the option to add it. Likewise, if the DeNIST field is set to Yes on the profile, the corresponding filter is enabled in Inventory, and you cannot disable it for that processing set.
Applying a Location filter
To filter your processing set files by location:
- Click Add Filter.
- Select Location from the filter list.
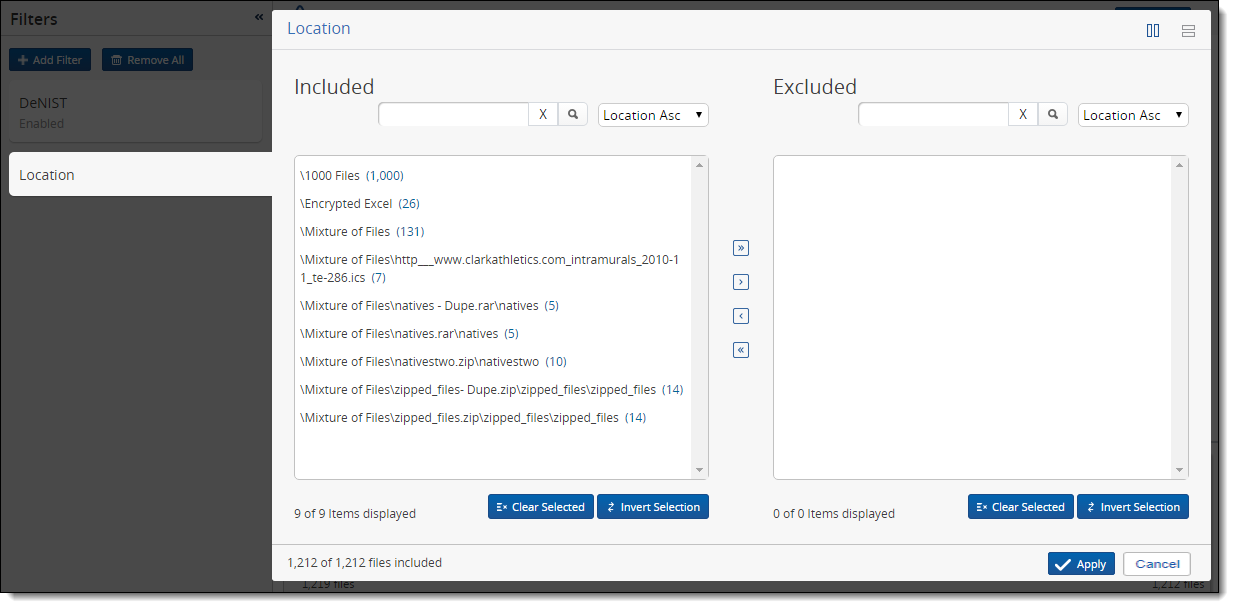
- Use the available options on the Location two-list filter to specify how you want to apply the location filter to your files.
- Click Apply once you have designated all the file locations you want to exclude. The Inventory Progress pane reflects the addition of the location filter, as well as the percentage and number of files that remain from the original data set.
You can now apply an additional filter to further reduce the data set, or you can discover the files.
Applying a File Type filter
To filter your processing set files by type:
- Click Add Filter.
- Select File Type from the filter list.
- Use the available options on the File Type two-list filter to specify how you want to apply the file type filter to your files.
- Click Apply once you have designated all the file types you want to exclude. The Inventory Progress pane reflects the addition of the file type filter, as well as the percentage and number of files that remain from the original data set.
You can now apply an additional filter to further reduce the data set, or you can discover the files.
Applying a Sender Domain filter
To filter your processing set files by email sender domain:
- Click Add Filter.
- Select Sender Domain from the filter list.
- Use the available options on the Sender Domain two-list filter to specify how you want to apply the sender domain filter to your files.

- Click Apply once you have designated all the email domains you want to exclude. The Inventory Progress pane reflects the addition of the sender domain filter, as well as the percentage and number of files that remain from the original data set.
You can now apply an additional filter to further reduce the data set, or you can discover the files.
Unspecified domains
Some of the domain entries in your filter window might not be displayed in a traditional domain format. For example, if there are files from an unspecified domain in your processing set, these files appear as a number in parentheses without a domain name next to it. Note the other instances in which Relativity returns unspecified domains and how it handles those items:
- [Non email]—the item was not handled by the Outlook handler.
- Blank—the Outlook handler processed the file, but could not find a sender domain.
- [Internal]—Relativity parsed an LDAP-formatted email address because there was no other valid domain available. When the system cannot identify the domain, it attempts to extract the organization or company name from the address.
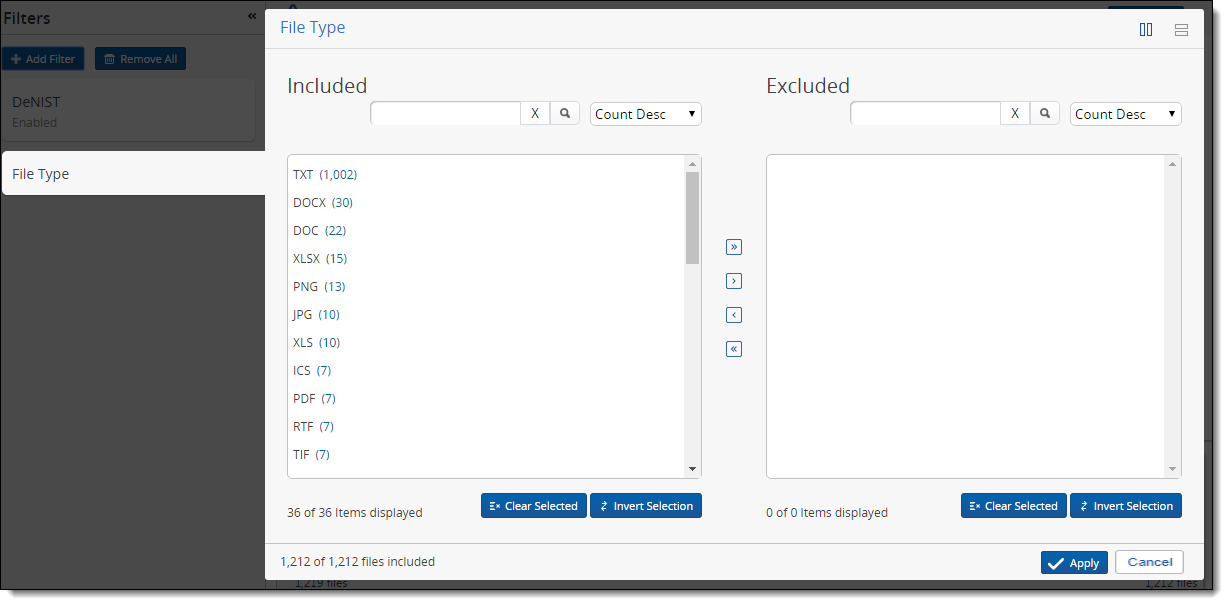
Applying a two-list filter
The two-list filter lets you filter processing set files by the following filter types:
- File Location
- File Type
- Sender Domain
When you add any of these filters, all instances of the variable being filtered for appear in the Included list to the left (or top). To exclude any instance, highlight it and click the single right arrow button to add it to the Excluded list on the right (or bottom).
If you add items from the Included list to the Excluded or vice versa, and these additions affect the sort and search criteria of the modified list, you can refresh the list to re-apply the sort and search.

Items removed from the data by edits to a previously applied filter are displayed in later filters with a value of (0) next to them. For example, if you apply the file type filter and then later narrow the date range to the extent that it filters out all files of the PDF type, then the next time you view the file type filter, PDFs are listed as having a count of (0).
You can use any of the following options in the two-list filter:
- Move over all items with double left and right arrows. Move over only the item(s) selected with the single left and right arrows.
- Toggle the two-list filter to display vertically or horizontally with the parallel line icons in the top right.
- The vertical lines display all files in the left column, and those designated for exclusion in the right column.
- The horizontal lines display all files in the top window, and those to be excluded in the bottom window.
- Double-click on any item to move it to the other list.
- Select multiple items in either list by clicking on the items, or select all items between two values in a list with the Shift key.
- Sort the Included and Excluded lists based on the following settings, depending on the filter type:
- Location Asc—sorts a list of file locations in alphabetical order.
- Location Desc—sorts a list of file locations in reverse alphabetical order.
- Sender Domain Asc—sorts a list of sender domains in alphabetical order.
- Sender Domain Desc—sorts a list of sender domains in reverse alphabetical order.
- File Type Asc—sorts a list of file types in alphabetical order.
- File Type Desc—sorts a list of file types in reverse alphabetical order.
- Count Asc—sorts a list of variables from the smallest count to the largest.
- Count Desc—sorts a list of variables from the largest count to the smallest.
- Clear Selected—marks the previously selected items in the Included or Excluded list as unselected.
- Invert Selection—marks the previously selected items in the Included or Excluded list as unselected while selecting the items that were not selected before.
Removing filters
Clicking Remove All under Filter Controls removes all the filters from the menu on the left side of the menu.
You can also remove filters individually by clicking the X on a single filter in the menu. You cannot delete a filter if you are currently working with it.
You are redirected to the processing set page if any of the following occur:
- Inventory or re-inventory is in process for the set
- The set has been canceled
- Discovery has been run for the set
- A job is in the queue for the set
- The set is secured or no longer exists
Inventory errors
If the processing set you select for inventory encountered any errors, the triangle icon appears in the upper left corner of the set. Hover over this icon to access a link to all applicable errors.

Clicking the link to view errors takes you to the Job Errors tab, which contains all errors for all processing sets in the workspace. By default, Relativity applies search conditions to this view to direct you to errors specific to your inventory data. Click any error message in the view to go to that error's details page, where you can view the stack trace and cause of the error.
All inventory errors are unresolvable. If you need to address an error that occurred during inventory, you must do so outside of Relativity and then re-run inventory on the processing set.
See Processing error resolution for details.
Inventory error scenarios
You receive an error when starting file inventory if any of the following scenarios occur:
- The processing license expires.
- You have an invalid processing license.
- The DeNIST table is empty and the DeNIST field on the profile is set to Yes.
- No processing webAPI path is specified in the Instance setting table.
Re-inventory
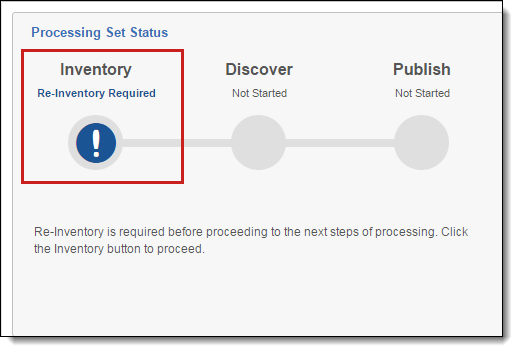
You may be prompted to run inventory again in the status display on the processing set layout.
You must run inventory again on a processing set if:
- You have added a data source to processing set that has already been inventoried but not yet discovered.
- You have edited a data source that is associated with a processing set that already been inventoried but not yet discovered.
- You have deleted a data source from a processing set that has already been inventoried but not yet discovered.
You can also voluntarily re-inventory a processing set any time after the Inventory Files option is enabled after the previous inventory job is complete.
To re-inventory at any time, click Inventory Files.
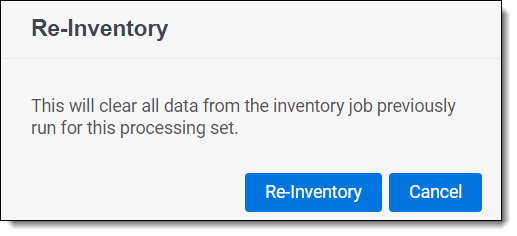
When you click Inventory again, you are presented with a confirmation message containing information about the inventory job you are about to submit. Click Re-Inventory to proceed with inventory or Cancel to return to the processing set layout.
When you re-inventory files:
- Filters that you previously applied in the Inventory tab do not get cleared.
- Errors that you encountered in a previous Inventory job are cleared.