


Feedback
Last date modified: 2026-Feb-05
Integration Points profiles
We’ve streamlined our Staging boundaries to more effectively separate staging data from workspace and system data. With this change, you can no longer write to or access data outside of the four defined staging area folders. The four defined staging area folders: ARM, ProcessingSource, StructuredData, and TenantVM.
Folders removed in the update include FTA, Temp, Export, and dtSearch. In addition to any other folders you manually created. Refer to the
You have the option of creating and saving Integration Points profiles, which can be used to run future common import or export jobs through Integration Points without having to recreate them each time. The profiles can be specific to each data source so that you can reuse the settings and avoid having to remap fields multiple times.
Creating Integration Point profiles
You can create in Integration Point profile through the Integration Point Profile tab. Or, if you are in the process of creating or editing an Integration Point job, you can save it as a profile for future use from the Transfer Options console. Both methods are described below.
To save a newly created or edited integration point as a profile, follow the steps below:
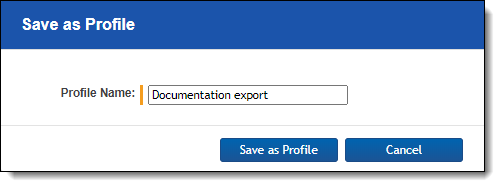
- While on the create or edit Integration Points window, click the Save as Profile button on the Transfer Options console.
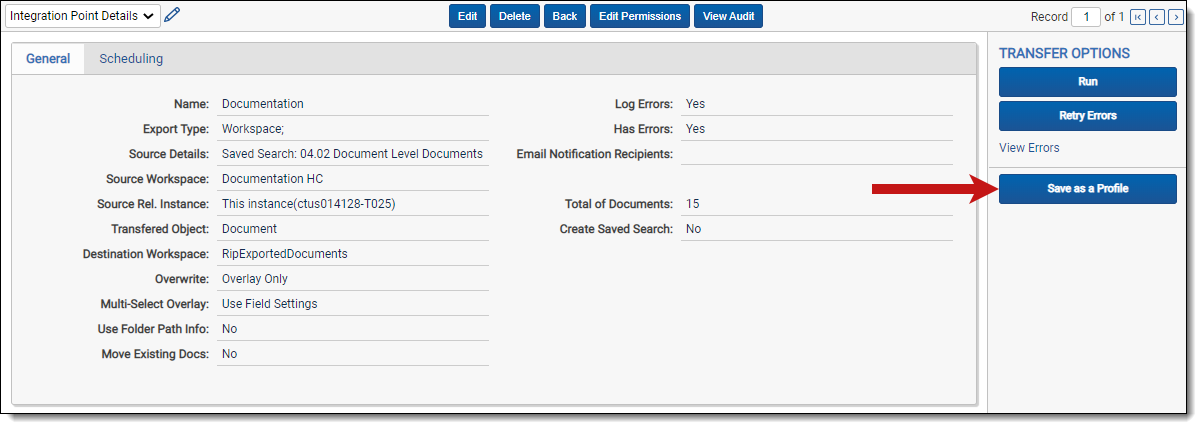
- Enter a descriptive name to help identify the profile in the Integration Point Profile Name field and click Ok. Note that the Integration Point Profile Name field defaults to the name you originally gave the integration point you created. You can change it, if desired, or keep it as is.
To create a profile through the Integration Point Profile tab, follow the steps below:
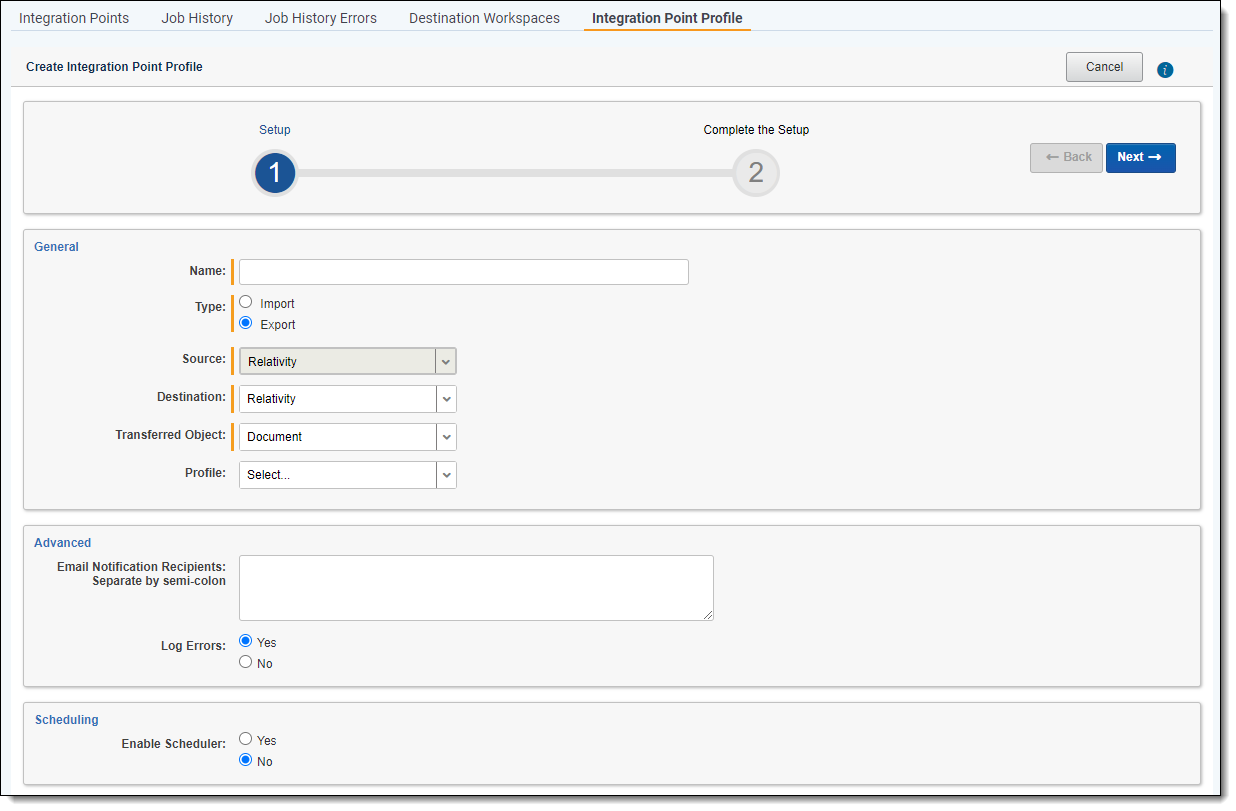
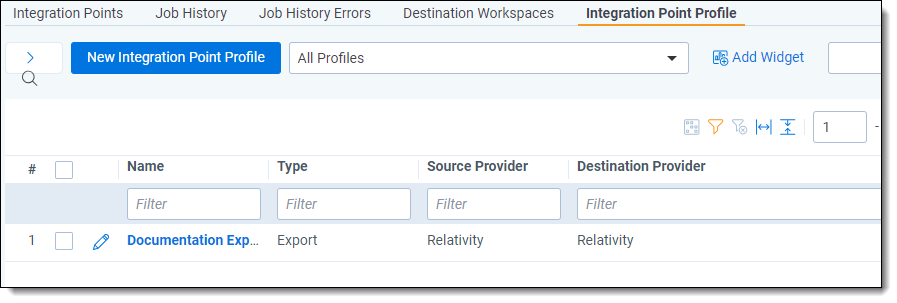
- Select the Integration Point Profile tab.
- Click New Integration Point Profile.
- Complete the required fields as needed. The fields and layouts for creating a profile here are identical to those for creating any integration point that you intend to run. For more information, see Importing data through Integration Points or Exporting data through Integration Points.
- Once the profile is saved, you do not have the option to run it. Instead, you see a detailed layout of the profile you just created.
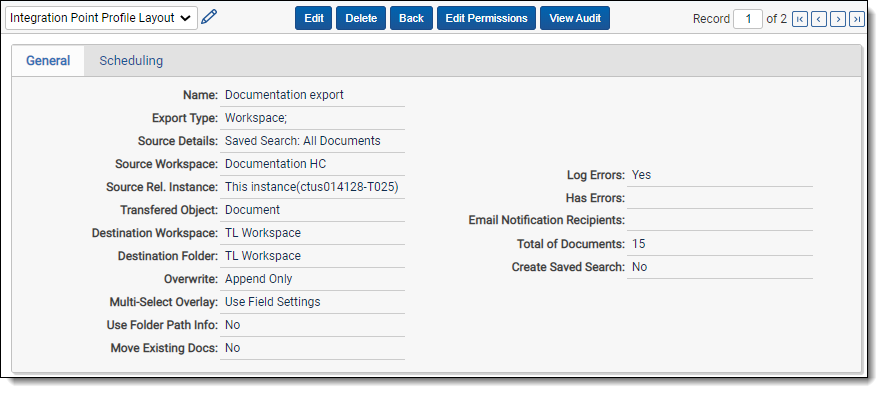
- Once a profile is saved, it's visible in the Integration Point Profiles tab.
To configure an Integration Point profile that can be copied to another workspace, see Configuring an Integration Point Profile for copying.
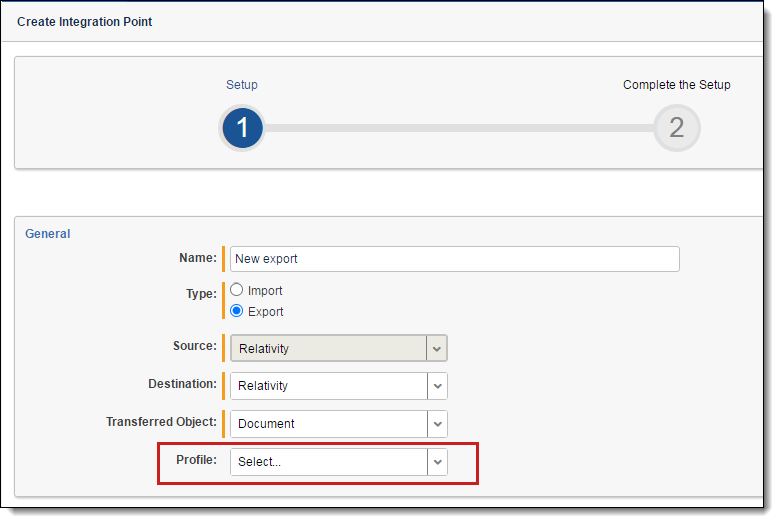
Once the profile is created, you have the option of applying it to a new Integration Point by selecting it in the Profile field on the Setup layout.
If the Destination workspace is changed after the fields have been mapped, the fields will automatically be remapped. The artifacts are mapped based on their names only if the ArtifactIDs are different in the new destination workspace. This mapping occurs so that the integration points job will not fail. Therefore, if the source workspace fields cannot match to the new destination workspace fields, those unmatched fields are presented at the end of the mappings list for easy identification. Relativity also displays a message to inform you that the original source fields from the profile were mapped with corresponding fields from the destination workspace.
Copying Integration Point profiles
You can copy the configuration of a Relativity Integration Point profile from a template workspace to a new workspace as long as the profile's Type field is set to Export and the Source and Destination fields are set to Relativity. This profile configuration is considered a non-document object.
If the Integration Point Profile configuration has the Type field set to Import or Export and the Destination field set to Loadfile, it will not be copied to the new workspace.
Configuring an Integration Point Profile for copying
In order to copy a profile to another Relativity workspace, it has to be configured a certain way.
To properly configure an Integration Point profile so that can be copied to another Relativity workspace, set the fields as shown below.
For Setup
- Name—enter a profile name of your choice.
- Type—select Export. This field must be set to Export for the profile to be copied.
- Source—select Relativity. This field must be set to Relativity for the profile to be copied.
- Destination—select Relativity. This field must be set to Relativity for the profile to be copied.
- Transferred Object—select the Document or non-document object meta data you want to sync to the destination workspace. The non-document object must already exist in the destination workspace.
- Profile—select a profile of your choice.
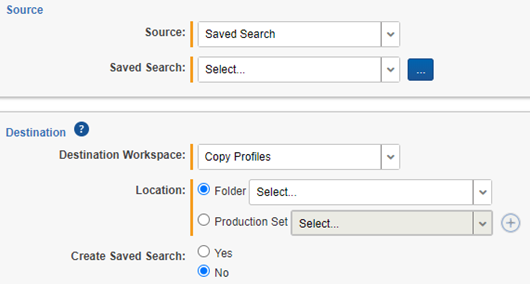
For Connect to Source
- Source—defaults to saved search.
When updating the connection to source for the copied profile, the Source field defaults to Saved Search. The Saved Search field is empty and you need to select the saved search of your choice whether it's the same saved search as the original profile or a different saved search.
- Saved Search—select the saved search of your choice.
- Destination Workspace—select the destination workspace of your choice.
- Location—select a location of your choice.
- Create Saved Search—select Yes or No.
Once the above fields are configured, the profile is ready to use for copying.
When you are ready to create a new workspace using the profile, go to Workspaces and click the New Workspace button. Then, click Select next to Template Workspace and select the workspace in the list with the Integration Points profile that you want to use.