


Feedback
Last date modified: 2026-Jul-16
Installing and updating Express Transfer desktop application
You must install the Express Transfer application on your computer in order to use it with Import/Export workflows. Use the instructions below for both Microsoft Windows and Apple macOS installations. You can configure preferences to automatically check for new software versions or you can check for them manually. We recommend keeping the default setting so the system can automatically check for new software versions and help ensure you are using the latest software features available.
For additional information on performance considerations when transferring data using desktop applications, see Data transfer performance considerations.
Requirements
The following sections describe necessary requirements for Express Transfer.
System requirements
To use Express Transfer, your computer must meet the following minimum system requirements:
| System Configuration | Requirement |
|---|---|
| Operating system | MS Windows 10, MS Windows 11, or Apple macOS |
| Windows Server operating system | Windows Server 2019 or Windows Server 2022 |
| System memory | 4 GB RAM, recommended 8 GB RAM |
Port access
Express Transfer requires TCP port 443 to be open in order for it to operate. For more specific information about port considerations relating to Express Transfer, see Data Transfer Tools: Required Port Considerations for RelativityOne (Import/Export, Express Transfer, ROSE and Migrate) article in the Relativity Community.
Prerequisites
- Install Import/Export application from the Application Library in the workspace.
- Install Express Transfer desktop application on your computer.
- Activate Express Transfer within Import/Export.
Installing Express Transfer
To install the Express Transfer application on your computer for use with Import/Export:
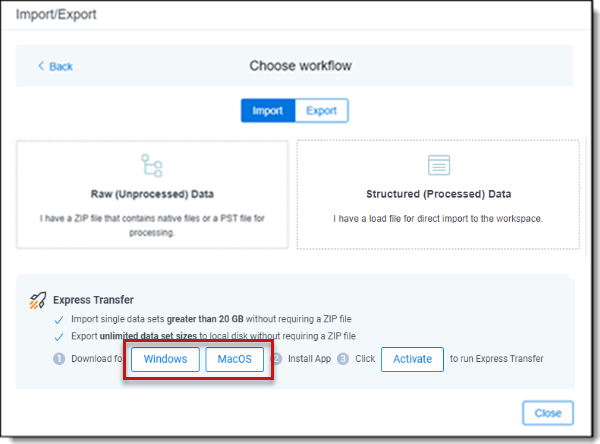
- Navigate to the Import/Export Job page.
- Click New Import/Export Job.
- Depending on the operating system used, click the Windows or MacOS button to download the installer file.
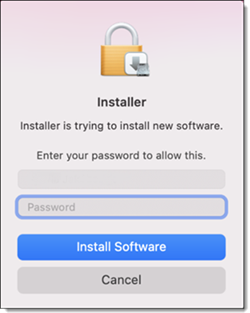
- For macOS systems, you need to have administrative privileges to use and install the software, as well as to receive automatic software updates. On the Installer dialog, enter your user name and password. Then, click Install Software.
- Navigate to the folder on your computer where the installer file was downloaded. Depending on the operating system, double-click one of the following files to begin the installation process:
- For Windows OS: Express Transfer Setup.exe
- For macOS: Express Transfer Setup.pkg
- Click one of the options on the Select Setup Install Mode dialog:
- Install for me only (recommended)—only your account can use Express Transfer.
- Install for all users—anyone who logs on to this computer can use Express Transfer. You need Admin credentials to select this option.
- Click Next.
- Use the default destination folder already displayed or click Browse to select a different location for the Express Transfer application.
- Click Next.
- (Optional) On the Select Additional Tasks dialog, do any of the following:
- Autostart Express Transfer on system startup—select this checkbox to automatically launch the Express Transfer application each time your computer starts. Leave it blank if you want to manually launch Express Transfer when you want to use it.
- Create a desktop shortcut—select this checkbox to create a shortcut icon on your desktop for Express Transfer. Otherwise, leave it blank.
- Click Next.
- Click Install on the Ready to Install dialog to begin the installation process.
- When the installation is complete, click Finish to close the installation wizard. Express Transfer is now installed. To use Express Transfer for import and export workflows, you must activate it within Import/Export. See Activating Express Transfer for more information.
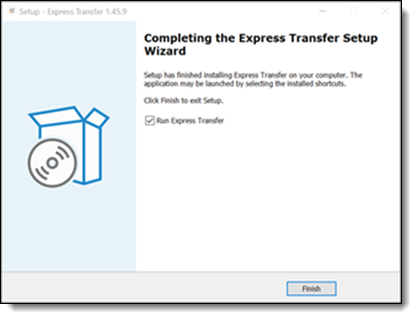
If you selected the Run Express Transfer checkbox on the finish setup dialog of the wizard, the Express Transfer application will open and its icon will be available in the system tray. Right-click on the icon to display an application menu with these options:

- Connectivity check—choose this option to check if Express Transfer is successfully accessing the Internet and the Import/Export application. See Express Transfer Connectivity check for more information.
- Show logs—choose this option if instructed to do so by Relativity Support to investigate or troubleshoot an issue with Express Transfer transaction logs and text files. File explorer will open the logs folder on your local drive. For example, C:\Users\<username>\AppData\Local\Express Transfer\logs. With Express Transfer open, you can also press F8 to display the logs folder.
- Check for Updates—choose this option if you want to manually check to see if your version is up-to-date or if a new version of Express Transfer is available. See Manually checking for software updates for more information.
- Preferences—choose this option to modify the application settings. You can also view the software version number from this dialog.
- Quit—choose this option to completely exit the Express Transfer application. The Express Transfer icon will no longer be displayed in the system tray. To reopen Express Transfer, double-click on its desktop shortcut, if you saved one for it, or select it from your computer's list of programs.
Installing Express Transfer silently
In some organizations, IT departments or system administrators deploy the Express Transfer desktop application across the network rather than having each user install it individually. Known as a silent or unattended installation, this process runs in the background without any user interaction or awareness. Large enterprise organizations commonly use this approach to standardize software deployment and ensure a consistent installation configuration across all users.
Prerequisites are the following:
- Windows OS installed.
- Administrator rights to run the command prompt.
- Knowledge of how to use command line interface (CLI) tools.
- Downloaded Express Transfer installer file for Windows OS, which is Express Transfer Setup.exe. See Installing Express Transfer for more information on how to download the file using the Import/Export application.
When installing Express Transfer from command line tools, we support silent and verysilent mode:
- /silent—this option displays the installation wizard as it goes through the installation process. All the default options are automatically selected.
- /verysilent—this option does not display the installation wizard as it goes through the installation process. All default options are selected automatically.
Locating the Express Transfer version number
You can check the Express Transfer version number at the bottom of the In Progress and History tabs within the application.

You can also find it in the bottom left corner of the Preferences dialog by right-clicking on the Express Transfer icon in the system tray and clicking Preferences.
The Express Transfer software version number is contained in the first few numbers after the "v", for example "v2.49.0." The numbers after the hyphen are session identifiers that change each time you launch Express Transfer after quitting the application. These numbers may be used by Customer Support if you encounter a problem with the software. You can disregard them otherwise.
Automatically checking for software updates
You can configure whether you want the system to automatically check for new software versions of Express Transfer each time it opens and notify you with a message box. By default, this feature is enabled in Express Transfer Preferences. We recommend keeping the default setting so the system can automatically check for new software versions and help ensure you are using the latest software features available. If you choose to change this default setting, you will need to use the Check for Updates option in the Express Transfer system tray. See Manually checking for software updates for more information.
To automatically check for software updates:
- Right-click on the Express Transfer icon in your system tray.
- Click Preferences.

- By default, the Check for Updates is toggled on. If you do not want the system to automatically check for updates and notify you, toggle it off. We do not recommend turning this option off. If it is off, your Express Transfer version may not contain the latest features. Also, you will need to regularly use the Check for Updates option in the Express Transfer system tray to determine if your software version is current. See Manually checking for software updates for more information.
- Click Save after updating the setting.
- To apply any changes made to Preferences, quit the Express Transfer application by right-clicking on the Express Transfer icon in your system tray and clicking Quit.

- Reopen the application by double-clicking on its desktop shortcut, if you saved one for it, or select it from your computer's list of programs.
Whenever a new version is available, you will be notified with an Application update dialog displaying the new version number available and release notes for it. Click Update now to download the new version's executable file, and then follow the Installing Express Transfer steps to finish installing the update on your system.

Manually checking for software updates
You can check for software updates anytime by right-clicking on the Express Transfer icon in your system tray and clicking Check for Updates. If your software version is current, a message appears letting you know it is up-to-date.
If a new version is available, the Application update window displays the new version number available and release notes for it. Click Update now to download the new version's executable file, and then follow the Installing Express Transfer steps to finish installing the update.