


Feedback
Last date modified: 2026-Jul-09
Public Portal
The Public Portal provides public users with a secure access point to research released documents, submit records requests, and track the status of previous submissions. Authentication is managed through platforms such as Login.gov, ensuring privacy and security. The portal is fully integrated with RelativityOne, delivering a seamless and consistent user experience across all interactions.
The Public Portal user interface
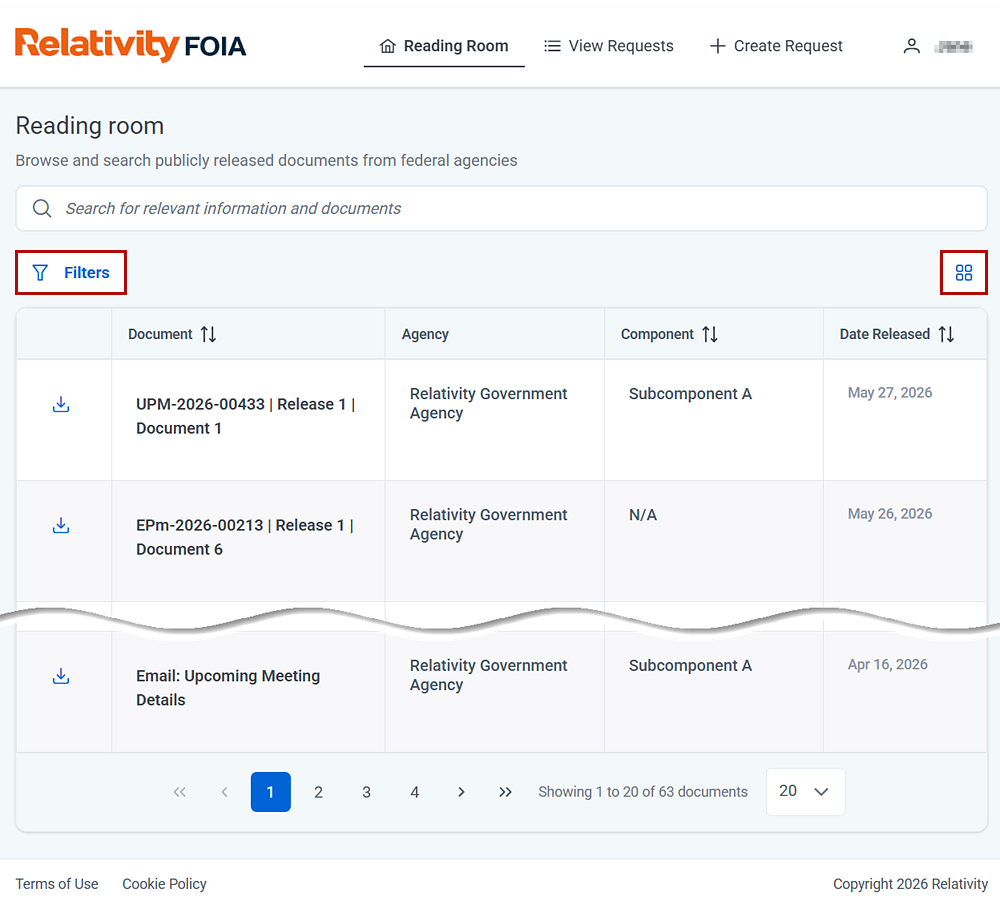
Noteworthy navigation points:
- Filters—opens a filter panel with options to define agencies and dates.
- Card view—switches from table view to card view.
Reading Room
Once an agency determines that documents are suitable for release under FOIA guidelines, they are made available in the Reading Room. You can search for documents, apply filters and sorting options, and download them as needed.
View Requests
The View Requests portal displays a list of active requests associated with the authenticated user. You can check the status of prior requests, the coordinating agency, and the submission and due dates.
Create Request
Create new FOIA records requests. See Request for detailed instructions on submitting a request.