


Feedback
Last date modified: 2026-Apr-01
Reviewing documents with Case Dynamics
When reviewing documents in the Review Interface, you can link the active document to Case Dynamics objects, which store information related to your case.
Object types include:
- Facts
- Issues
- Entities
- Interview Questions
- Outlines
New review workflow with Case Dynamics
The new, streamlined Case Dynamics makes it easier for attorneys to create facts and annotate documents to build out the fact chronology using the evidence stored in Relativity.
The Classic Case Dynamics coding pane was deprecated on Feb. 28, 2024. Data that was created using the Classic coding pane will be preserved in Relativity.
To continue using Case Dynamics, verify that users have permissions to use Case Dynamics and excerpts so that they can immediately begin using the new workflow.To learn more, see Installing and upgrading Case Dynamics and Excerpt permissions.
To continue using Case Dynamics, verify that users have permissions to use Case Dynamics and excerpts so that they can immediately begin using the new workflow.
To start using the new workflow while in the Viewer, select the Case Dynamics Document Layout. To learn more about this new layout, see Case Dynamics Document Layout. Alternatively, you can add any new Case Dynamics fields to one of your existing custom Document layouts. Attorneys can then use these fields to create facts and other case information.
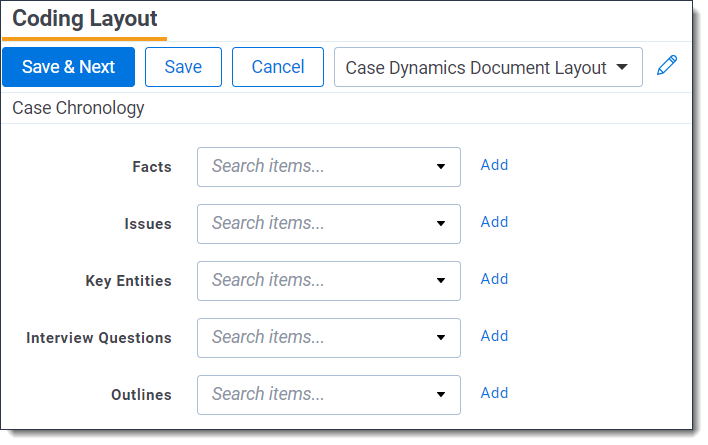
The following Case Dynamics fields can be added to an existing layout to try the new enhancements without having to create a new layout from scratch:
- Fact Case Dynamics
- Issue Case Dynamics
- Key Entities Case Dynamics
- Interview Questions Case Dynamics
- Outlines Case Dynamics
Adding the Document Excerpt Object to either a document layout or a document view can cause errors and a loss of data.
Adding the Fact Excerpt field to a fact view can also cause errors. The Fact Excerpt field should only be added to fact layouts so users can see the Fact Excerpt preview. To view excerpts on the Facts tab or other fact views, add the "Fact Excerpts::Location" field or the "Fact Excerpts::Document Text" field.
Mass operations cannot be used on either the Fact Excerpt or Document Excerpt fields.
Attorneys can create facts and other case information using the new fields. They can also select key text from documents and create facts with corresponding non-editable excerpts.
Excerpts
As part of the fact creation process, you can also create excerpts. Excerpts are non-editable pieces of text that preserve evidence from a document as part of a fact. They can also conveniently be used to create a fact in the Viewer.
To view excerpts in a document, add the Fact Excerpts field to a fact layout and select that layout in the Viewer.
Adding the Document Excerpt Object to either a document layout or a document view can cause errors and a loss of data.
Adding the Fact Excerpt field to a fact view can also cause errors. Adding the Fact Excerpt field to a fact view can also cause errors. The Fact Excerpt field should only be added to fact layouts so users can see the Fact Excerpt preview. To view excerpts on the Facts tab or other fact views, add the "Fact Excerpts::Location" field or the "Fact Excerpts::Document Text" field.
Mass operations cannot be used on either the Fact Excerpt or Document Excerpt fields.
Excerpts that are associated with a fact are highlighted in that fact's fact color. We recommend choosing a fact color that is distinct from nearby persistent highlights to prevent confusion. You can choose to display or hide excerpt highlights as well. To learn more, see Displaying or hiding excerpt highlights.
Alternatively, you can turn persistent highlight sets off in the Viewer or edit the highlight colors for a persistent highlight set to better differentiate them from nearby facts.
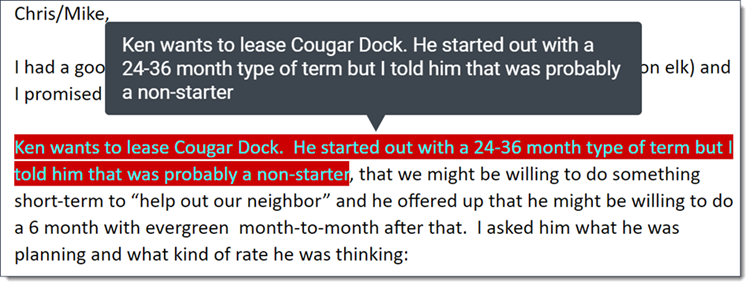
If a fact has an excerpt associated with it, you can view the excerpt by hovering your cursor over the fact. The Fact title will then display as a tooltip.
Excerpt considerations
Before using excerpts, please note the following:
- Deleting a document will remove excerpts but not any facts that were created from that document.
- We do not recommend uploading excerpts using Import/Export, as doing so may result in a loss of data.
- Excerpt hyperlinks are not supported in offline reports or list pages other than Case Dynamics.
- Excerpts cannot be copied.
- If an excerpt is not found on a document, for example, the native document was replaced, a message displays that identifies the missing facts. To re-link an excerpt, either delete the affected facts and create new ones or append a new excerpt to the existing fact.
Excerpt permissions
If a user is not granted the permissions described below, the New Fact from Excerpt and Append Excerpt to Fact options in the context menu will display but cannot be selected.
The following permissions are needed to use each part of excerpts:
| Object Security | Tab Visibility | Mass Operations |
|---|---|---|
|
Creating a fact from an excerpt
To create a new fact using an excerpt you've selected in the Viewer:
- Navigate to the Documents tab and select a document.
- Click-and-drag your cursor over the text that you wish to create an excerpt and fact with.
- Right-click and choose the New Fact from Excerpt option from the menu.
The Fact pop-up displays. - Ensure that a Fact layout that contains the Fact Excerpts and Fact Color field is selected.The Excerpt field is associated with the old Case Dynamics pane and is scheduled for future deprecation. We do not recommend adding this field to a fact layout because it does not have the new excerpt functionality.
- Enter the desired text in the Fact field.
- Optionally, complete the remaining fields as desired.
- Click Save.
A new fact is created and linked with the excerpt.
Appending an excerpt to a fact
To add an excerpt to a fact that has already been created:
- Navigate to the Documents tab and select a document.
- Click-and-drag your cursor over the text that you wish to create as an excerpt and link to a fact.
- Right-click and choose the Append Excerpt to Fact option from the menu.
The Select Item - Facts modal displays.You can customize which fields display in this modal and in what order. To learn more, see Customizing object layouts. - Select the desired fact from the list.
- Click Set.
A new excerpt is created and linked to the selected fact.
Displaying or hiding excerpt highlights
A user can choose to display or hide the excerpt highlights as needed while in the Viewer. Toggling the excerpt highlights to display or be hidden only affects the user that performs the action. The highlights will display or remain hidden as a user navigates from document to document and if they change Viewers. The excerpt highlights revert back to displaying when a user refreshes their browser or logs out of Relativity.
Displaying or hiding excerpt highlights is not supported in the Standalone Viewer or Document Preview Panel.
To display or hide excerpt highlights, right-click in the Viewer and select the Toggle Excerpt Highlights Off or Toggle Excerpt Highlights On option.
If excerpt highlights are hidden and you add new excerpts to a document, they will not display until the excerpt highlights display again.
Case Dynamics Document Layout
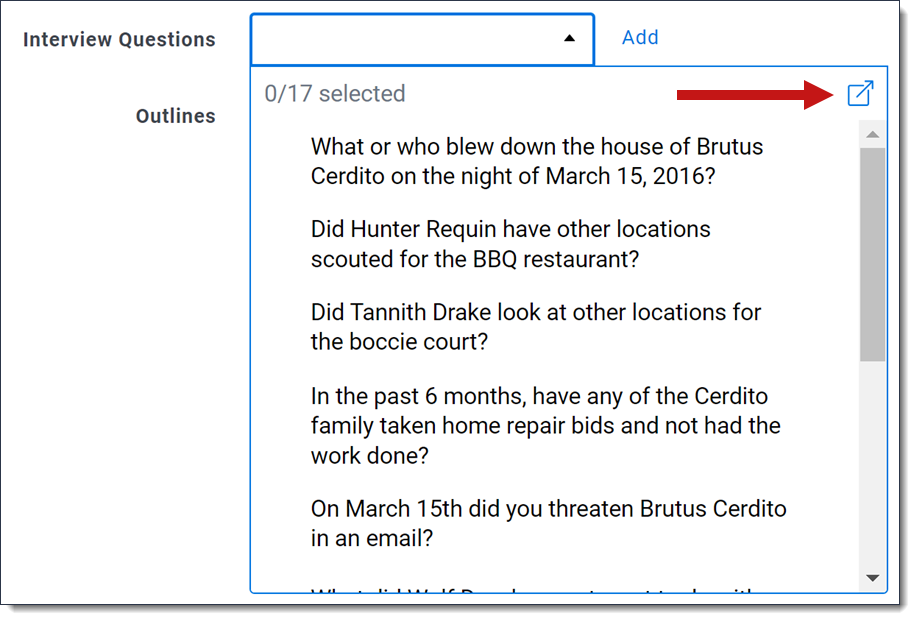
To make finding the desired objects easier, the Case Dynamics fields in this layout have typeahead functionality. The drop-down menus also filter the results as you enter information on your keyboard. If you would like to see the related Case Dynamics fields for an object before making any selections, click on the drop-down menu and then click on the Open list picker icon.
The Excerpt field is associated with the old Case Dynamics pane and is scheduled for future deprecation. We do not recommend adding this field to a fact layout because it does not have the new excerpt functionality.
While viewing facts, you can hover your cursor over a fact object to see the entire fact at a glance. To edit a fact from the Case Dynamics Document Layout, do either of the following:
To edit a fact using the View Fact icon:
- Click inside the Facts field and then hover your cursor over the fact you want to edit.
- Click on the View Fact icon on the right side of the drop-down menu.
The Fact pop-up displays. - Click Edit.
- Make the desired edits and click Save.
To edit a fact using Open list picker icon:
- Click inside the Facts field and then click on the Open list picker icon.
- Click the Edit icon in the row of the fact you wish to edit.
- Make the desired edits and click Save to stay on the fact page or Save and Back to return to the Viewer.
You can create a new Case Dynamics object by clicking the Add icon and completing the required fields in the pop-up. Alternatively, if you have selected Case Dynamics objects and want to remove them all, click Clear All on the right side of the drop-down menu.
Date suggestion
To speed up fact creation for attorneys, you can display a date suggestion for the Primary Fact Date field based on the Sort Date/Time metadata for each document. To display the date suggestion, ensure your workspace has a document object field that is associated with the Processing Sort Date/Time field. If there isn't one, you can create a new field that is associated instead. Then, after discovering and publishing documents using Import/Export, the Sort Date/Time field on the document object will be populated and the date suggestion appears when creating a new fact. If you do not use Import/Export to upload documents, the Sort Date/Time field won't be populated, and the date suggestion does not display.

To create the field required for enabling date suggestions on the fact:
- Navigate to the Fields tab.
- Click New Field.
- Enter the following in the Field Information section:
- Name—Enter a name for the field.
- Object Type—Document
- Field Type—Date
- In the Advanced Settings section, select Sort Date/Time for the Source field.
- Leave the remaining fields as default.
- Click Save.
- Discover documents in the workspace.
- Publish the documents in the workspace.
Fact color options
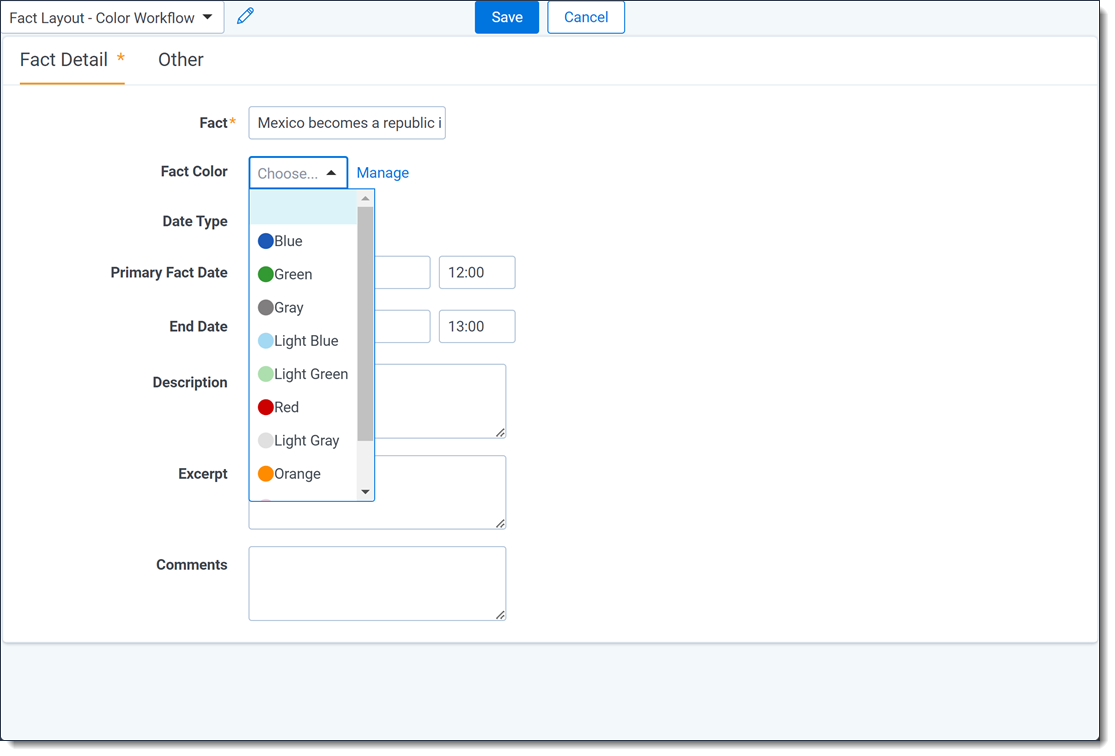
As part of the redesigned coding pane, fact colors have also been enhanced. When you create a new fact during document review in the Viewer or from the Facts tab, you can assign the fact a color to categorize it and annotate documents. The assigned color will be used throughout the application, including the Timeline Builder to make it easy to track facts.
Fact Color is a new single choice field added to the fact object. To view and select a fact color while creating a new fact, select a layout that includes the Fact Color field.
From the Facts tab, you can select a view that includes the Fact Color field to see the fact colors.
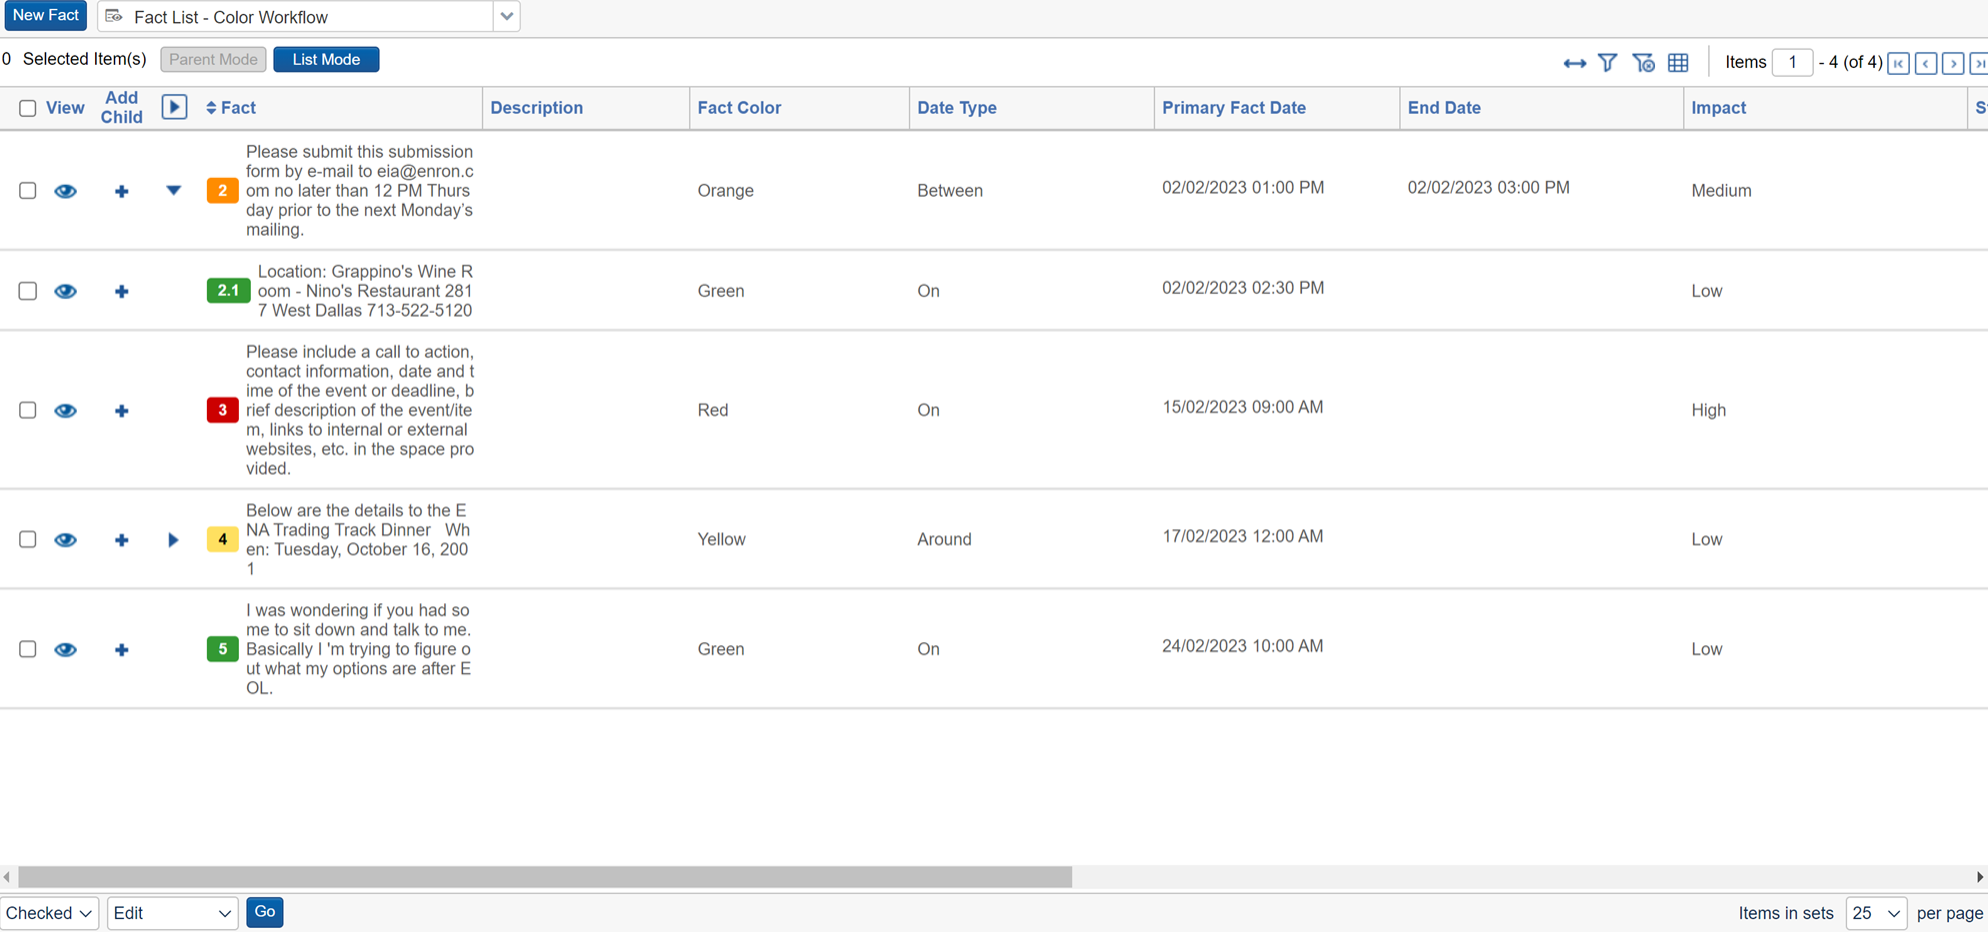
Editing fact color names
A system administrator can edit the name of fact color choices to make them more descriptive and tailor them to your review workflow. You can edit fact color names from either the Documents tab or the Fields tab.
To rename a fact color choice from the Documents tab:
- Navigate to the Documents tab and select a document.
- On the coding layout, select the Case Dynamics Document Layout from the drop-down menu.
- Click Edit on the coding layout.
- On the Facts field, click Add.
The New Fact pop-up displays. - Ensure that Fact Layout - Color Workflow is selected on the layouts drop-down menu.
- Click Manage on the Fact Color field.
The Choices - Fact Color modal displays.To save time, you can also add new fact colors from this tab at the same time by adding the fact color names you wish to create as choices. To learn more, see Adding new fact colors. - Click on the fact color you wish to edit and enter the desired name change using your keyboard.
- Repeat the previous step until all fact colors have been edited.
To rename a fact color choice from the Fields tab:
- Navigate to the Fields tab.
- Ensure that the All Fields view is selected from the views drop-down menu.
- Filter as needed and select Fact Color from the list.
- In the Choices section, click on the fact color that you would like to edit and enter the desired name change using your keyboard.
- Repeat the previous step until all fact colors have been edited.To save time, you can also add new fact colors from this tab at the same time by adding the fact color names you wish to create as choices. To learn more, see Adding new fact colors.
Adding new fact colors
A system administrator can add new fact colors to enhance your review workflow. A user must have the Tab Visibility - Color Map permission granted to view the Color Map tab. You can create new fact colors from either the Documents tab or the Fields tab.
To create a new fact color from the Documents tab:
- Navigate to the Documents tab and select a document.
- On the coding layout, select the Case Dynamics Document Layout.
- Click Edit on the coding layout.
- On the Facts field, click Add.
The New Fact pop-up displays. - Ensure that Fact Layout - Color Workflow is selected on the layouts drop-down menu.
- Click Manage on the Fact Color field.
The Choices - Fact Color modal displays. - Click Add Choice.
- Enter the new fact color name using your keyboard and press Enter.
- Navigate to the Choices tab and locate the artifact ID for the fact color you just created. You may need to add the Artifact ID field to a Choices view to see this information. The new fact color's artifact ID will be entered into a field shortly.
- Navigate to the Color Map tab.
- Click New Color Map.
- Enter the following field information:
- Name—Enter a name for the fact color.
- Field—Select the Fact Color option.
- Field Value—Enter the fact color's artifact ID.
- Foreground Color—We recommend entering black using the following hexadecimal code: #000000.
- Background Color—Enter the hexadecimal code for the color you wish to assign to this fact color.
- Click Save.
The fact color is created and available to assign to new facts in the Fact Color field.
To create a new fact color from the Fields tab:
- Navigate to the Fields tab.
- Ensure that the All Fields view is selected from the views drop-down menu.
- Filter as needed and select Fact Color from the list.
- In the Choices section, click Add Choice.
- Enter the new fact color name using your keyboard and press Enter.
- Navigate to the Choices tab and locate the artifact ID for the fact color you just created. You may need to add the Artifact ID field to a Choices view to see this information. The new fact color's artifact ID will be entered into a field shortly.
- Navigate to the Color Map tab.
- Click New Color Map.
- Enter the following field information:
- Name—Enter a name for the fact color.
- Field—Select the Fact Color option.
- Field Value—Enter the fact color's artifact ID.
- Foreground Color—We recommend entering black using the following hexadecimal code: #000000.
- Background Color—Enter the hexadecimal code for the color you wish to assign to this fact color.
- Click Save.
The fact color is created and available to assign to new facts in the Fact Color field.