Last date modified: 2026-Feb-09
Setting instance permissions
Permissions can be set based on the features using the Features tab or by using the granular settings on the Object Security tab, Tab Visibility tab, or Admin Operations tab.
Edit instance permission settings from the Instance Details tab. Access Admin security with the following steps:
- Click the Relativity logo in the upper left corner or navigate to Home with the user drop-down menu.
- Navigate to Instance Details.
- Click Manage Permissions.
- Click Edit Permissions next to the group whose permissions you want to manage.
- Modify the settings on the tabs as needed. Refer to the Features tab, Object Security tab, Tab Visibility tab, or Admin Operations tab sections for specific information of each tab.
- Click Revert All if you need to undo all your unsaved toggle key changes. The features will return to their original toggle key settings.
- Click Review and Save after modifying settings.
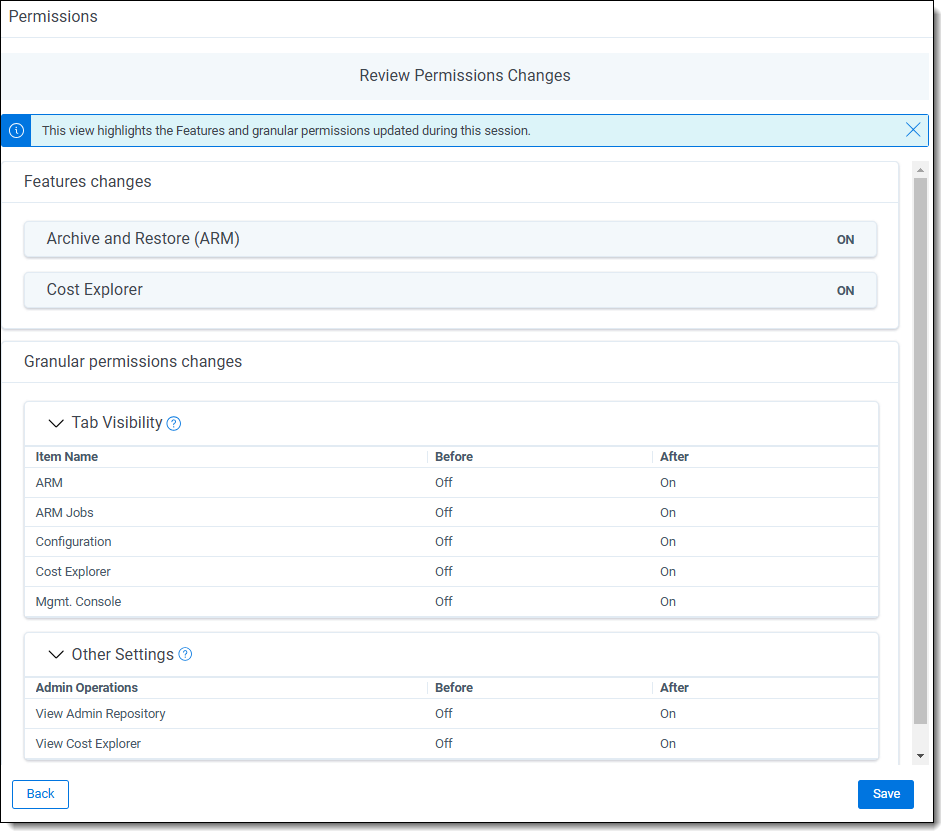
- Review the unsaved changes displayed on the Review Permissions Changes modal.
- Features changes—lists the features that were changed and how they were changed. Changes at the granular level may affect the status of the feature setting, so review this information carefully.
- Granular permissions changes—lists the changes made at the granular permissions level, including those resulting from feature changes or direct edits at the granular permission level.
- Click Save to finalize the changes.
From here you can edit the admin permissions of groups.
Groups Management tab
The Group Management tab displays all groups that have admin security privileges.
In the Group Management tab you can view all users in a group, edit the permissions of any group, transfer a group's permissions to another group, or preview a group's current permission settings. The Group Management tab displays all groups that have Admin Security access in Relativity. The following actions are available for groups added to a workspace other than system admins:
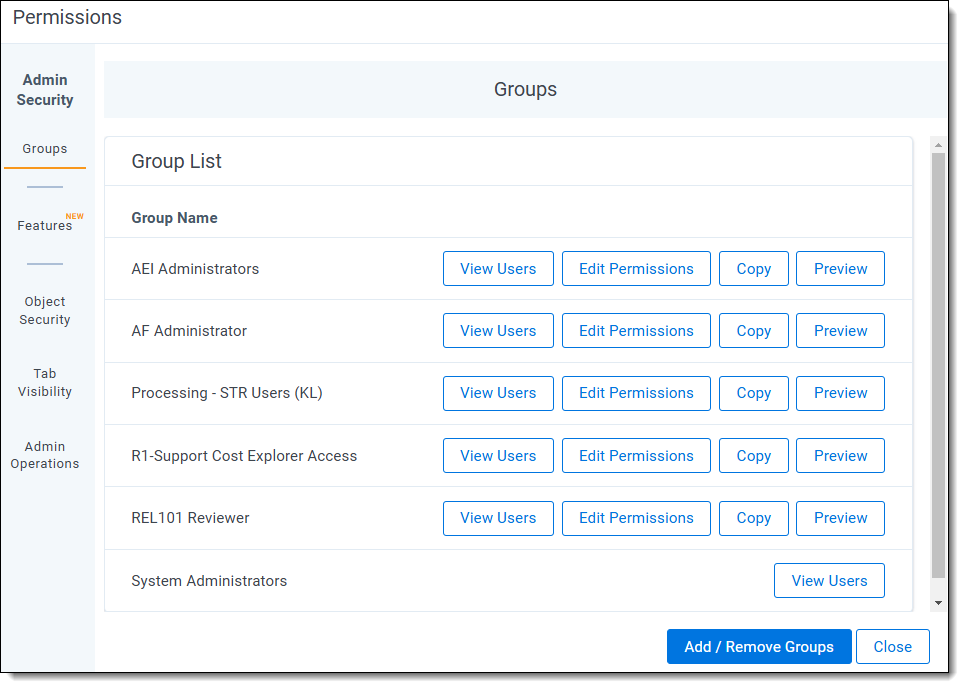
- View Users—displays a list of users in a group.
- Edit Permissions—opens the Object Security tab for editing the admin permissions of a group.
- Copy—opens a list of groups whose permission settings you can transfer to the group. Click Copy Permissions at the bottom of the list to complete the transfer.
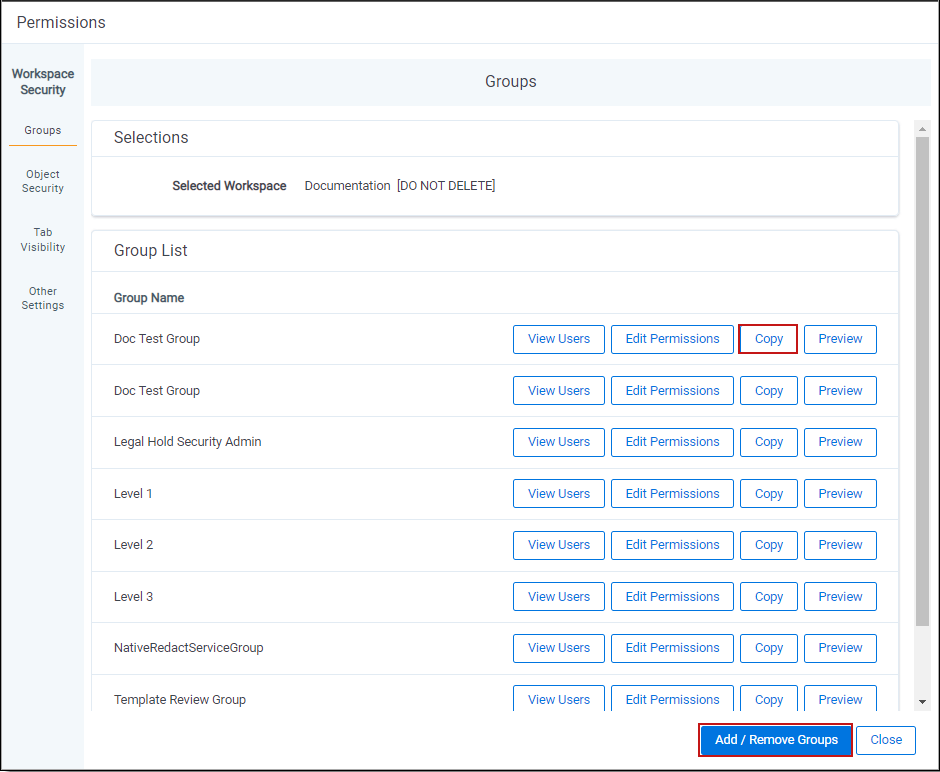
- Preview—preview currently applied security settings for a group. See Preview Security for more information.
- Add/Remove Groups—opens the Add/Remove Groups dialog to grant admin access to groups. See Add/Remove Groups for more information.
A system admin is the only user able to grant other users membership into the System Administrators group. Any user who is not a member of the System Administrators group is unable to add themselves to any group.
Add/Remove Groups
Click the Add/Remove Groups button on the Group Management tab of the Admin Security window to access the Add/Remove Groups window. The Group Management page displays all groups that exist in your Relativity environment.
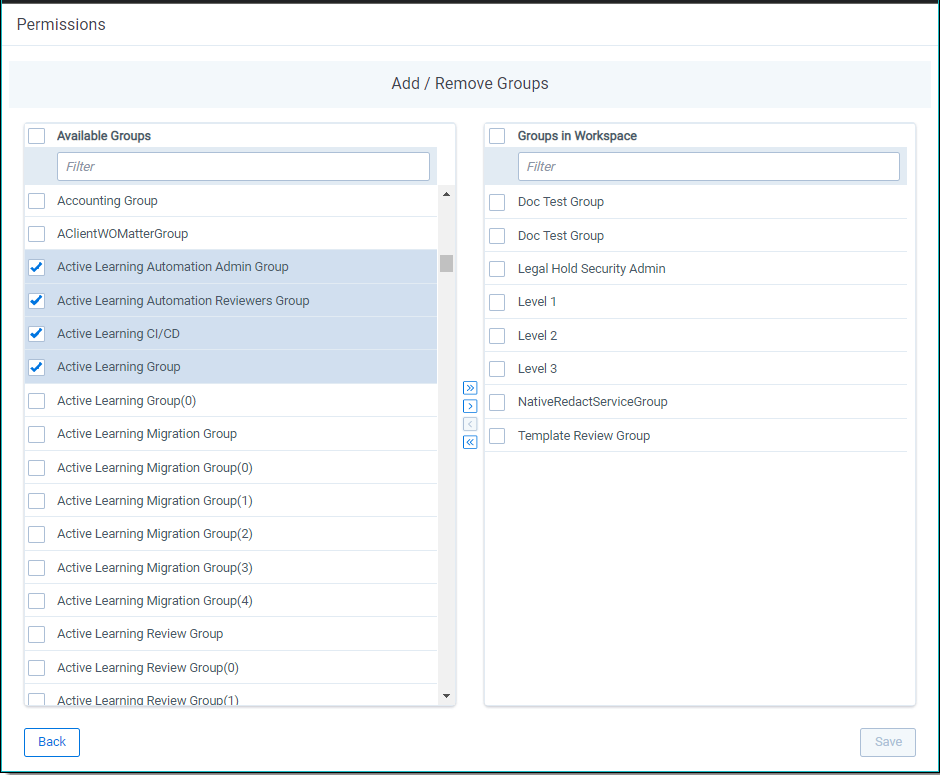
The Add/Remove Groups window displays the following lists:
- Available Groups—lists groups in your Relativity environment not yet granted access to the workspace.
- Groups with Admin Permissions—lists groups granted access to admin permissions.
You must add a group to the Groups with Admin Permissions column to grant the group admin security privileges.
Adding groups to the Groups with Admin Permissions column
To add admin permissions to a group, follow these steps:
- Navigate to Instance Details.
- Click Manage Permissions.
- Click Add/Remove Groups.
- Scroll through the Available Groups list or search for a specific group using the search bar.
- Select one or more groups from the Available Groups list in any order.
- Click Add.
- Click Save.
Removing groups from the Groups with Admin Permissions column
To remove admin permissions from a group, follow these steps:
- Navigate to Instance Details.
- Click Manage Permissions.
- Click Add/Remove Groups.
- Scroll through the Groups with Admin Permissions list or search for a specific group using the search bar.
- Select one or more groups from the Groups with Admin Permissions list in any order.
- Click Remove.
- Click Save.
Features tab
You can set permissions based on features in the system using the Features tab. Rather than managing specific permissions by navigating through the three tabs (Object Security, Tab Visibility, Admin Operations) individually, permissions can be set based on features in the system using the Features tab. Examples of features include Preservation, Production, and Imaging.
Each feature listed consists of a collection of the required permissions for that feature from the other three tabs. Once you enable a feature, its associated permissions are automatically enabled.
Adjusting the settings for individual permissions requires accessing their respective source tabs (Object Security, Tab Visibility, Admin Operations). Editing them from the Features tab is not possible.
Setting permissions at the feature level is intuitive and simplifies the management of permissions within Relativity. With one click, the necessary permissions can be enabled or disabled for a particular feature.
Considerations
Keep these factors in mind when setting Feature permissions:
- Granular permission settings on the Object Security, Tab Visibility, and Admin Operations tabs are the primary source of truth and propagate to features listed on the Features tab. Changes to these permissions from those tabs will also update in the corresponding features.
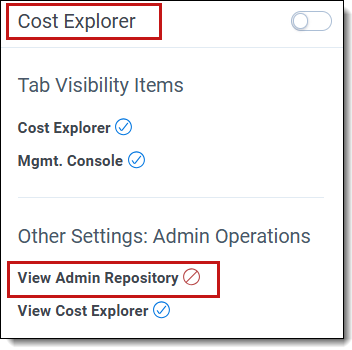
If you remove the View Admin Repository capability on the Admin Operations tab, it will be disabled within its corresponding Cost Explorer feature on the Features tab.
- Changing a specific permission under the Object Security, Tab Visibility, and Admin Operations tab associated with an enabled feature will result in the feature being disabled.
If the Cost Explorer feature is enabled on the Features tab and you disable View Admin Repository on the Admin Operations tab, the Cost Explorer feature on the Features tab is automatically disabled. Additionally, any other feature that included the View Admin Repository capability is also disabled.
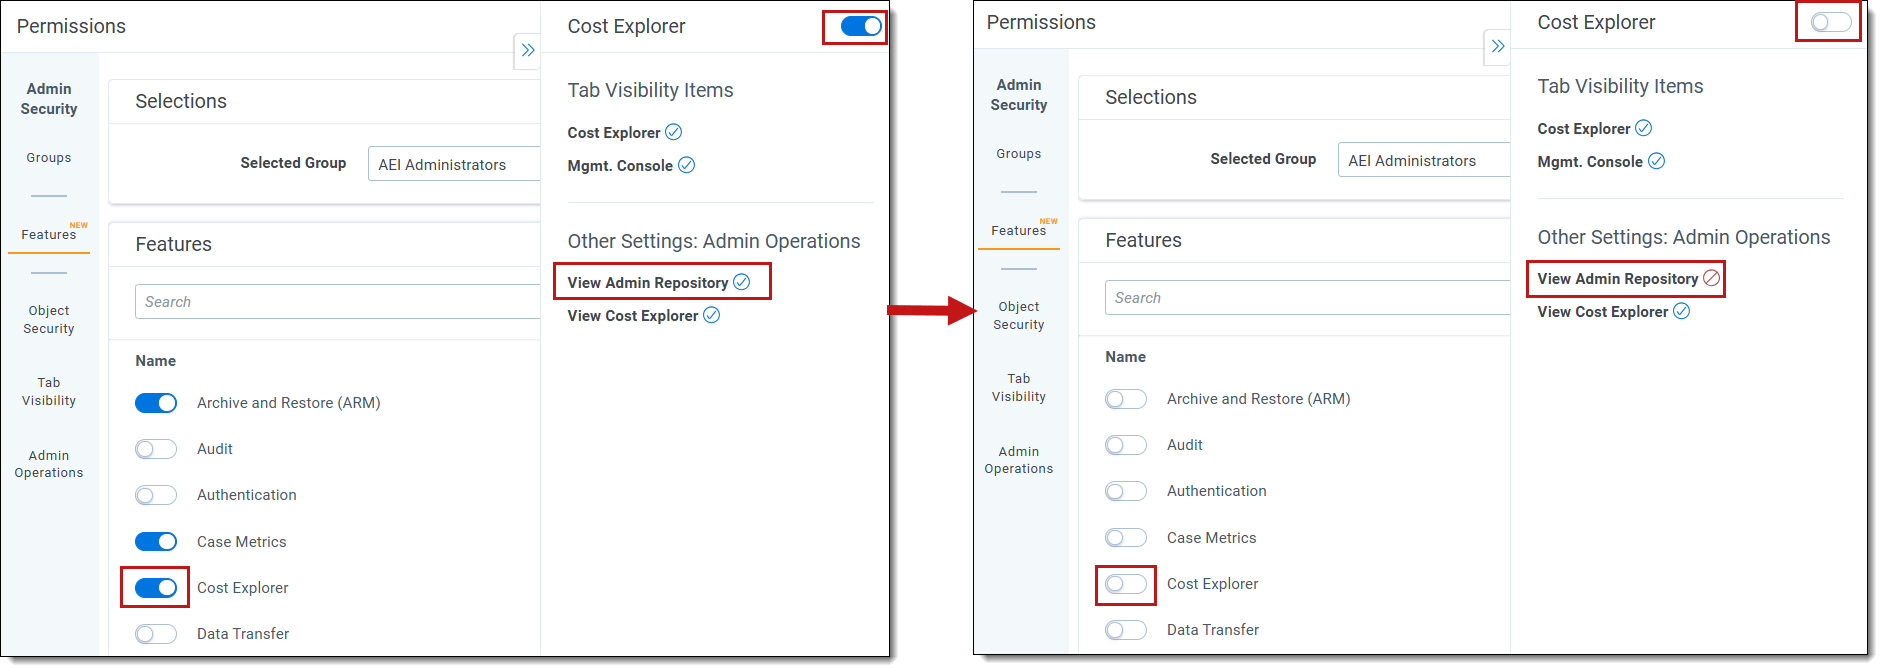
Therefore, if all granular permissions are enabled for a feature, the feature's toggle is enabled. If any of the granular permissions is disabled for a feature, the feature's toggle is automatically disabled.
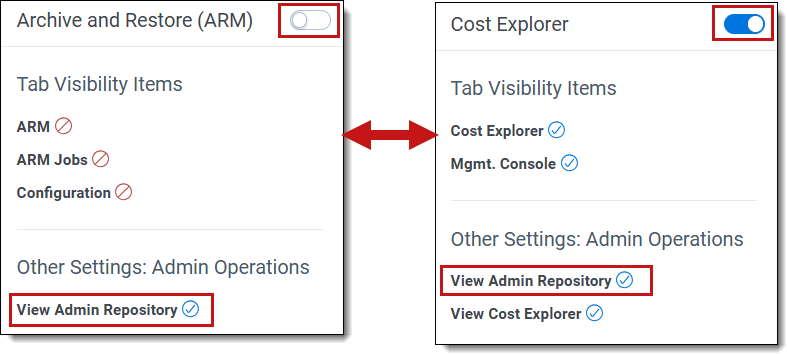
- Disabling a feature on the Features tab disables its associated granular permissions for that feature. However, if a granular feature is part of another enabled feature, then it will remain enabled (blue check mark) on the disabled feature’s See Details panel.
The Archive and Restore (ARM) and Cost Explorer features are enabled, and they share the granular permission of View Admin Repository. If you disable the Archive and Restore (ARM) feature, the View Admin Repository setting remains enabled (blue check mark) on the See Details panel of Cost Explorer because they are included in the enabled Cost Explorer feature.
- Disabling a feature revokes access to all granular permissions associated with the feature that are not currently granted as part of a different enabled feature. Therefore, enabling and then disabling a feature will not necessarily return the group to the state it was previously in. Be sure to examine the Review Permissions Changes dialog to confirm all permissions changes are as expected.
A group has access to two permissions. If you enable a feature for that group which includes those two permissions as well as two additional permissions, the group will then have access to all four permissions. Subsequently, if you disable the feature for the group, all four permissions will be disabled for the group (assuming none of the permissions are part of another enabled feature). The group will not revert to having access to the original two permissions.
Using the Features tab
The Features tab displays a list of features currently available for the selected group in the instance. Click the toggle key next to one or more features to enable or disable them. You can also do the following from here:

- Use the Search bar to locate a particular permission in the list.
- Click See Details to view the list of granular permissions associated with this feature and their settings. They are propagated from the Object Security, Tab Visibility, and Admin Operations tabs. To collapse the details panel, click the double arrow
button. The panel includes:
- Ability to enable or disable the feature’s toggle key from here in addition to doing so from the main Features dialog.
- Current state of each granular permission for the feature. A blue check mark
 indicates the selected group has permission to use this feature (enabled). A red circle
  with a slash indicates the selected group does not have permission to use it (disabled). The state permissions may change based on the toggle key setting.
Frequently asked questions
- Check item-level Security: if the tab is secured against the selected group, it will not be available in the application.
- Check the tab configuration: if the tab’s parent is not visible, it will not appear in the side panel or hamburger menu, but it will still be accessible via Quick Nav.
Object Security tab
With the Object Security tab you can grant admin permissions to Relativity objects.
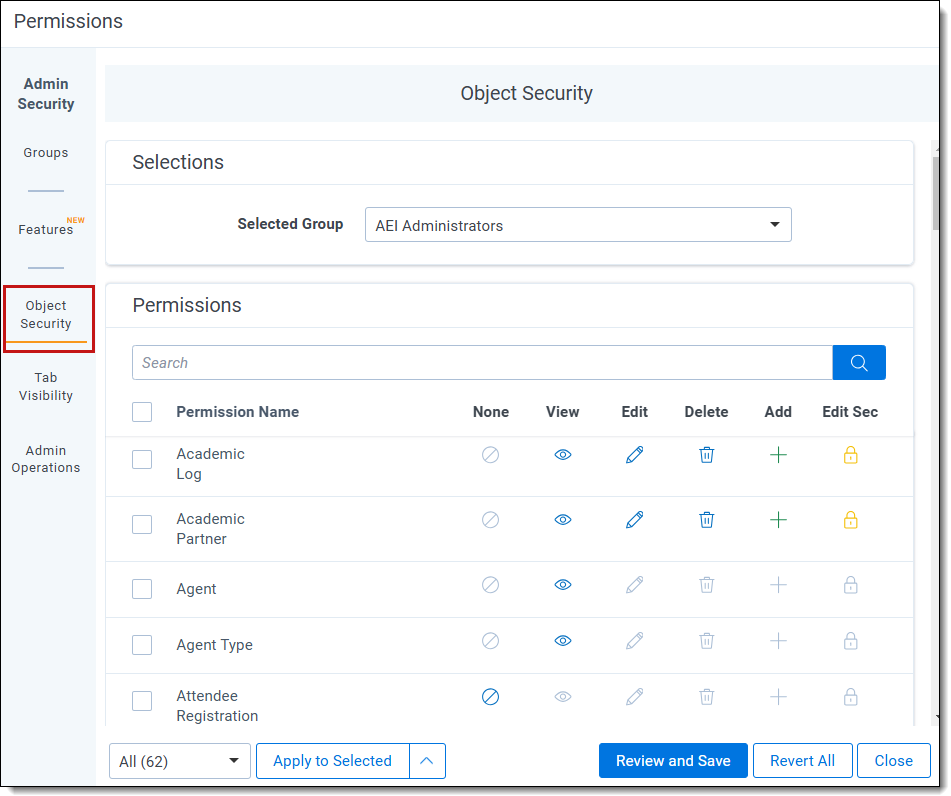
You can apply the following group permission settings to any Relativity object in the Object Security window:
- None
 —denies users access to the object.
 - View
 —view the object. This is the lowest level object permission.
 - Edit
 —edit and view the object.
 - Delete
 —delete, edit, and view the object.
 - Add
 —add new objects. This icon turns blue when the setting is unsaved; once you click Save, the blue icon becomes grey. This icon turns green when you give users this permission both when the setting is unsaved and saved.
 - Edit Security
 —grants users the ability to edit the security of objects. This icon turns blue if you click twice indicating a not applicable status.
See Object list for a complete list of objects and the impact of each assignable security permission.
Tab Visibility tab
With the Tab Visibility tab you can grant a group permission to view admin tabs.
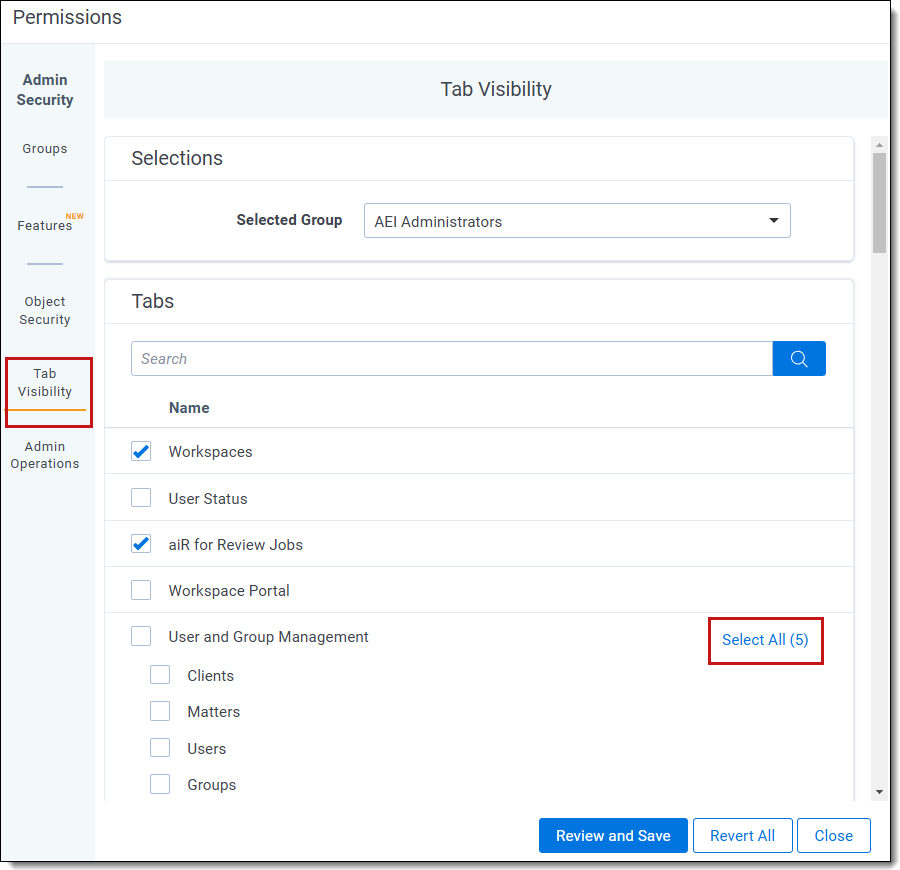
You must grant tab visibility independent of permission settings for users in a group to access a permitted tab. You can make any tab visible by selecting the checkbox in the list. To make all sub tabs visible, click on the parent tab and click Select all (#).
Do not use tab visibility as a sole method of preventing security permissions.
Admin Operations tab
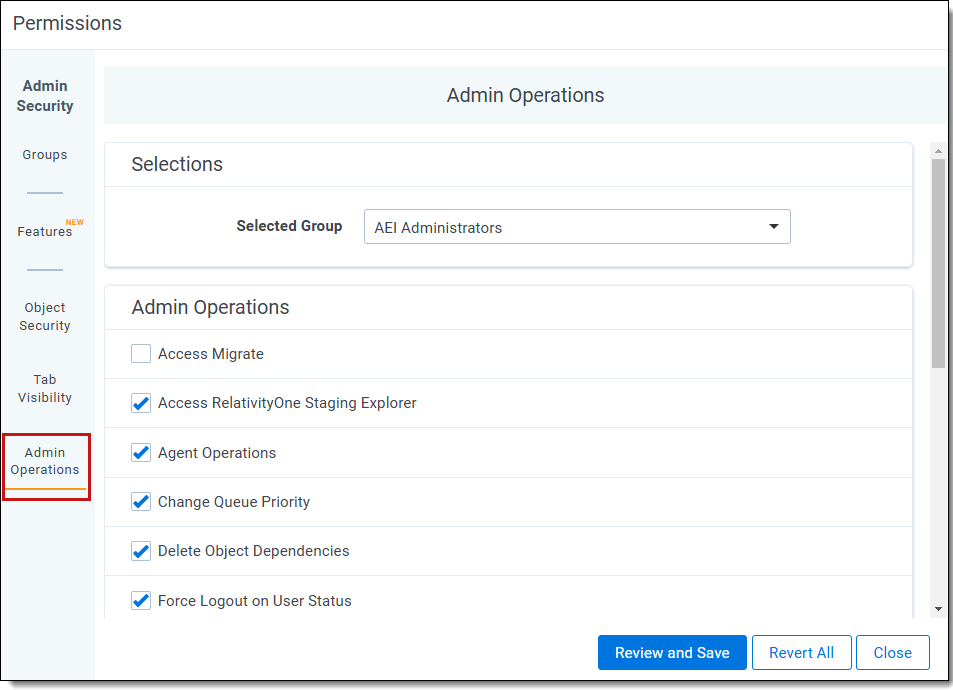
With the Admin Operations tab you can grant admin action permissions to particular groups. See Admin Operations tab for a complete list of actions you can grant through this tab.
For more scenario examples, see Permissions scenarios


