Last date modified: 2026-Jan-06
Hard Delete
This topic provides details on performing a hard delete of processed files as part of the Post-publish Delete (file-level deletion from Review) workflow. Hard deletion provides full deletion of files within Processing when the corresponding document has been deleted out of the Documents tab. When you perform a hard delete, you remove all traces of the file from Relativity, which means the processing database no longer contains a reference to the deleted file or any of the associated metadata.
Hard delete is currently available to select customers, and for these customers, hard delete is the only option when deleting from the Documents tab. For all other customers, we currently only support soft delete from Processing when you delete a file from the Documents tab. This means the file is only unpublished and not fully removed from the system. For details on soft delete, see Post-publish delete.
The hard delete workflow assumes that you've
- Used the Processing duplication workflow to calculate duplicate status on your documents.
- Completed the RelativityOne repository workspace setup.
Setting up for hard delete
To optimize your hard delete workflow, consider creating the following objects. The content in the rest of this topic will refer to the following objects.
Create the following new Document fields:
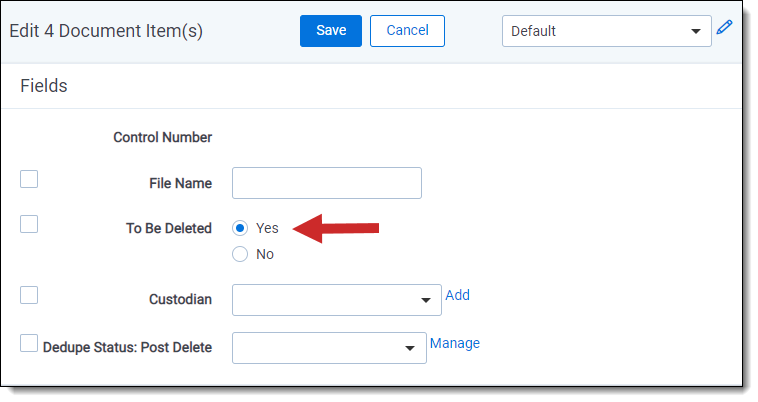
- To Be Deleted - a Yes/No field to identify what needs to be deleted from Processing.
- Duplicate Status: Post Delete - a single-choice field to identify what needs to be promoted in the case of duplicates. Add the following choices to this field:
- Master
- Unique
- Duplicate
- To Be Promoted - a Yes/No field to identify what needs to be promoted into the Repository workspace.
Create a new Document Deletion view with the following fields:
- Processing File ID
- Control Number
- Container ID
- Duplicate Status
- Duplicate Status: Post Delete
- Custodian
- All Custodians
- All Paths
- To Be Promoted
- To Be Deleted
Deleting files from the review workspace
Hard deletion requires first deleting files from the review workspace before you delete from the repository workspace.
To delete published files from the review workspace, perform the following steps:
- Select the documents you want to delete, including their entire families.You must delete entire families when using hard delete. You may see unwanted behavior such as incorrect or no deletions if you do not select complete families.
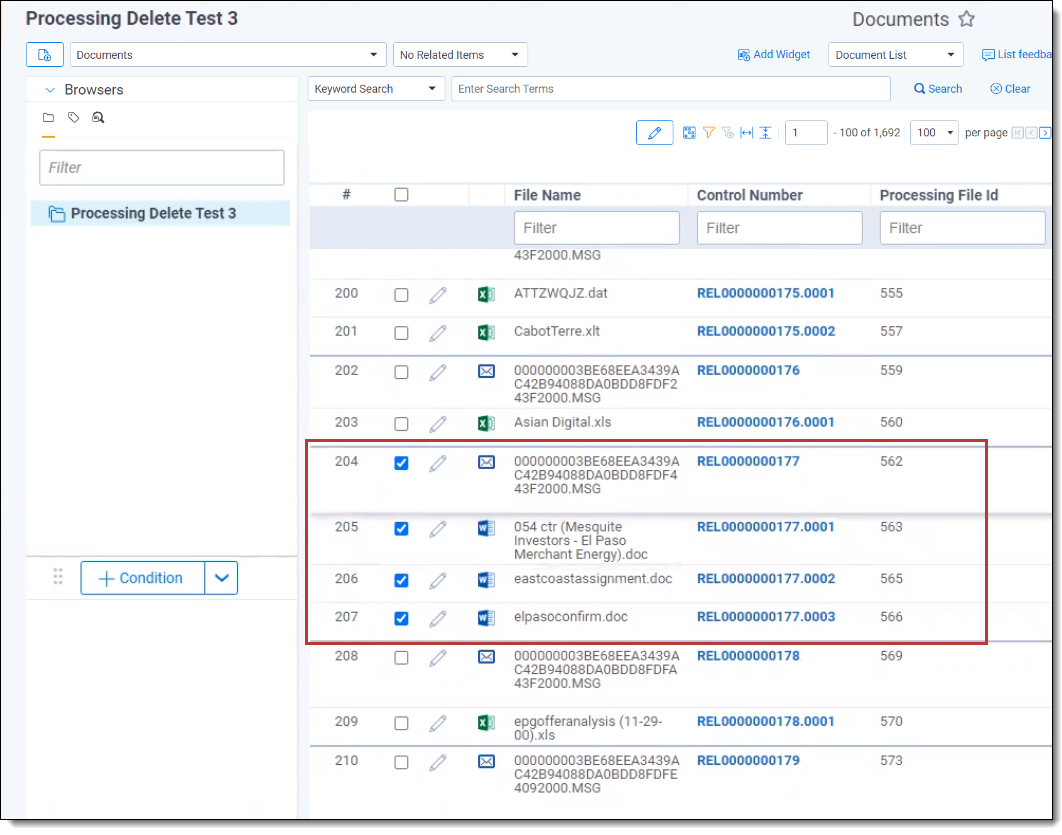
- Select Edit from the mass operations drop-down and select Yes for the To Be Deleted field you created earlier.
- Create a saved search of the documents you just tagged for the To Be Deleted field.
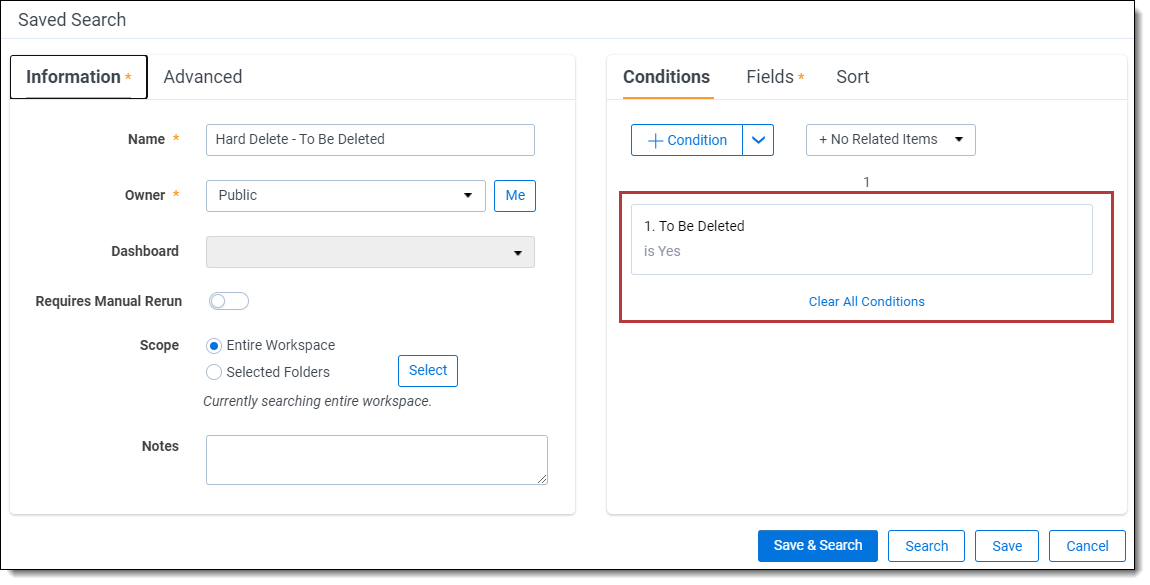
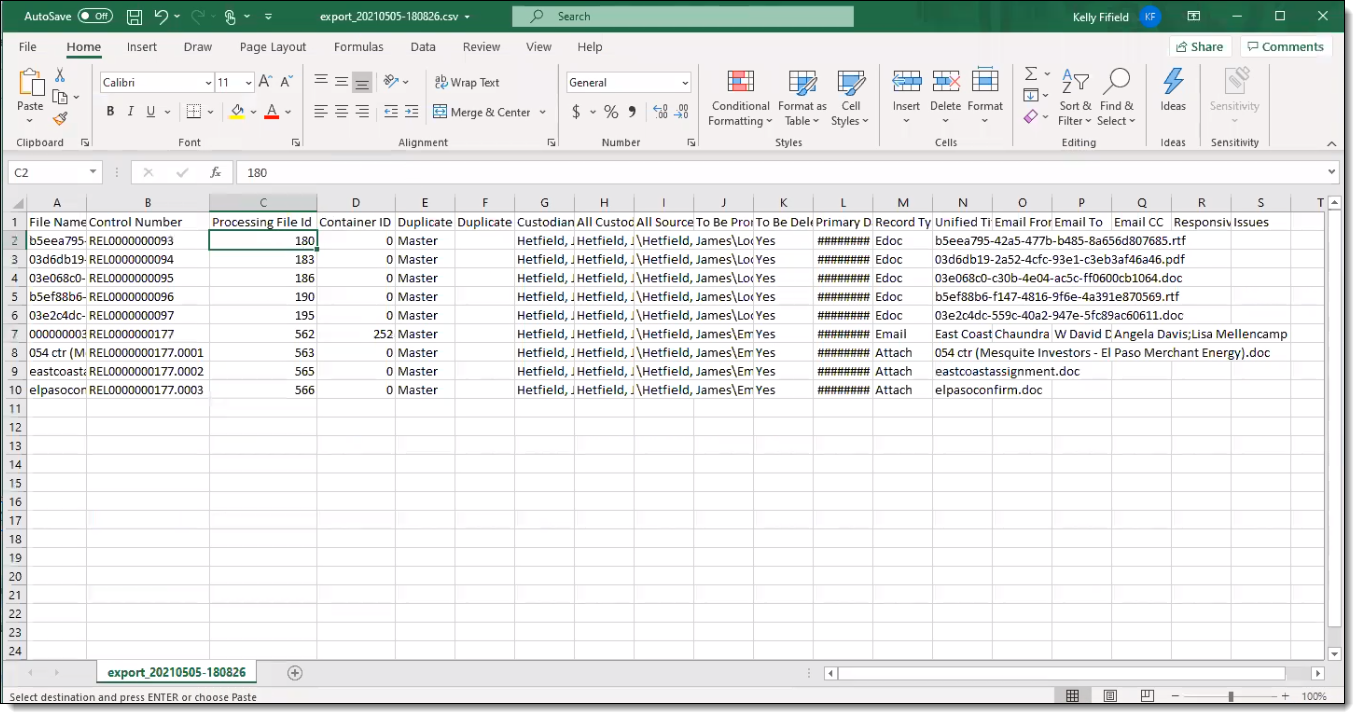
- Export the results of the saved search by selecting all the returned documents and selecting the Export to file mass operation. You can review the file once Relativity exports it. Save the file for future reference.
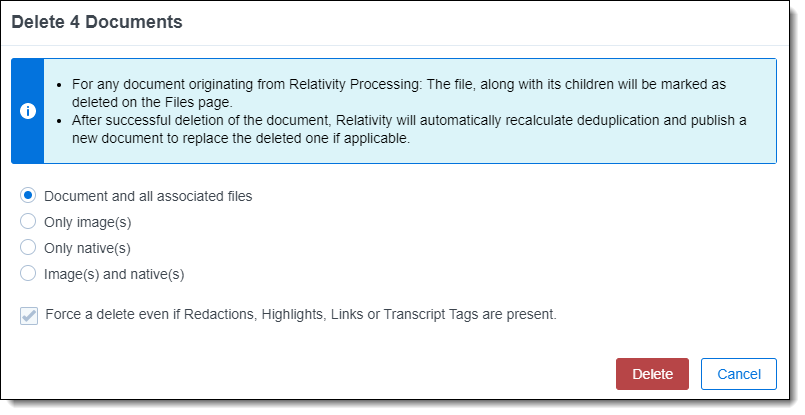
- Delete all documents returned by the saved search from the Documents tab by selecting those documents and selecting Delete from the mass operations drop-down. Select Document and all associated files on the deletion confirmation modal.
Deleting files from the repository workspace
Now that you've deleted files from your review workspace, you need delete the same files from the repository workspace to complete the hard deletion.
To delete files from the repository workspace, perform the following steps:
- Navigate to the Documents tab. Here, you will see master, unique, and duplicate files.
- Select the documents you wish to delete, including their entire families. Select only Masters and Uniques only. Do not select any duplicates.
- Repeat steps 2-5 from above to fully delete files from the repository workspace.
After the documents are deleted from the Documents tab, they are also removed from Processing. If you navigate to the Files tab, you will no longer see the deleted files displayed, nor will you see any associated containers.
You must delete entire families when using hard delete. You may see unwanted behavior such as incorrect or no deletions if you do not select complete families.
Auditing delete actions
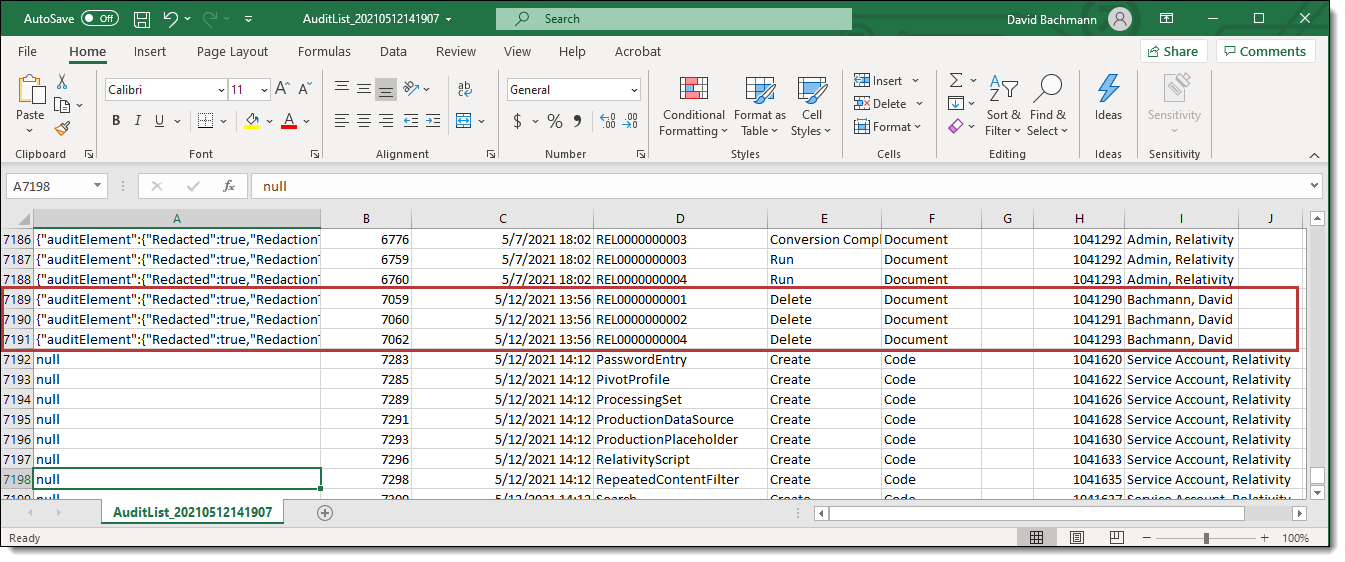
To view which published documents have been deleted, navigate to the Audit tab and filter for the following:
- Action Type = Delete
- Object Type = Document
Metadata deletion typically occurs off-hours. Because of this, the metadata of deleted files won't disappear instantaneously.
Redaction audit fields are as follows:
- Audit ID - Audit ID number of a document that receives an error
- Timestamp - indicates when an audit finishes processing
- Object Name - name assigned to an object
- Action - action the system performs
- Object Type - object type selected
- Execution Time (ms) - displays a sort so you can view which scripts are taking the most time to run
- Object Artifact ID - artifact identifier of an object
- User Name - name of user running the audit
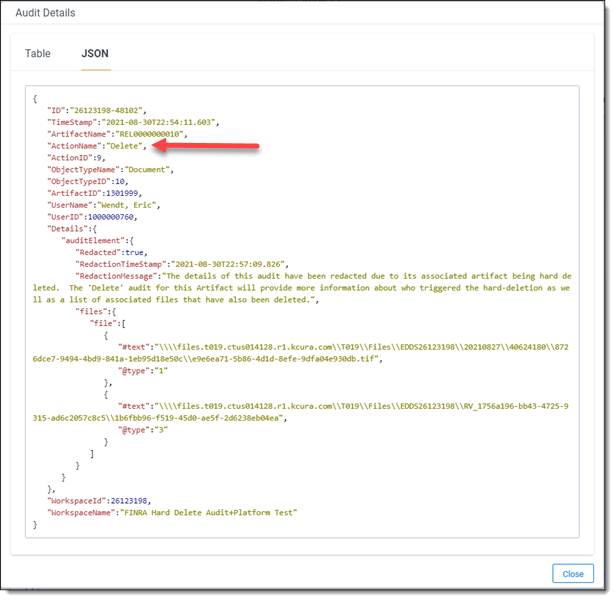
To view detailed information on a specific audit record, open the Details modal and note that the Action Item field reflects the deletion.
You can also use the Export mass operation to export a list of all the Audit records in your workspace. You can then find the deleted documents in the export file.
Relativity Audit
- File locations will be available through the files attribute located under the redaction message on the JSON tab of the Relativity audits.
- This attribute will contain all relativity generated files from the original natives.
- Most commonly standard images and production images.
- Each path will have an @type value associated to it. These values denote the type of generated file associated with the record. The key to these types can be found as follows:
- Standard Image = 1
- Full Text = 2
- Production Image = 3
- Transcript = 4
- PDF = 6
Invariant Log File Export
The invariant log is a CSV file created after you hard delete files. The log contains information about deleted records, including those not deleted.
Navigating to the delete log using the Staging Explorer
Use the following steps to open, review, and act upon information found in the invariant log:
- Login to the RelativityOne Staging Explorer.
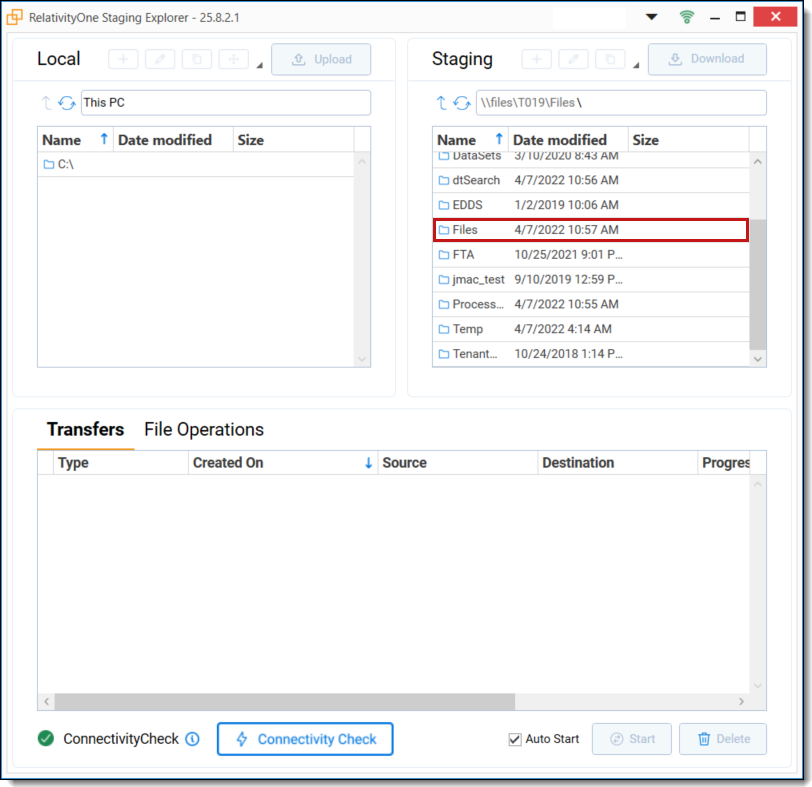
For information on installing and logging into the staging explorer, see RelativityOne Staging Explorer. - Navigate to the \Files\ repository. (Double-click Files to open the repository.)The \Files\ folder is the most common location for the invariant log file. If you do not see the log in the \Files\ folder, contact your system administrator to determine the location of the file on your instance.
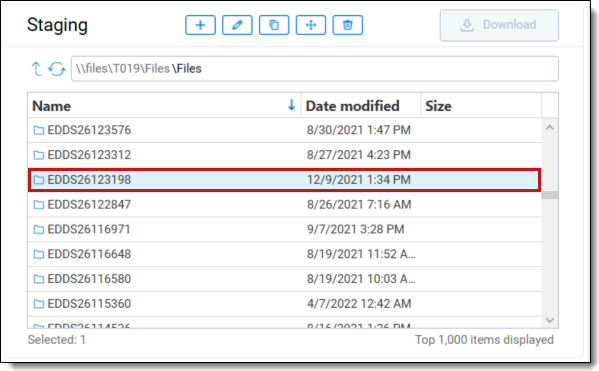
- Locate your workspace based on the ArtifactID.
- Using the ArtifactID, locate the workspace in the staging explorer. Double-click the workspace to drill into the files.
All Relativity workspaces have an EDDS prefix.
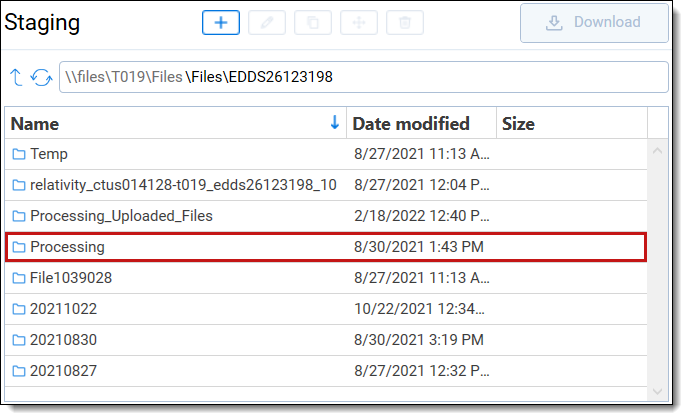
- Double-click the Processing folder.
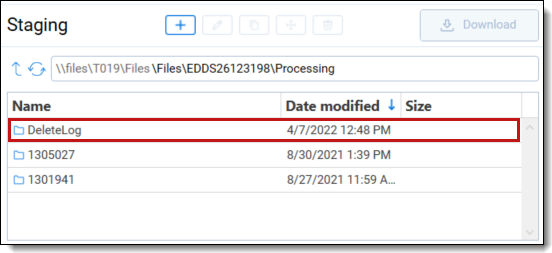
- Double-click the DeleteLog folder.
The DeleteLog will not be present if no deletions have occurred in the workspace. Perform a document deletion first, then navigate to the log.
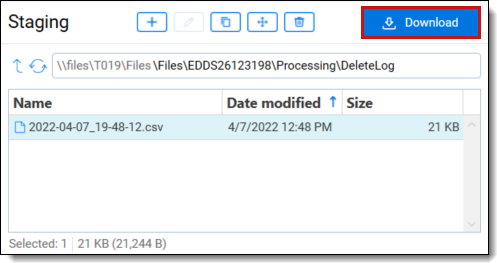
- Select the appropriate CSV file, then click the Download button.
Reviewing the CSV log
- Open the downloaded CSV file in Excel.
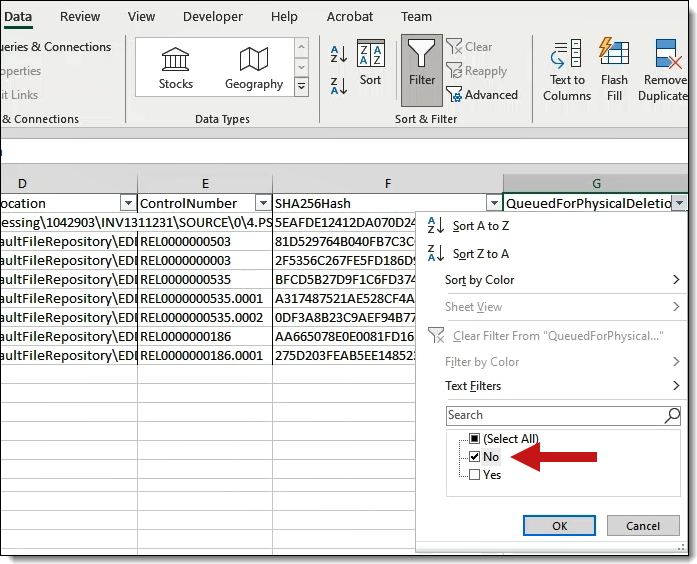
Information in the file includes: - Filter the QueuedForPhysicalDeletion column so that only files that were not deleted are shown.
One of the primary reasons some files are not deleted is because they are shared with another file. The following steps guide you through how to determine the name of the shared file.
- Copy the SHA-256 hash for a file.

- In your workspace, click the Files tab.
- Search for documents using the SHA-256 hash. You should see a list of one or more files that shared the same hash and therefore, you cannot delete.
Special considerations
After performing a hard delete, all traces of the files you deleted have been removed from the system, but you may need to take action in other areas of your workspace to ensure that those deleted files are accounted for.
If you're running any of the following features, make sure to take the actions listed below after file deletion is complete.
Structured Analytics
Perform a full population and analysis to recreate results for removed documents. The following updates are necessary because:
- Email Threading – Inclusives and duplicate spares will be updated.
- Near Duplicates - Identify new principal documents.
- Language ID – Not necessary to run.
- Name Normalization – Not necessary to run.
- Repeated Content ID – Not necessary to run.
Analytics Indexes
Perform a full population and analysis to recreate results for removed documents. We recommend running the indexes once after all deletion and subsequent publishing steps are completed in their respective workspaces.
Backups
Backups are not impacted by hard delete and no further action is required for them.
Cold Storage
If any Cold Storage workspaces contain references to the documents to be deleted, you must reinstate the workspace and follow the delete workflow.
Containers (Processing)
If there are any parent containers associated with the documents you’ve selected and deleted, all those parent containers will automatically be deleted as well.
Data Grid
References to the document regarding Data Grid enabled long text fields are automatically removed as part of the Delete mass operation, as long as you've selected Document and all associated files on the Delete confirmation modal.
Document Transformation
References to the document regarding Document Transformation (Productions, Imaging) are automatically removed as part of the Delete mass operation, as long as you've selected Document and all associated files on the Delete confirmation modal.
dtSearch
Re-run any applicable Search Indexes.
We recommend running the indexes once after all deletion and subsequent publishing steps are completed in their respective workspaces.
Other Jobs in the Workspace
When you perform a mass delete, Relativity will block all other processing jobs in order to support a seamless deletion experience and avoid resource contention. As a result, consider deleting during non-peak hours.
Error Deletions (Processing)
If there are any Invariant errors associated with the documents you’ve selected and deleted, all those Invariant errors will automatically be deleted as well.
Inventory (Processing)
There are no deletions required here or in Inventory reporting.
ROSE
Files in RelativityOne Staging will not be affected by hard delete.


