


Feedback
Last date modified: 2026-Jun-02
Lists
Lists provide a simple way to save a list of objects, such as documents, without specifying the types of conditions you do for a saved search. Since lists aren't based on conditions, they remain constant unless you replace an existing list.
Lists are especially useful when saving a list of sampled items. When using Sampling, you can save a random sample set of documents as a list in order to access the same sample set again later. See Sampling. When saving a list of documents, you can view the list later by creating a saved search with the list set as search criteria. The Lists console includes a command to automate the creation of a saved search from a list.
Auditing is performed when a user creates or deletes a list. Individual documents are not audited when added to a list.
See this related page:
Enabling lists on an object
The option to save items to a list is available on any object type that has the Lists field enabled.
To enable an object to be saved to a list:
- Navigate to the Object Type tab.
- Click Edit on an object type.
- Toggle the Lists Enabled field on..
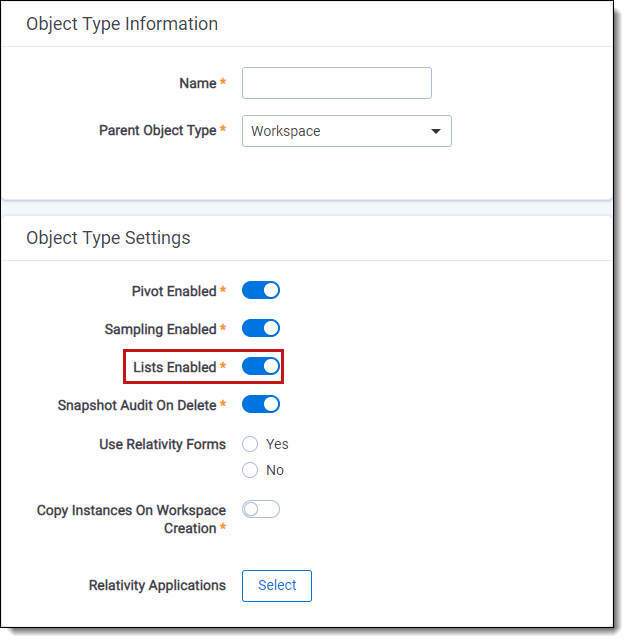
- Click Save.
After enabling Lists for an object, you can perform a Mass Save as List operation to save a search as a list. For more information, see Mass Save as List.
Viewing items in a list
To view items in a saved list, create a new saved search or view based on the list.
The Create Search from List button has been deprecated. To create a search from a list, create a new saved search that includes the desired list as a condition.
Incorporating a list of documents as a search criterion in a saved search
Follow these steps to create a new saved search using a saved list of documents as the search criteria:
- On the Documents tab, click the Saved Searches browser icon.
- Click Create New Search.
- Type a name for the saved search in the Name field.
- Add a condition with the following column settings:
- Field—select Lists.
- Operator—select these conditions.
- Value—select the following value criteria:
- Field—select Lists.
- Operator—select any of these.
- Value—select one or more saved lists to include in the search criteria.
- In the Fields category, select the fields you want to include when viewing your saved search results. Select the Lists field to show the list(s) with which an object is associated.
- Click Save to save the search. Or, click Save & Search to save and execute the search.
Creating a view from a saved list
To view the items saved as an object list, create a view with a field condition using the Lists field. Follow these steps to create a new view that displays the items saved in a list for any object type.
- Click the object's tab in your workspace. For example, if the name of the object type for which you saved a list of items is Media, click the Media tab.
- Click the Create View icon.
- Type a name for the new view in the Name field.
- Verify Object Type is set to the object type for which you saved a list.
- Click Next.
- Add the fields you want to include in your view to the Selected Fields box.
- Click Next.
- Add a condition with the following settings:
- Field - select Lists.
- Operator - select these conditions.
- Value - click the ellipsis and select the following Lists criteria:
- Field - select Lists.
- Operator - select any of these.
- Value - select and add one or more saved lists to include in your view.
- Click Next.
- (Optional) Select one or more fields with ascending or descending sort order for your view.
- Click Save.
- Select your new view from the view drop-down menu on your object tab to display the saved list of items.
For more information on creating a view, see Creating a view with field categories.