SSO setup
Centralized Authentication supports single sign-on (SSO). A guided wizard on the Authentication Provider tab walks you through the setup. You can configure your identity provider, test the connection, and enable it for your users.
The wizard is the same for every provider. Each provider topic describes only the settings that differ, so start here first.
Supported identity providers
The wizard supports the following identity providers:
- Okta (Org2Org)—connects an Okta org-to-org integration using private key JWT authentication.
- Microsoft Entra ID—connects a Microsoft Entra ID application.
- Google Workspace—connects a Google Cloud client.
- Custom SAML—connects any SAML 2.0-compliant identity provider.
- Custom OIDC—connects any OpenID Connect (OIDC)-compliant identity provider.
Each provider uses the same wizard. The provider topics cover only the settings unique to that provider.
To use your existing SSO provider with Centralized Authentication, re-register the connection in Relativity with the wizard. For best results, open your identity provider in a second window, or work with someone who has access to it.
Prerequisites
Complete these items before you register an SSO provider:
- Confirm your browser allows traffic to login.relativity.one, *.okta.com, and *.oktacdn.com.
- Open your identity provider in a separate browser window.
- Confirm you have administrator access to your identity provider, or work with someone in your organization who does.
Registration workflow
Registering an SSO provider requires you to move between Relativity and your identity provider (IdP). The following table shows where each part of the setup takes place.
| Task |
Where you do this |
| Start the wizard and select your identity provider type. |
Relativity |
| Create or configure an application for Relativity. |
Identity provider |
| Enter the connection values from your application. |
Relativity |
| Add the redirect callback URI and grant user access. |
Identity provider |
| Test the connection, then finish the wizard. |
Relativity, then sign in to your identity provider |
SSO setup wizard
The wizard walks through the same stages for every provider. You create an application in your identity provider, enter the connection settings, exchange a redirect URL, grant access, and test the connection. The connection settings differ by provider, so see your provider topic for the exact fields.
Registering an SSO provider
To register an SSO provider:
- Navigate to the Authentication Provider tab.
- Click New SSO Provider.
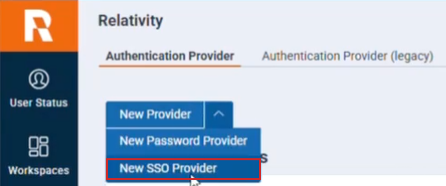
- Enter a display name.
- Select your identity provider, then click Next.
- Create or configure an application in your identity provider. For the steps, see the topic for your provider.
- Enter the connection settings the wizard requests. The fields vary by provider.
- Copy the redirect URL from the wizard, and paste it into the sign-in redirect field in your identity provider.
- Grant, or confirm access to the appropriate users or groups in your identity provider.
- Click Test Connection. A window opens and prompts you to sign in to your identity provider.
- Complete the sign-in prompt. A green check mark confirms success, and a red error indicates a problem to resolve.
- Click Finish. The new provider appears on the Authentication Provider tab.
If your identity provider requires multi-factor authentication (MFA), complete the MFA prompt during the connection test.
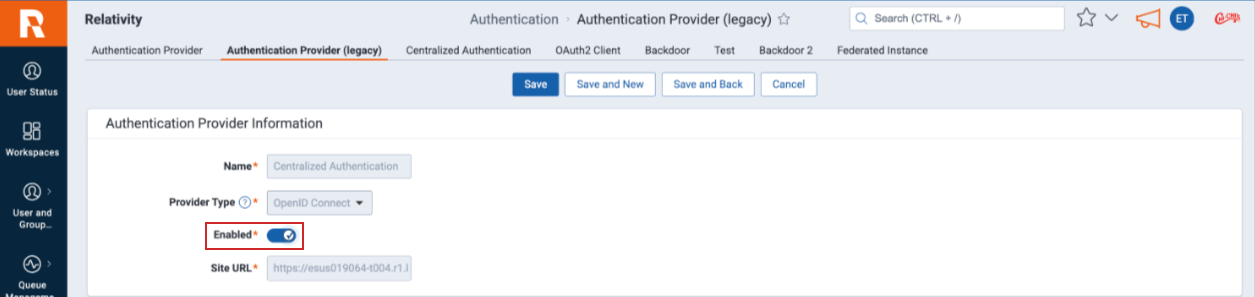
If your instance is currently migrating to Centralized Authentication, follow this step to complete the transition. After you test the connection, enable the Centralized Authentication provider.
On the Authentication Provider (legacy) tab, open the Centralized Authentication provider. Set the Enabled toggle to on, then click Save. This will update your login page to the Centralized Authentication login page, and you will no longer see the legacy login options.
Editing an SSO provider
You may need to update an SSO provider to change its name or, more commonly, to rotate the certificate or secret. To do this, edit the SSO provider and then use Test Connection to confirm the configuration.
You must update or rotate your own SSO certificate or client secret. Relativity support cannot perform this action for you.
To edit an SSO provider:
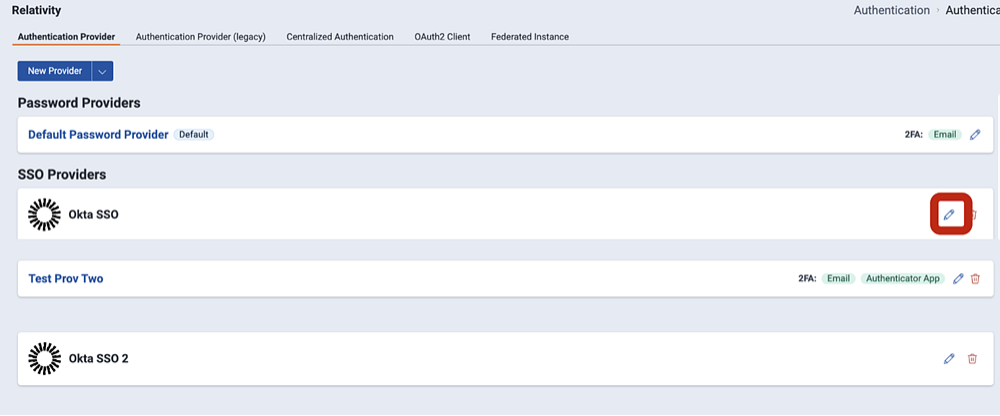
- On the Authentication Provider tab, find the provider you want to change.
- Click the Edit icon (pencil). The wizard reopens.
- Update the values you want to change.
- Complete the wizard to apply your changes.
Considerations
Review the following before and after setup:
- To use an existing SSO provider with Centralized Authentication, re-register the connection in the wizard.
- Trusted IPs for SSO providers are configured in your identity provider, not in Relativity.
- SSO users do not need to be sent nor accept an invitation from Relativity. You create the user in Relativity and grant access through your identity provider.
- Ensure the user email address is the same between the two
- The connection fields differ by provider. See your provider topic for the required fields.
See these related pages:


