Okta (Org2Org)
Okta Org2Org connects an Okta org-to-org integration to Relativity as a single sign-on (SSO) provider. Okta Org2Org authenticates with a private key JWT, so it does not use a client secret.
This topic covers the settings specific to Okta Org2Org. For the shared wizard steps, see SSO setup.
This documentation contains references to third-party software, or technologies. While efforts are made to keep third-party references updated, the images, documentation, or guidance in this topic may not accurately represent the current behavior or user interfaces of the third-party software. For more considerations regarding third-party software, such as copyright and ownership, see
Terms of Use.
Before you begin
Complete these items before you configure the provider:
- Create an Okta org-to-org integration in your Okta org.
- Confirm you have administrator access to your Okta org.
- Review the prerequisites in Prerequisites.
Okta Org2Org settings in Relativity
When you reach the connection screen in the wizard, complete these fields:
- Provider Name—enter a name for the connection.
- Okta Org URL—enter your Okta org URL. Copy it from the browser address bar, and remove admin from the address.
- Client ID—enter the Client ID from your Okta org-to-org connection. To get this value, see Getting the Client ID from Okta.
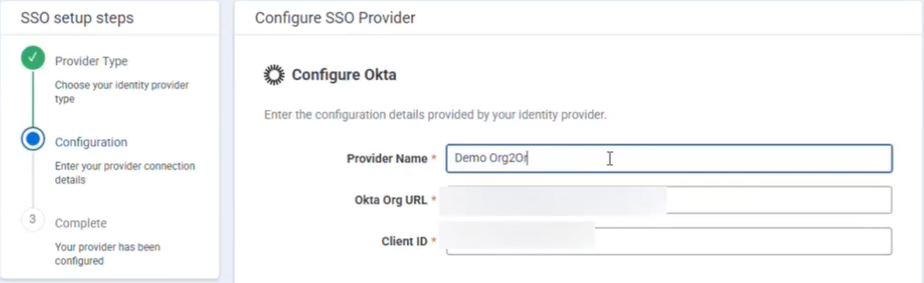
Okta Org2Org uses private key JWT authentication. You do not enter a client secret for this provider.
Getting the Client ID from Okta
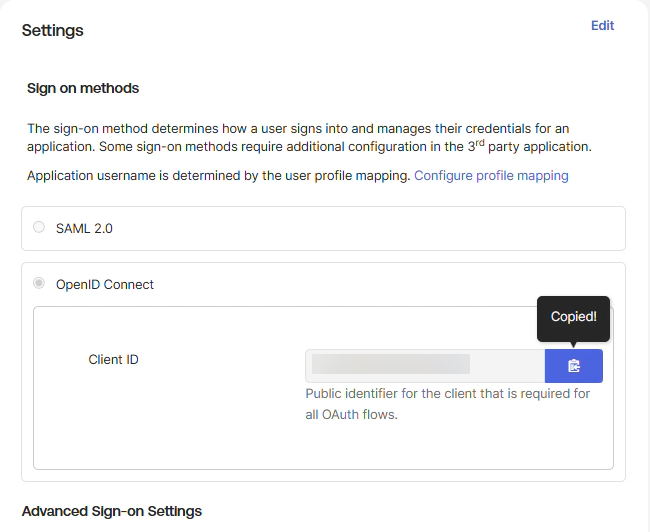
Generate the Client ID in your Okta org-to-org connection before you enter it in Relativity.
To get the Client ID:
- In Okta, open your org-to-org connection.
- On the Sign On tab, click Edit.
- Select OpenID Connect.
- Click Save. Okta generates a Client ID.
- Copy the Client ID.
Completing the connection in Okta
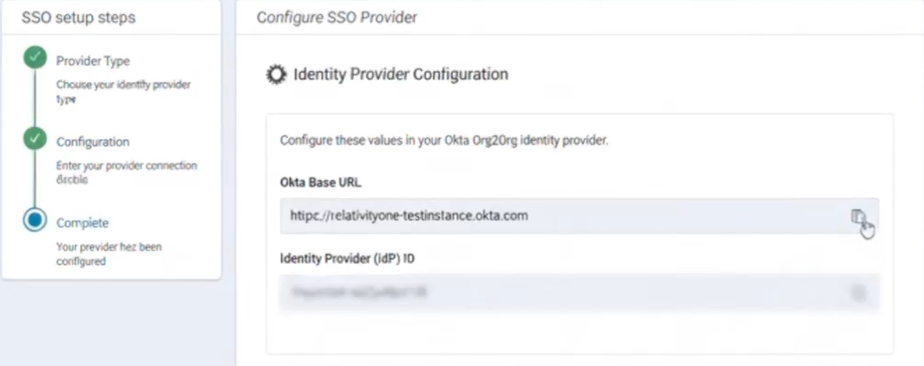
After you enter the Relativity settings and continue, the wizard generates two values. Copy each value into your Okta org-to-org connection.
To copy the Okta base URL value:
- In the wizard, copy the Okta base URL value.
- In Okta, open the org-to-org connection.
- On the General tab, click Edit.
- Paste the value into the Base URL field.
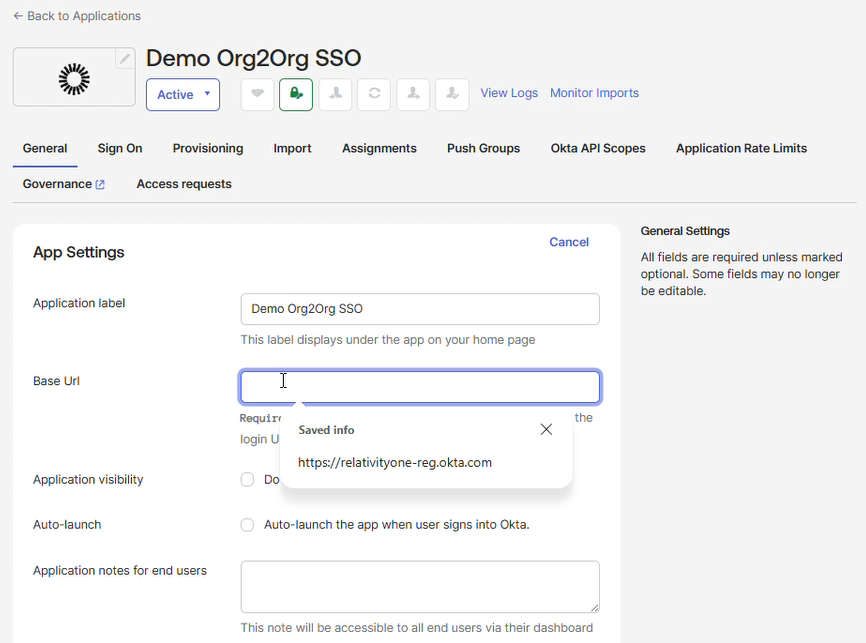
- Click Save.
To copy the target org IdP value:
- In the wizard, copy the target org IdP value.
- In Okta, on the Sign On tab, click Edit.
- Paste the value into the Target org IdP field.
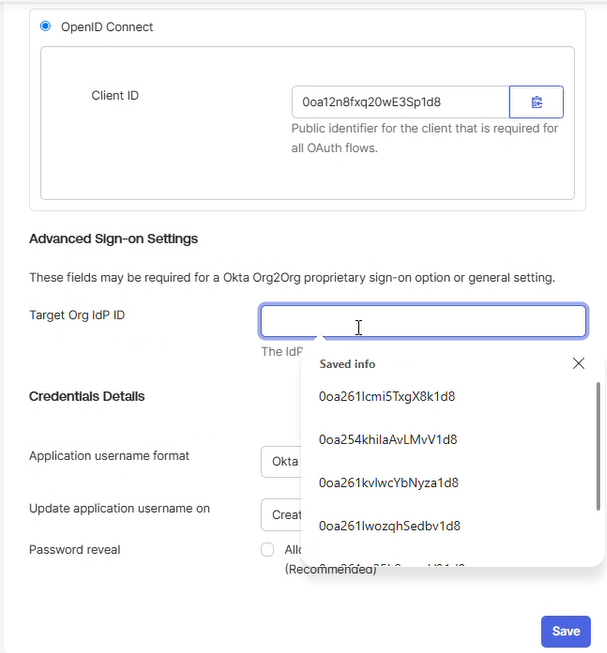
- Click Save.
Assigning users in Okta
Before you test the connection, assign your users to the application in Okta.
To assign users to the application:
- In Okta, navigate to the Assignments tab and click the Assign button.
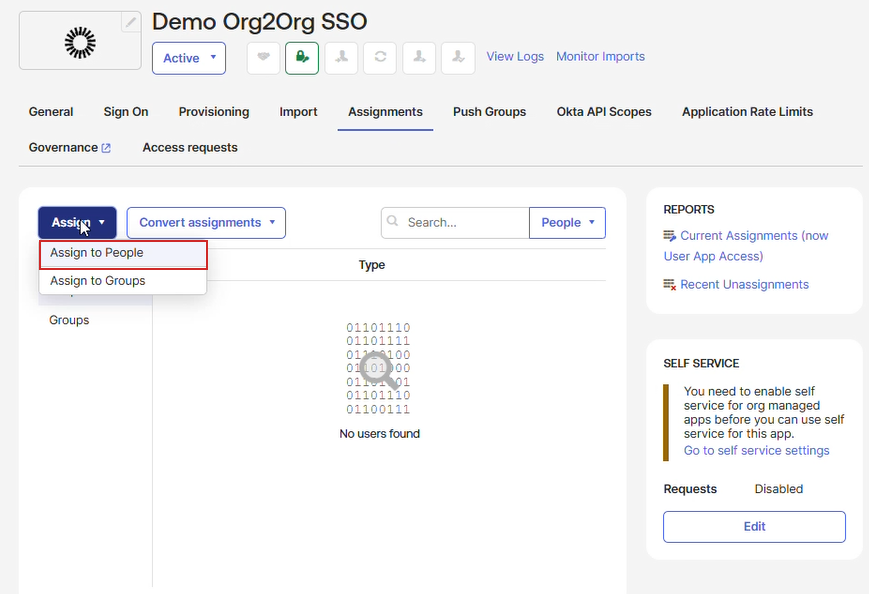
- Assign the user or group and click save.
If you do not assign a user in Okta, the connection test fails for that user.
Testing and enabling the provider
To test the connection and finish setup, follow the shared steps in Registering an SSO provider. The test connection triggers a login to your Okta org using the configured settings. A green check mark confirms success, and a red error indicates a problem to resolve.
See these related pages:


