Microsoft Entra ID
Microsoft Entra ID connects an Entra ID application to Relativity as a single sign-on (SSO) provider using OpenID Connect.
This topic covers the settings specific to Microsoft Entra ID. For the shared wizard steps, see SSO setup.
This documentation contains references to third-party software, or technologies. While efforts are made to keep third-party references updated, the images, documentation, or guidance in this topic may not accurately represent the current behavior or user interfaces of the third-party software. For more considerations regarding third-party software, such as copyright and ownership, see
Terms of Use.
Before you begin
Complete these items before you configure the provider:
- Register an application for Relativity in Microsoft Entra ID.
- Confirm you have administrator access to the Azure portal.
- Review the prerequisites in Prerequisites.
Microsoft Entra ID settings in Relativity
When you reach the connection screen in the wizard, complete these fields:
- Name—enter a name for the connection.
- Client ID—enter the Application (client) ID from your Entra ID application.
- Client Secret—enter a client secret that you create in Entra ID.
- Issuer URL—enter the issuer from your application endpoints.
- Authentication endpoint—enter the OAuth 2.0 authorization endpoint (v2.0).
- Token endpoint—enter the OAuth 2.0 token endpoint (v2.0).
- JWKS URI—enter the JWKS URI from your application endpoints.
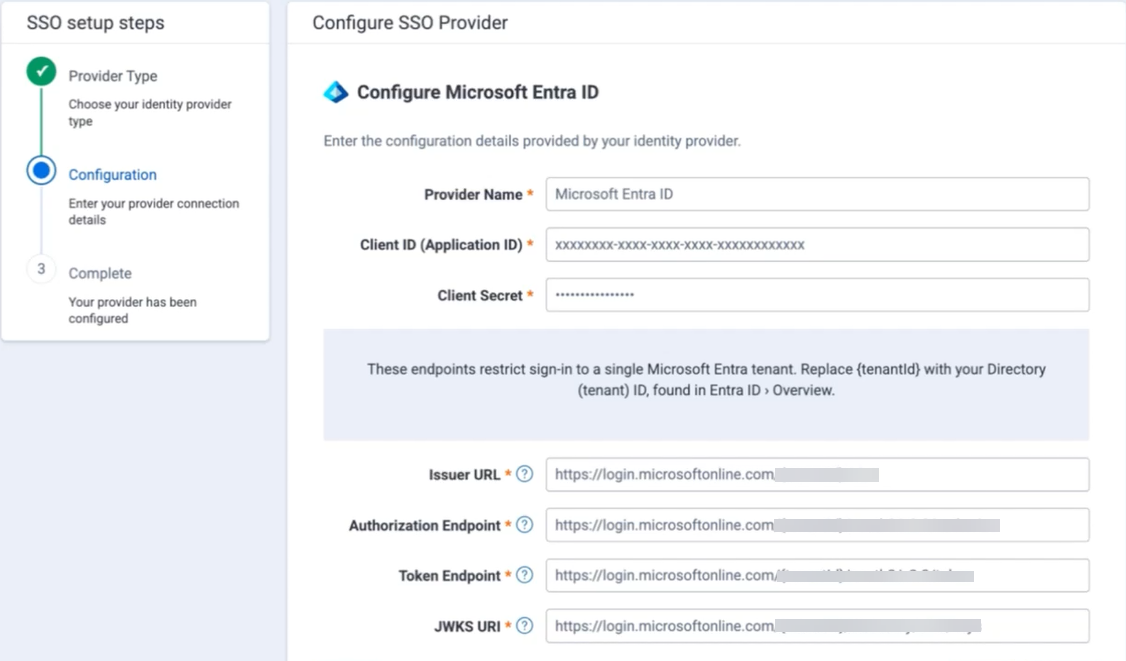
If you have your Entra ID tenant ID, you can enter it to populate the endpoint values instead of entering each endpoint separately.
Getting the values from Entra ID
Collect these values from your application in the Azure portal before you enter them in Relativity.
To get the values:
- In the Azure portal, open your application registration.
- Copy the Application (client) ID.
- Create a client secret.
- Copy the client secret value.
- Click Endpoints.
- Copy the following values:
- the issuer
- the OAuth 2.0 authorization endpoint (v2.0)
- the OAuth 2.0 token endpoint (v2.0)
- the JWKS URI
Adding the redirect URL in Entra ID
After you enter the Relativity settings and continue, the wizard generates a redirect URL. Add it to your Entra ID application.
To add the redirect URL:
- In the wizard, copy the redirect URL.
- In the Azure portal, open your application registration.
- Click Authentication.
- Add the redirect URL under the Web platform.
- Click Save.
Assign your users to the application in Entra ID so they can sign in.
Granting admin consent
An administrator must grant consent for the User.Read permission. This consent lets Relativity read the resources it needs in Microsoft Entra ID.
Testing and enabling the provider
To test the connection and finish setup, follow the shared steps in Registering an SSO provider. The test connection triggers a login to your Okta org using the settings configured. If your organization requires multi-factor authentication (MFA), complete the MFA prompt.
See these related pages:


