


Feedback
Last date modified: 2026-Jul-17
Microsoft Entra ID provider
Microsoft has renamed Azure Active Directory (Azure AD) to Microsoft Entra ID. This site has been updated to reflect the name change, where applicable. Refer to Microsoft documentation for more information.
Relativity can import Entity (Employee/Custodian) data from Microsoft Entra ID, formerly known as Azure Active Directory, through Integration Points. The following prerequisites must be established:
- In Relativity:
- You will need to install Integration Points into your workspace. See Installing Integration Points for details.
- Once Integration Points is installed, you will then need to install the Entra ID provider application. To do so, follow the steps:
- Go to the Files tab in Community and click Relativity Applications.
- Locate in the library and download RIP_AAD_Provider.rap file. The old naming convention is temporary.
- Extract the downloaded archive.
- Use the extracted RAP file for installing Entra ID application provider in your Application Library in Relativity.
- The application name is RIP AAD Provider.
- The old naming convention is temporary.
- In Microsoft Azure:
- Set up an application in Microsoft Azure which can be used to configure an Integration Point in Relativity.
- Only an Application Administrator with access can create an application, find credentials, and delete an application.
- If you do not have permissions, contact your admin.
- For more information on Application Administrators, see Microsoft’s documentation.
- Set up an application in Microsoft Azure which can be used to configure an Integration Point in Relativity.
- The final step is to import Microsoft Entra ID into Relativity. For more information, see Importing from Microsoft Entra ID.
This documentation contains references to third-party software, or technologies. While efforts are made to keep third-party references updated, the images, documentation, or guidance in this topic may not accurately represent the current behavior or user interfaces of the third-party software. For more considerations regarding third-party software, such as copyright and ownership, see Terms of Use.
Registering an Azure application and credentials
To create your application ID and secret, you must have Application Administrator privileges to log into your Azure Portal and register an app.
Start with registering your application in the Azure portal by following the steps below.
The listed permissions and roles are required and supported by Relativity.
- Relativity does not support substitutions or reduced permissions.
- You can submit requests for alternative or reduced permissions as product feedback.
These steps must be completed by a Microsoft 365 administrator.
- Open your Azure Portal.
- Click Microsoft Entra ID (formerly known as Azure Active Directory).
- Click App registrations.
- Click New Registration to display the Register an application page.
- Enter an application name in the Name field.
- Accept the default setting, Accounts in this organizational directory only, as the supported account type.
- Click Register.
- Once the application is registered, make note of the Application (client) ID and Directory (tenant) ID for use later when configuring the data source in RelativityOne Collect.
Next, from the app's page, add permissions to the web API by following the steps below:
- Click API Permissions.
- Click Add a permission.
- Click Microsoft Graph.
- Select Application Permissions.
- Select the following options from the Application Permissions section:
- Directory – Directory.Read.All
- Group – Group.Read.All
- User – User.Read.AllThis permission is required if Filter by Group functionality is used.
- Click Add Permission.
- Click Grant Permission.
Finally, grant Admin consent for the API by following the steps below:
- Click the API Permissions tab.
- Click Grant admin consent for [tenant].
- In the pop-up window, click Accept.
Finding Azure credentials
If an application is already created and you need to find the application information to complete the Source Connection step, follow the steps below in the Azure Portal. For more information, see relevant Microsoft documentation on the Microsoft site.
- Open your Azure Portal.
- Click Microsoft Entra ID (formerly known as Azure Active Directory).
- Navigate to Enterprise applications.
- In the list of applications, locate and click on your application.The application page displays.
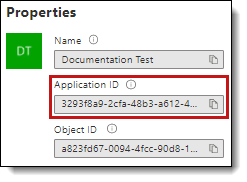
- Navigate to Properties.
- Click the copy icon next to the Application ID. The ID is copied to your clipboard to use as needed.
Removing application access
Removing access to an application can be done outside of Relativity in Microsoft Entra ID. To remove access, follow the steps below in the Azure Portal:
- Click Microsoft Entra ID (formerly known as Azure Active Directory).
- In the navigation menu, click Enterprise applications.
- In the list of applications, locate and open the desired application.
- In the application, click Delete.