


Feedback
Last date modified: 2026-Jul-17
Creating Case Dynamics reports
You can create offline reports to view objects like facts, issues, key people, interview questions, and related documents. The report can be customized to display the objects you wish to view as well as any relevant fields using a custom view. You can also hide objects that do not need to be included in the report by creating a custom layout. This is a convenient feature for reviewing case information while preparing for and during interviews, depositions, and trial.
Offline report date formatting
The date formatting in offline reports is determined by your internet browser settings and not your operating system. The date format that is selected in your browser when creating an offline report will persist even if you email the report to someone else who has a different date format selected for their internet browser or operating system.
You can change the date format of an exported offline report by opening it in Excel. Click the Number format option from the Number section of the Home tab. Select the Date category and select a date format option from the Locale (location): drop-down menu.
Create an offline report
To create an offline report:
- Navigate to the Report Set tab.
- Click New Reports.
- Enter field information in the Settings section.
- Click Save.
- Click on the object tab you would like to include in the offline report.
- Click Link.
- Select the desired data you'd like to include in the report and click on the Move selected from left to right icon.
- Click Apply. The selected fact, issue, person, question, or document appears under their respective tab.
- Select a view for the tab that contains the fields you wish to see in the offline report. If you select a default view, facts are sorted in the report by date in ascending order (oldest to most recent). Issues, key people, and interview questions are sorted by name in alphabetical order. The default views are Offline Facts, Offline Issues, Offline People, Offline Interview Question, and Offline Report Key People Case Dynamics.
Optionally, you can edit a view or create a new view using the drop-down menu. Using either of these options takes you to the View tab and you can return to the Report Set tab when done.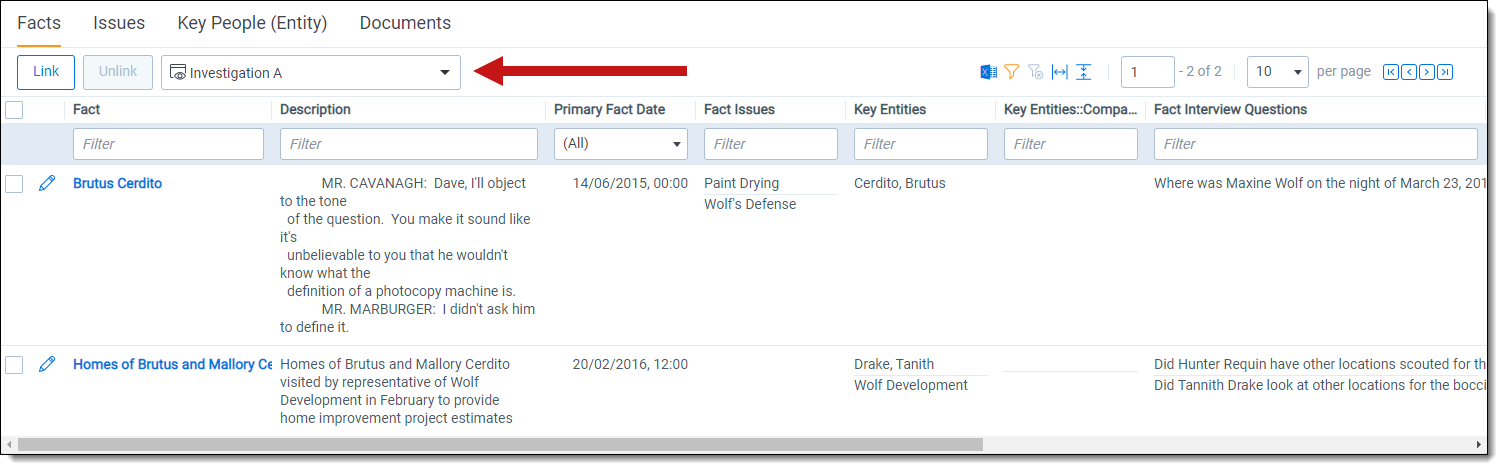
- Repeat steps 5-9 until you have finished linking all of the objects you wish to see in the offline report.
- From the Report Set Console, click Generate Report. The aggregate file size limit for an offline report is 1 GB.
- Save the .zip file to a desired location.
- Open and extract the .zip file to view the offline report.
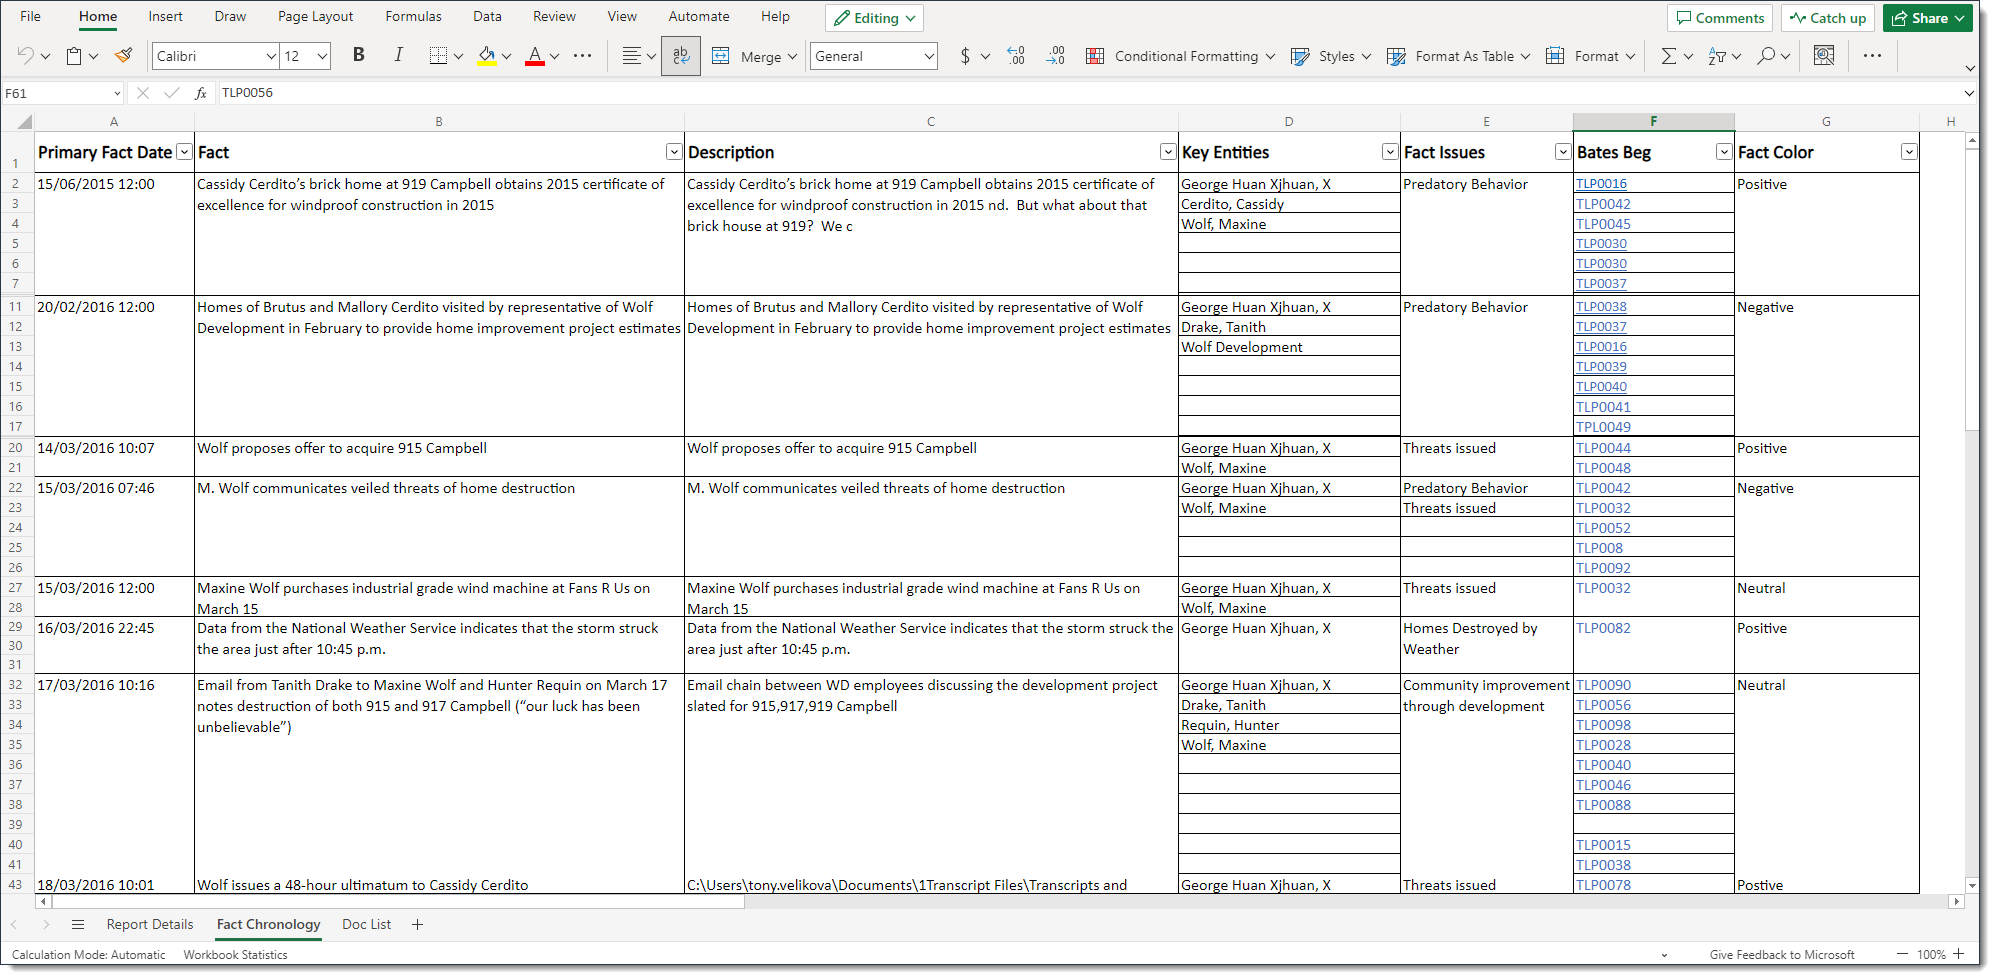
- In the .xlsx report file, you can click on hyperlinks to view the applicable document in the desired original format. To view information about a different object, click on the tabs in the Excel file. The file type fields are not displayed in offline reports.
Create a custom layout
Optionally, you can customize which objects display in the report by creating and selecting a custom layout. You can simplify the report to show as few as one object with a custom layout to simplify the report creation process. While creating the custom layout, you can also choose one view for viewing an object using that layout and a different view for linking objects to the report.
To create a custom layout with the desired view for a Case Dynamics object, do the following:
- Navigate to the Layouts tab.
- Create a copy of the Reports Layout that you will customize. We recommend giving the copy a lower order number than other layouts so that it displays by default on the Report Set tab. Other report layouts, including Master Report Layout, Timeline By Criteria Report Layout, and Timeline Report Layout should not be copied.
- Click the Build Layout button.
- Optionally, remove any tabs that you do not wish to include in the custom layout by clicking X. You can also rearrange the order of the tabs by clicking on a tab and dragging it to where you would like it to display.
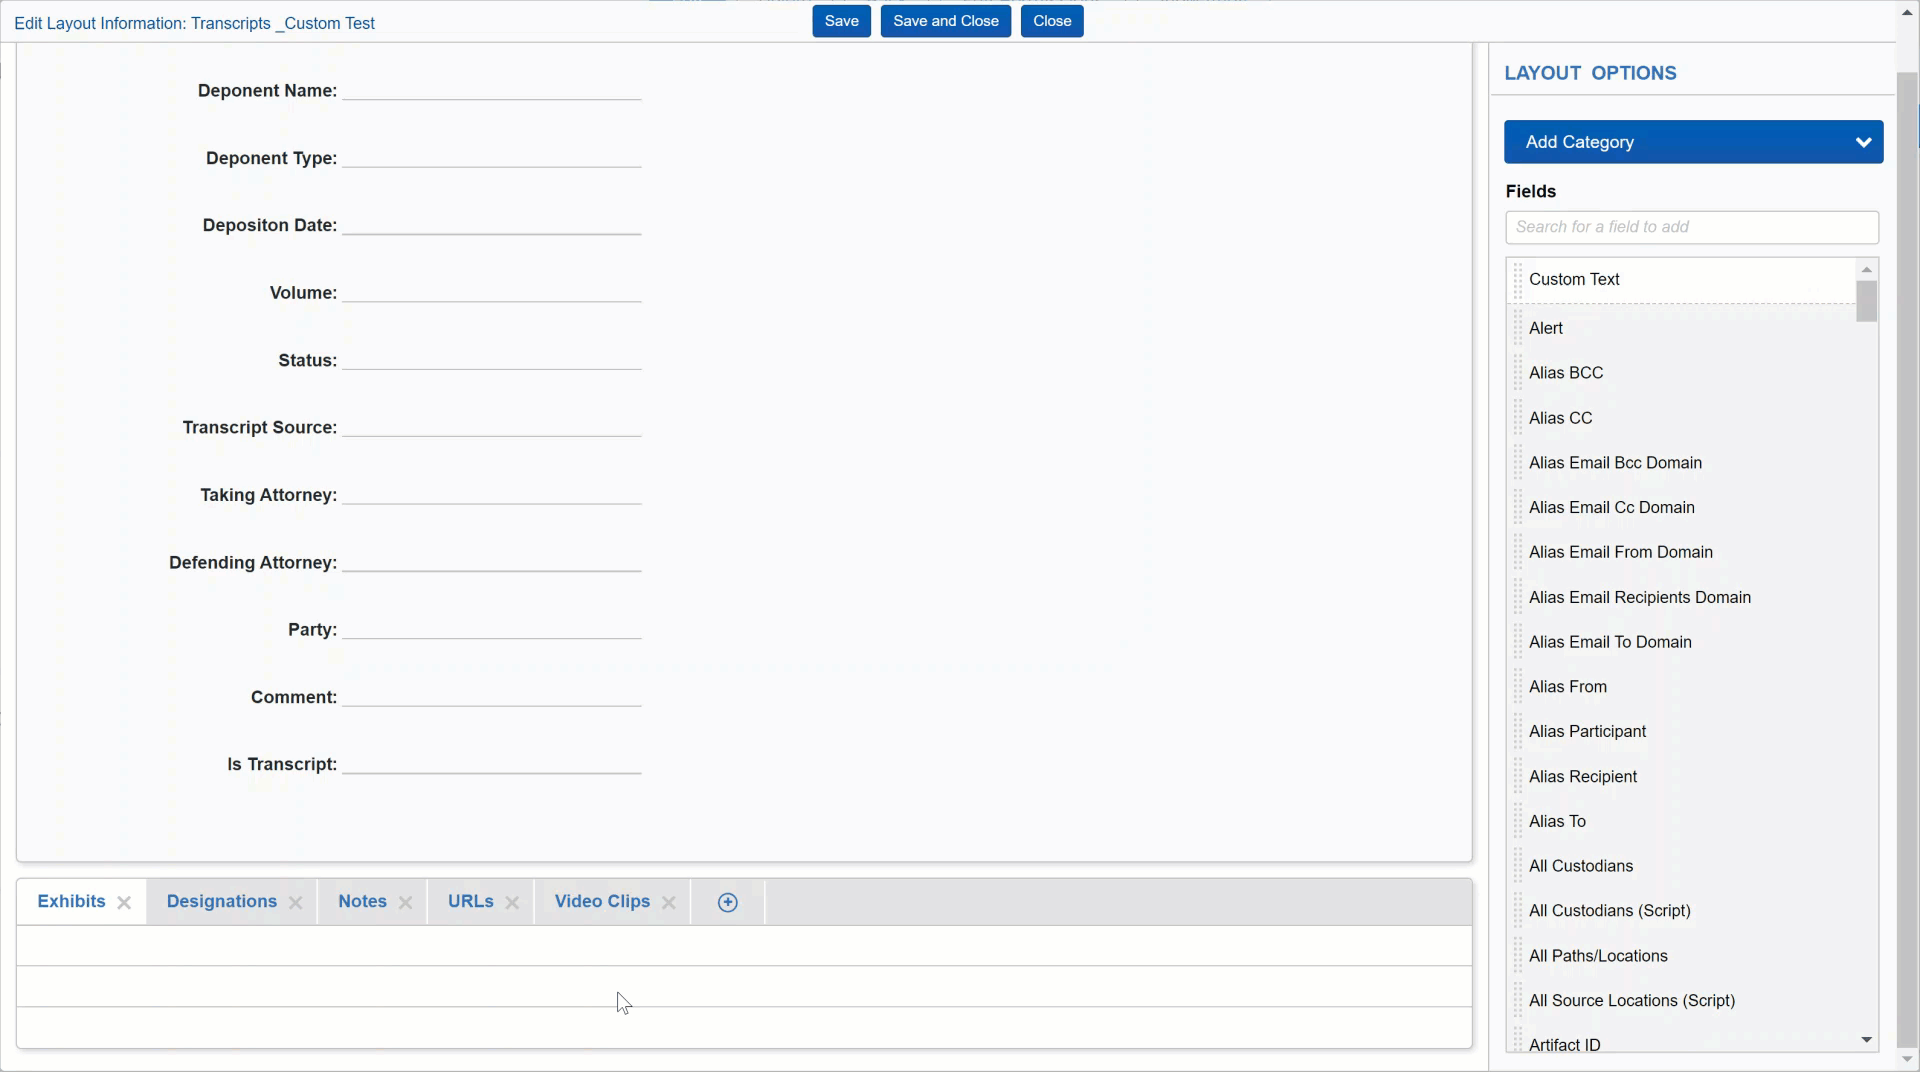
- Select the desired View option in the upper-right. The View field determines what you will see when you use the custom layout.
- Select the desired Link View option in the upper-right. The Link View field determines what you will see when you click a Link button on the Case Dynamics object.
- If desired, continue customizing other objects in the layout by repeating steps 4-6.
- Once you are done customizing the layout, click Save and Close. We do not recommend editing the fields in the Settings section of the Reports Layout. The custom layout should have at least one associated object list. We also recommend including the Report File object to ensure the offline report downloads correctly.
- Navigate to the Report Set tab.
- Click New Reports.
- Ensure that the custom layout is currently selected for the new offline report.

Adding a Bates field to a custom view
When viewing an offline report, it can be helpful to have a hyperlinked Bates field included in the report so that reviewers can easily access the documents
To assign a Bates field to a custom view, do the following:
- Navigate to the Production Sets tab.
- Optionally, you can create a new production set or select an existing one that contains the documents that you wish to create a new Bates number for.
- In the Production console, click Copy To Legacy Document Field.
- Enter the following field options. The remaining fields can be left as default.
- Production - Select the desired production set from the drop-down menu.
- Begin Bates Field - Select the beginning Bates field that you wish to include in the offline report.
- End Bates Field - Select the ending Bates field that you wish to include in the offline report.
- Click Run.
- Navigate to the Fields tab.
- Select the Bates field that you wish to include in the offline report.
- Click Edit.
- On the Advanced Settings tab, enable Open to Associations.
- Click Save.
- Navigate to the Views tab.
- Click the Edit icon in the row the custom view you previously created.
- Add the Bates field to the custom view that you wish to include in the offline report. Optionally, you can remove any other document fields from the custom view so that there is only one field that includes hyperlinks to documents.
- Navigate to the Report Set tab.
- Select the custom view and click Generate Report.
Settings fields
The Settings section contains the following fields:
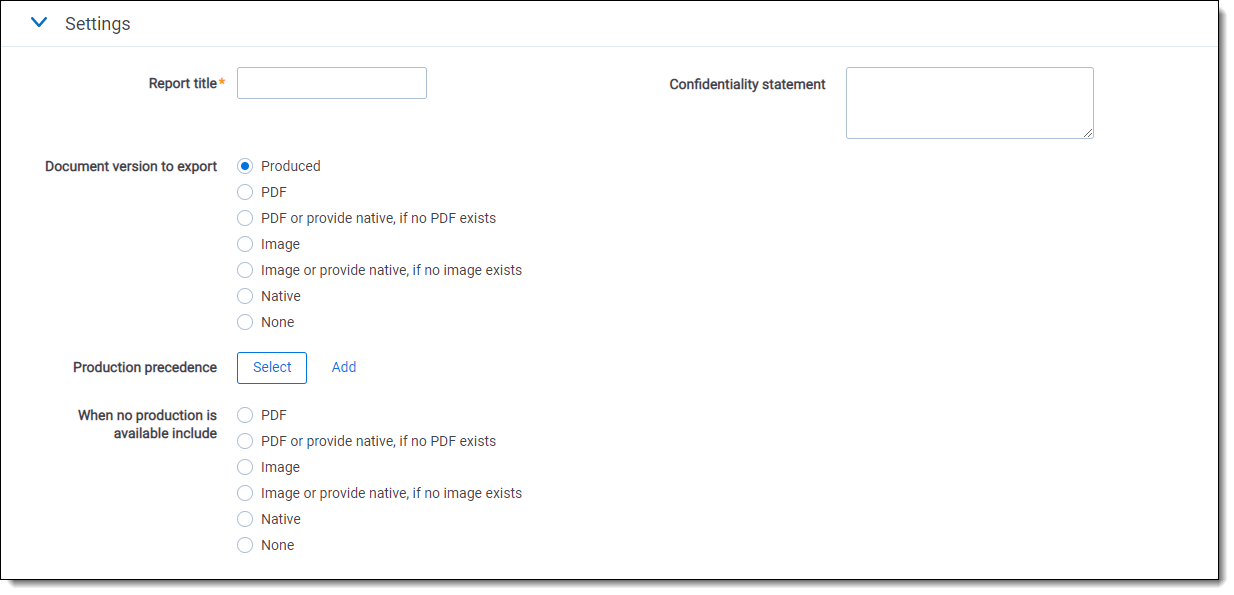
- Report title - Enter the name of the offline report.
- Document version to export - Determine which documents are included in the report by selecting one of the following options:
- Produced - Select to include produced documents in the offline report. Selecting this option causes the Production precedence and When no production is available include fields to display in the Settings section.
- PDF - Select to include only PDF documents in the offline report.
- PDF or provide native, if no image exists - Select to include PDF documents in the offline report. If there is not a PDF document but there is a native document, that will be included in the report instead.
- Image - Select to include only imaged documents that have not been produced in the offline report.
- Image or provide native, if no image exists - Select to include imaged documents in the offline report. If a document is not imaged but there is a native document, that will be included in the report instead.
- Native - Select to include native documents that are linked to facts or issues in the offline report.
- None - Select to include only produced documents in the offline report. If a fact or an issue is linked to a document that is not produced, the document is not included in the report; only a control number displays.
- Production precedence - click Select and choose the desired productions in the workspace. The order numbers that appear next to the selected productions in the Production precedence field are not a part of the actual production set name. These numbers are only applied to reflect the order precedence for this report.
- Click Add, then use the up or down arrows to set a production order precedence.
- Click Save.
- When no production is available include - Select which documents are included in the report when there are no produced documents available. Use these options in conjunction with the Production precedence field.
- PDF - Select to include PDF documents in the offline report for any documents that have not been produced.
- PDF or provide native, if no image exists - Select to include PDF documents in the offline report. If there is not a PDF document but there is a native document, that will be included in the report instead.
- Image - Select to include only imaged documents in the offline report for any documents that have not been produced.
- Image or provide native, if no image exists - Select to include imaged documents in the offline report. If a document is not imaged but there is a native document, that will be included in the report instead.
- Native - Select to include native documents in the offline report for any documents that have not been produced.
- None - Select to include only produced documents in the offline report. If a fact or an issue is linked to a document that is not produced, the document is not included in the report; only a control number displays.