


Feedback
Last date modified: 2026-May-12
Segment contracts into sections
The segmentation model breaks a document into sections by detecting signals for the start and end of each section. The model assigns a weight to each signal, determines the coordinates of each section, and generates a new document for every section it finds. Contracts then auto-groups each new document with the root agreement and its other sections using a family identifier field called Document Parts.
How segmentation works
At a high level, the segmentation model relies on the outline format of a contract. For example, the structure of the section headings. If the contract has some structure in the form of discernible section headings, the segmentation model will use this information.
The model will then take the beginning of a section heading, find all the text until the next section heading, and create a new section for the heading and body. The model recognizes that additional information at the end of a section such as page numbers, footers, and white space should not be included in the section.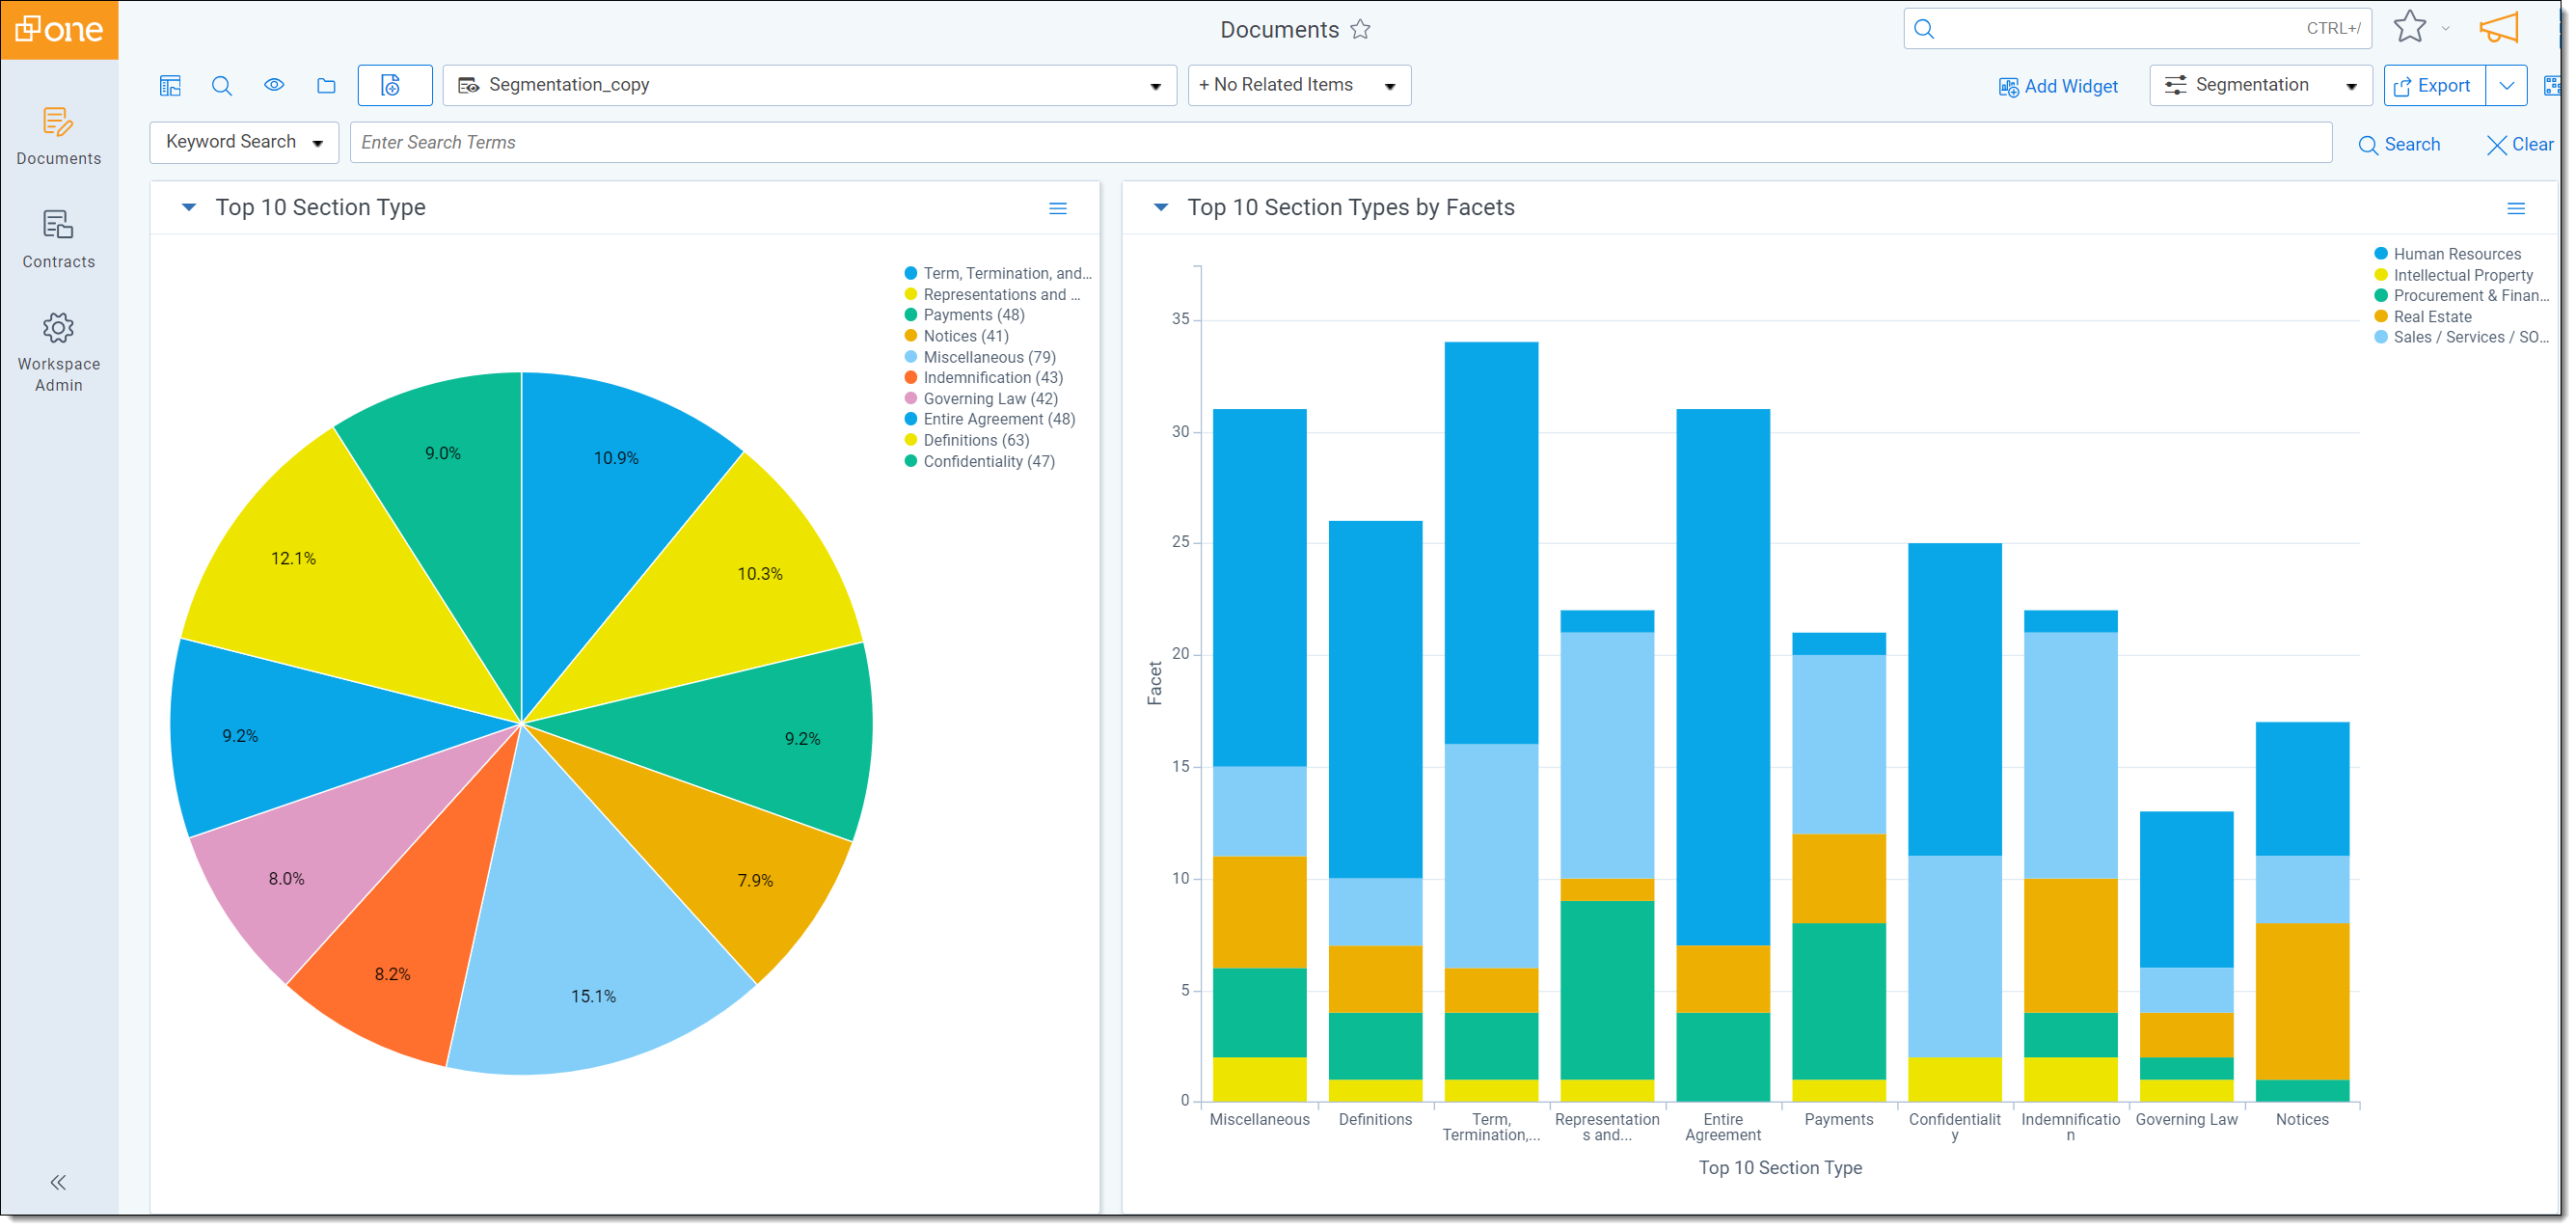
The model does not segment subsections, only the top-level section. For example, if Section 1 contains Section 1.1 and Section 1.1.A, Contracts will only segment Section 1 and not individually parse out any subsections within it.
Segmentation and outline formats
Contracts may perform more accurately on some structure types than others. This is because of the publicly available contracts that Contracts has used as training data for building models to segment documents. You can assume that for high accuracy structure types, Contracts has a lot of training data and for low accuracy structure types, it has less. You can also assume that high accuracy structure types are more commonly used in practice. Though you may see low accuracy structure types on projects, they are far less common.
Addendums, exhibits, and attachments
Once the model finds the last section in the main contract, it stops. This means that the model should not segment any sections after the signature block appears. For example, if there are addendums or exhibits in the document, the model will not segment sections within them. If it does, that means Contracts has incorrectly located the end of the main contract.
When to use segmentation
The following scenarios illustrate when segmentation may benefit your project. Note that segmentation is not required for every project. For example, if you only need to extract data points to fields using quality regex, you may not need to segment documents into sections.
Comparing differences between sections
Compare allows you to compare textual differences at the section-level by selecting section documents and using the compare mass action.
One common use case is when a company buys another and wants to uncover how certain key clauses in contracts they are acquiring differ from existing standard language.
Since every section is a document in Relativity, you can take advantage of the compare mass action to hone in on differences.
Auto populating yes/no fields to indicate section presence
After you segment your documents and classify all sections with a section type, you can use the Populate Section Text script. This script populates a yes/no field on each main document to indicate whether it contains a certain section. You can also populate a long text field with the text of that section. For example, you could use this to determine which documents contain a Confidentiality section.
For steps, see Using the Populate Section Text script
Filtering sections with regular expressions
You can run segmentation to unlock the ability to filter a section using regex.
For example, if you are looking for a contract's Termination date, Contracts includes a Date regular expression that is great at finding dates in most formats. However, since you only care about the date in the Termination section, you have to figure out some way to refine your regex so that it only returns dates in the Termination section.
If you have all your documents segmented, including all Termination sections, you can create a saved search of all Termination sections, select it as a Regular Expression Filter, and see only hits in the Contracts Viewer for dates in the Termination section. This filtering power extends to field auto population as well.
Auto-linking references to sections
When creating or editing an analysis profile, you can auto link references to sections. This setting will only work when a segmentation model is also selected in the analysis profile.
If checked, this will create links in the documents for all instances where the text references a section. For example, a reference like "as provided in Section 5" will appear in the Contracts Viewer as a link. Clicking that link will navigate you to Section 5, found during Segmentation Analysis. This setting will apply to all such references in the document.
If your document is fully segmented and you auto link references, more links will generate for self-references in the document.
Coding sections at the section level
Since Contracts lets reviewers code individual sections within the Contracts Viewer, you could implement a workflow where multiple reviewers are coding different sections on the same document at the same time.
You can create a section-level report that lists out the risks and obligations for each section you care about. To achieve this, you'd want reviewers coding sections.
For workflow efficiency, you can batch out all Assignment sections to your best assignment reviewers.
Running segmentation
You can run segmentation with Contract's analysis profile or a custom profile.
To run segmentation with Contract's analysis profile:
- Go to the Contracts Analysis Sets tab.
- Click New Contracts Analysis Set.
- Name your analysis set.
- Choose the Segmentation analysis profile.
- Select a saved search to run the analysis on.
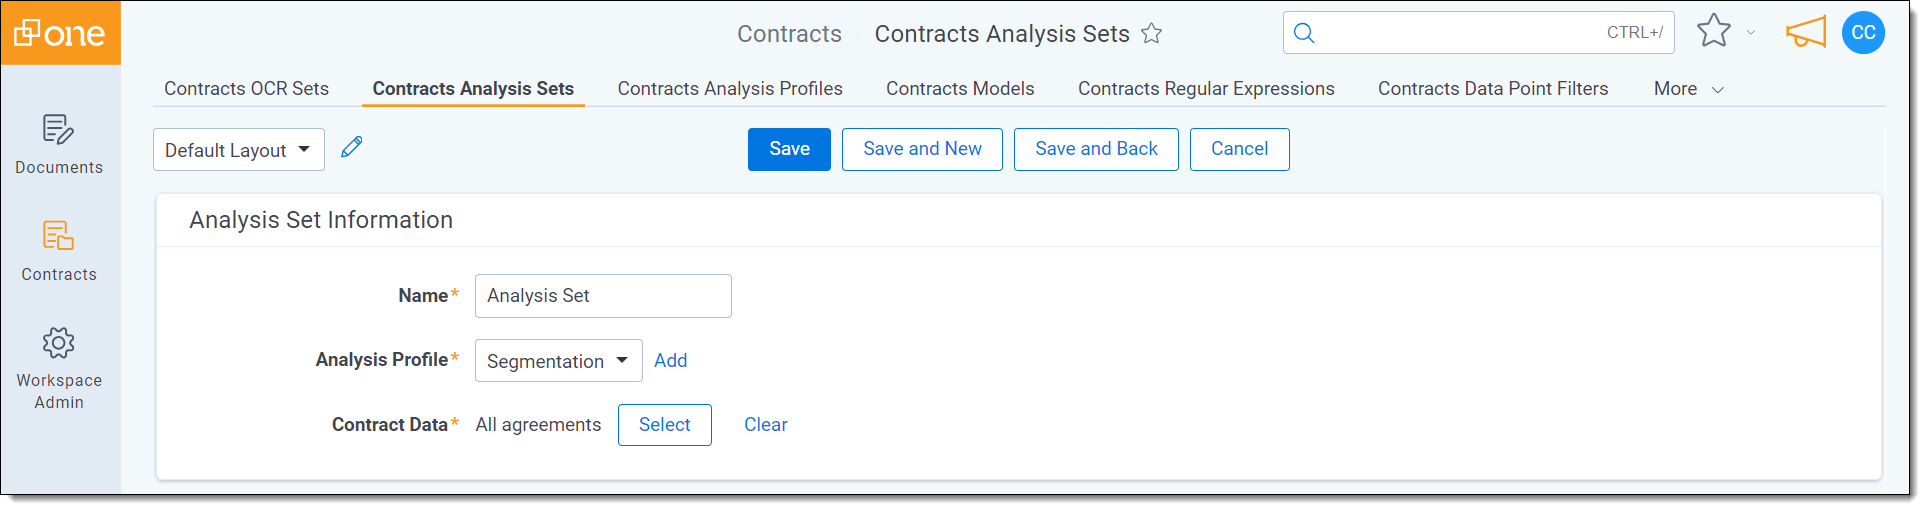
- Click Save.
- Click Analyze.
The status of the analysis will appear under the Status section. Once complete, click the Refresh button to refresh the page and view results.
Using a custom analysis profile
To create a custom analysis profile:
- Go to the Contracts Analysis Profiles tab.
- Click New Contracts Analysis Profile.
- Name your analysis profile and optionally add a description.
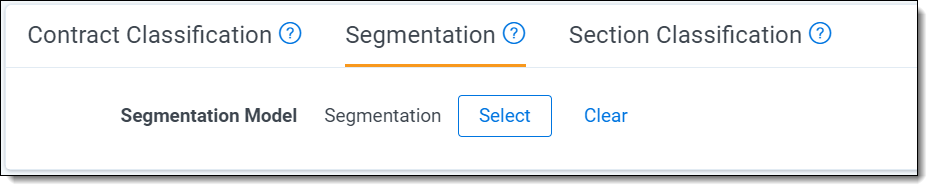
- Add the Contract Classification, Segmentation, and Section Classification models.
- Click Save.
After you create a new analysis profile, run analysis with that profile:
- Go to the Analysis Set tab.
- Click New Contracts Analysis Set.
- Name your analysis set.
- Choose the analysis profile you created.
- Select a saved search to run the analysis on.
- Click Analyze.
The status of the analysis will appear under the Status section. Once complete, click the Refresh button to refresh the page and view results.
Fields auto-populated by Contracts
Following is a list of all fields that Contracts will auto-populate when you run segmentation.
| Field | Field Type | Field Auto-population |
|---|---|---|
| Contracts Section Headings | Fixed-length text | Auto-populated with the verbatim section heading, extracted directly from text in the contract. |
| Contracts Section Warnings | Fixed-length text | Auto-populated with One or more sections were missed if the model detect that it may have missed sections during segmentation. |
| Contracts Section Warning Details | Long text |
Auto-populated with information on which sections the model detects that it may have missed during segmentation. For example, Missing section(s) 3, 4, 6. |
| Contracts Section Start | Whole number |
Auto-populated with a number denoting coordinates for the start of a section. Contracts uses this field to order section documents top-down as they appear in the root agreement in both the Sections pane of the Contracts Viewer and the Contracts Segmentation view on the document list in Relativity. |
| Contracts Section End | Whole number |
Auto-populated with a number denoting coordinates for the end of a section. Since Contracts knows the coordinates for the starts and ends of sections, you can navigate to sections within the Contracts Viewer precisely. |
| Contracts Document Parts | Fixed-length text |
Auto-populated with a family identifier that groups sections with their root agreements. This field keeps sections visually grouped with root agreements in your document lists and in the Sections pane of the Contracts Viewer. |
| Contracts Document Type | Single choice | Auto-populated with Section on all section documents the model creates. |
| Contracts Related Documents | Fixed-length text |
Auto-populated with a family identifier for grouping related documents, such as amendments, with their root agreements. All section documents within a root agreement will share the same ID. |
If you run segmentation and later edit the values of these fields, running segmentation again will replace your manual edits.
Segmentation using regular expressions
If contracts segmentation is not performing well on your data set, you can segment documents based on your own custom regular expression:
- Navigate to the Contracts Models tab.
- Click New Contracts Model.
- Enter a Name. For Model Type select Regular Expression Segmentation.
- Select a Regular Expression.
- Select a Parsing Flag.
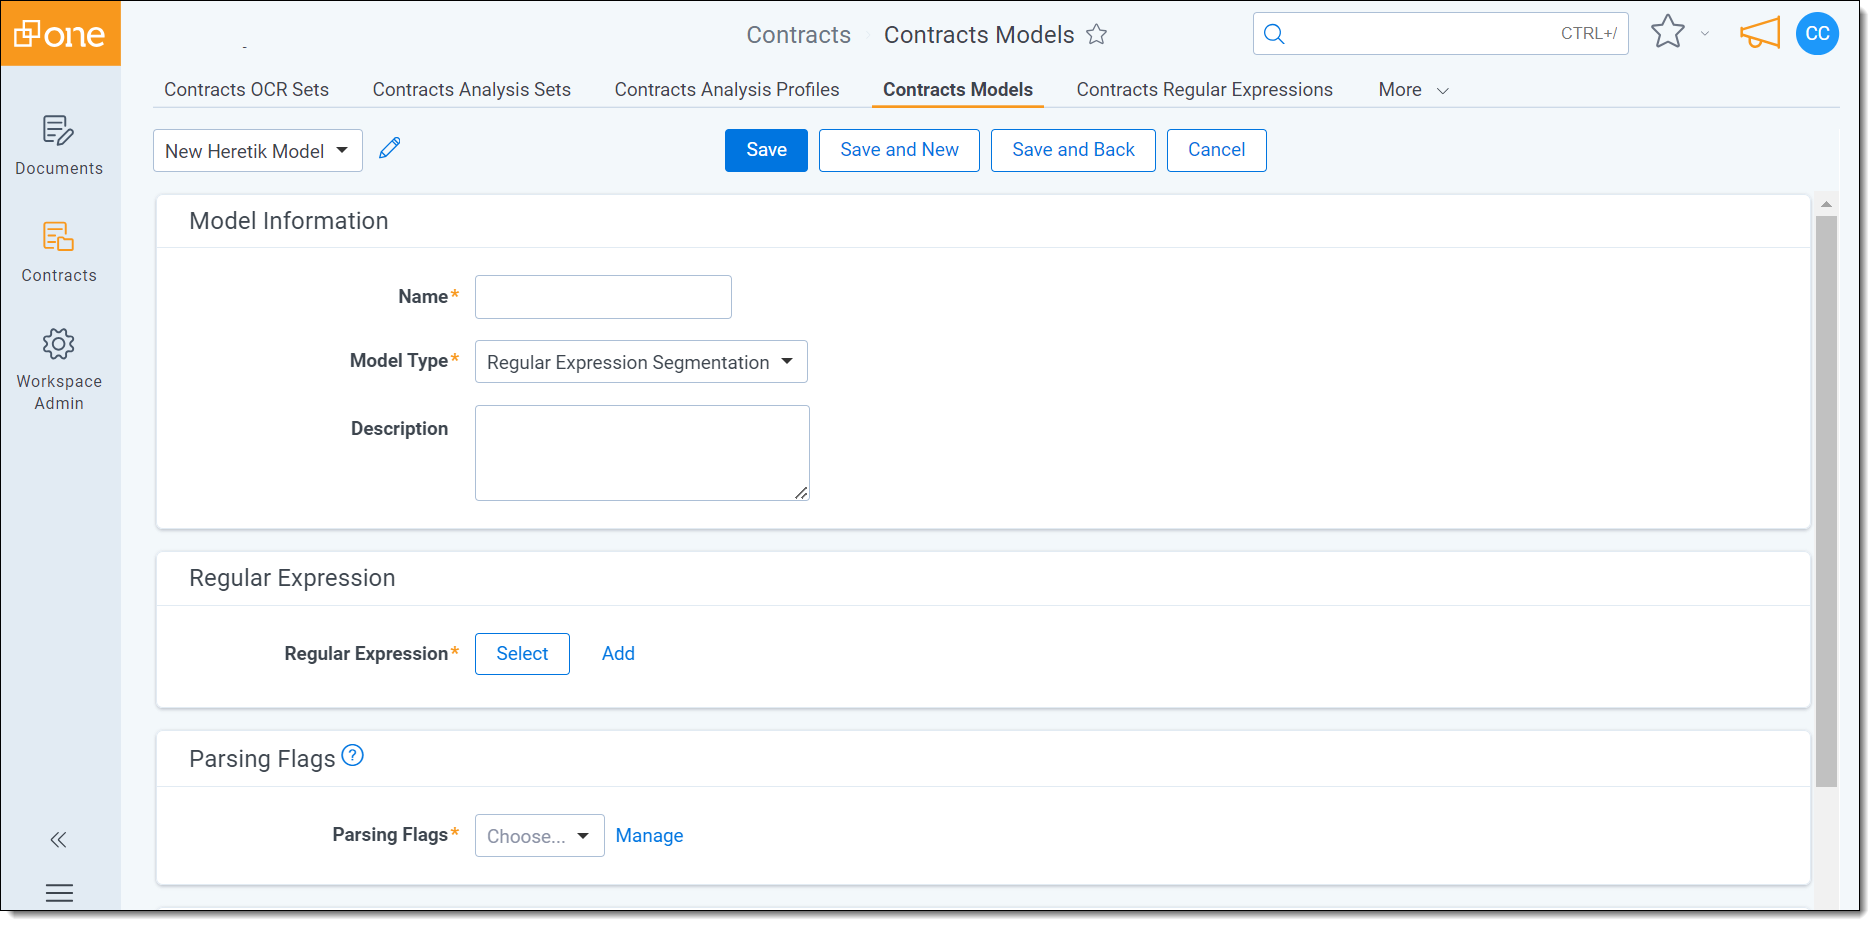
- Save the Model.
To run analysis:
- Go to the Contracts Analysis Profiles tab.
- Whether creating a new analysis profile or editing an existing one, navigate to the Segmentation tab in the layout group and select the model you created.
- Click Save.
- Go to the Contracts Analysis Sets tab.
- Click New Contracts Analysis Set.
- Name your analysis set.
- Choose the analysis profile.
- Select a saved search to run the analysis on.
- Click Analyze.
The status of the analysis will appear under the Status section. Once complete, click the Refresh button to refresh the page and view results.
Understanding parsing flags
The following parsing flags may appear when using segmentation:
| Parsing flag | Description |
|---|---|
| Segment before match | A section should be created before the match and another section at the start of the next match. If your regular expression is matching on section headings, you should use the Segment before match parsing flag. |
| Segment after match | Section should be created through the end of matched text and another section after the match. If your regular expression is matching on where sections end, you should use the Segment after match parsing flag. |
| Segment except match | Sections should be created before & after the match, with the matched text not included in either section. If you want everything but your matches to be sections, you should use the Segment except match parsing flag. |
| Segment only match | A section should be created for the match itself and only for the match itself. If your regular expression is finding key language that you want to be a section (but you don't want anything else to be a section), you should use the Segment only match parsing flag. |
Improving segmentation results
When you need to improve segmentation results but don't have the time or inclination to do so manually, you can semi-automate this process:
- Put all section documents in a saved search (Document Type = Section) and delete them.
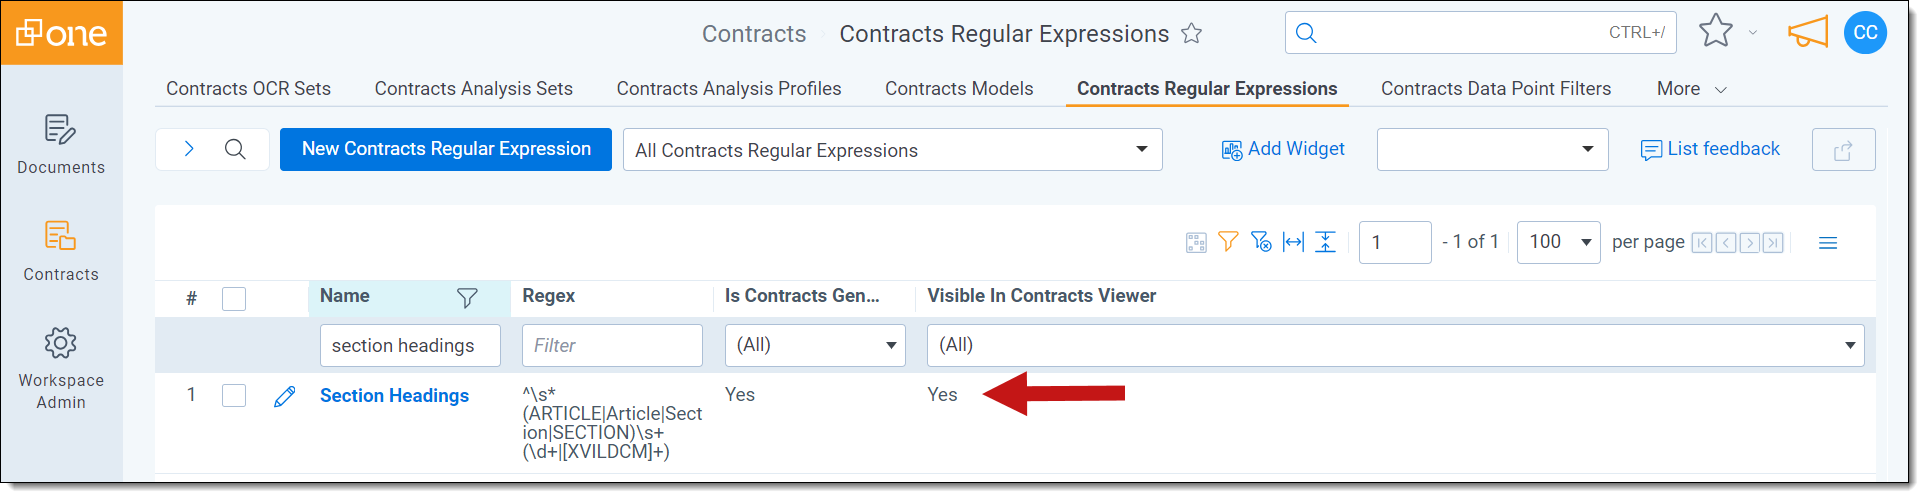
For more information, see Rerunning analysis. - Go to the Contracts Regular Expressions tab and search for the Section Headings regular expression to verify that it is set to Visible in Contracts Viewer.
- Go back to the document list and click into a document.
- In the data points pane, right click on the Section Headings data point and click Edit.
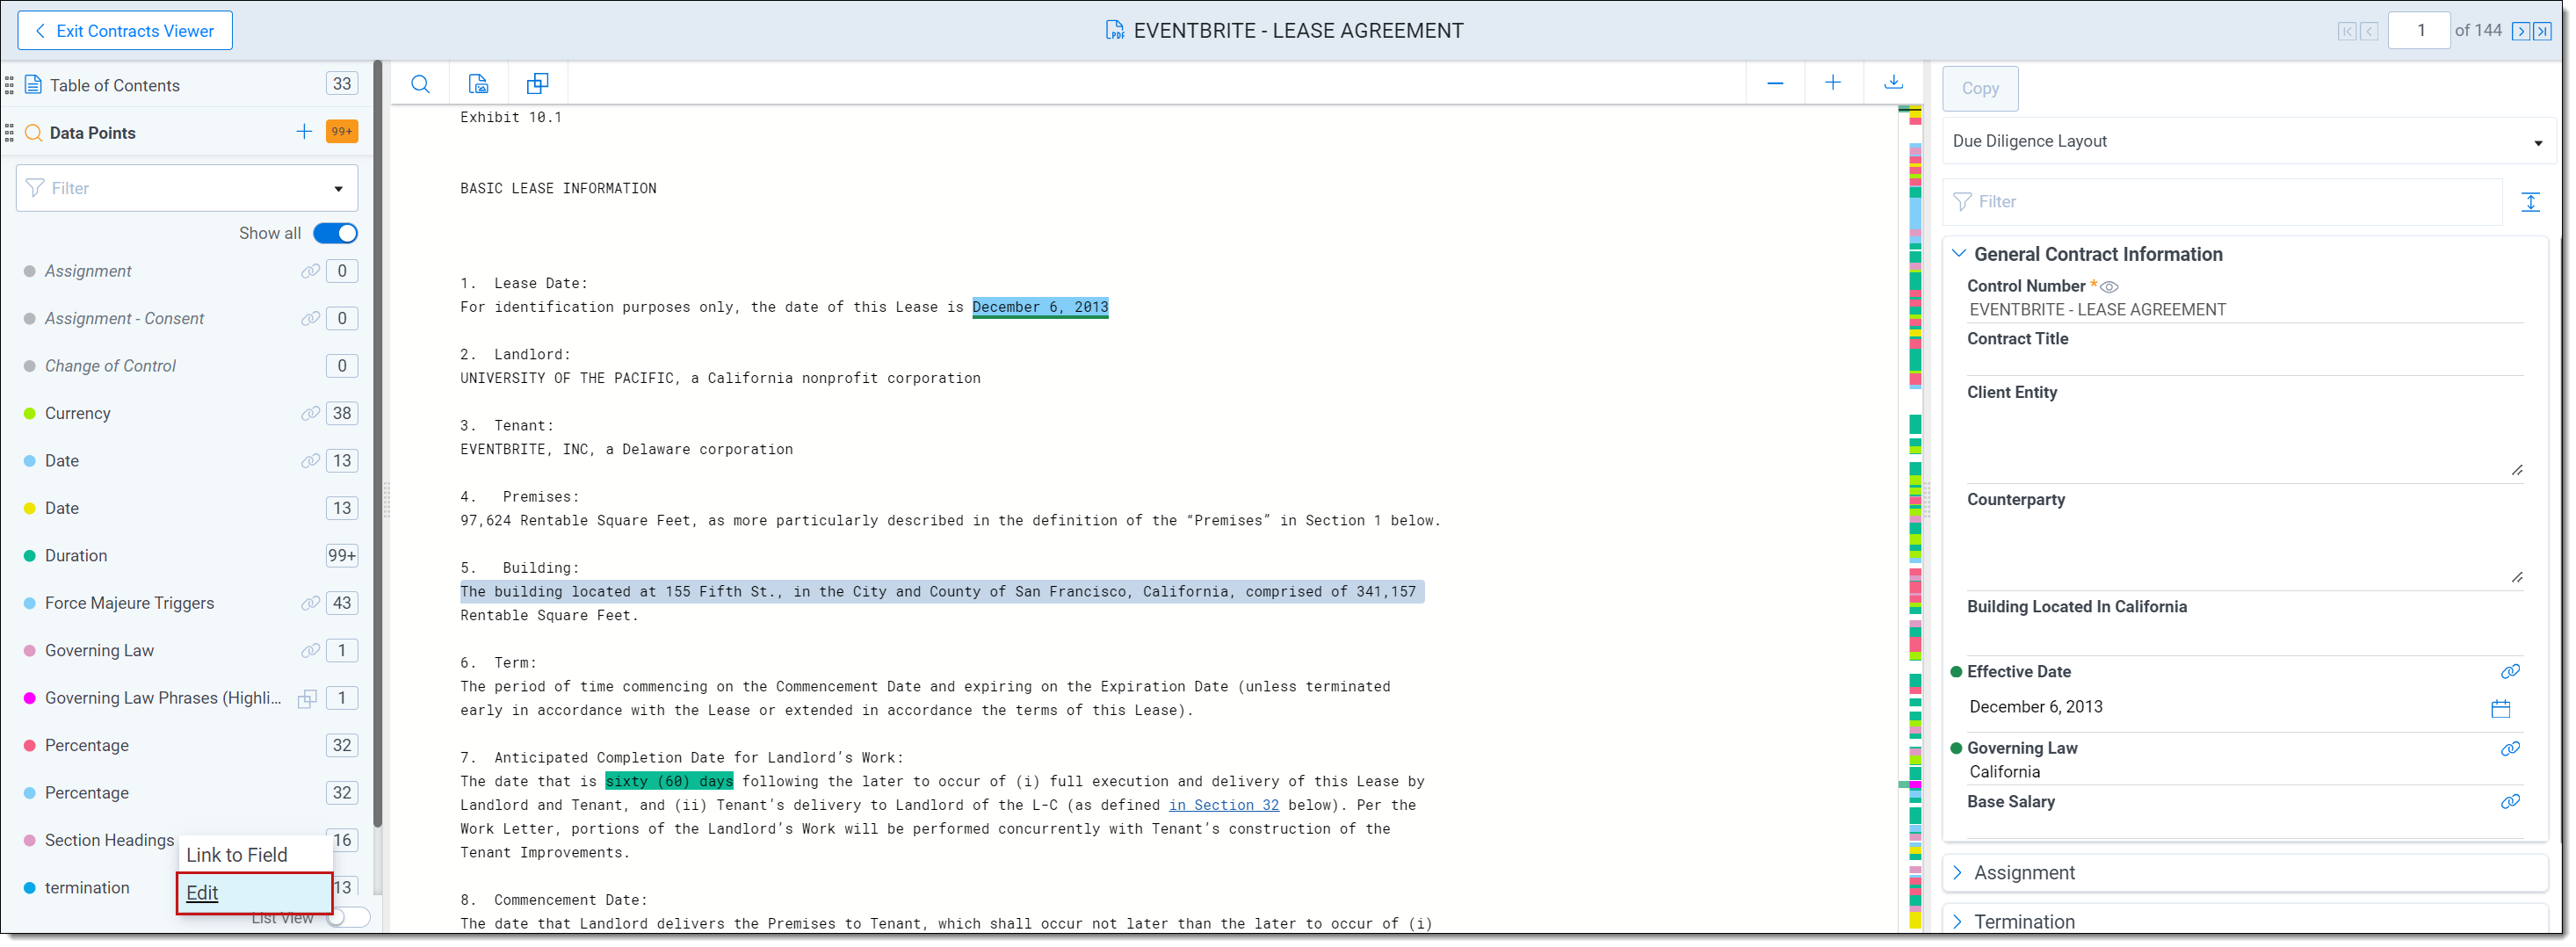 This regular expression is a helpful starter regex for identifying headings in a contract. You can tweak this regex until it better captures the regex in your document, or you can cancel out of editing it and start from scratch. For more info on how to do this see Editing regular expressions in the Contracts Viewer.
 - When you're happy with how the regex is finding your section headings, click the Preview Results button and enter the saved search you'd like to preview.
For more information, see Preview regular expressions results. - Here you can get a picture of how your regex is capturing section headings across the data set.
For the documents without hits, you can click this link and then click on individual documents to get a sense of why your regex was not hitting. - Tweak your regex so that it hits on all your documents.You can also visualize how this regex would segment documents using the preview segmentation feature.
- When you are happy with your regex, run Regular Expression Segmentation to segment all of your documents based on this regex.
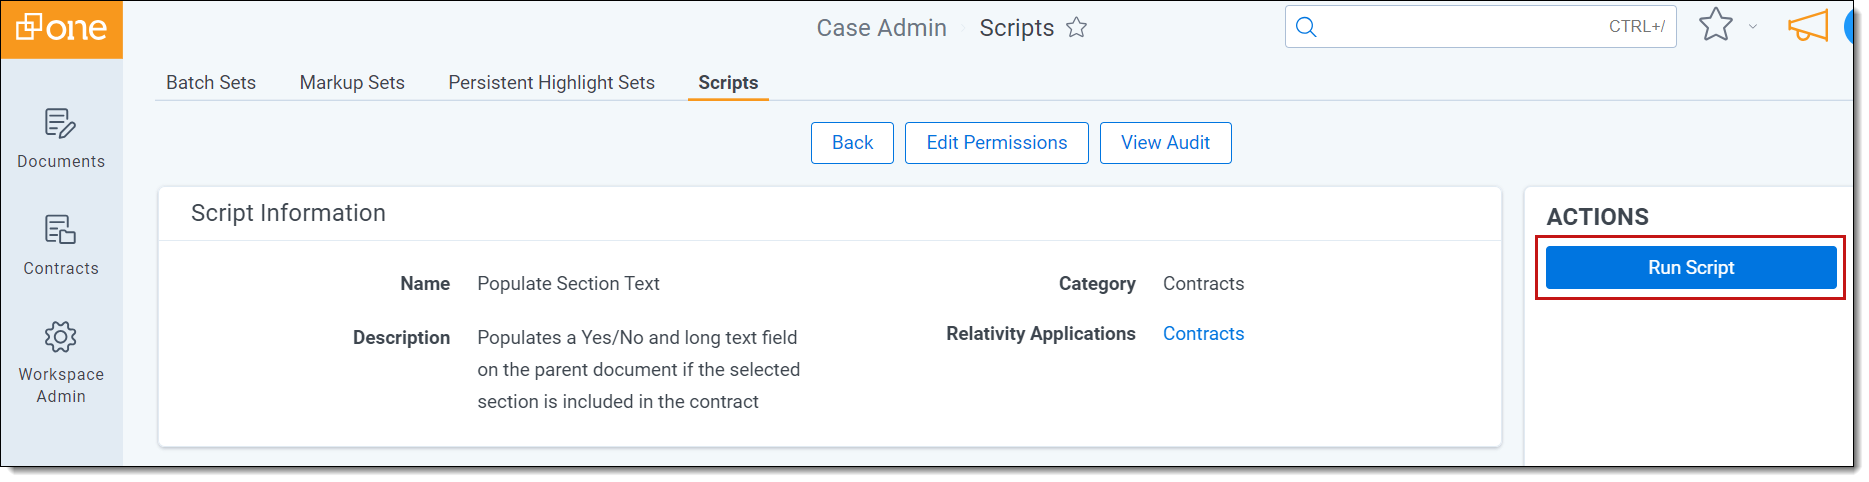
Using the Populate Section Text script
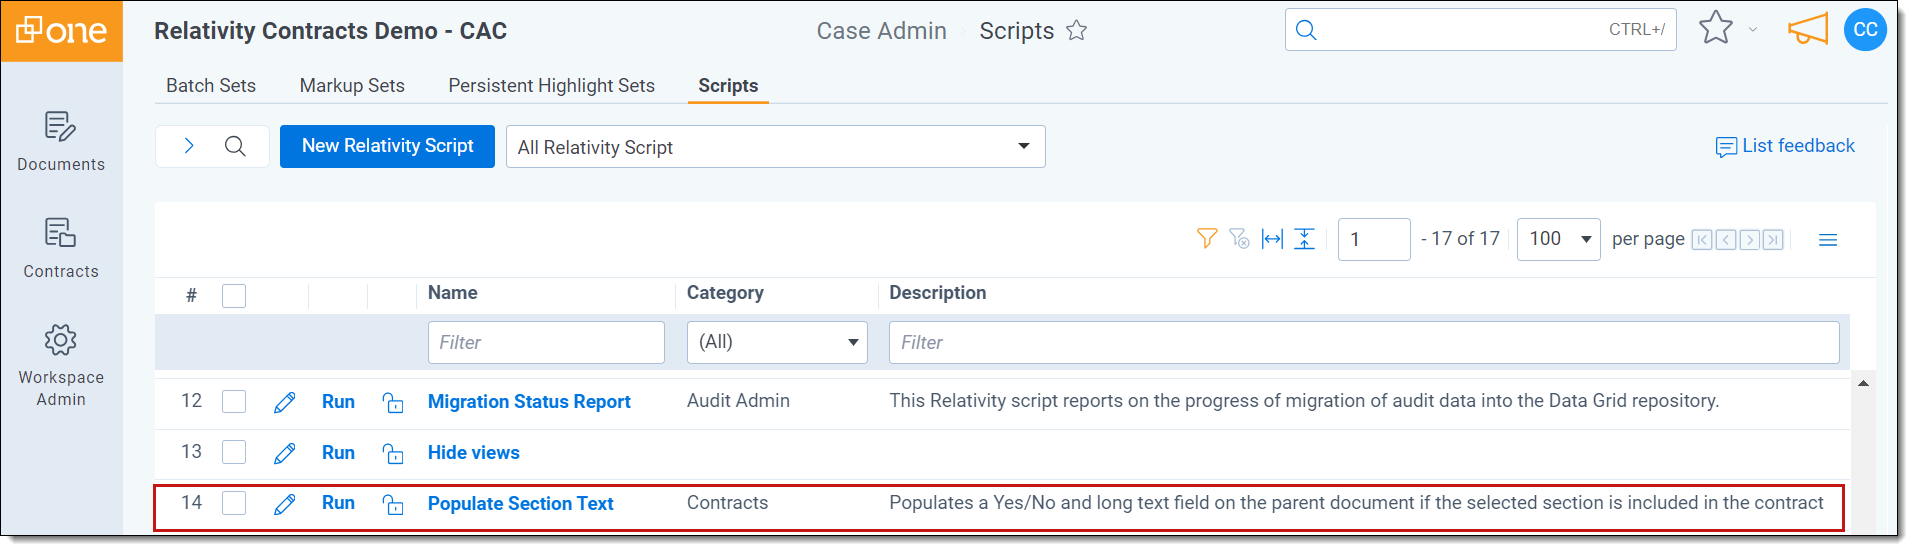
To use the Populate Section Text script:
- Go to the Scripts tab in your current workspace.
- Select the Populate Section Text script.
- Click the Run Script console button.
- For Section Type To Find, choose the section type.
- For Section Text Field To Populate, choose the long text field you'd like to use for storing the text of the section.
- For Yes/No Field To Populate, choose the yes/no field you'd like to use for indicating whether the document contains the section.
- Click the Run button.