Compare contracts or sections
Use Compare to identify textual differences between contracts or individual sections within your data set. Compare supports two methods:
- Section to Section — Compare a section with similar sections across contracts or different versions of the same draft.
- Root Agreement to Root Agreement — Compare entire contracts to other similar contracts or different versions of the same draft.
Select documents to compare
Before using Compare, you must select documents to compare.
To select which sections or root agreements to compare from your document list:
- Create a view or saved search of the sections or root agreements you want to compare.
- Select two or more documents in the list.
- Click the Mass Action button and select Compare.
The Compare interface opens in a new window.

The following scenarios prevent you from using Compare:
- Section to Root Document — Your document list contains at least one section and at least one root agreement. You cannot compare sections to root documents.
- Non Contracts-Analyzed Documents — Your document list contains at least one document that has not been through Contracts analysis. Compare requires all documents to have been analyzed.
Select an existing base document
The Base Document is the section or contract that acts as the control. Contracts compares other sections or contracts in your data set to the Base Document.
To select an existing base document:
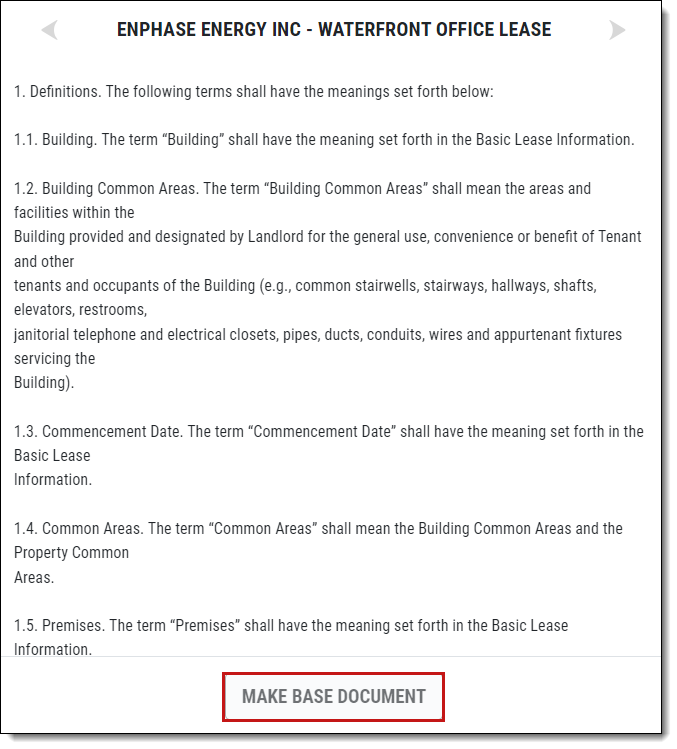
- In the Compare interface, select a document from the document list. A pop-up displays the extracted text of the selected section.
- Use the arrows at the top of the pop-up to navigate to other documents in your list.
- When you find the document you want to use as the base, click Make Base Document. A red highlight appears next to the base document, and similarity scores appear next to each target document.
- Click Compare Documents.
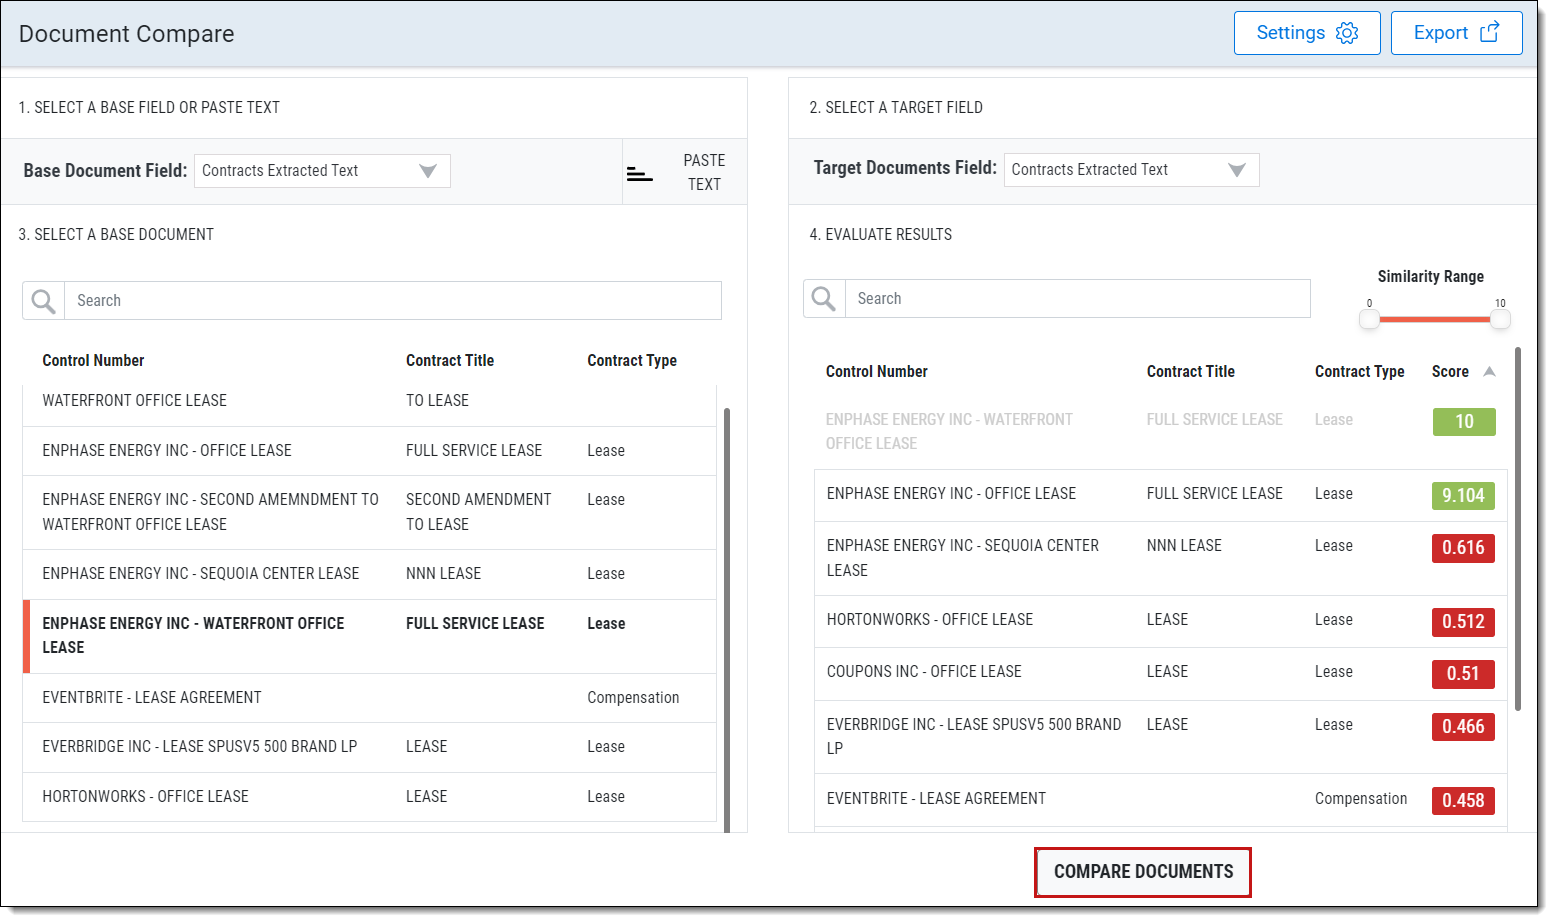
The base document appears side by side with the selected target document.
Paste in a custom base document
If the text you want to use as your base document is not yet in Relativity, you can paste it directly into Compare.
Paste Text is supported for sections only. It is not supported for root agreements. The pasted text is not permanently saved as a document for use outside of the Compare interface.
To paste in a custom base document:
- In the Compare interface, click Paste Text.

- Enter a title for your custom base document.
- Paste the body of your section into the Enter Text field.
- Choose one of the following:
- Click Make Base Document to run the comparison analysis immediately.
- Click Save to add the text to your list of base documents for later use.

- Click Compare Documents to compare.
The custom base document appears in the document list with a red highlight. Similarity scores appear next to target documents.
View differences using the compare interface
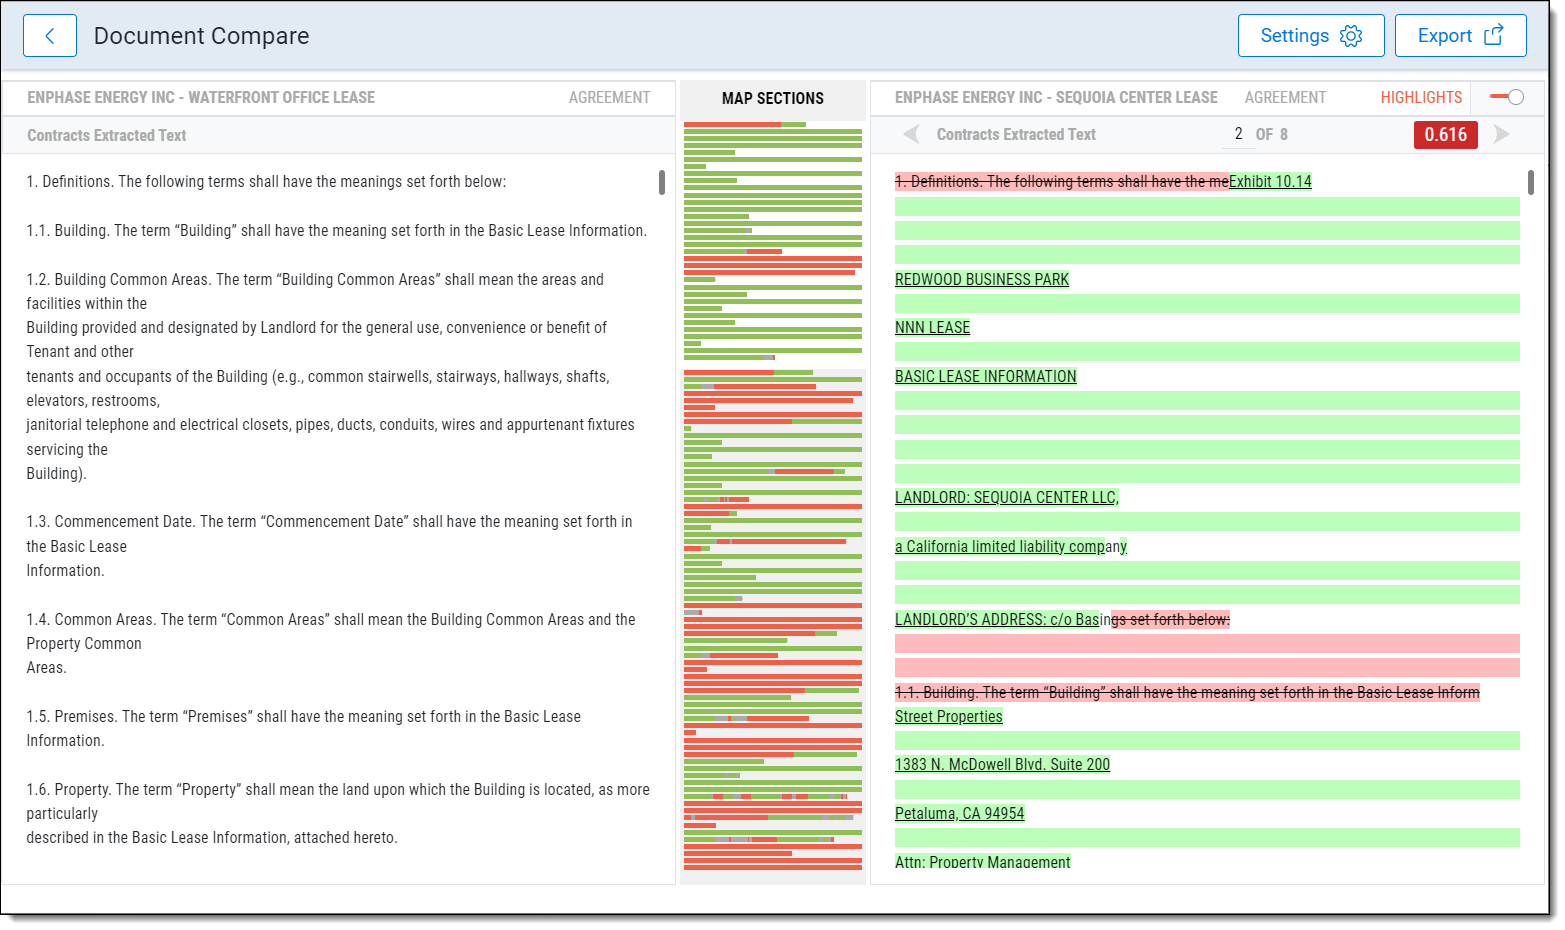
After you click Compare Documents, the base document and target document appear side by side.
If the Highlights toggle is on, highlights indicate differences between the two documents:
- Green — Text is present in the target document but not in the base document.
- Red — Text is present in the base document but not in the target document.
- Red followed by Green — The target document contains different text in place of the base document text. Red highlights show the base document text, and green highlights show the replacement text.
The similarity score appears at the top of the target document. If you are comparing multiple documents, use the arrow buttons to navigate between target documents.
Noise removal settings
You can configure Compare to ignore certain differences between documents, such as case changes or white space.
To change noise removal settings:
- In the Compare interface, click Settings.
- Turn on the Ignore whitespace toggle.
- Turn on the Ignore case changes toggle.
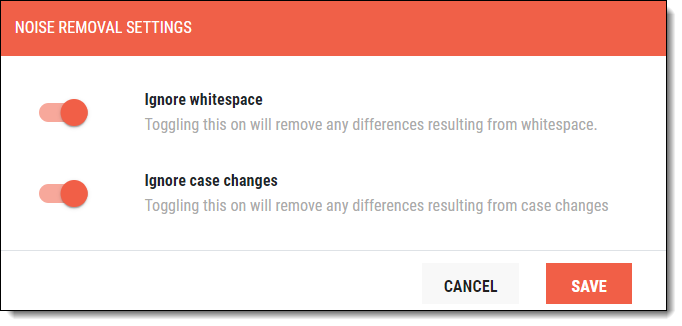
- Click Save.
When you click Compare Documents, the comparison score updates to reflect these settings. The Compare interface does not display differences that result from white space or case changes.
Filter target documents
The following Contracts Compare controls let you filter target documents:
- Similarity range slider—use the Similarity Range slider to narrow the similarity score range. Drag the slider buttons to your desired range to view documents within that range.
- Sort by score—view results by sorting the Contracts Compare score by most or least similar. Click the Score column to toggle sorting by most similar or least similar.
- Sort by control number—click the Control Number field to sort the column by control number ascending or descending.
When you click Compare Documents, the control number sort order from the scores page will be used.
Whenever you open Compare, your last sort order on control number will be used.
- Type to filter target documents—use the Search bar to find specific control numbers to include as target documents for comparison.

Export differences
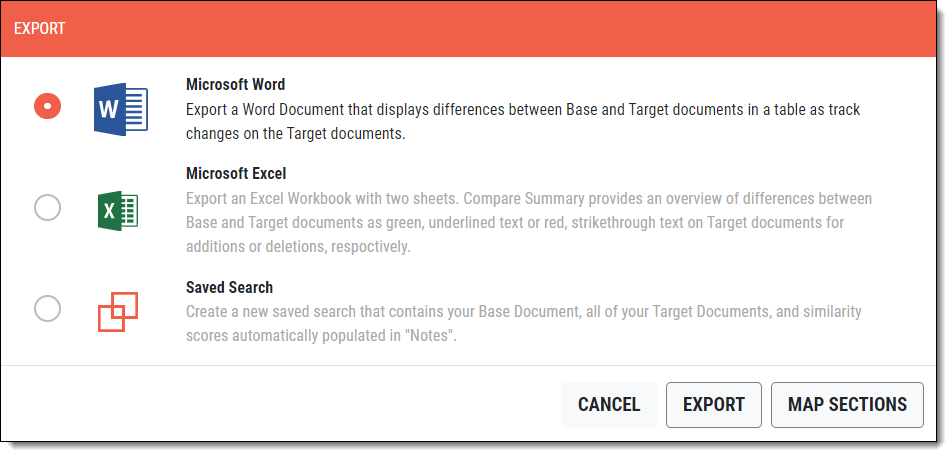
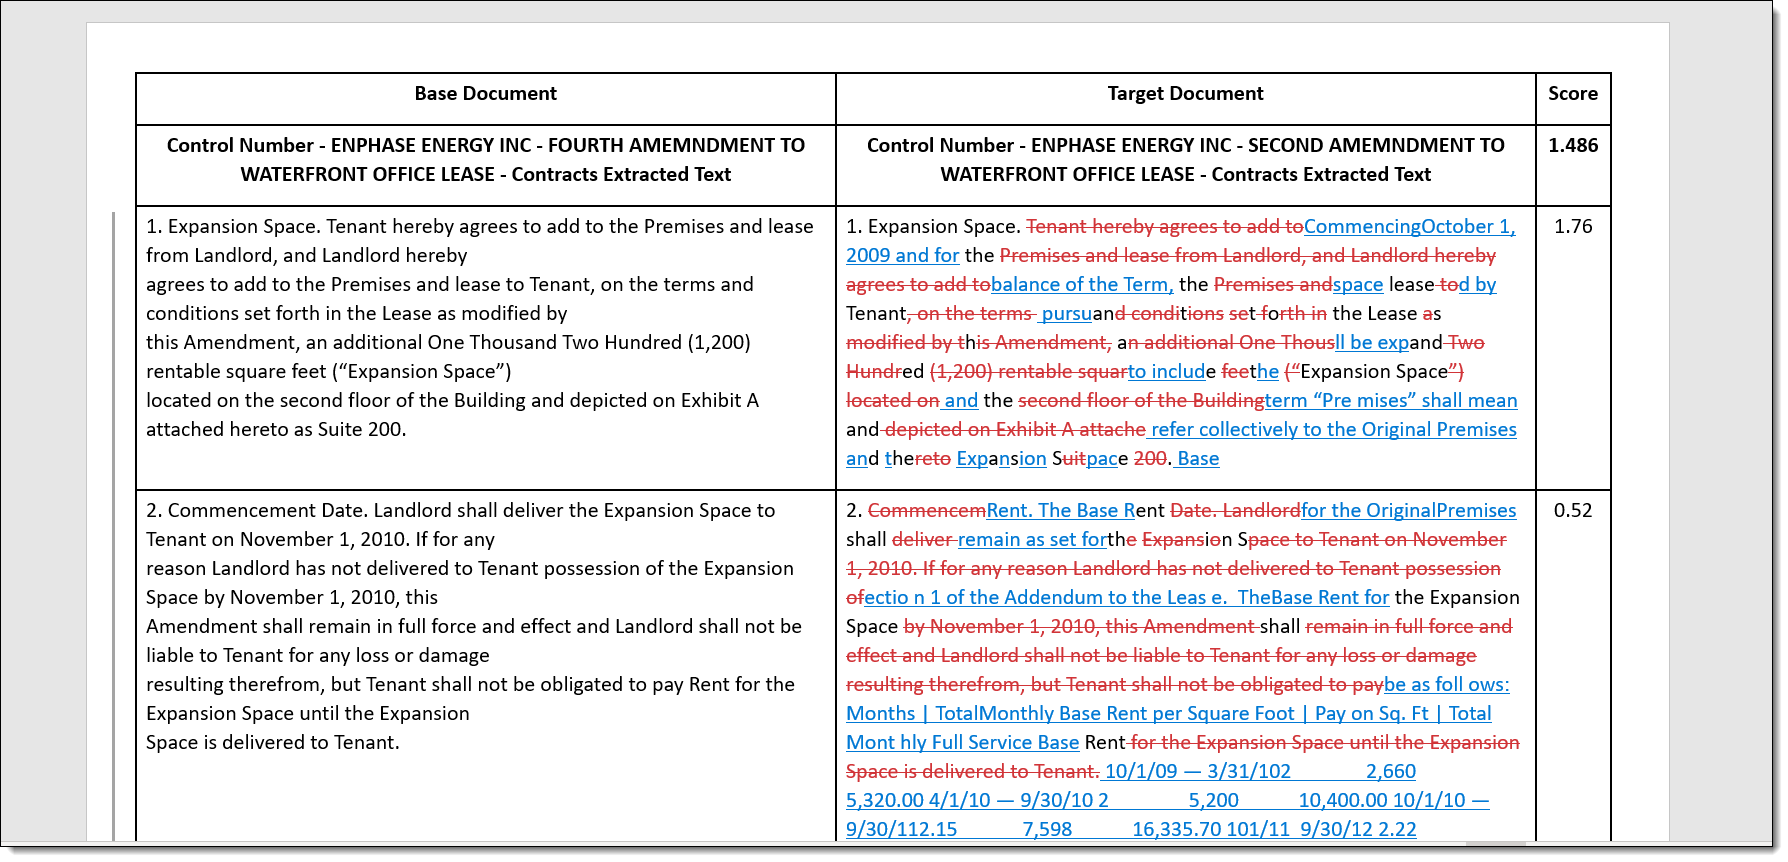
You can export a Word document or an Excel file with tracked changes and strike-throughs representing Compare results.
You can also export compare results to a saved search.
Export to Word
To export differences to Word:
- Select Export in the Compare interface.
- Select Microsoft Word, then select Export.
Open your downloads folder or save location and open the file. Default orientation is landscape to maintain the formatting of the extracted text.
Export to Excel
To export differences to Excel:
- Select Export in the Compare interface.
- Select Microsoft Excel.
- You can add more fields to the export. Below the Add Fields heading, click on a field to add it to the final export.
- To add a logo to the export, select Choose a File.
Open your downloads folder or save location and open the file.
Export to a saved search
To export to a saved search:
- Once you've compared your sections or contracts, select Export in the Compare interface.
- Select Saved Search.
- Enter a name for the saved search and click Export.
In the Document List, open your Saved Search folders. Your Compare export appears.
Export differences among root agreements
When you export differences among root agreements, you can use Map Sections to align the sections of each contract in a one-to-one match. Map Sections requires that your contracts have their sections segmented using Contracts analysis. You can adjust sections using the Edit sections workflow.
To export differences among agreements:
A requirement of Map Sections is that your contracts have their sections segmented using Contracts Segment Analysis. You can adjust sections using the Edit sections workflow.
- In the Compare interface, click Export.
- Select Word or Excel.
- Click Map Sections.
- Drag sections up or down to create the best one-to-one match between the base contract and the target contract.
- To create an empty filler section, drag a section onto an empty space at the bottom of the list. This section appears as a "Contracts filler section" in the comparison interface and in your exports.

- Click Previous or Next Document to map sections in remaining contracts.
- Click Export.
- Open your downloads folder or save location and open the file.


