


Feedback
Last date modified: 2026-Jul-14
Google Workspace data source
This topic provides details on how to capture Google Chats, Drive, Groups, and emails with Collect. Relativity collects Google Drive data using the Vault API.
This documentation contains references to third-party software, or technologies. While efforts are made to keep third-party references updated, the images, documentation, or guidance in this topic may not accurately represent the current behavior or user interfaces of the third-party software. For more considerations regarding third-party software, such as copyright and ownership, see Terms of Use.
Considerations
Consider the following items about this data source:
- Collection of Calendar is currently unsupported.
- Google allows a maximum of 20 simultaneous Vault exports per organization.
- Running more than 20 target collections at the same time can lead to export failures on Google's end.
- For more details, refer to Manage exports.
- Google does not have a date range limitation.
- We recommend limiting the date range of the collection.
- Extended date ranges can increase collection time and potentially create issues.
Grouped collection
Google Chat data is collected into grouped collections. Chat conversations often include multiple custodians in the same message threads or channels. Relativity collects this data as a single grouped data set rather than splitting messages by individual custodian.
For more information on grouped collections, see Grouped collections.
Collection size
Google Workspace collections can be large. When collection jobs become too large, performance decreases.
Chat
Chat collections grow quickly due to conversational density, especially in active organizations.
| Category | Details |
|---|---|
| Hard limits (enforced) | 30 custodians per job |
| Planning thresholds (guidance) | Long chat histories become large quickly |
| When to split | Long date ranges in active orgs |
| Notes | Collected as RSMF |
Limit date ranges for active tenants to prevent rapid growth in job size.
Drive
Drive performance depends more on folder structure than raw data size.
| Category | Details |
|---|---|
| Hard limits (enforced) | 30 custodians per job |
| Planning thresholds (guidance) | Deep folder trees scale poorly |
| When to split | Large or complex folder structures |
| Notes | Data shape > raw size |
Prioritize simplifying folder scope. Complex hierarchies should be split or targeted.
Gmail
Gmail collections are heavily influenced by Vault export behavior, particularly for long historical ranges.
| Category | Details |
|---|---|
| Hard limits (enforced) | 30 custodians per job |
| Planning thresholds (guidance) | Greater than 15 custodians and greater than 3 years commonly slows exports |
| When to split | Multi‑year collections |
| Notes | Vault export behavior dominates |
Expect slower exports for large historical scopes. Split primarily by time range.
Groups
Groups behave similarly to chat-based sources, especially in high‑traffic environments.
| Category | Details |
|---|---|
| Hard limits (enforced) | 30 custodians per job |
| Planning thresholds (guidance) | High‑traffic groups over long periods |
| When to split | Long time windows |
| Notes | Similar to chat‑style sources |
Split collections based on traffic volume and duration to control size.
Create the data source in Collect
After completing the steps covered above for Google Workspace account setup and user account setup, you can then configure your first Google data source in the RelativityOne Collect application.
After generating the Refresh Token in Step 10 below for the first Google data source, be sure to save the token value in a secure location, as it will be needed to set up additional Google data sources. Google only allows one refresh token to be generated. If you attempt to generate another refresh token, it will invalidate the original token, and you will not receive a new one, which will break the data source connection to Google. When setting up additional Google data sources in the Collection application, paste the refresh token value that you saved in a secure location into the refresh token field and click Save.
To add the Google Workspace data source, follow the steps below in RelativityOne:
- Navigate to Collection Admin within Collect Admin of Set Up.
- Click the New Collection Source Instance button.
- In the Data Source Information pane, do the following:
- Name—enter in a unique name for the data source.
- Type—select a Google Workspace data source. Chat, Drive, Gmail, or Groups.
- In the Settings pane, enter the Client Id and Client Secret copied from Google’s OAuth2 credentials page. For more information, see Google Workspace data source.
- Click Generate Code.
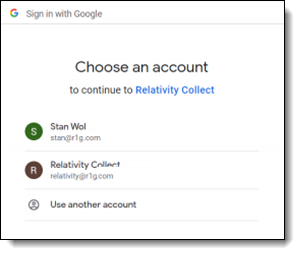
- Select or sign into Google’s account on which behalf collections will be performed.
- Click Copy Temporary Code to copy to your clipboard.
- Once copied, you can close that window and return back to RelativityOne.
- In Collect, paste the code in the Temporary Code field.
- Click Generate Refresh Token.
The access token will be generated and populated in the Refresh Token field. Refer to the Caution above regarding Refresh Tokens. - Click Save.
Configure the data source in Collect
Add criteria to collect specific data. To configure the data sources, complete the following fields:
- Select and unselected tabs—choose the data sources to collect from by moving unselected data sources to the selected list.
- Field—choose the field to filter on within the data source.
- Operator—choose an operator such as equals, contains, greater than, or less than.
- Value—enter a value to find in the selected field.
After selecting field options, you must click Add Criteria.
Details to know about criteria:
- Each criteria is then separated by an AND operator.
- Leave the data source criteria empty to collect all data from the sources.
Filter a data source's data that you want to collect by adding criteria. This section covers the different criteria for each data source. It also includes what can be searched within each data source. The criteria options change based on the selected data source.
Google Groups
Setting criteria for Google Groups is not required. For more information on Advanced examples, see Google Workspace documentation.
The following table lists the filter criteria support for Google Workspace Groups collections. Setting criteria for Google Workspace Groups is not required. For more information on Advanced examples, see Google Workspace documentation.
| Criteria | Operators | Description | Example |
|---|---|---|---|
| Advanced | Equals | When you use the Advanced property in a query, specific Google Workspace search criteria become available in Collect. For more information, see Google Workspace documentation. | For more information on Advanced examples, see Google Workspace documentation. |
| Email BCC | Contains | When you use the Email From property in a query, the search returns all messages that contain the text in the Email BCC field. | If you search “@example.com,” your results include all blind carbon copied messages received by people with the @example.com in their email address. |
| Email CC | Contains | When you use the Email From property in a query, the search returns all messages that contain the text in the Email CC field. | If you search “@example.com,” your results include all carbon copied messages received by people with the @example.com in their email address. |
| Email From | Contains | When you use the Email From property in a query, the search returns all messages that contain the text in the Email From field. | If you search “@example.com,” your results include all messages sent by people with the @example.com in their email address. |
| Email Received Date | Equals, Does Not Equal, Greater Than, Greater Than or Equals, Less Than, Less Than or Equals | When you use the Email Received Date property in a query, the search returns all messages that equal/doesn’t equal, greater/less than the date entered. | If you search “Less Than 1/1/2021,” your results include all emails received before January 1, 2021. |
| Email Sent Date | Equals, Does Not Equal, Greater Than, Greater Than or Equals, Less Than, Less Than or Equals | When you use the Email Sent Date property in a query, the search returns all messages that equal/doesn’t equal, greater/less than the date entered. | If you search “Greater Than 1/1/2001,” your results include all emails sent after January 1, 2001. |
| Email To | Contains | When you use the Email To property in a query, the search returns all messages that contain the text in the Email To field. | If you search “@example.com,” your results include all messages sent to people with the @example.com in their email address. |
| Has Attachments | Equals, Does Not Equal | When you use the Has Attachments property, the search returns emails with or without attachments based on the Value setting. | If you mark toggle the Value setting On, your results include all messages that include an attachment. |
| Is Draft | Equals | Indicates whether or not messages are written and not sent. Use the values true or false. | If you mark toggle the Value setting On, your results include all emails that are in the drafted state. |
| Keyword Search | Search In | When you use the Keyword Search property in a query, the search returns all messages that contain the text you are searching for. | If you search “Dear John,” your results include all messages that contain the text in email body. Note that this is not the same as searching for “Dear” OR “John”. In order to do that you need to enter keywords in separate lines. |
| Label | Equals | When you use the Label property, the search returns all messages that contains the search word or phrase in the emails' label. | If you search "Important," your results include all emails that are marked with the "Important" label. |
| Subject | Contains | When you use the Subject property, the search returns all messages that contains the search word or phrase in the email's title. | If you use the Subject property in a query, the search returns all messages which the subject line contains the text you’re searching for. In other words, the query doesn’t return only those messages that have an exact match. For example, if you search for subject “Quarterly Financials,” your results include messages with the subject “Quarterly Financials 2018.” |
Included in the Google Workspace Groups Criteria is one toggle:
- Collect all email with attachments regardless of criteria—enable the toggle to collect emails and attachments. Disable to collect only emails that match the criteria.
Gmail
Setting criteria for Gmail is not required. For more information on Advanced examples, see Google Workspace documentation.
The following table lists the filter criteria support for Google Workspace Gmail collections. Setting criteria for Google Workspace Gmail is not required. For more information on Advanced examples, see Google Workspace documentation.
| Criteria | Operators | Description | Example |
|---|---|---|---|
| Advanced | Equals | When you use the Advanced property in a query, specific Google Workspace search criteria become available in Collect. For more information, see Google Workspace documentation. | For more information on Advanced examples, see Google Workspace documentation. |
| Email BCC | Contains | When you use the Email From property in a query, the search returns all messages that contain the text in the Email BCC field. | If you search “@example.com,” your results include all blind carbon copied messages received by people with the @example.com in their email address. |
| Email CC | Contains | When you use the Email From property in a query, the search returns all messages that contain the text in the Email CC field. | If you search “@example.com,” your results include all carbon copied messages received by people with the @example.com in their email address. |
| Email From | Contains | When you use the Email From property in a query, the search returns all messages that contain the text in the Email From field. | If you search “@example.com,” your results include all messages sent by people with the @example.com in their email address. |
| Email Received Date | Equals, Does Not Equal, Greater Than, Greater Than or Equals, Less Than, Less Than or Equals | When you use the Email Received Date property in a query, the search returns all messages that equal/doesn’t equal, greater/less than the date entered. | If you search “Less Than 1/1/2021,” your results include all emails received before January 1, 2021. |
| Email Sent Date | Equals, Does Not Equal, Greater Than, Greater Than or Equals, Less Than, Less Than or Equals | When you use the Email Sent Date property in a query, the search returns all messages that equal/doesn’t equal, greater/less than the date entered. | If you search “Greater Than 1/1/2001,” your results include all emails sent after January 1, 2001. |
| Email To | Contains | When you use the Email To property in a query, the search returns all messages that contain the text in the Email To field. | If you search “@example.com,” your results include all messages sent to people with the @example.com in their email address. |
| Has Attachments | Equals, Does Not Equal | When you use the Has Attachments property, the search returns emails with or without attachments based on the Value setting. | If you mark toggle the Value setting On, your results include all messages that include an attachment. |
| Is Draft | Equals | Indicates whether or not messages are written and not sent. Use the values true or false. | If you mark toggle the Value setting On, your results include all emails that are in the drafted state. |
| Keyword Search | Search In | When you use the Keyword Search property in a query, the search returns all messages that contain the text you’re searching for. | If you search “Dear John,” your results include all messages that contain the text in email body. Note that this is not the same as searching for “Dear” OR “John”. In order to do that you need to enter keywords in separate lines. |
| Label | Equals | When you use the Label property, the search returns all messages that contains the search word or phrase in the emails' label. | If you search "Important," your results include all emails that are marked with the "Important" label. |
| Subject | Contains | When you use the Subject property, the search returns all messages that contains the search word or phrase in the email's title. | If you use the Subject property in a query, the search returns all messages which the subject line contains the text you’re searching for. In other words, the query doesn’t return only those messages that have an exact match. For example, if you search for subject “Quarterly Financials,” your results include messages with the subject “Quarterly Financials 2018.” |
Included in the Google Workspace Gmail Criteria is one toggle:
- Collect all email with attachments regardless of criteria—enable the toggle to collect emails and attachments. Disable to collect only emails that match the criteria.
- If you are using keyword search criteria, we recommend enabling the toggle, regardless of keyword search results.
- Use the Collect all emails with attachments regardless of criteria to collect all emails with attachments, including ones that do not match the selected keyword search criteria.
- Enabled—toggle on to collect emails that match the keyword search criteria, emails that match other criteria such as date range, and all emails with attachments regardless of keyword search criteria.
For example, if you add a date range and keywords, Collect pulls the following:- Emails with keywords in the body.
- Emails within the specified date range.
- Emails with attachments within the date range.
- Disabled—toggle off to collect only emails that match the search criteria.
- Enabled—toggle on to collect emails that match the keyword search criteria, emails that match other criteria such as date range, and all emails with attachments regardless of keyword search criteria.
- Other filter criteria still applies to the collection. For example, if you specify a date range along with keywords, Collect does not return any emails outside the date range. It returns the emails within the date range that are either responsive to the keywords or have an attachment.
- Collect Linked Files—enable the toggle to collect linked files related to Gmail emails in the mailbox export. Linked files can be, for example, PDF file, picture file, PowerPoint file, and so forth, that is linked from Google. Disable to exclude linked files related to Gmail emails in the mailbox export.
Google Drive
Setting criteria for Google Drive is not required. For more information on Advanced examples, see Google Workspace documentation.
Google Vault API usage limits do not permit more than 20 exports to be in progress simultaneously across your entire organization. If you have very large matters and need the maximum to be increased, contact Google for assistance. For more information, refer to Google Vault documentation on usage limits and usage quota increases.
The following table lists the filter criteria support for Google Workspace Drive collections. Setting criteria for Google Workspace Drive is not required. For more information on Advanced examples, see Google Workspace documentation.
| Criteria | Operators | Description | Example |
|---|---|---|---|
| Advanced | Equals | When you use the Advanced property in a query, specific Google Workspace search criteria become available in Collect. For more information, see Google Workspace documentation. | For more information on Advanced examples, see Google Workspace documentation. |
| File Type | Equals | When you use the File Type property in a query, the search returns all files that equals what is entered. | If you select "Google Sheets" as your value, your results include Google Sheet files. |
| Filename | Contains | When you use the Filename property in a query, the search returns all files that contain the value entered. | If you search "Important_Document,” your results include all files with "Important_Document” in the filename. |
|
Keyword Search |
Search In | When you use the Keyword Search property in a query, the search returns all files that contain the text you’re searching for. | If you search “Dear John,” your results include all messages that contain the text in the file. Note that this is not the same as searching for “Dear” OR “John”. In order to do that you need to enter keywords in separate lines. |
| Modification Date | Equals, Does Not Equal, Greater Than, Greater Than or Equals, Less Than, Less Than or Equals | When you use the Modification Date property in a query, the search returns all files that equal/doesn’t equal, greater/less than the selected date. | If you search “Less Than 1/1/2021,” your results include all files received before January 1, 2021. |
| Owner | Contains | When you use the Owner property in a query, the search returns all messages that contain the text in the Owner field. | If you search “Iscovery,” your results include all files sent by people with the "Iscovery" in their name, such as "Ed Iscovery." |
| Shared By | Contains | When you use the Shared By property in a query, the search returns all files that contain the text in the Shared By field. |
If you search “ExampleUser1,” your results include all filed shared by people with the UserExample1 in their name. |
|
Shared With |
Contains | When you use the Shared With property in a query, the search returns all files that contain the text in the Shared With field. | If you search “UserExample1,” your results include all files shared with people with the UserExample1 in their name. |
| Version Date | Equals | When you use the Version Date property in a query, the search returns the version of files on the selected date. | If you search 1/1/2021, your results include only the version of the files on 1/1/2021. The results won't include earlier or later versions of the file. |
Included in the Google Workspace Drive Criteria is one toggle:
- Collect files from shared drives—enable the toggle to retrieve data from shared drives, along with personal drives, that match the criteria. Disable to collect only data from personal drives that match the criteria.
Google Chat
Setting criteria for Google Workspace Chat is not required. For more information on Advanced examples, see Google Workspace documentation.
The following table lists the filter criteria support for Google Workspace Chat collections. Google Workspace Chat data is collected in RSMF.
| Criteria | Operators | Description | Example |
|---|---|---|---|
| Advanced | Equals | When you use the Advanced property in a query, specific Google Workspace search criteria become available in Collect. For more information, see Google Workspace documentation. | For more information on Advanced examples, see Google Workspace documentation. |
| Content Type | Equals | When you used the Content Type property in a query, the search returns messages with specific file types. | If you search with the value set to Google Docs, your results include all Google Docs sent as messages. |
| Keyword Search | Equals | When you use the Keyword Search property in a query, the search returns all messages that contain the text you’re searching for. | If you search “Dear John,” your results include all messages that contain the text in email body. Note that this is not the same as searching for “Dear” OR “John”. In order to do that you need to enter keywords in separate lines. |
|
Message Source |
Equals | When you use the Message Source property in a query, the search returns all direct messages or all messages in rooms. | If you search with the value set to "Messages in Rooms," your results include only messages sent in a group chat and no direct messages will be included. |
| Sent/Updated Date | Greater Than or Equals, Less Than, Less Than or Equals | When you use the Sent/Updated property in a query, the search returns all messages that equal/doesn’t equal, greater/less than the date entered. | If you search “Greater Than 1/1/2001,” your results include all messages sent after January 1, 2001. |
| Slice Interval in Hours | Equals | When you use The Slice Interval in Hours property, the search returns all messages in a specific time range or defaults the slice interval to 24 hours. | If you search with a slice interval set to one hour and a conversation spans five hours, you will end up with five RSMFs after processing. |
| User At | Contains | When you use the User At property in a query, the search returns all messages that contain the text in the User At field. | If you search “UserExample1” your results include all messages sent to people with the UserExample1 in their email address. |
|
User From |
Contains | When you use the User From property in a query, the search returns all messages that contain the text in the User From field. | If you search “ExampleUser1,” your results include all messages sent by people with the UserExample1 in their email address. |
Included in the Google Workspace Chat Criteria are two toggles:
- Include results from Spaces—enable this toggle to include all messages in spaces, along with direct messages, that match your query. Disable to collect only direct messages that match your query.
- Disable RSMF conversion—enable this toggle to keep data in its original format by preventing Relativity from converting the files into Relativity's short message format (RSMF) files. Relativity provides you win .json files when running collections with this toggle enabled.
Troubleshooting
This table includes troubleshooting for Google's data sources.
| Error | Cause | Resolution |
|---|---|---|
| The token is invalid. You must remove access and generate a new refresh token. | Your token is invalid. This could be due to changing the account owner. | While signed in with your account, navigate to https://myaccount.google.com/u/0/permissions. In the page, click Remove Access. Then generate a new refresh token. For more information on generating a refresh token, see Google Workspace data source |