Last date modified: 2026-Feb-03
Creating and running an Archive job
The archive function assesses a workspace’s primary and critical components and packages those components into an archive. ARM includes everything that is in a workspace database including:
- processing
- coding decisions
- layouts
- views
- saved searches
This archive can serve multiple purposes that vary for each organization. For example, you can use this archive to migrate a workspace from one SQL Server to another.
For ARM archive, if the SQL server has a security certificate installed, the archive can only be restored to an SQL Server with the same security certificate or to a database that has been encrypted before the restore process.
The archive process does not support archiving sentiment analysis results. You will need to re-run sentiment analysis on any documents for which you would like to see the results in the viewer after restoring the workspace.
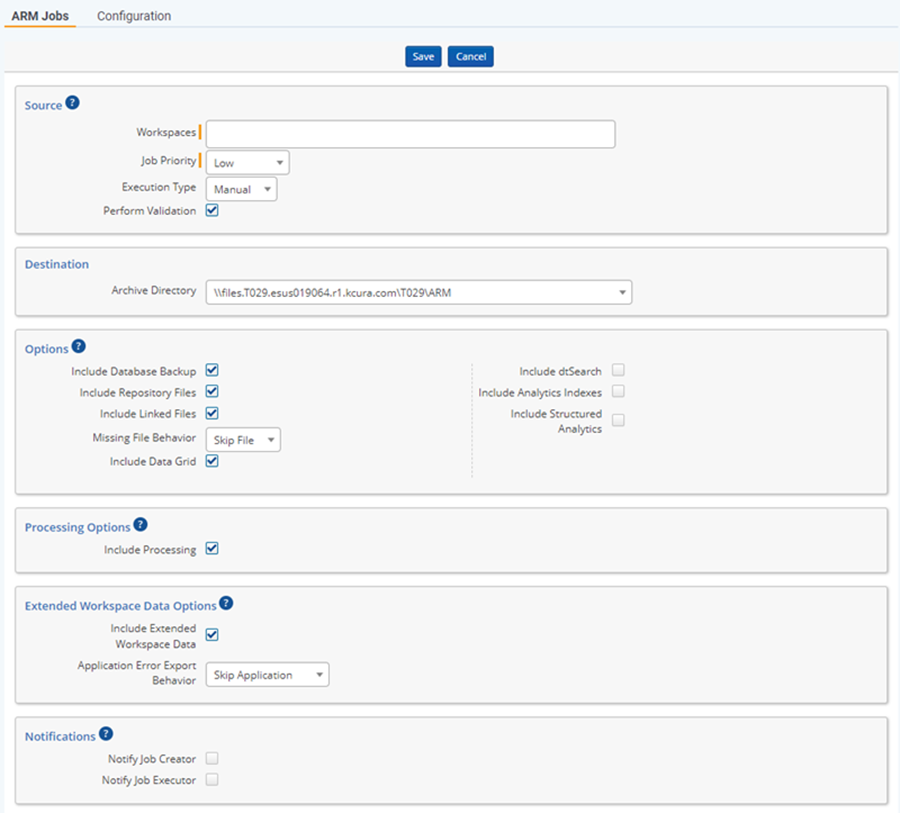
To create a new Archive job, click New Archive Job at the top of the ARM Jobs page. The New Archive Job page appears.
Configure the following settings in each section on the New Archive Job page:
Source
- Workspaces—select the workspace(s) from the drop-down list, or enter a workspace name in the search box that appears. You can also enter a few letters from a workspace name, and the list will filter based on your input. You can select multiple workspaces simultaneously from the drop-down list. When you select multiple workspaces, each job will be run with the same settings for database, files, indexes, archive path, etc. If you schedule a start time with multiple workspaces selected, each job shares the same start time.
- Workspaces in Cold Storage can be archived directly from the Workspace drop-down and do not have to be moved to an active state before archiving.
- When moving a workspace to Cold Storage, it remains within Relativity environment.
- Only a single job can exist for a single archive at a given time.
- Processing is included by default.
- Job Priority—select a priority of High, Medium, or Low for the job from the drop-down list. The job priority determines the order in which the ARM agents attempt to complete tasks for jobs that are running concurrently with other jobs.If multiple jobs are run at the same time, with the same priority, the job with the earliest creation date will be prioritized. Even if you create multiple archive jobs simultaneously, they do not share a simultaneous creation date. If two jobs do share a creation date, the priority is determined alphabetically.
- Execution Type—select from the following options:
- Manual—run the job manually from the Job List page.
- Scheduled—run the job automatically at a specified date and time. When you select this option, the Scheduled Start Time field appears. Click inside the field, and then select a date and time from the calendar. You can schedule multiple jobs to run at the same time.
- Perform validation—select whether to perform a file validation on files copied to archive locations and database validation. After repository and linked files are copied to the archive location, ARM will verify if those files are present in the archive location and the missing file list is completed if needed.If you clear (unselect) this field, a warning appears alerting you that additional verification steps will not be performed. We recommend leaving Perform validation selected to ensure ARM archive integrity.
Destination
- Archive Directory—the file path to the archive directory. These locations are pre-configured and are displayed for selection. There may be one or many locations configured for archive storage.
Processing Options
- Include Processing—select this checkbox to include Invariant/Processing data in the archive directory.
- When you enable this, ARM takes all information from both the Store database and the primary Invariant database relevant to the jobs in the Store. It also packages all discovered files, including non-repository files, from the Invariant data source location.
- You must have the Processing Migration Agent installed and enabled in order to use this option. If that agent is disabled, you will receive an error when you attempt to archive.
- To archive processing data, the Temporary directory field on the Worker Manager Server object in Relativity associated with the workspace in which you're processing data must display the BCP path and a server name, not just local host.
- You should not have any processing jobs, such as inventory, discovery, or publish, running in the workspace you are archiving while performing the processing archive job.
- If you receive an authentication error during the archive job, verify that the IdentityServerURL entry in the Invariant AppSettings table contains a valid address with a fully qualified domain name.
When Include Processing is not selected, be aware that ARM will not archive Invariant database or discovered files, and published files will be treated as Linked files. Also, you will not be able to process any data, such as documents, sets, profiles, from the source workspace in the restored workspace because it was not included when archived. Additionally, if you do not plan to use Processing after restoring, but you need a copy of published files, then do not select Include Processing and select Include Linked Files under the Options section. - Include Processing Files—select this checkbox if you want all the files and containers that have been discovered by Processing to be archived and placed in the Invariant directory.
- Missing File Behavior—select from the drop-down menu whether to skip missing files and complete the job or to stop the job when a missing file is encountered.
- Skip File—if you select to skip missing files to keep the job running, a CSV file is provided after the job has completed so that you can review the files that were skipped.
- Stop Job—if the job is set to stop on missing files, the first missing file will immediately stop the job, and that file must be placed in the expected location before the job can resume.
Options
- Include Database Backup—select this option to include the workspace database in the archive. The database will be backed up, compressed, and placed in the archive directory. If you do not select this option, the database is not archived, and in order to restore the archive, you must manually restore the database on the target SQL Server.
- Include Repository Files—select this checkbox to include all files in the workspace file repository, including natives, images, production, and files on file fields.
- Include Linked Files—select this checkbox to include files that are linked to the workspace, but that are not located in the workspace file repository, in the archive directory.
- Linked files included in the archive will be placed into the restored workspace repository after a successful restore.
- Linked files will be any files marked as InRepository=0 in the File table which include files loaded with pointers.
- Missing File Behavior—select from the drop-down menu whether to skip missing repository files and complete the job or to stop the job when a missing file is encountered.
- Skip File—if you select to skip missing files to keep the job running, a CSV file is provided after the job has completed so that you can review the files that were skipped.
- Stop Job—if the job is set to stop on missing files, the first missing file will immediately stop the job, and that file must be placed in the expected location before the job can resume.
- Include Data Grid—select this checkbox to include Data Grid application data if present. If you are using any of the Data Grid features such as Audit or storing long text, we recommend selecting this checkbox.When Include Data Grid is unselected, a warning will appear alerting you that this action may create an incomplete archive of Relativity audits or long text document fields. It is recommended this option be selected if Data Grid or Audit is included in the workspace.
- Include dtSearch—select this checkbox to include dtSearch indexes in the archive directory. If dtSearch indexes exist in the workspace, but you do not select the option to include them, when the workspace is restored, those indexes will cease to function and will need to be removed and recreated from scratch. It is very important to archive dtSearch indexes if you want to keep them.
- Include Analytics Indexes—select this checkbox to include Analytics indexes in the archive directory.
- You cannot archive a workspace from RelativityOne to Relativity Server.
- If Analytics indexes or Structured Analytics sets exist in the workspace, but you do not select the option to include them, when the workspace is restored, these will cease to function and you will need to run Full build. It is very important to archive these if you want to keep them.
- Include Structured Analytics—select this checkbox to include structured analytics sets such as email threading, language identification, etc.
Extended Workspace Data Options
- Include Extended Workspace Data—select this checkbox to include all admin scripts, non-core applications, and standalone resource files as exports in the archive directory. This option should be selected to preserve the status of a Repository workspace when restored.The Repository Workspace application will be included in the archive created when you select Include Extended Workspace Data.
- Application Error Export Behavior—if Include Extended Workspace Data is selected, this field appears.
- Skip Application—this is the default selection. This option keeps running the job even if it encounters multiple errored applications. After the job has completed, a CSV file is provided so you can review the applications that errored and were skipped.
- Stop Job—select this option to stop the job on the first errored application.
Notifications
Specific email notification settings can be configured on the Configuration page. However, selecting these two options will register the Job Creator or Job Executor for all of them. You will not receive redundant alerts. For example, if you are the job executor, you will not receive the Job Started notification.
- Notify Job Creator—select this checkbox to notify the job creator by email when the job is started, paused, or canceled, or when the job completes successfully or fails in error.
- Notify Job Executor—select this checkbox to notify the job executor by email when the job completes successfully or fails in error.
When you are finished configuring settings for the Archive job, click Save.
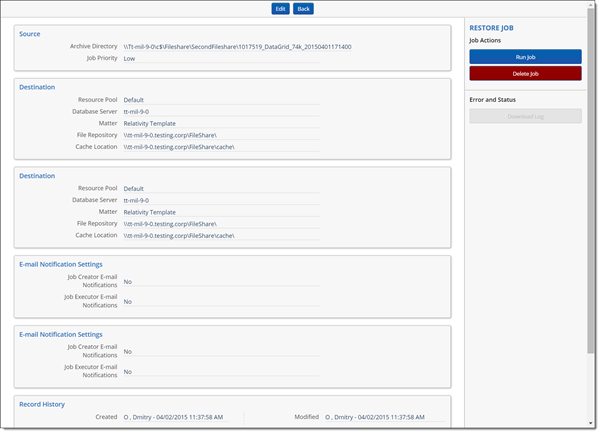
The Archive Job Details page appears with the Job Actions console.
At this point, you can:
- Click the Run Job button in the console to run the job manually. See Job statuses and options.
- Click the Delete Job button in the console to delete the job.
- Click the ARM Jobs tab on the page to navigate back to the ARM Jobs list and view the newly created Archive job.


