Last date modified: 2026-Feb-20
Preservation sources
A preservation data source allows you to define where you want to put data on preservation hold. Set up workspace data sources before beginning preservations.
Preservation data sources are stores of information from which you preserve data. These preservation sources have parameters that you can set during the creation of a preservation job.
See these related topics:
- Google Workspace preservation source
- Microsoft 365 preservation source
- Slack preservation source
- Preservations
Creating a preservation data source
There are multiple data sources to create within the Preservation app. Some sources need extra steps, but there is a general creation workflow.
To add a preservation data source:
- Navigate to the Preservation Data Source tab.
- Click the New Preservation Data Source button.
- Enter in a unique name for the data source in the Name field.
- Select a data Source Type.
Fields will be different depending on the selected source type. - Enter in the data source-specific fields for your select data source. For more information, see Create the Google Workspace data source, Creating the Microsoft 365 preservation source, and Creating the Slack data source.
Common fields include:- Name—enter in a unique name for the preservation data source.
- Show in Wizard—select Yes to show this data source in the preservation wizard. Select No to hide this data source in the preservation wizard. For more information, see Data sources in wizard.
- Click Authenticate for Google or Validate Credentials for Microsoft 365.
- Select or sign into the account on which behalf preservations will be performed.
If authentication is successful, a confirmation message appears. - Close the window the successful authentication window.
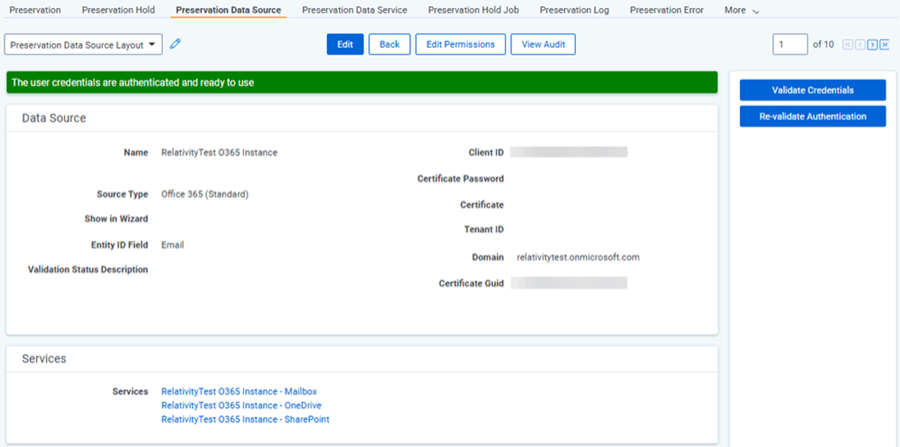
- Click the Re-Validate Authentication button in the right pane on the Preservation Data Source that you created. You should see the following status, “The user credentials are authenticated and ready to use.”
For data source-specific setup procedures, see Google Workspace preservation source and Microsoft 365 preservation source.
Viewing preservation source details
After creating a data source, you can view the details page. The view includes the information you provided when creating the data source. For example, the Microsoft 365 data source page includes the client ID, certificate, and domain.

Each data source details page includes a console to complete actions. Each data source has different actions.
- Google
- Authenticate—click to authenticate the client ID and client secret with Google.
- Re-validate authentication—click to re-authenticate the client ID and client secret with Google.
- Microsoft 365
- Validate credentials—click to validate the client ID, certificate, and other credentials with Microsoft 365.
- Re-validate authentication—click to re-authenticate the client ID, certificate, and other credentials with Microsoft 365.
- Slack
- Validate credentials—click to validate the client ID, certificate, and other credentials with Slack.
- Re-validate authentication—click to re-authenticate the client ID, certificate, and other credentials with Slack.
Data sources in wizard
You can hide a data source from being displayed in the preservation wizard. Select No on the Show in Wizard field. Select No when you want to hide invalid data sources to users when they're configuring holds. With only valid data sources shown, users can see a clean view of only configured data sources.
Understanding data services
When you create a data source, you are connecting to data services. For example, you integrate Microsoft 365 with RelativityOne. After integrating the Microsoft 365 data source, you can select Microsoft data services. Microsoft data services include Microsoft 365 mailbox, SharePoint, and OneDrive.
You will select these data services in the Preservation wizard. For more information, see Creating a preservation.
You can review these data services in the Preservation Data Service tab. On this data services list page, you can click into an existing data service. For example, you can click into the a Microsoft 365 SharePoint service. On the SharePoint data service details page, you will see a console with a Refresh Sites button. Click Refresh Sites to identify and add new SharePoint sites that were added after the initial integration with Microsoft.


