


Feedback
Last date modified: 2026-Feb-10
Creating Conditional Coding Rules
Use the following steps to add information for a coding rule:
Refer to Best practices for building coding rules for guidelines to improve your rule creation.
- Navigate to the Conditional Coding Rules tab.
- Click New Conditional Coding Rule.
- Complete the fields and add conditions or logic groups to the rule. See Fields for conditional coding rules. To reorder condition cards or logic groups, hold the left mouse button down on the six-dot drag handle on the left side of the card and drag it to the desired position. Alternatively, a single left click on the six-dot icon displays an up and down arrow to control ordering.
- Click Save. If the Enable field is toggled on, your coding rule is immediately active.
- Optionally, test the rule to see how it works.
Fields for conditional coding rules
The Conditional Coding Rule contains the following fields for basic information about the rule, the conditions for the rule, and the action message displayed when the rule is not fulfilled:
Basic Information:
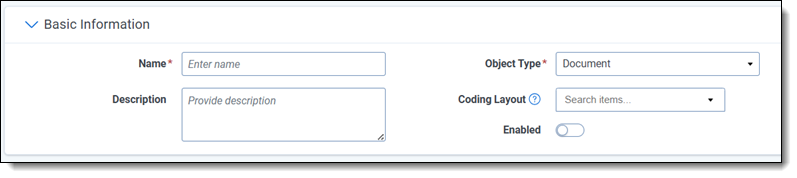
- Name—enter a descriptive, unique name for the rule.
- Description—optionally provide further details about the rule, such as its intended purpose or outcome. This information only appears in the Description column of the Conditional Coding Rules list.
- Object Type—select which Object Type the rule relates to or begin typing the first few letters of the object to display matching options to select from. Document is the default. System objects are not shown in the list.
- Coding Layout—optionally select one or more layouts for which this rule applies. If you leave this blank, the rule will apply to every layout that contains all the fields that have been configured in the rule.
- Run Even If Fields Absent toggle—click the toggle to allow the rule to execute even when some or all of the fields referenced in its conditions are not present on the current layout. This setting is disabled by default.
- Enabled toggle—click the toggle to enable or disable the rule within the workspace.
Rule:
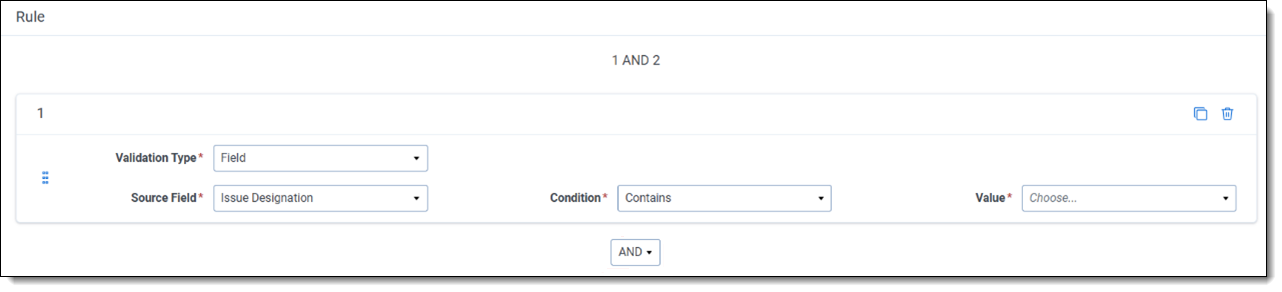
- Validation Type—select Field or User as the type of rule that you want to validate. Supported field types include Current User, Long Text, Fixed-length Text, Single Choice, Multiple Choice, and Yes/No fields. For the Current User field, conditions are only validated for the user currently logged in to Relativity.When using condition cards with the Field validation type, by default all referenced fields must be present on the coding layout for the rule to execute. To run a rule even when some fields are not on the layout, you must enable the Run Even If Fields Absent toggle in the Basic Information section.
- Source Field—the name of the field to validate. This field does not appear if you selected Group as the Validation Type.
- Condition—select an operator to use for validation. The field type that you selected for the Validation Type must support the operator. See Supported conditions by field type.
- Value—select a choice that you want to use for validating your condition.
- AND/OR—this operator drop-down appears when more than one condition card is present. Its default value is AND.
Action:
- Show Message—enter the validation error message that users see when they have not met all conditions in the rule.
Example Rule
This example shows how to create a Conditional Coding Rule that ensures a user selects an option for the Issue Designation field if they chose Responsive in the Responsiveness field. It will display an error message and prevent saving if no Issue Designation selection is made.
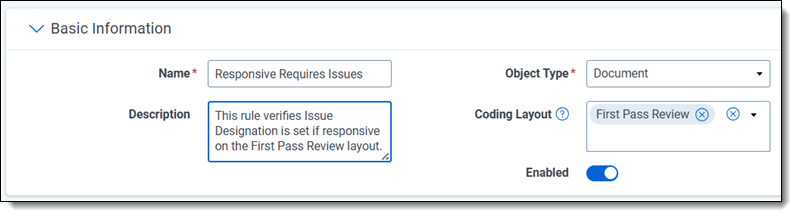
Basic Information values:
- Name: Enter Responsive Requires Issues.
- Description: Enter This rule verifies Issue Designation is set if responsive on the First Pass Review layout.
- Object Type: Keep the Document default value.
- Layouts: Select First Pass Review.
- Enabled: Click toggle On to enable the rule.
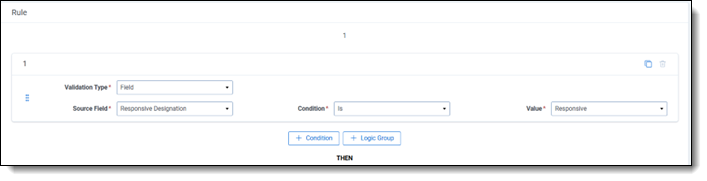
Rule section values:
Add the first condition:
- Validation Type: Select Field.
- Source Field: Select Responsive Designation.
- Condition: Select Is.
- Value: Select Responsive.
Add the second condition:
- Click + Condition to create a new condition card. Repeat this process when you need to add another condition.
- Validation Type: Select Field.
- Source Field: Select Issue Designation.
- Condition: Select Is Not Set.
Action value:
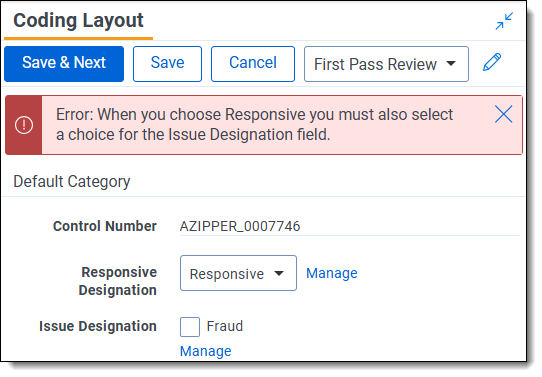
- Show Message: Enter When you choose Responsive, you must also select a choice for the Issue Designation field.
When the user selects Responsive in the Responsiveness field on the Coding Layout form but does not enter an Issue Designation, the rule's error message displays. The user will not be able to save the form until the proper action is executed:
Supported conditions by field type
When building a condition, use only the operators supported by the field type chosen in the Validation Type drop-down box. The table below displays a check mark for each operator supported by specific field types.
| Operator | Current User | Fixed Length Text | Long Text | Multiple Choice | Single Choice | Yes/No |
|---|---|---|---|---|---|---|
| Is | ü | ü | ||||
| Is Not | ü | |||||
| Is Set | ü | ü | ü | ü | ||
| Is Not Set | ü | ü | ü | ü | ü | |
| Contains | ü | |||||
| Has Changed Do Not Include Initially Set | ü | ü | ü | |||
| Has Changed Include Initially Set | ü | ü | ü | |||
| Is In Groups | ü | |||||
| Is Not In Groups | ü |
Additional information about operators
Conditional Coding Rules provide operators that you can use to control whether the rule executes on a layout that does not contain any initial values. In general, the fields on the layout will not contain any value when a user first begins to code with it. You may not want your rule to fire when initial updates are made. You could use the operator called Has Changed Do Not Include Initially Set to add a condition in the rule. When you set this condition, the rule executes as follows:
- When the user sets the initial values on a layout, the rule does not execute.
- When the user sets or updates any subsequent values, the rule will execute.
For example, the layout contains a required Responsiveness field that is not set when the user initially accesses the layout. You would not want the rule to execute and display an error message the first time that a user updates the field, on subsequent changes.
In addition, you may want to add a condition that ensures the rule executes when the user changes an existing value on a layout. You could use the Has Changed Include Initially Set operator to add this condition. When you set this condition, the rule executes as follows:
- When the user sets the initial values on a layout, the rule will execute.
- When the user sets or updates any subsequent values, the rule will execute.
For example, you may want the rule to execute only after the Responsiveness field on a layout has been updated to a new value. When a user changes the value from Not Responsive to Responsive, or from unset to Responsive, you may want to execute the rule to ensure that the Issue Designation field is also set.
Using logic groups
Your coding rule may require more complex nesting or parenthesis to achieve the desired outcome. Click the + Logic Group button to add a container to the rule. Drag individual condition cards into the logic group using the six-dot drag handle on the left side of the card. The logic is represented at the top of the condition builder.
Logic groups can be nested within other logic groups to a depth of three levels.

To reorder logic groups, hold the left mouse button down on the six-dot drag handle on the left side of the card and drag it to the desired position. Alternatively, a single left click on the six-dot icon displays an up and down arrow to control ordering.
To remove an entire logic group and its contents, use the trash can icon located at the top right of the logic group box. However, if you wish to retain any condition cards or groups within the logic group, drag them out of the box before deleting the logic group.
Editing coding rules
Use either option below to update a rule:
Changes to one workspace's coding rule will not impact other Relativity workspaces with similar rules.
- Click the Edit pencil icon appearing next to its name on the Conditional Coding Rules tab.
- Click the name of the rule, then click the Edit button at the top of the page.
Deleting coding rules
To delete a coding rule:
This does not impact any other workspaces where similar rules may exist.
- Navigate to the Conditional Coding Rules tab.
- Use the Delete mass operation to remove the rule from the workspace.