Custom SAML 2.0
Some identity providers do not have a dedicated option in the SSO setup wizard. For those providers, select SAML 2.0 and enter the connection details yourself.
This topic covers the SAML 2.0 settings only. For the shared wizard steps, see SSO setup.
This documentation contains references to third-party software, or technologies. While efforts are made to keep third-party references updated, the images, documentation, or guidance in this topic may not accurately represent the current behavior or user interfaces of the third-party software. For more considerations regarding third-party software, such as copyright and ownership, see
Terms of Use.
When to use SAML 2.0
Select SAML 2.0 in the Provider Type step when both of the following are true:
- Your identity provider supports the SAML 2.0 protocol.
- Your identity provider does not have its own option in the Provider Type step.
Identity providers that commonly use this option include ADFS, Duo, Keycloak, and PingFederate.
Some identity providers support both SAML 2.0 and OpenID Connect. Select the protocol your provider is configured for. For OpenID Connect, see
Custom OpenID Connect.
Before you begin
Complete these items before you start the wizard:
- Create an application for Relativity in your identity provider.
- Confirm you have administrator access to your identity provider.
- Review the prerequisites in Prerequisites.
Open your identity provider in a separate browser window while you work through the wizard. You move values between the two systems.
SAML 2.0 settings in Relativity
Enter the configuration details from your identity provider on the Configure SSO Provider screen.
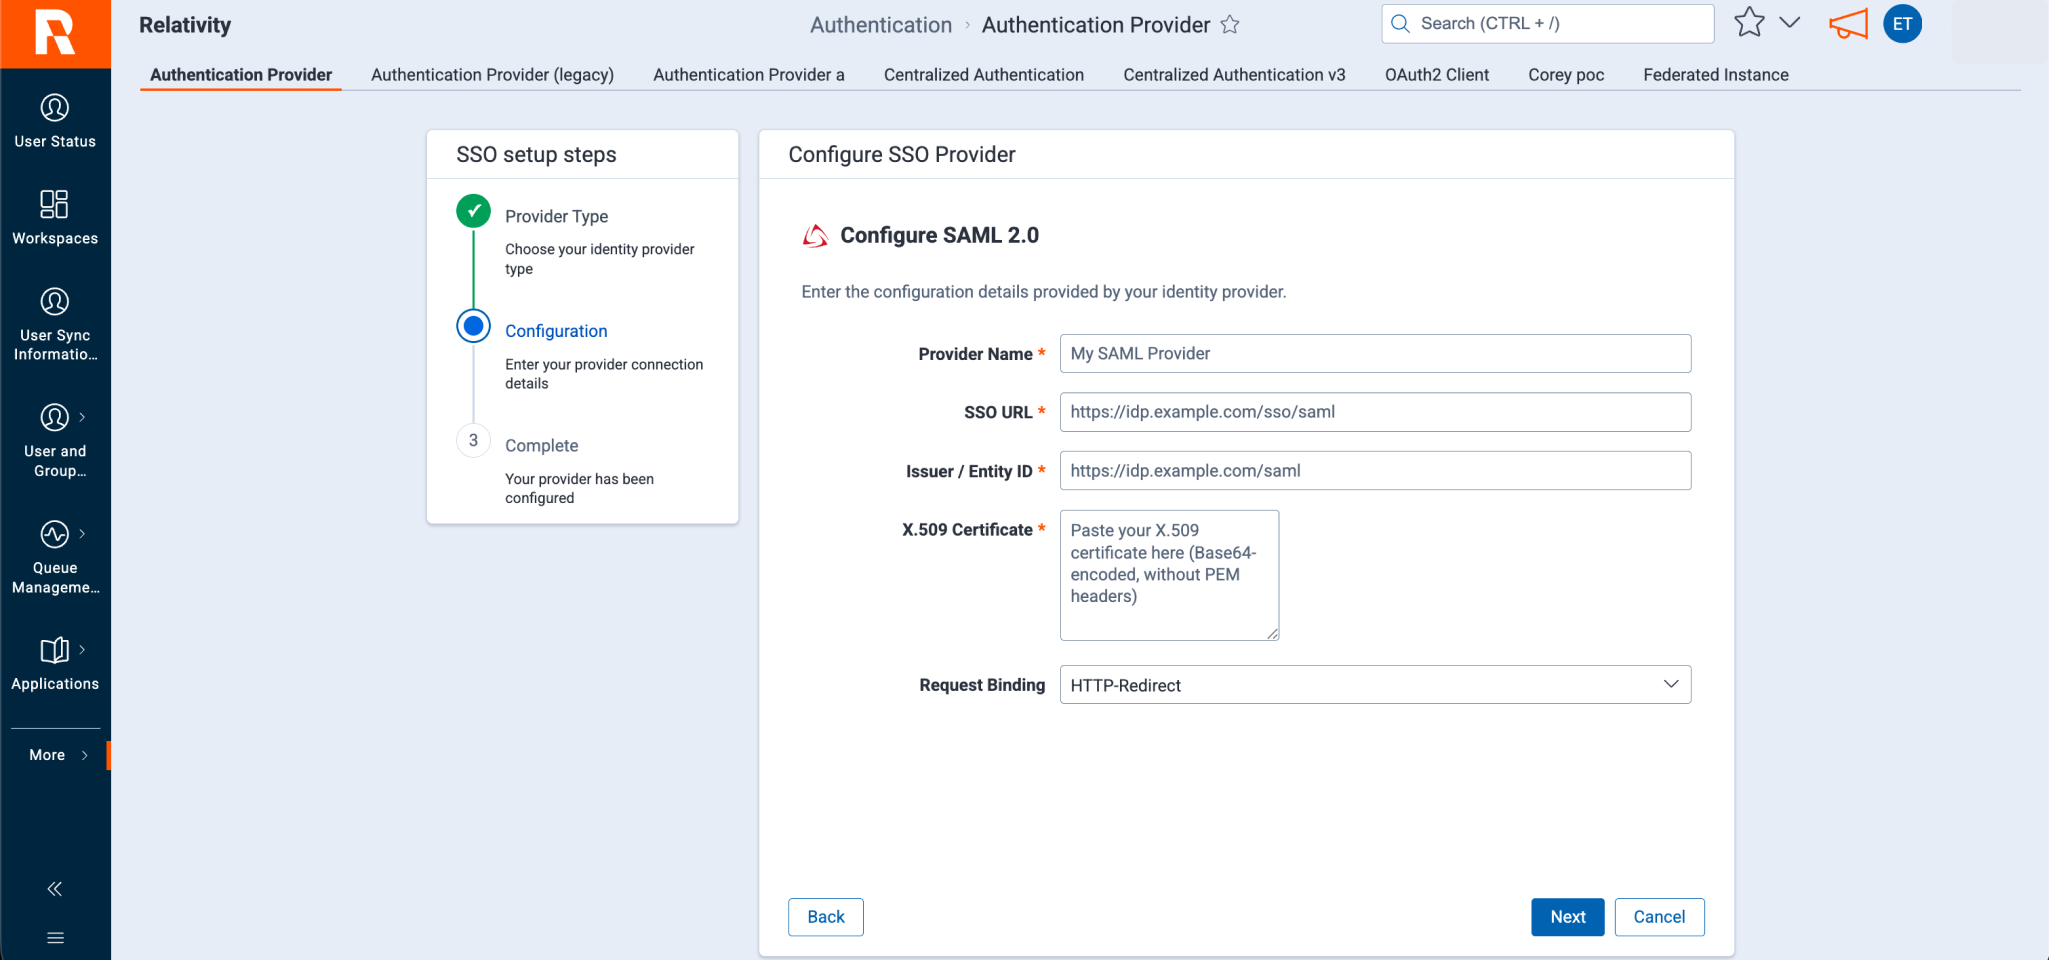
Complete these fields:
- Provider Name—enter a name for the connection. The login page shows this name on the SSO button.
- SSO URL—enter the single sign-on URL from your identity provider.
- Issuer / Entity ID—enter the unique identifier of your identity provider.
- X.509 Certificate—paste the Base64-encoded signing certificate from your identity provider. Remove the PEM header and footer lines.
- Request Binding—select the binding your identity provider expects. The default value is HTTP-Redirect.
Provider Name, SSO URL, Issuer / Entity ID, and X.509 Certificate are required.
Relativity aiR supports only the RSA-SHA256 assertion signing algorithm. Configure your identity provider to sign assertions with that algorithm.
Getting the values from your identity provider
Collect these values in your identity provider before you start the wizard. Field labels differ by provider, so check your provider's documentation for the equivalent name.
- The single sign-on URL, sometimes called the SSO endpoint or the login URL.
- The issuer, sometimes called the entity ID or the IdP identifier.
- The signing certificate.
For the steps to create the application and locate these values, see your identity provider's documentation.
Testing and enabling the provider
After you enter the settings, the wizard generates a callback URL. Add it to your identity provider, then test the connection.
For these shared steps, see Registering an SSO provider.
Assign your users to the application in your identity provider before you test the connection. The test simulates a login.
See these related pages:


