Last date modified: 2026-Feb-20
Reporting and monitoring using Audit
This topic provides use cases for when you can use the Audit application to report, monitor, and search through Relativity’s audit records. Use this information to familiarize yourself with the functions and capabilities of the Audit application to help monitor activity in your Relativity instance.
Identifying Relativity scripts and long-running queries
This use case highlights how you can use Relativity scripts run in a workspace or instance to determine who is running the scripts and if the scripts are causing performance issues in your environment.
You can perform this workflow from the Audit tab at the instance or workspace level.
- In the List view of the Audit tab, scroll under the Action column for RelativityScriptExecution.
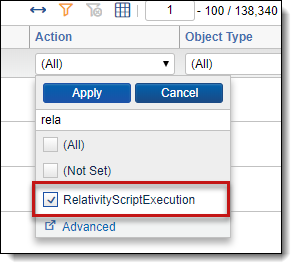
- Click Apply to filter results.
With this filter, you can view all users who ran a Relativity script and see how frequently they ran each script over time using the timestamp widgets. The Object Name should have details on what the script was performing. If it does not, you can check the Audit Details section for more information on the script including what the query was performing (see the JSON tab in Audit Details).
- To access the Audit Details, click
 in the Details column for the record you wish to view.
 - Toggle between the Table and JSON tab. The JSON tab contains information on what query the script performed.
- Close the Audit Details to return to the Audit tab.
- In the List, click on the Execution Time (ms) column to change the sort.
By altering the sort, you can view which scripts are taking the most time to run. Long running scripts can cause issues with the user experience in Relativity. These long running scripts should be running during the off-hours or a downtime window as to not affect other users.
Identifying incorrect coding and performing a mass revert
This use case highlights how to filter to identify incorrect or erroneous coding decisions and then perform a mass revert to update the coding decision back to the previous selection.
You can only mass revert audits from the workspace Audit tab.
Use filters to query on all updates and mass edits performed by a specific user:
- Navigate to the workspace Audit tab.
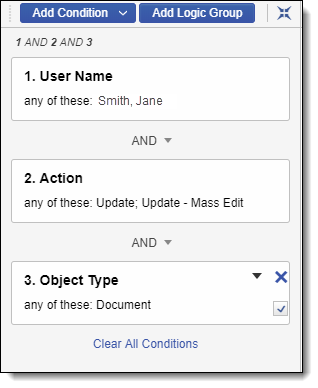
- In the List view, filter on the User Name column for a specific user.
- From the search panel, click Add Condition, and then select the Action field.
- Select the Update and Update - Mass Edit actions.
- Click Apply.
- Click Add Condition again, and then select the Object Type field.
- Select the Document object.
- Click Apply.
Before reverting documents to the previous coding decision, create a report of the documents you're about to revert:
- From the mass operations bar, select Export in the drop-down menu.
- Next to Format, select Comma Separated Values (.csv).
- Click Run.
- Save the exported report.
Perform a mass revert to update the document coding decisions to the previous selection:
- In the items per page option, adjust the display up to the number you wish to revert (maximum 1000).
- From the mass operations bar, select Revert in the drop-down menu.
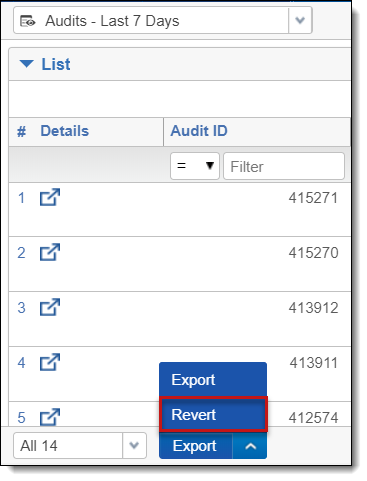
- A pop-up window appears verifying the audits can be Reverted. Once complete, click Run to revert the documents.
You can also use a similar workflow to identify when Mass Updates are occurring and monitoring users performing mass actions.
Tracking user access and identifying potential breaches
This use case highlights how to create a view in the Audit tab to regularly report users accessing the Relativity instance. This view can help identify users’ login, logout, and failed login attempts.
You can only perform this workflow from the instance Audit tab.
- Navigate to the instance Audit tab.
- Click the view drop-down menu, and then click New View.
- Enter the following name for you view: Security Analysis - Last 30 Days.
- On the Fields tab, add the following fields to your view:
- Details
- Audit ID
- Timestamp
- Object Name
- Object Type
- User Name
- Object ArtifactID
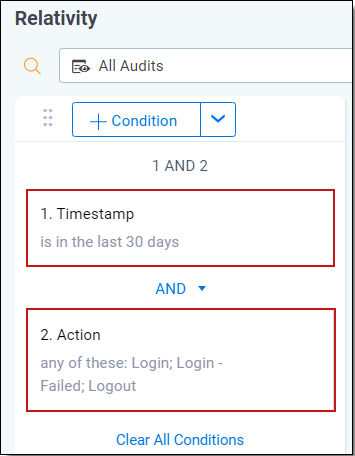
- On the Conditions tab, click Add Condition, and then select the Timestamp field.
- Next to Operator, select is in.
- Select Last 30 Days from the drop-down list.
- Click Apply.
- Click Add Condition, and then select the Action field.
- Next to Operator, select any of these.
- Select the following actions:
- Login
- Login - Failed
- Logout
- Click Apply.
Once you create this view, you or your security team can filter on the Login - Failed action for more insight into what caused the login failure.
- On the Count of Action widget, select the Login – Failed action.
- Click Apply.
- On the Count of User Name by Timestamp widget, look for a User Name of 0. Click on the 0 username to filter.
A username of 0 indicates someone who is not a registered user for your Relativity instance. The reason for this varies and could be as simple as someone incorrectly typing their username. However, it could also indicate an attempt to breach the system. It’s important to note when these times occur and if there's a pattern.
Aggregating the number of errors over time
This use case highlights how to identify patterns of errors over time. Use the timestamp widgets to see if there are a consistent amount of errors occurring during a specific time of day. By using a few different filtering methods - directly in the List, on a widget, adding conditions - you can view patterns of errors specific to services, agents, etc. with Relativity to see if something is consistently causing users issues in Relativity.
You can only perform this workflow from the instance Audit tab.
- Navigate to the instance Audit tab.
- In the List view, filter on the Object Type field to only display only the Error object.
- Once you apply the filter, view the various timestamp widgets above the List.
- If you notice a consistent pattern where the Error action occurs, use your mouse to click and drag on a specific timeframe in each of the timestamp widgets.
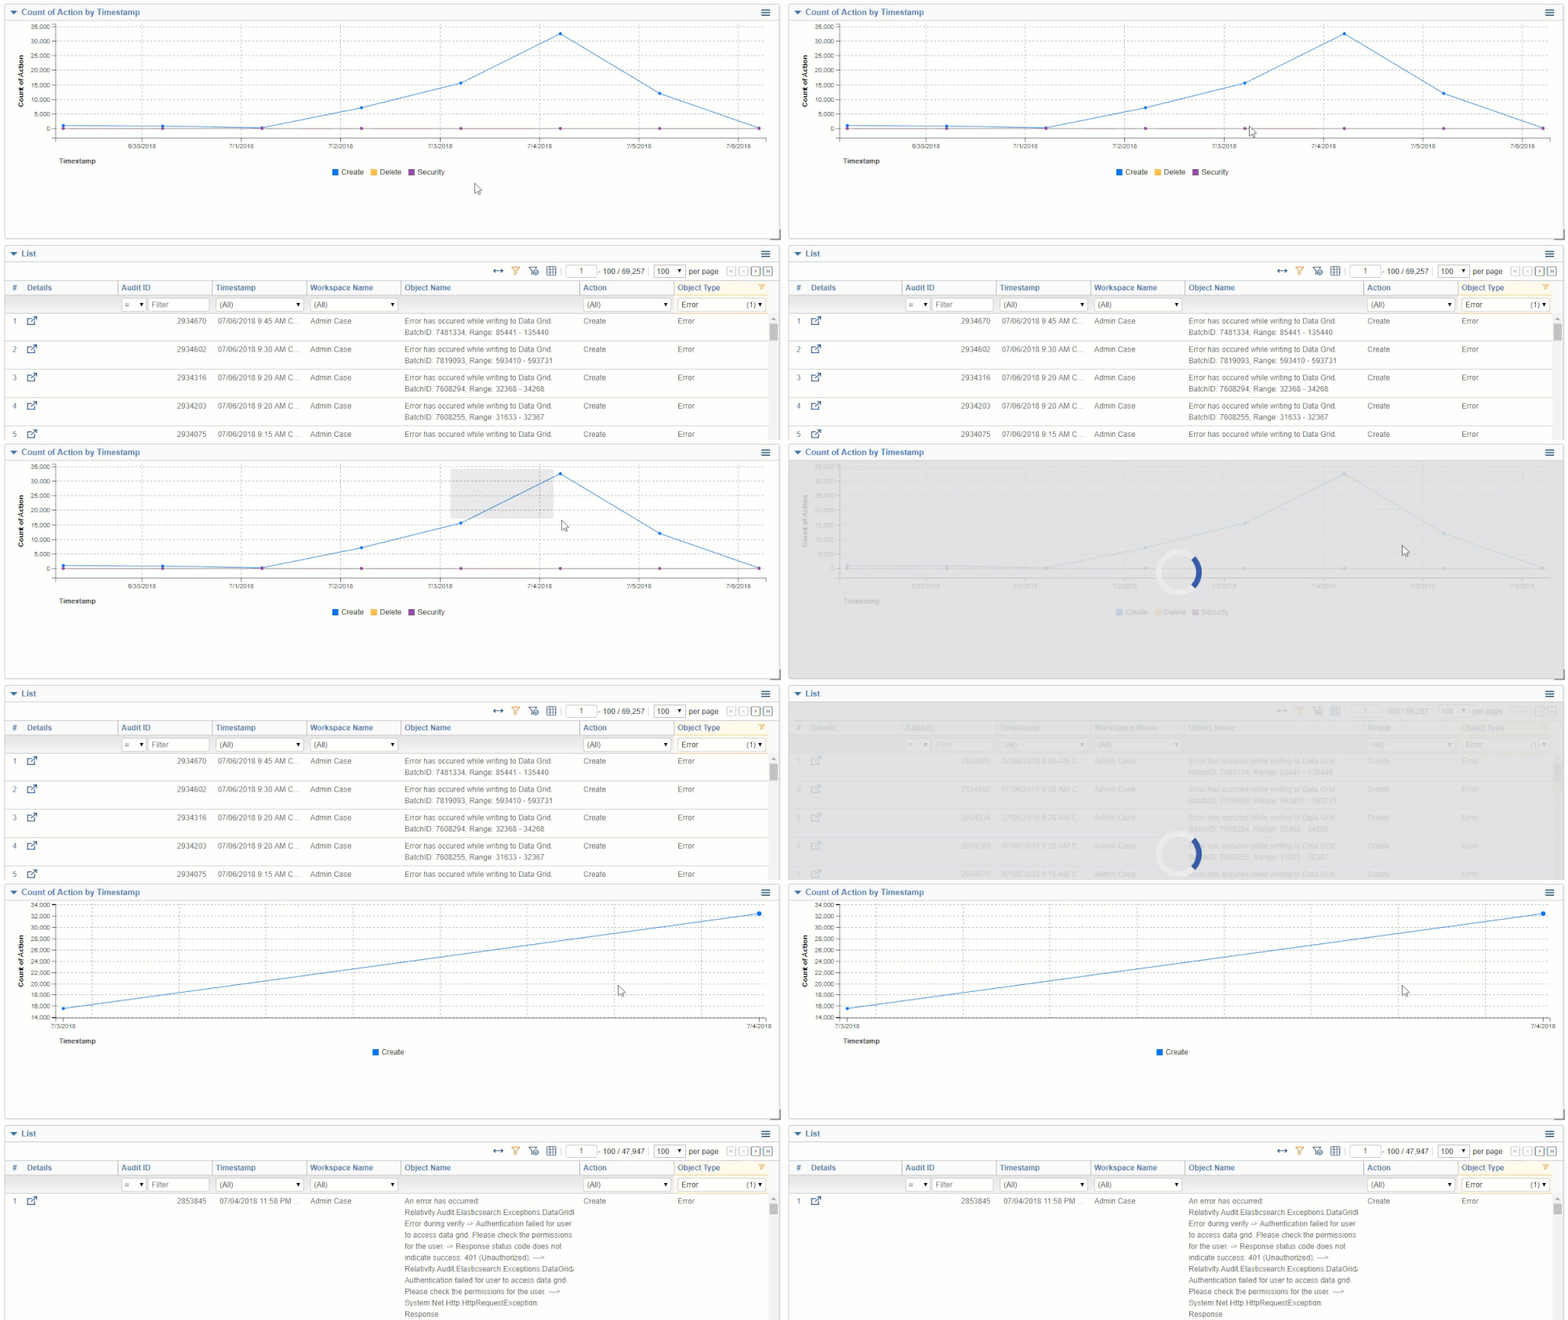
- In the List view, use the Object Name field to see more details about the error.
You can also add a condition to filter on the Object Name field for a specific component of Relativity. Selecting the Object Name field gives you a free text search back. You can specify a specific string or set of string along with the is like operator to filter for errors for a specific component.
You can also save these filters in a View to regularly monitor for specific errors occurring in Relativity.


