


Feedback
Last date modified: 2026-Jul-14
Box data source
This topic provides details on how to capture Box with Collect.
This documentation contains references to third-party software, or technologies. While efforts are made to keep third-party references updated, the images, documentation, or guidance in this topic may not accurately represent the current behavior or user interfaces of the third-party software. For more considerations regarding third-party software, such as copyright and ownership, see Terms of Use.
Collection size
Box collections are constrained primarily by API rate limits rather than strict job limits.
| Category | Details |
|---|---|
| Hard limits (enforced) | No custodian hard stop. |
| Planning thresholds (guidance) | Greater than 20 custodians with large folder trees often throttled. |
| When to split | Sustained throttling. |
| Notes | API rate limits dominate. |
Monitor for throttling and split jobs reactively when limits are encountered.
Task checklist
The table lists the order to set up this data source for RelativityOne Collect.
| Order | Application Used | Task |
|---|---|---|
| 1 | Box | Create and authorize Collect as an application in Box |
| 2 | RelativityOne | Create the Box data source instance in Collect |
| 3 | RelativityOne | Configure the Box data source in Collect |
Box application setup
Before using the Box data source in Collect, you must create and authorize Collect as an application in Box.
The Box connector relies on Server Authentication, with JWT. SSO is currently not supported.
Creating an application with Box
Create and download a config.json file. For more information, see Box's
The config.json file will contain the values required to configure a data source connection in Collect.
In Box:
- Log into Box.
- Navigate to the Developer Console.
- Click Create New App.
- Click Custom App.
- Select Server Authentication (with JWT).
- Enter an App Name.
- Click Create App.
- In App Access level, select App Access + Enterprise Access.
- In Content Actions, select Read all files and folders stored in Box and Write all files and folders stored in Box.
- In Advanced Features, select Make API calls using as-user header and Generate user access tokens.
- Add and Manage Public Keys clicking Generate a Public/Private Keypair. Authentication is required for this step.
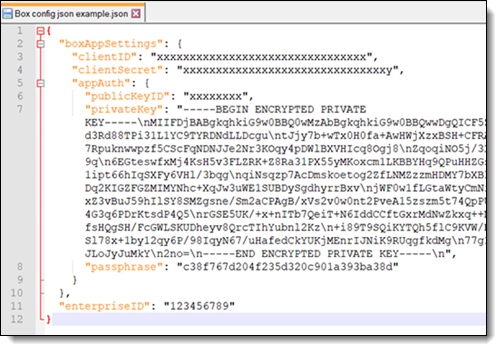
A .json file will be downloaded to your machine. Save the file in a secure location. This file contains the values required to configure a data source connection in Collect. This file can also be downloaded from the App Settings section.
Authorizing an application
Ensure you get approval to use the Box application within your enterprise. Follow the steps provided by Box to submit for approval.
Finally, you must get authorization from a Box admin to use the authentication application.
Creating the data source instance in Collect
Use the following procedure to connect the Box data source instance to Collect.
In RelativityOne:
- Navigate to Collection Admin within Collect Admin of Set Up.
- Click the New Collection Source Instance button.
- Do the following:
- Name—enter in a unique name for the data source instance.
- Type—select the Box data source.
- Settings—enter the required information in the Settings fields. For more information on the fields, see Settings fields.
- Click Save. The data source displays on the Collection Admin page.
Settings fields
Gather the information listed from the .json file, and enter it into the Settings fields:
- Client ID—enter the Client ID of the requesting application. This can be found with authorization_code, client_credentials, or urn:ietf:params:oauth:grant-type:jwt-bearer as the grant_type.
- Client Secret—enter the client secret of the requesting application to gain an access token.
- Public Key ID—enter the Public Key ID of the requesting application that you found in your app configuration settings .json file.
- Private Key—enter the encrypted private key that you found in your app configuration settings .json file.
- Passphrase—enter the pass phrase that you found in your app configuration settings .json file.
- Enterprise ID—enter the Enterprise ID that you found in your app configuration settings .json file.
Data source details
Each data source details page includes an Actions console. The options available will be different for each data source.
You can click Validate Connection to validate the client ID, client secret, and other credentials with Box.
Configuring the data source in Collect
Each data source used in Collect has different search criteria on the Collection Details step when creating a collection job. The criteria needs to be configured next.
- Configure search criteria to collect specific data.
- Select and unselected tabs—choose the data sources to collect from by moving unselected data sources to the selected list.
- Field—choose the field to filter on within the data source.
- Operator—choose an operator such as equals, contains, greater than, or less than.
- Value—enter a value to find in the selected field.
- Click Add Criteria.
The following table lists the filter criteria support for Box collections. Entering the start date and end data criteria isn't required.
| Criteria | Operators | Description | Example |
|---|---|---|---|
| Creation Date | Greater Than or Equals, Less Than or Equals | When you use the Creation Date property in a query, the search returns all messages that equal/doesn’t equal, greater/less than the date entered. | If you search “Greater Than 1/1/2001,” your results include all messages created after January 1, 2001. |
| Modification Date | Greater Than or Equals, Less Than or Equals | When you use the Modification Date property in a query, the search returns all updated files that equal/doesn’t equal, greater/less than the date entered. | If you search “Less Than 1/1/2020,” your results include all files modified before January 1, 2020. |