Feedback
Last date modified: 2026-Mar-04
Normalize redactions across relational group
You must have valid Relativity Community credentials in order to download any Community file linked to the documentation site. You'll need to enter those credentials on the Community login screen if you're not already logged in. If you're already logged in to the Community at the time you click a link, the file is automatically downloaded in the bottom left corner of your screen. If you get an error message stating "URL No Longer Exists" after clicking a Community link, it may be due to a single sign-on error related to the SAML Assertion Validator, and you should contact your IT department.
The Normalize Redactions Across Relational Group script facilitates normalizing redactions across duplicate imaged documents. This solution does not affect redactions on native files.
Before you begin
The Normalize Redactions Across Relational Group solution facilitates normalizing redactions across duplicate documents. Any redactions that exist on a document in a relational group are applied to all other documents in the relational group where the redaction does not already exist.
When the script is executed, all documents in the selected saved search are grouped together based on the field selected in the Relational Field input. Any documents not included in the selected saved search are excluded from the script. The script gets all unique redactions in the selected markup set for each group of related documents. Redactions are considered unique based on the following criteria:
- Redaction type
- Redaction text
- Order
- x and y coordinates
- Height and width
- Fill color
- Border color, style, and size
- Font color, style, and size
Similar redactions that do not exactly match all of these criteria are considered unique.
For each document in the relational group, the script checks the document to see which redactions do not already exist and are present on other documents in the same relational group. For any redactions which do not already exist, the script applies those missing redactions to the selected markup set. Any documents which have redactions created by the script are set to "Yes" in the selected Has Auto Redaction Field.
This script is only intended for use on groups of documents that are exact duplicates, meaning they contain exact copies of images including, but not limited to, page count, order, dimensions, and resolution. Any other situation produces unexpected results.
Supported versions
This solution is supported in Server and RelativityOne.
Some past versions of this application may no longer be eligible for support by Customer Support.
Click on any of these links to download the appropriate version from the Relativity Community:
| Solution version | Supported Relativity version |
|---|---|
| 2.2 | RelativityOne |
Components
This solution consists of a Relativity script that runs at the workspace level.
Considerations
- This script should only be run by a system admin. If you are not a system admin, we recommend you do not run this script.
- The results of the script cannot be undone. We recommend that you create a back-up copy of all redactions before you run the solution.
- This script updates the Markup Set field with Has Redactions and/or Has Highlights accordingly.
- This script does not create audit records for the redactions that are created by it.
- This solution doesn't support the client domains (multi-tenancy) and Data Grid features of Relativity.
Deploying and configuring the solution
This solution is now available as an application. If you are upgrading from a script version of the solution to an application version of the solution, you must delete the original script before adding the new application to your environment and installing it to a workspace.
To deploy the solution, you first add it to the Application Library as a Relativity application. You can then install it from the Application Library to one or more workspaces.
This script runs from the Admin level, you must install this application into a workspace for it to appear in the Script Library (at the instance level).
To add the solution to the Application Library:
- Log in to Relativity.
- Navigate to the Application Library tab.
- Click New Library Application.
- Either click Select File, or drag and drop the file into the Application.
- Navigate to and select the application file included in the solution, and then click Open.
- Click Save to upload the file to the Application Library.
To add the solution to a workspace:
- In the Workspaces Installed section, click Select to install the application to one or more workspaces.
- Select the workspace(s) where you want to install the application, and then click the Move selected left to right icon.
- Click Apply.
The application is installed to the selected workspace(s). A list of workspace(s) where the application has been installed displays in the Workspaces Installed section.
Preparing the workspace
After you deploy the solution, you're ready to install and configure it in a workspace by creating a destination field for the Has Auto Redaction field:
- Go to the workspace.
- Navigate to the Fields tab.
- Click New Field.
- In the Object Type drop-down list, click Document.
- In the Name field, enter a name for the field. The field name can be anything you like.
- In the Field Type drop-down list, click Yes/No.
- Click Save.
After you install the script in the workspace and create one or more destination fields for the data, you're ready to run the solution.
Running the solution
After you prepare the workspace, you can configure and run the solution by doing the following:
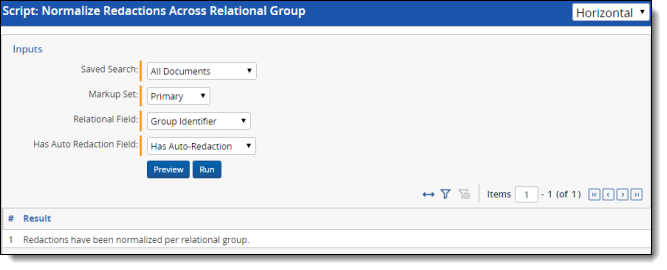
- In the workspace, navigate to the Scripts tab.
- Click the name of the Normalize Redactions Across Relational Group script. The Normalize Redactions Across Relational Group script displays fields that let you specify which documents and redactions you want to change and how you want to change them.
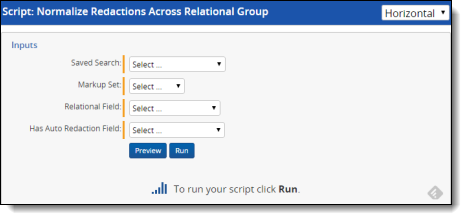
- Complete the following fields:
- Saved Search – Select the saved search which contains the documents you wish to normalize redactions across.
- Markup Set – Select the markup set to normalize redactions on.
- Relational Field – Select the relational field which identifies the groups of related documents to normalize redactions across.
- Has Auto Redaction Field – Select the Yes/No destination field that you created in the previous section to indicate which documents have redactions created by the script.
- Click Run.
Viewing the results
After you run the Normalize Redactions Across Relational Group script, the results appear as a report on the script page: