


This referential page describes the main RPC user interface windows and buttons. Find any specific RPC task instructions in their respective topics.
The RPC user interface is comprised of a number of movable windows and panes. Click any of the windows to un-dock, move, and re-dock panes across your desktop.
(Click to expand)
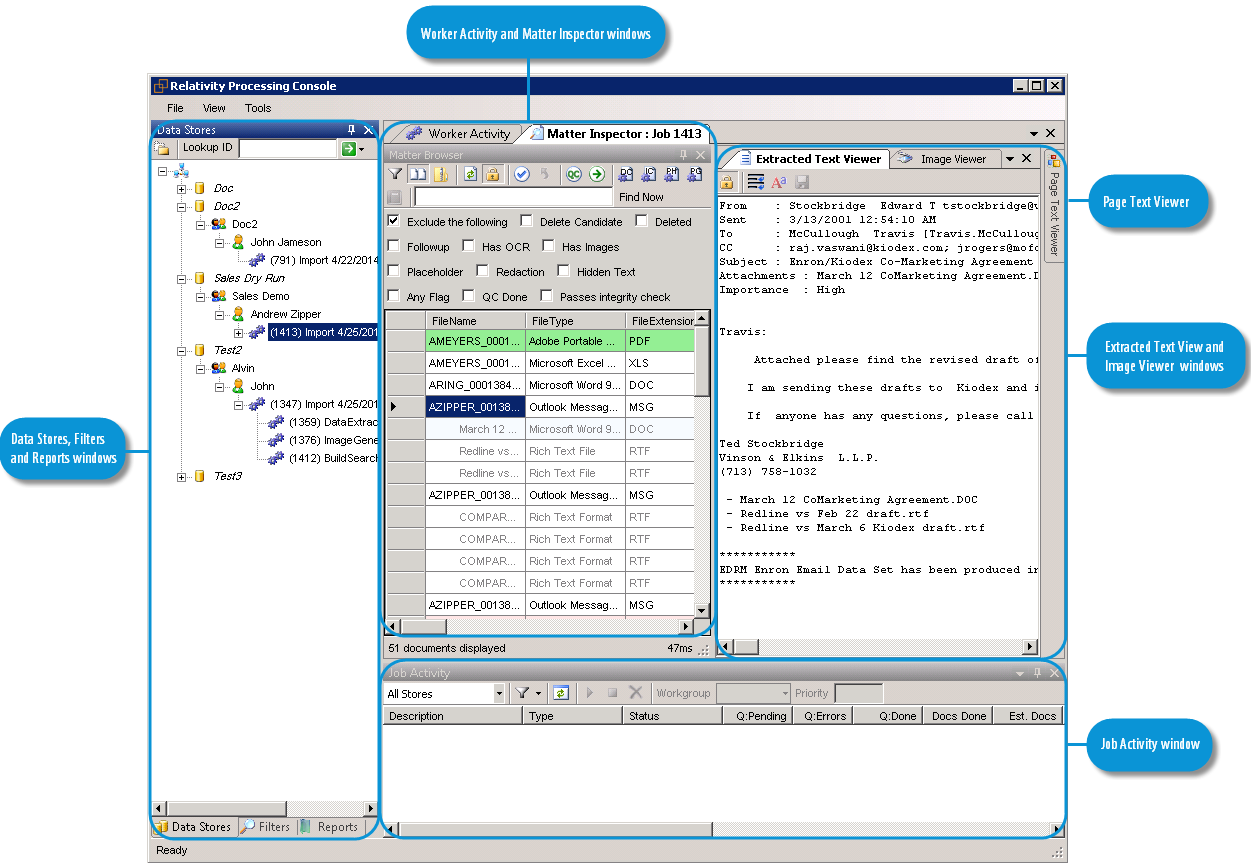
By default, only the Worker Activity, Job Activity, and Data Stores panes are open when you first access the RPC.
Note: Open the various windows and position them to where you will always want them. Then close the program without closing the individual windows first. If you do this, the desired window positions will be stored to a configuration file so that each time you open the RPC, the windows will be where you want them.
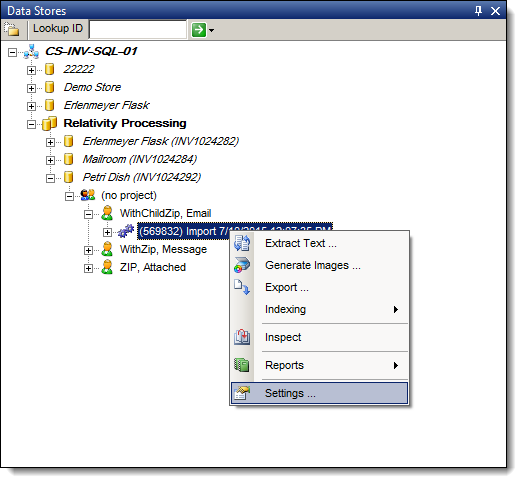
Data Stores window
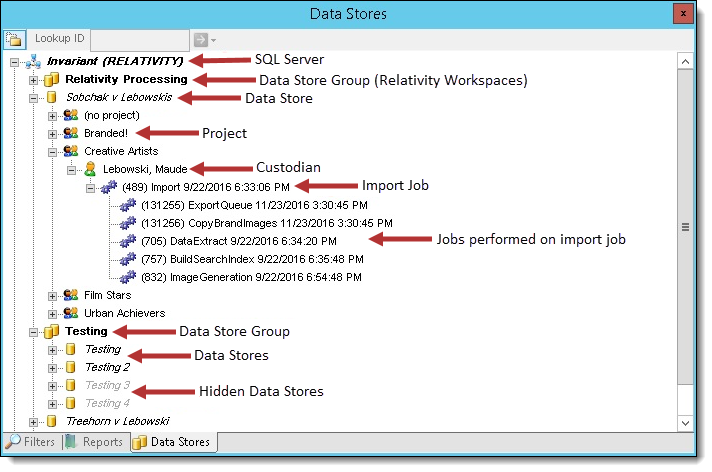
The Data Stores window contains all the SQL Servers, data stores (workspaces), and imports done in those data stores, along with a listing of all work performed on the imports.
The top-down hierarchy of the display is SQL server > Data store (workspace) / Groups > Project > Custodian > Import > Jobs performed on an import.
Note: When you delete a workspace that corresponds to a data store in the RPC, that data store is not automatically removed from the RPC.
Right-click Data Store options
The following actions are available when you right-click a data store and select the Tasks option:
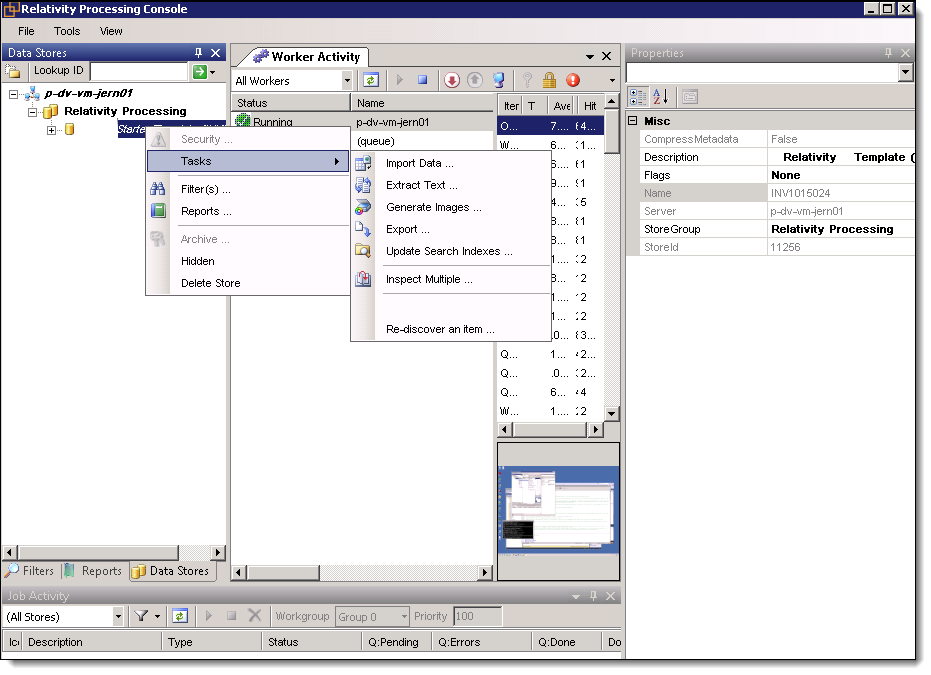
- Import Data - import a data set to the selected data store.
The following options are only available after you've imported data and when you perform them, they're applied to all imports in the data store. If you wish to perform any of these tasks on an individual import only, right-click on the import job instead of on the data store:
- Extract Text - perform text extraction on a data set.
- Generate Images - generate images from a data set.
- Export - Export files for review or production.
- Update Search Indexes - update the search indexes of a data set.
- Inspect Multiple - inspect multiple jobs in a data store.
- Re-discover an item - re-discover an item by file ID.
You can right-click on a data store and select Filter(s) or Reports to access those windows for that data store. You can also right-click on import and run one of these reports:
- Error report - gives a detailed list of errors on import job or any job performed on an import.
- Summary report - lists the frequency of each file type in the job, the total number of discovered documents and counts of de-NISTed files. It also includes file sizes of all files, de-NISTed files and the size of files remaining after de-NISTIng not counting containers. Additionally, there is a brief entry describing each error encountered during import.
- Bad Containers report - lists all container files that Invariant was unable to pull any documents from. If a container throws an error on import but Invariant was able to get a single file from it, the container will not appear on this report however it will appear on the error report.
- QC Report - provides information on who performed various image QC tasks and when.
The Lookup ID section, look at stored files or folders by entering the File ID or Storage ID of a document. These are the choices available after entering an ID number:
- View Native File
- Explore Native Folder
- View Intermediate File
- Explore Intermediate Folder
- Explore Pages Folder
Hiding a data store
To hide a data store from the list, simply right-click on the store and select Hidden from the menu. The store will no longer be visible in the list.
To un-hide the store so that it displays in the list, click the Show All option in the upper left of the window to display all active and hidden stores, locate the hidden, grayed-out data store name, right-click on it and select Hidden again. The store will now be visible in the list.
Deleting a data store
To delete a data store from the list, right-click on the store and select Delete Store from the menu. Note the following details about store deletion:
- You can’t delete stores associated with active Relativity workspaces, meaning workspaces that haven't been deleted.
- You can manually delete a store through the right-click menu as soon as the workspace is marked for deletion by the Case Manager.
- If you don't manually delete a store and the workspace associate with it is deleted from Relativity, that store will automatically be removed from the store list in the RPC.
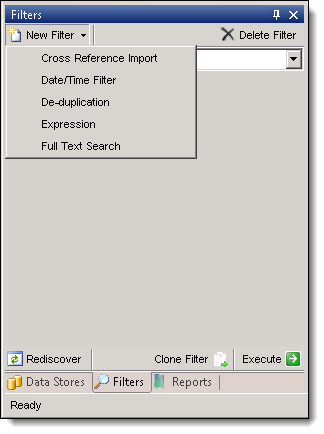
Filters window
The Filters window contains RPC Filters for use. Right-click a data store > Filters to access the Filters window or click the Filters tab at the bottom of the window. See Filtering data for more information.
Reports window
The Reports window contains RPC reports to run on data sets in data stores. Select a data store and click the Reports tab at the bottom of the window. See Running standard reports for more information.
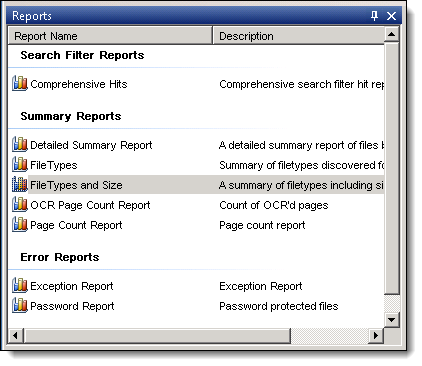
Search Filter Reports
- Comprehensive Hits - displays a list of search terms and the frequency that they occur in the document set. You need to apply a search filter when you run this report.
Summary Reports
- Detailed Summary Report - contains data about the number and size of raw files, number of files before and after De-NISTing, number of e-mail messages and their attachments, and other information.
- File Types - lists the extensions of all the files in the data set, and the number of occurrences for each one. It also includes summary totals.
- FileTypes and Size - lists the extensions of all the files in the data set, the number of occurrences for each one, and file sizes. It also includes summary totals.
- OCR Page Count - lists the number of OCR'd pages.
- Page Count- lists the total page count, in addition to pages marked as deleted and pages marked as delete candidates.
Error Reports
- Exception Report - displays the exception totals for Unprocessable files, Password protected files, and Errored Files.
- Password Report - displays the exception totals for Password protected files and total file size count.
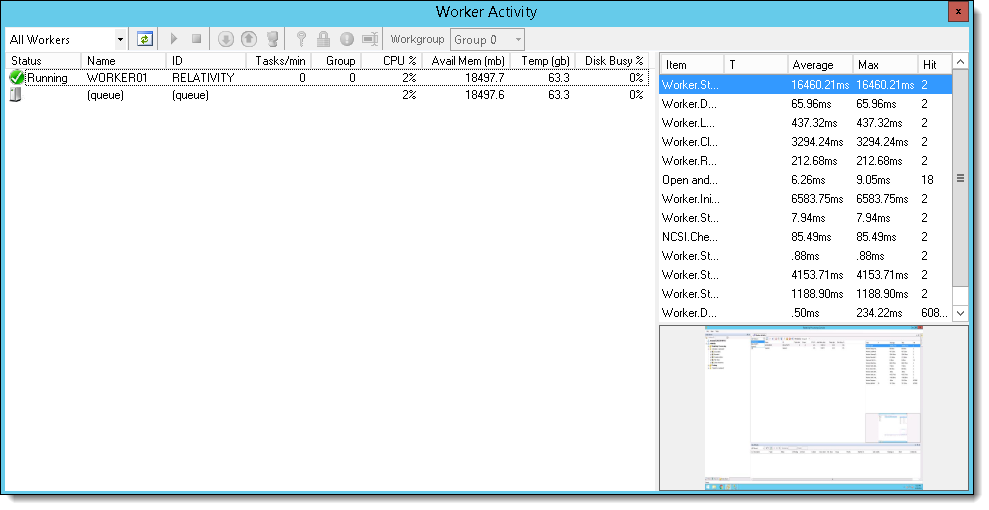
Worker Activity window
The Worker Activity window contains a list of all workers along with information on their current tasks per minute, group assignment, and CPU usage. Click View > Workers window to access the Workers window.
Worker Activity menu options

|
Menu Options |
Description |
|---|---|
|
All Workers drop-down list |
Displays list of all workers. |
|
Refresh |
Refreshes the Worker Activity window. |
|
Start |
Starts the selected worker. |
|
Stop |
Stops the selected worker. |
|
Offline |
Takes the selected worker offline. |
|
Online |
Brings the selected worker online. |
|
Remote Desktop |
Open a remote desktop connection to the worker. |
|
Remote Logon |
Log in to a remote machine. |
|
Remote Logoff |
Log off of a remote machine. |
|
Reboot Worker |
Reboot a worker. |
Remote command  |
Execute a remote command. |
|
Workgroup drop-down list |
Displays the selected Worker's workgroup. |


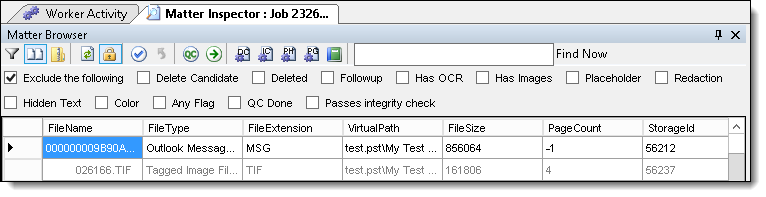
Matter Inspector window
The Matter Inspector window displays a list of imported data files and a fixed set of metadata associated with them. See Performing Quality Control tasks for more information.
Matter Browser menu options
|
Menu options |
Description |
|---|---|
|
Filter |
Click this icon to display the Select Filters dialog box. See Filtering data. |
|
Show Duplicates |
Use this option to show or hide duplicate documents. Duplicate documents are shaded in pink. |
|
Show Containers |
Use this option to show or hide containers, including ZIP, RAR, and PDF portfolios. (PDF portfolios contain other PDFs, but do not have content of their own.) |
|
Check out Check in |
Use these options when you want to check out a document so no other users can perform QC tasks on it, and then check the document in when the QC is completed. (Invariant will skip documents that are checked out when you browse through the list.) |
|
Finalize QC |
Highlight documents that you want marked as QC completed, and click this icon. The Matter Browser then displays these documents with green shading. |
|
Automatic QC |
Click this option to automatically flag documents as being QC’d, and then click the Play button in the Image Viewer to page through the documents. |
Promote Delete Candidates  |
Click this option to change pages flagged as Delete Candidate to Delete. Note that this action will be applied to all documents currently displayed in the Matter inspector. Pages with a delete flag will not be exported. |
|
Mark Integrity Check Completed |
Click this option to mark this QC task as being completed. This verification step is listed in the QC Report. |
|
Mark Placeholder Check Completed |
Click this option to mark this QC task as being completed. This verification step is listed in the QC Report. |
|
Mark Page by Page QC Completed |
Click this option to mark this QC task as being completed. This verification step is listed in the QC Report. |
|
Generate QC Report
|
Generates a report that displays who completed the above QC steps and when they were completed. |
|
Exclude the Following |
Use this option to exclude documents that have been flagged with any of the options listed below. |
|
Deleted, Followup, Has OCR, Has Images, Placeholder, Redaction, Hidden Text, Any Flag, QC Done, Passes Integrity Check |
Use these checkboxes to filter on documents with these flags that you do or do not want displayed in the grid based on the setting selected for ‘Exclude the Following’. For example, you can select Delete Candidate if you want to display documents that have pages with the Delete Candidate flag so that you can QC them before promoting them to Deleted.
|


Note: The Matter Inspector is not necessarily reflective of the complete document list that you would be exporting. This is because the inspector isn’t concerned with document relationships, as it is merely a place for you to inspect documents that hit on, for example, any keywords you specified in your report settings. This means that if you don’t flag parents or children and you review the resulting documents in the Matter Inspector, you may see a different number of results than you’d see in the comprehensive hit report. Likewise, the number of documents that you export might be different than what you viewed in the Matter Inspector because the exporter has to honor document relationships, and thus it will not export child documents without their parents.
Right-click Matter Browser options
The following options are available to you when you right-click on a record in the Matter Browser: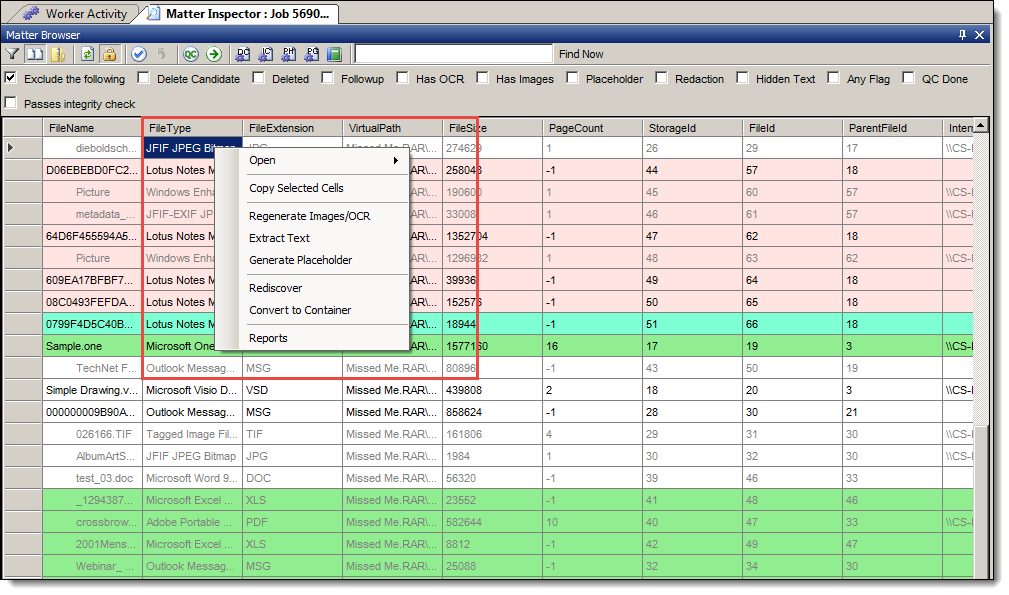
- Copy Selected Cells - copies the cells you’ve selected to the clipboard. There is no subsequent window or explicit indication that you’ve taken action on the cells you’ve selected, but they have been copied once you select this option. This is the only right click option that can be used on more than a single record. Everything below will only work on the document where the mouse is when the right click was executed regardless of how many documents are highlighted.
- Regenerate Images/OCR - opens the Job Settings window, where you can switch to the Image or OCR tab to reconfigure your OCR and image settings and perform an imaging job on the selected document. Once you have made the desired settings click start and the document will be placed in the job queue.
- Extract Text - queues the selected document for text extraction. It does not first bring up the Job Settings window as the Regenerate Images/OCR option does. If you wish to make changes to the settings before executing extracting text you will need to right click on the appropriate import job in the Data Stores window and select ‘Settings’. If the selected document has already been text extracted nothing will happen unless the ‘Overwrite intermediate files’ setting on the Text tab is checked.
- Generate Placeholder - creates a generate placeholder job in the queue for the selected document. If you’ve already specified a file for the Custom placeholder PDF setting in the OCR/Image tab of the Job Settings window, the placeholder that you generate through this right-click option will display as that file. Thus, there is no option for you to override a custom placeholder PDF in the Matter Browser.
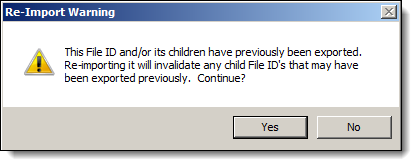
- Rediscover - starts a rediscover job for that file. This job appears in the Job Activity window as a ReImport type. Note that if you’ve already exported this file, you will receive the following confirmation message. Click Yes to continue.
- Convert to Container - takes what is currently a document in the job and converts it to a container file.
- Containers are not exported or published, and their children are promoted up a level. For example, if a parent Word document with two child attachments is converted to a container file, then the two child attachments would become parents instead of children. They would then display as coming from a Word document parent container.
- This option is useful when the RPC misidentifies a container file as a document, for example if it misidentifies a ZIP file and treats it like a document. In this case, the option to convert the document to a container allows you to correct the relationship.
- When you select this option, the record is no longer available for individual inspection, as you aren't able to inspect containers.
- You also have the option to convert a container to a document, which does the reverse of container conversion.
- Reports - this option currently provides no functionality.
Image Viewer window
The Image viewer window contains the selected document's images. See Performing Quality Control tasks for more information.
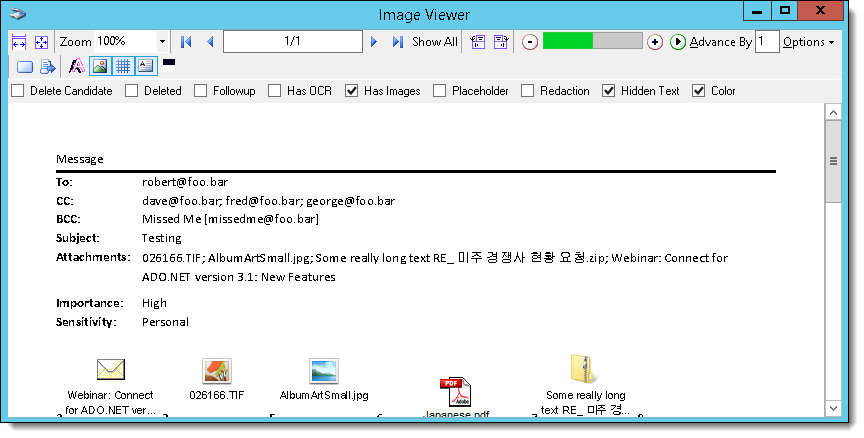
Image viewer menu options
| Menu options | Description |
|---|---|
|
Play |
Use this option to perform a visual inspection of the images by paging through them. (You can use this option in combination with the Automatic QC button in the Matter Browser to confirm that the images are displayed correctly.) |
Show All  |
Shows all pages of the current document regardless of what page level filters may be applied (e.g. Deleted, Delete Candidates). |
|
|
Set the number of images that you want to advance by. Regardless of what this number is set to, the image viewer will always show at least the first page of each document. |
Options  |
These options are available when using the Image Viewer window:
|
Anti-Alias  |
Toggles on or off anti-aliasing to the displayed document to sharpen the image. Having this turned on will slow down the auto-advance of the images. |
|
Show Images |
Use this option to show or hide the image layer of the intermediate PDF currently being displayed in the image viewer. |
|
Show Line Art
|
Use this option to show or hide the line art layer of the intermediate PDF currently being displayed in the image viewer. (Line art is most commonly associated with CAD drawings.) |
Show Text  |
Use this option to show or hide the text layer of the intermediate PDF currently being displayed in the image viewer. |
|
Black and White
|
Use this option to display an image in black and white. |
| Delete Candidate | Use this option to flag pages for deletion from the export. This is especially useful for when you encounter blank pages among a set of images and you want to exclude them from the export file. |
|
Deleted, Followup, Has OCR, Has Images, Placeholder, Redaction, Hidden Text |
Use these checkboxes to flag images. The setting for the flag is stored in the database. Note: Images marked as delete are not exported, but they remain in the database. |


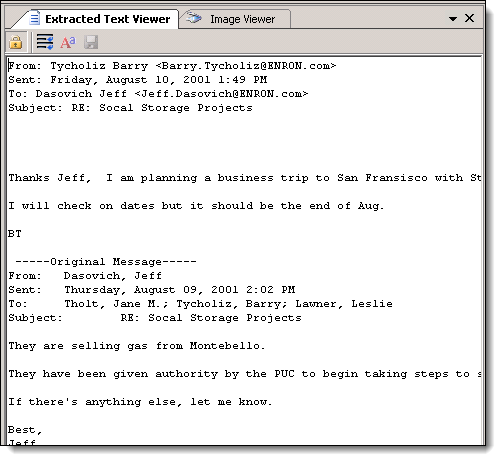
Extracted Text Viewer window
The Extracted Text Viewer window contains a selected item's extracted text.
Extracted Text Viewer menu options
|
Menu Options |
Description |
|---|---|
|
Lock/Unlock Grid |
Locks/unlocks the grid for editing. |
|
Toggle Word Wrap |
Toggle the word wrapping on and off. |
|
Select Font |
Select a different extracted text font to use. |
|
Save Changes |
Save your changes. |


Page Text Viewer window
The Page Text Viewer window contains a selected item's page text. Click the horizontal Page Text Viewer button on the right to open the Page Text Viewer window.
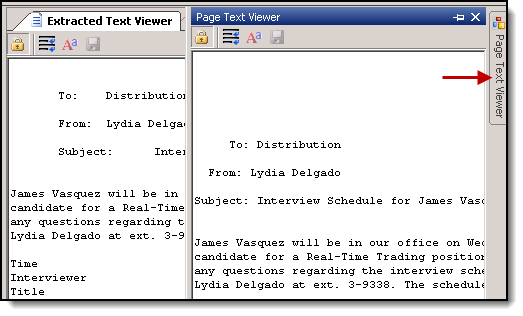
The Page Text Viewer window menu options are the same as the Extracted Text Viewer menu options.
Job Activity window
The Job Activity window contains all RPC active jobs and corresponding statuses.

Job Activity menu options
|
Menu Options |
Description |
|---|---|
|
All Stores drop-down list |
Allows the user to select a specific data store to display jobs only from the selected store. |
|
Filter Icon |
Displays a list of job statuses to be displayed in the Job Activity window with these options:
Note: The ‘Finished’ status is unchecked by default. It is strongly recommended to change the All Stores drop-down list to a specific data store before checking the ‘Finished’ option. |
|
Refresh |
Refreshes the Job Activity window. |
|
Start |
Starts the selected job. |
|
Stop |
Stops the selected job. |
|
Delete |
Deletes the selected job. |
|
Workgroup |
Displays the selected job workgroup. |
| Priority | Displays the selected job priority. |
Note: Making changes to the workgroup or priority, or starting, stopping or deleting a job can have serious consequences, especially to jobs that originated from Relativity processing. For more information on what will occur when using these features see Managing workers and jobs.
Configuring job settings
All of the tabs in the Settings pane are available at all times while you are in the RPC, regardless of what operation you’re currently configuring. For example, the import settings are available even when you’re preparing a data extraction job, even though import settings aren’t logically applicable to extraction. Some of the Settings overlap, in that they are applicable to more than once type of job.
If you anticipate having to repeatedly perform jobs with identical settings, you have the option of saving a group of settings as the default for those future jobs.
To save your settings as the default:
- Select the job from the Data Stores pane, right-click, and select Settings…
- Specify settings for all applicable tabs in the Job Settings window.
- Click Save as Default at the bottom left of the window.
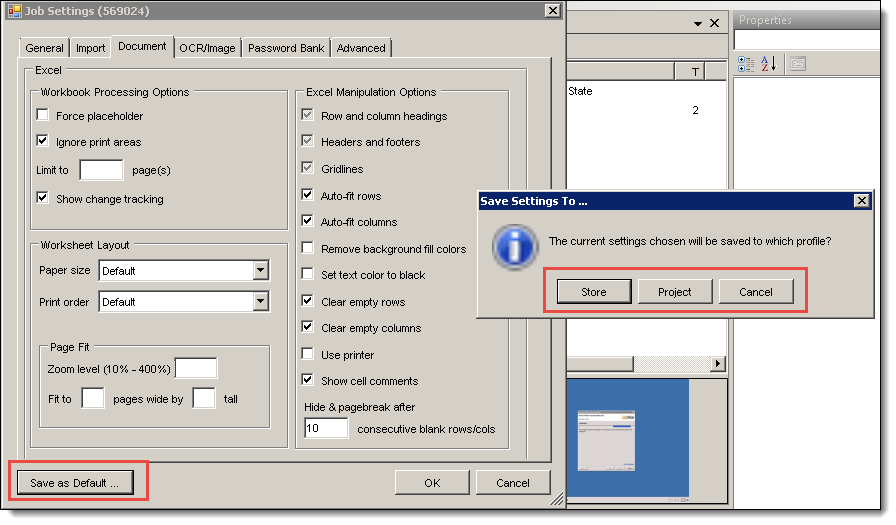
- Select whether to save your settings to a (Data) Store or a Project profile by clicking Store or Project. If you haven't specified a project name, you'll only have the option to save the defaults to a store. You aren't able to save the settings of the following areas as defaults:
- The General tab
- The File Handling section of the Import tab
- The E-Mail | Ignore PST/OST CRC errors in the Import tab
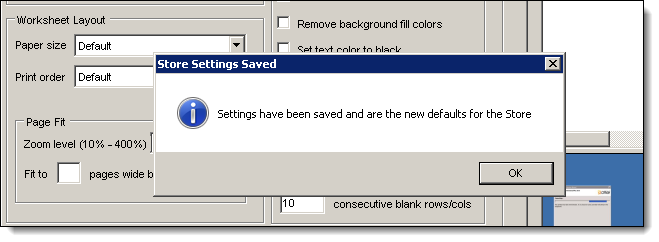
- Note the confirmation screen, which states that your settings have been saved and are now the defaults for the store or project.
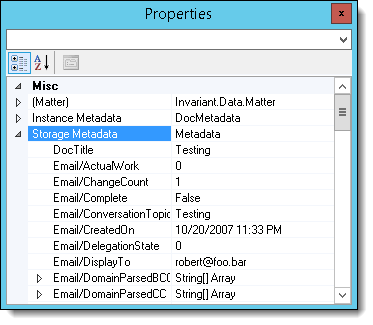
Properties window
The properties window is a dynamic display of information related to whatever item is currently highlighted in the RPC. It displays information about a specific worker, job, data store or document, as well as any information stored in the underlying SQL tables on the given item being examined. You can also edit some information here.
- For workers, information about what types of work it the worker is set up to do is displayed, and you can edit the name of the worker , along with setting the max threads the worker can utilize. For a breakdown of the worker properties, see Viewing basic worker properties.
- For jobs, information about doc counts, error counts, Start/Finished/Last Progress times are displayed.
- The properties of a given data store are also available.
- The properties window can be especially useful when used in conjunction with the matter inspector. Here, you can click a specific document and find all available metadata on that document. You can also edit metadata here, even though this isn’t something that would be done in a typical workflow.
You can click and highlight the following items to display their properties:
- Data Stores in the Data Stores window
- Jobs in either the Data Stores or Job Activity windows
- Workers or the Queue Manager in the Worker Activity window
- Individual documents in the Matter Inspector
Clicking on the Project or Custodian level item in the Data Stores window or any item in the Reports or Filters windows results in nothing being displayed in the Properties window.
- The Categorized
 or Alphabetical
  buttons will change the sort order of the various properties displayed. The default is Categorized.
 - The Property Pages
 and blank drop-down above these buttons are currently non-functional.