


The RPC uses a queue manager to control the activities of worker machines. All jobs executed by the RPC are designed to be distributed across these machines to improve performance. To centrally manage these workers, the RPC includes the Worker Activity window, which displays the workers and their current statuses. This central management console also provides you with the ability to manage the activities of these machines.
For example, you might create an Import job and add it to Workgroup 1. Any worker machines assigned to that workgroup will immediately begin processing the job. If you have a large job, you may want to add more workers to the workgroup. The use of multiple workers splits a job across numerous machines leveraging parallel processing, which increases the performance of the RPC.
Note: If you're starting an import job of a large PST or similar container you may note that only a single worker in the assigned group is doing any work for an extended period of time. This is because the file must be copied to the repository and have hash values calculated for it. This is not a distributable task and can take considerable time on very large files which is normal. Once these tasks are complete the other workers will be able to work on importing messages from the PST simultaneously.
Since you can constantly monitor the queue, you can also dynamically reallocate workers from one workgroup to another as the job load requires. You must stop a worker in order to reallocate it to another workgroup. The worker will complete its current job, and then display its status as Stopped.
You also have the option to bring the worker offline immediately. In this case, the worker doesn't complete the current job. When you restart the worker, it automatically performs a series of cleanup tasks based on stored procedures in the database. It then cleans up any entries added to the Matter table and other places in the system, as well as removes any sub-jobs that it added to the queue. The restarted worker resets and re-executes any of its open jobs from the beginning.
While you can queue multiple jobs to the same workgroup, we don't recommend this method because of the first-in-first-out design of the queue. This method can create contention for shared resources that may degrade performance if small and large jobs intermix. We instead recommend utilizing multiple workgroups with their own workers processing a single job.
Starting worker machines
Use these instructions to start a worker machine:
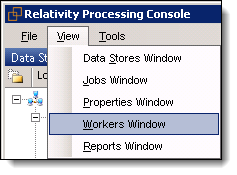
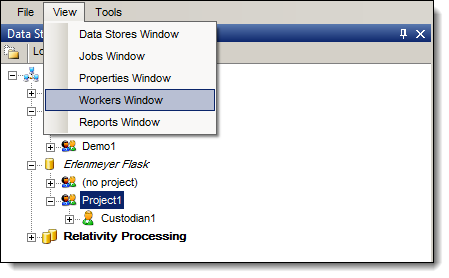
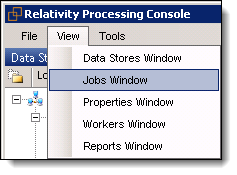
- In the View menu, click Workers Window. The Workers Activity window displays a list of available workers and their current statuses.
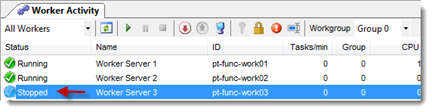
- From the Workers Activity window, highlight a worker machine with the Status of Stopped.
- In the Workgroup box, select a group. The worker is now assigned to this group, and will only process the jobs that are added to it.

- Click Run to start the worker. Its status will be updated to Running.
Stopping versus taking worker machines offline
Note the following difference between stopping a worker versus taking it offline:
- Stopping a worker
 - the worker stops receiving work from the queue, and it finishes only the tasks it’s working on, not the entire root job. The remainder of that job is then available to be picked up by another worker.
 - Taking a worker offline
 - the worker immediately stops and is brought offline, regardless of whether or not it’s working on any tasks. After a short period of time the worker should bring itself back online automatically. If you are concerned that a worker is hung up on a task it is recommended to try stopping the worker first to allow as many of the tasks the worker has picked up to end gracefully. If the worker remains in a “stopping” state, then it may be necessary to bring the worker offline.
Note: In order to stop a worker and take a worker offline, the account running the RPC must be a local administrator on the worker servers.
Viewing worker activities
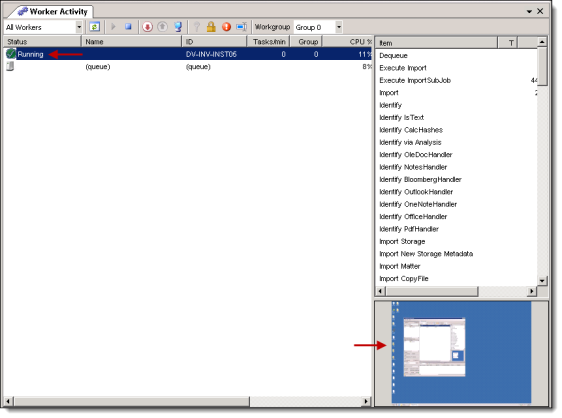
You can monitor the activities of a worker machine or the queue on the side panel in the Worker Activity window. As illustrated below, you can highlight a worker and expand this panel to display statistics about the number of microseconds (ms) taken to perform various tasks.
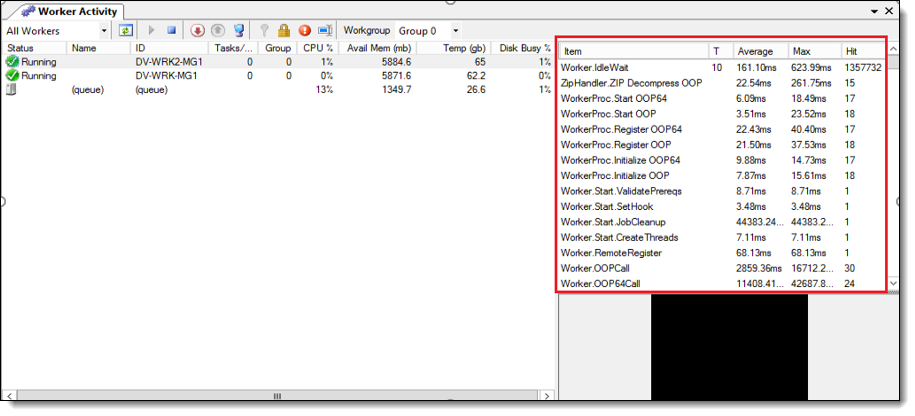
The panel to the right of the Worker Activity window provides the following information:
- Item - a list of tasks that the worker has performed since it was brought online.
- T (Threads) - a count of how many threads are currently working on the listed Item. It is recommended to sort on this column so that items that are currently being worked on are always displayed at the top of the list.
- Average - the average amount of time the worker has spent executing the items in that row since it was last brought online (displayed in milliseconds).
- Max - the maximum amount of time the worker has spent executing an item in that row since it was last brought online (displayed in milliseconds).
- Hit - the total number of times the worker has executed the item in that row since the worker was last brought online.
Note the following details about the behavior of the Worker Activity window:
- If no worker is highlighted, the Tasks window displays the last worker selected.
- You aren't able to display tasks for all workers simultaneously. You can only display tasks for a single worker.
Viewing worker status
The following columns/fields are available in the Worker Activity window for you to monitor the current state of your workers.
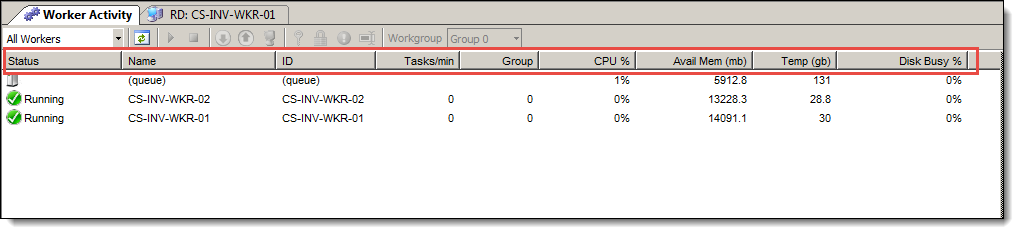
- Status - reflects the current status of the worker. This displays one of the following values:
- Running - the worker thread is performing one of its designated jobs.
- Stopping - the worker has been instructed to stop and is attempting to complete and tasks that it had already picked up. Once the worker has completed all tasks that it had picked up it will change to a status of stopped. If the worker is unable to complete the tasks it has picked up the worker will remain in a stopping state indefinitely and will need to be brought offline.
- Offline - the worker has been brought offline by the user or the InvariantWorker.exe program was somehow forced to close. As long as the queue manager is running, the worker will automatically try to bring itself back online even if it was deliberately taken offline by the user. While the worker is offline only the Status, Name, ID, and Group columns will be populated.
- Stopped - the worker has been manually stopped. If the worker is either stopped of logged off, the remaining columns will contain no data. A worker being brought online will briefly go into a stopped state before going online.
- Logged Off - the worker is either powered off or the relativity service account is not currently logged in as the user. While the worker is logged off only the Status, Name, ID, and Group columns will be populated.
Note: The network on the Utility Server isn't set up to view the status of your workers; therefore, you’ll see all workers logged off in the Worker Activity window in the RPC, and you'll need to refer to the All Workers view of the Processing Administration tab in Relativity to see the status of your workers.
- Name- the name of the worker.
- ID - the identifier of the worker.
- Tasks/min - how many singular units of designated work the worker is performing per minute.
- Examples of tasks are discovering a document and converting a native.
- Group - the workgroup the worker belongs to.
- CPU % - the amount of CPU resources the worker is using to perform its designated work across all CPU's on the Invariant worker machine. If the actual CPU reading is between 0 and 1, Relativity rounds this value up to 1.
- In most cases, a high CPU Activity reading with a low Memory in Use is indicative of smoothly running worker that has no stuck jobs.
- This value can't necessarily tell you whether or not a worker is stuck on a job, but it can tell you whether or not the worker is making a higher-than-normal effort to complete a job relative to other jobs in the environment.
- Avail Mem (mb) - how many MB of RAM are still available after counting what the worker is currently using.
- Temp (gb) - the amount of space in GB that is free on the disk drive assigned to the TEMP environment variable on the worker machine.
- The value will vary based on the disk's capacity.
- Only the disk associated with the TEMP environment variable is reflected here.
- Disk Busy % - the percentage of disk activity on the worker. If the actual disk activity reading is between 0 and 1, Relativity rounds this value up to 1.
- If the disk drive is being hit excessively relative to other jobs, it can be an indicator that the worker is either low on memory and burdening the paging file, or it can mean that it is working on a large number of container files.
- If the disk drive activity is very high relative to other jobs for a sustained period of time, it's probably a sign that you're having an issue with your worker.
- Low CPU usage coupled with high disk activity can be indicative of low memory or a high container count. You should always address low memory by adding more memory. With a high container count, there's nothing to address, but note that performance can be impacted if the disks are slow.
Naming a worker
To provide or edit a worker name, perform the following steps:
- If the Worker Activity window isn't already open, navigate to the View menu and select Workers Window.
- In the Worker Activity pane, select the worker you want to name.
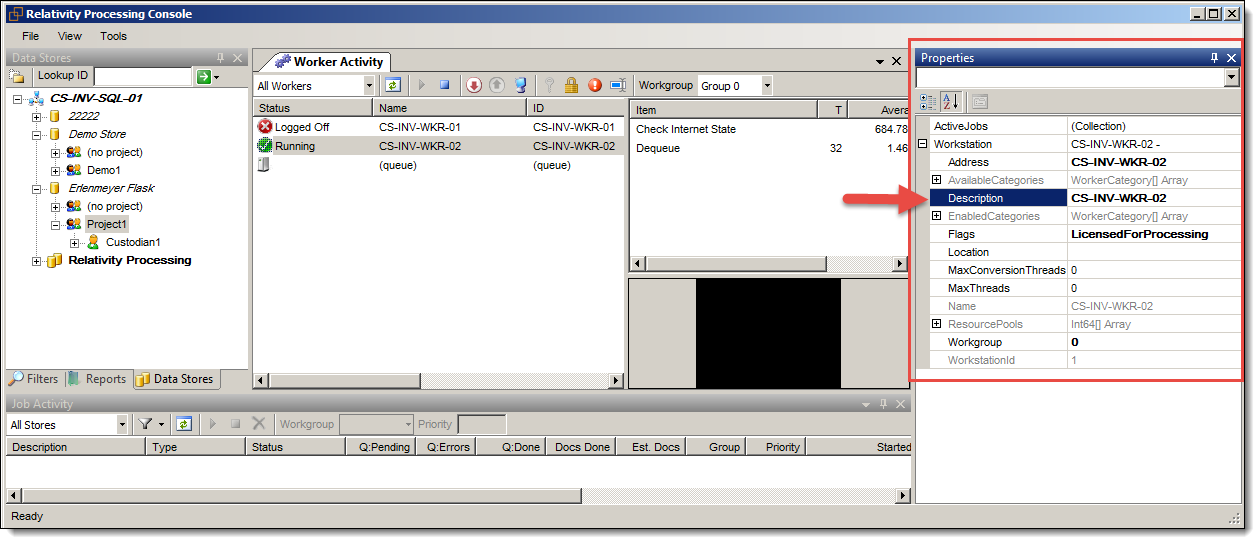
- If the Properties window isn't already open on the right side, navigate to the View menu and select Properties Window.

- In the Properties Window on the right, expand the Workstation row, and scroll down the Description row. This is the name of your worker. Edit the value directly to the right in the Description row by clicking once inside the current name and modifying it.
- Click the refresh button in the Worker Activity pane to display the changed values.
Viewing basic worker properties
The Properties window provides information about the worker that you've selected in the Worker Activity pane. To access this information, expand the Workstation column under the ActiveJobs column in the Properties window. Note that the Workstation column represents the EDDS.Workstation table in the database and that each value below it corresponds one-to-one with a column in the Workstation table.
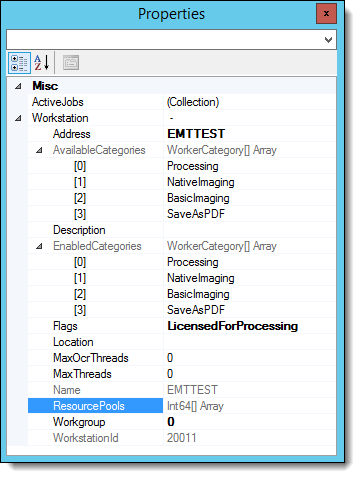
- Address - the address of the worker server, as specified in the Address column of the workstation table.
- Available Categories - the categories available for selection when designating a worker for different kinds of work in Relativity.
- Description - a description of the worker, as specified in the Description column of the workstation table. Note that this value can be identical to the address and the workstation Name below.
- Enabled Categories - the categories of work for which the worker has been designated in Relativity. For example, if the worker has been designated to perform native imaging and processing, those will appear here.
- Flags - any database flags that have been applied to the worker.
- Location - the location of the worker server, as specified in the Location column of the workstation table.
- Max Threads - the maximum number of threads the worker is allowed to make use of. If this is set to 0, the worker is permitted to make use of all available threads.
- The main reason to set this to something other than 0 is for troubleshooting purposes.
- On rare occasions, if you are aware that the worker machine needs to process difficult files (large CAD drawings, blueprints, complicated excels, etc.), lowering the max threads can keep the worker from opening too many of these simultaneously, which may result in out-of-memory errors or similar issues.
- If you do set this to something other than 0 for one of these purposes make sure to reset it back to 0 when done.
- Name - the name of the worker server, as specified in the Name column of the workstation table. This can be identical to the Description and the Address columns.
- Resource Pools - the artifact IDs of the resource pools to which the worker belongs in Relativity.
- Workgroup - the number identifier of the workgroup to which the worker belongs.
- Workstation ID - the ID of the workstation as specified in the WorkstationID column of the workstation table.
Other control options
The following table breaks down the other control options available in the worker activity window.
|
Menu Options |
Description |
|---|---|
|
Refresh |
Displays newly added workers. |
|
Online |
Brings a worker back online after being taken offline if you don’t want to wait for the worker to come back online on its own in a few seconds. |
|
Remote Desktop |
Opens a remote desktop connection to the worker, in which you can bring a worker back online and add to your worker machines in order to troubleshoot issues. |
|
Remote Logon |
Logs in to the worker as the RCA if the worker has been logged off. |
|
Remote Logoff |
Logs the worker off, which closes any tasks that were opened while logged in. This is sometimes a useful last resort before rebooting a worker if it has been working on many problem files that have been causing the worker to hang. |
|
Reboot Worker |
Reboots the worker if it needs it. If a worker is unresponsive this may work to reboot it but usually if the worker is in such state it won’t respond to an instruction to reboot either. If the worker is up and running fine though and you need to cycle the worker, this button will work. |
Remote command  |
Brings up a text box in which you can enter a command as though you had clicked Start then Run on the worker machine. This feature should not be needed for typical day to day work. |


Selected workers appear in a screen shot in the user interface bottom right corner, and updates every five seconds.
Running a job
This section includes the steps for manually starting a job. You need to complete these steps when a job has been added to workgroup that is not assigned to a started worker machine. You may need to complete these steps for Group 0, the default workgroup in the RPC.
However, you can create jobs that will start automatically if you select workgroup that also has workers with the status of Running. (For most job types, you can select the Workgroup on the General tab of the associated job settings window.)
Note: Making changes to the workgroup or priority, or starting, stopping or deleting a job can have serious consequences, especially to jobs that originated from Relativity processing.
- In the View menu, click Jobs Window. The Jobs window displays a list of available workers and their current statuses.
- In the Job Activity window, highlight your job. It will have the status of NotStarted. See the Job Activity section in the RPC user interface topic.
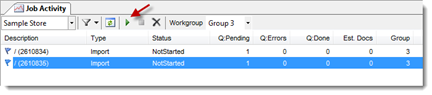
- Click
 to start the job. The job's status is updated to Running. See Viewing worker activities