


Sending a communication
To send a communication, use the buttons on the Communication console. See Communication console for notification options.
Note: Once you've sent a communication or questionnaire, you can't retract it. If necessary, a system admin can create and send a new communication or questionnaire. For more information, see Creating a communication.
Communication details
The Communication details page appears once you create a communication in Legal Hold. Access the communication details by clicking the communication from the communication tab in a project details page.
From here, you can view all details related to that communication.
Note: Dates and times in Communications fields are listed as Universal Time Coordinated (UTC).
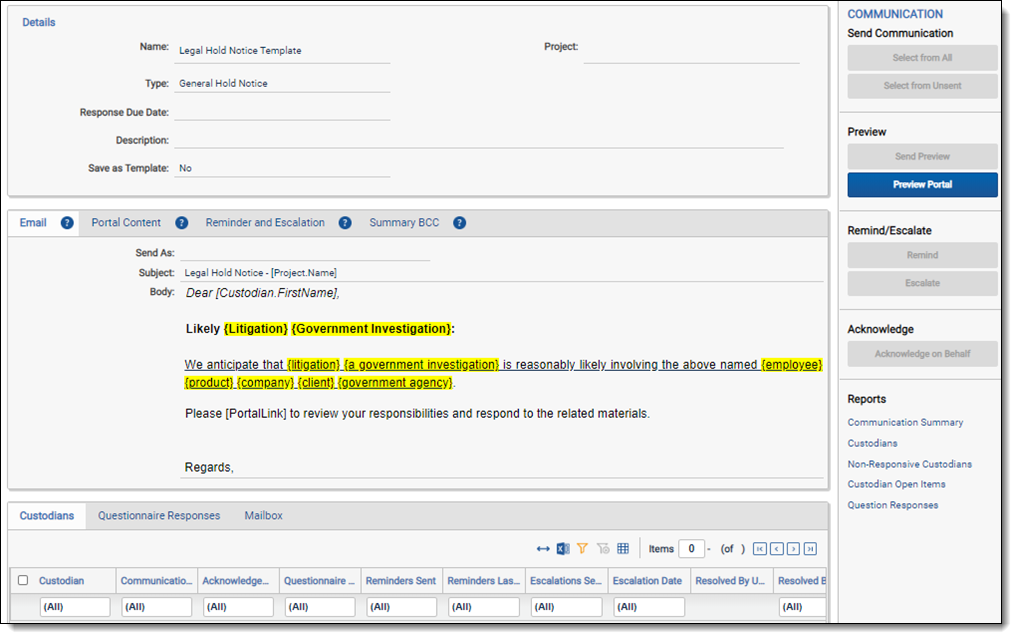
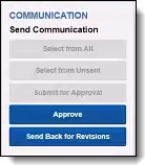
Communication console
Use the Communication console to take an action related to that communication. Buttons are shaded gray when the action is unavailable.
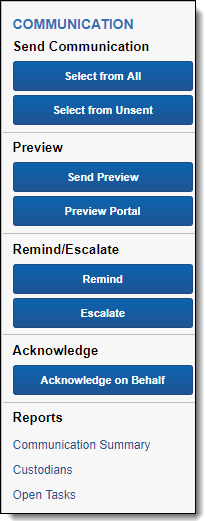
Send Communication
- Select from All - use the custodian item picker to select which custodians on the project that Legal Hold should send the communication to. All of the custodians on the project will appear in the Unselected list in the item picker.
- Select from Unsent - use the custodian item picker to select which custodians on the project that Legal Hold should send the unsent communication to. Only custodians that haven't received a communication will appear in the Unselected list in the item picker.
- Submit for Approval - use the custodian item picker to select which communications on the project that should be submitted to the Send To for Approval user before being sent to custodians.
Preview
- Send Preview - send a test email to a specified email addresses. Separate addresses with a comma.
-
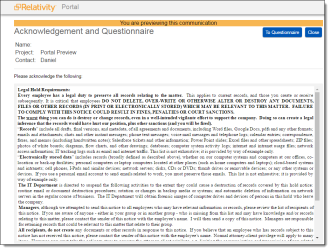
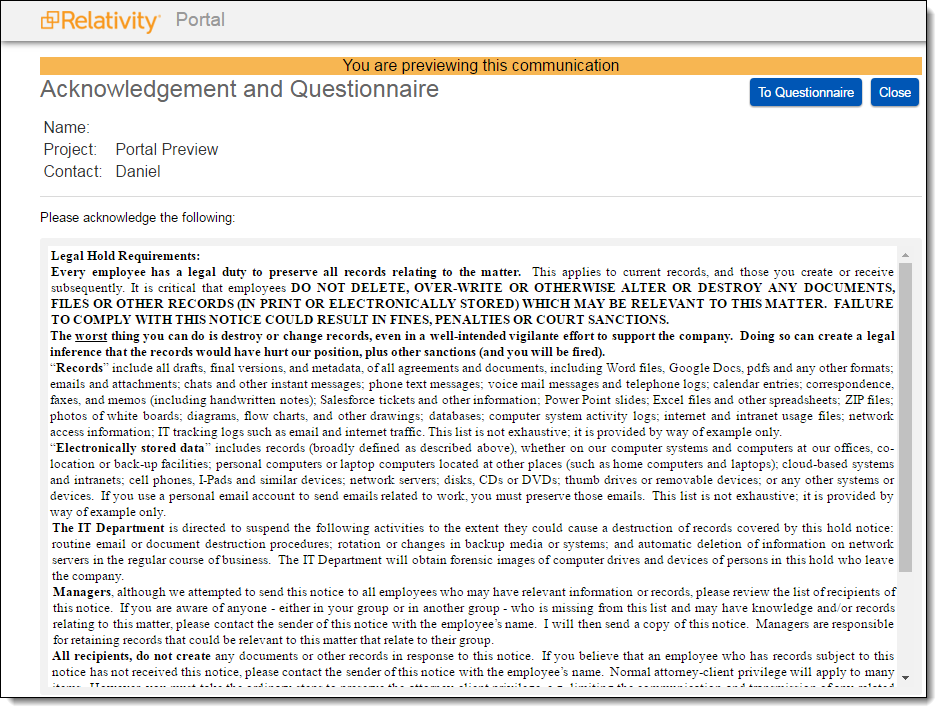
Preview Portal - preview what the custodian will see in the Custodian portal. If there's a questionnaire attached to the communication, you can click To Questionnaire to preview and interact with the questionnaire that the custodian will see. Note that in preview mode, you can't submit any questionnaire responses that you might have selected during your preview.
(Click to expand image)
If previewing a questionnaire with a communication, you can click To Communication to return to the communication preview.
Note: In order to use the Preview feature, the Communication Portal Content tab must have the following fields populated: Acknowledgement Required, Questionnaire, Portal Detail. See Communication details.
Remind/Escalate
- Remind - sends a reminder communication to the selected custodian or custodians. See Sending a reminder.
- Escalate - escalates the communication to the selected custodian's manager. See Sending an escalation.
Acknowledge
- Acknowledge on Behalf - acknowledge project participation on behalf of another custodian. See Acknowledging on behalf of a custodian.
Reports - run a project-specific report from this section. The report appears inline. See Report types for more information about each report. Note that you may not be able to view all reports depending on your permissions.
Scheduling a communication
You can schedule email acknowledgement and general hold notice communications to be sent to a custodian or custodians. Scheduling a communication is done in the third step of the project wizard. To set a schedule, follow the steps in the third step of the project wizard. For more information, see Schedule.
Sending a reminder
You can send a reminder to a custodian using a specified reminder communication. Use reminders to prompt a custodian to acknowledge participation in a hold, or respond to a questionnaire if they're unresponsive.
You can also utilize the global reminder functionality to send periodic reminders to all active, on-hold custodians to review their hold obligations. See Enabling reminders.
To send a reminder:
- Click Remind from the Communication console.
- Select a custodian or custodians from the list.
- Click Assign.
- Click Save. Reminders are sent to the selected custodians.
Scheduling an automatic reminder
You can schedule automatic reminders from the Reminder & Escalation tab.
To schedule an automatic reminder:
- Navigate to the specified Communication's detail page. See Communication details.
- Click Edit.
- From the Reminder & Escalation tab, set the Automatic Reminders to Yes. Complete the following fields:

- Allotted Reminders - the number of reminders allowed for this communication.
- Reminder Interval (in days) - the number of days between each reminder.
- Notes: The interval clock starts counting down from the time the communication was sent or from the last sent reminder time.
- Click Save. Automatic reminders are sent to any individual on the project that haven't yet acknowledged the hold or completed the questionnaire.
Sending an escalation
You can send an escalation to a custodian's designated manager. See Communication details. Use escalations when a custodian is non-responsive or to have the manager acknowledge participation on a hold or respond to a questionnaire on behalf of the custodian.
To send an escalation:
- Click Escalate from the Communication console.
- Select a custodian or custodians from the list.
- Click Assign.
- Click Save. Escalations are sent to the selected custodian's managers.
Scheduling an automatic escalation
You can schedule automatic escalation from the Reminder & Escalation tab.
To schedule an automatic escalation:
- Navigate to the specified Communication's detail page. See Communication details.
- Click Edit.
- From the Reminder & Escalation tab, set the Automatic Reminders to Yes.
- Set the Automatic Escalation to Yes. Doing so sends the escalation email one iteration after the scheduled reminder ends. For example, if an automatic reminder is configured to send a total of two reminders every five days, the first automatic escalation would get sent on the 15th day, five days after the last reminder was sent.
- Click Save.
Approving a communication
If enabled in Legal Hold Settings, general hold notices or email acknowledgements need to be approved if created by users that don't have the Approve communications permission. See Legal Hold Settings for more information. They will have to send the communications to admins that have the approve communications permission. For more information, see Securing a project.
In the Communications tab within the project details, all communications within the project are listed with a status. The statuses are Approved, Approval pending, and Approval required. Only communications marked Approved can be sent out by users without approving communication permissions. The communication cannot be modified once it is approved.
When sending a communication and it needs to be approved, follow the steps below:
- Open up a communication.
- Enter the email address of the reviewer in the Send to for Approvals field.
- Create or update a communication. For more information, see Creating a communication.
Note: During this time, the communication button to send out a communication is disabled.
- In the Communication console, click Submit for Approval.
- In the pop up dialogue, click Submit. Clicking submit sends the communication to the email address specified in the Send to for Approvals field.
Reviewing communications
Once the communication is submitted for approval, an email is sent to the approval user and the Approval Status is listed as Pending Approval in the Communications tab on the Projects Details page. For more information on being a user that can approve communications, see Securing a project.
When you receive the request for approval email, click the link within the email to open the document for review.
- Review the communication using the rich text editor.
Note: Making updates to the content is optional. You can also add notes instead of revisions to send back for updates.
- Save the communication.
- Click either Approve or Send Back for Revisions.
- If sent back for revisions, the communication will change to Approval Pending and the user updates the communication. Once the updates are made, the user will resubmit and the processes follows the same path.
- If approved, an approval email is sent to the user that submitted the communication and the approval status is changed to Approve.
Once the communication is approved, the Send Communication button becomes available in the console and any user with communication permissions can use the custodian picker buttons. From the approval time moving forward, the communication can be sent out to whoever and whenever. Changes to the communication cannot be edited after it has been approved.
Acknowledging on behalf of a custodian
A custodian may be unable to acknowledge, or officially accept, their participation in a hold. For example, the custodian doesn't have an email address, the custodian interaction level has been set to Redirect, or they are no longer with the company. In these cases, the hold owner can acknowledge a custodian's participation on behalf of the custodian if necessary.
To acknowledge on behalf of a custodian:
- Click Acknowledge on Behalf in the Communication console.
- Select custodian(s) on the left side of the item picker.
- Click Select.
- Click Proceed.
- Enter a reason for your acknowledgment.
- Click Acknowledge.