The content on this site is based on the most recent monthly version of Relativity, which contains functionality that has been added since the release of the version on which Relativity's exams are based. As a result, some of the content on this site may differ significantly from questions you encounter in a practice quiz and on the exam itself. If you encounter any content on this site that contradicts your study materials, please refer to the What's New and/or the Release Notes for details on all new functionality.
(Click to expand)
Views on the Files tab
The Files tab contains the following views:
- All Files - contains all the files in your workspace.
- Current Errored Files - contains all the documents that yielded errors in your workspace that currently have an Error Status value of Not Resolved.
- All Errored Files - contains all the documents that yielded errors in your workspace, including those with a current Error Status value of Resolved and Unresolved.
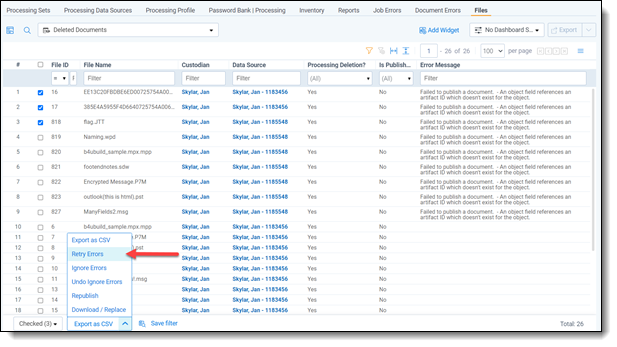
- Deleted Documents - contains all the documents you deleted from your workspace.
Note: You can export any file list as a CSV file, which will include the total set of filtered results.
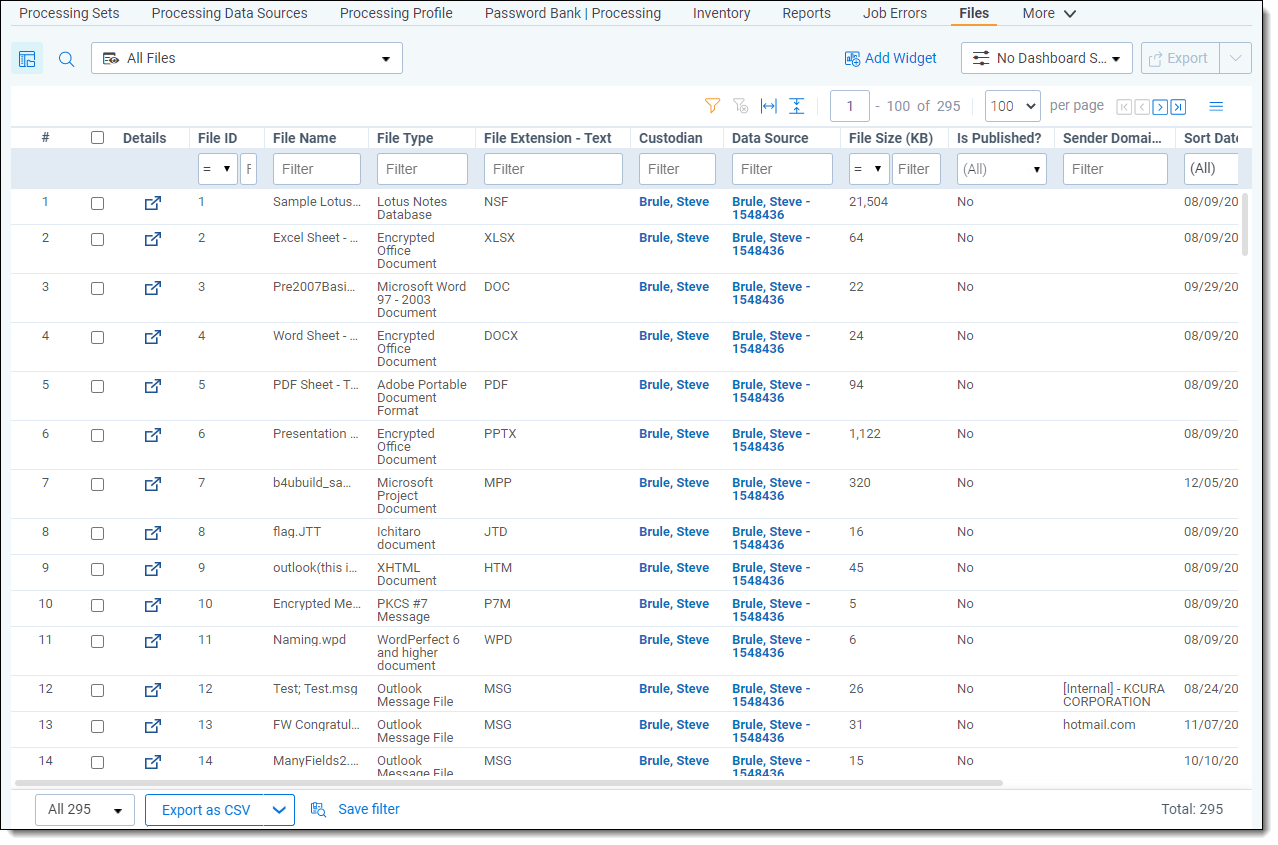
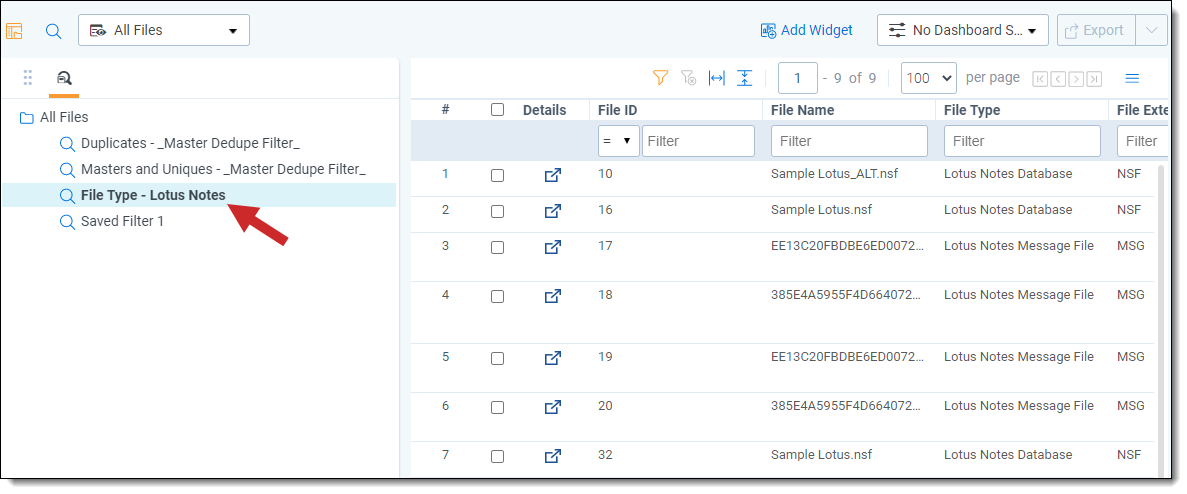
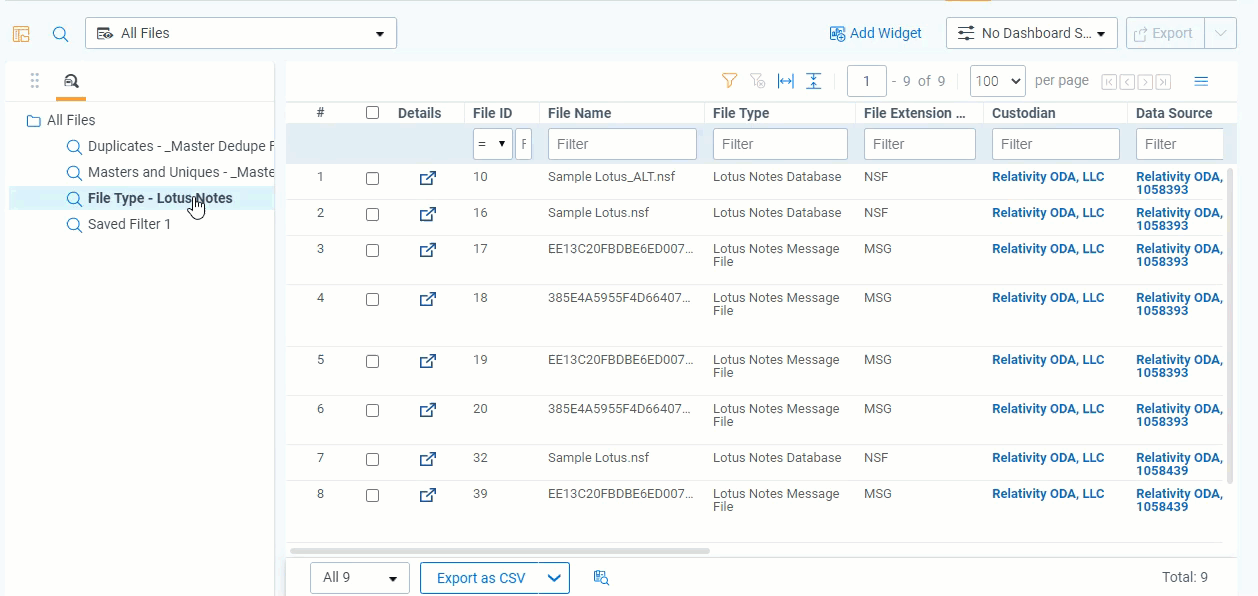
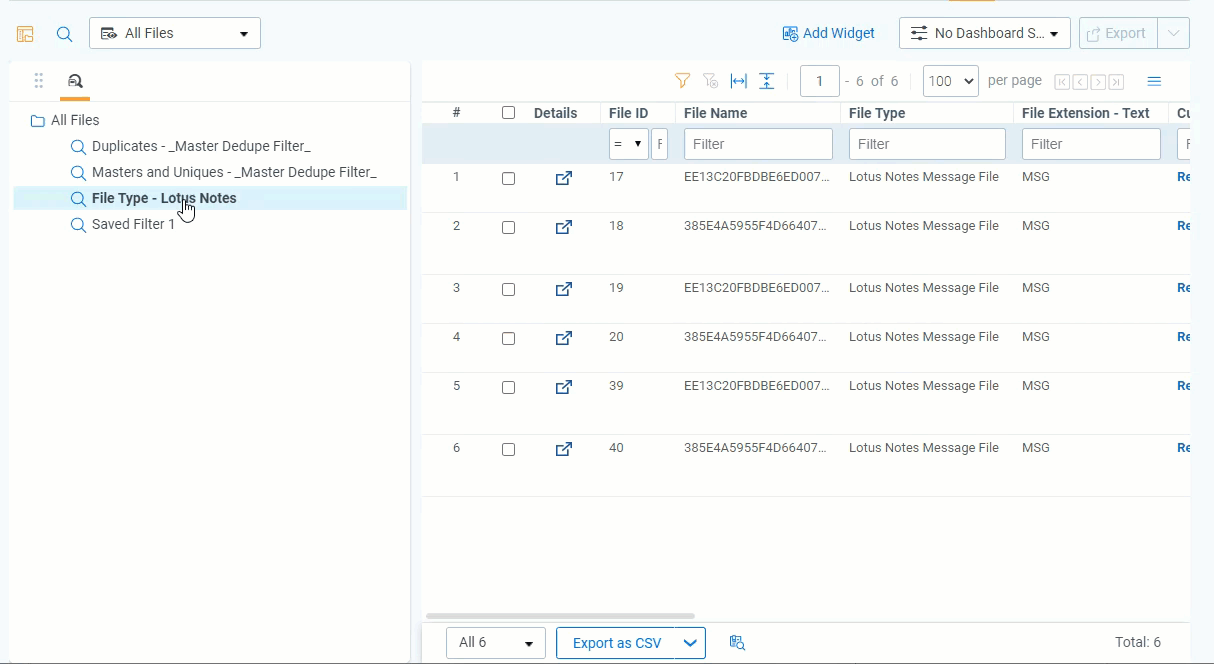
All Files view
The All Files view contains all the discovered files in your workspace. This view does not contain documents that have been deleted and have a Yes value for the Processing Deletion? field. Those documents can only be found in the Deleted Documents view described in the next section.
(Click to expand)
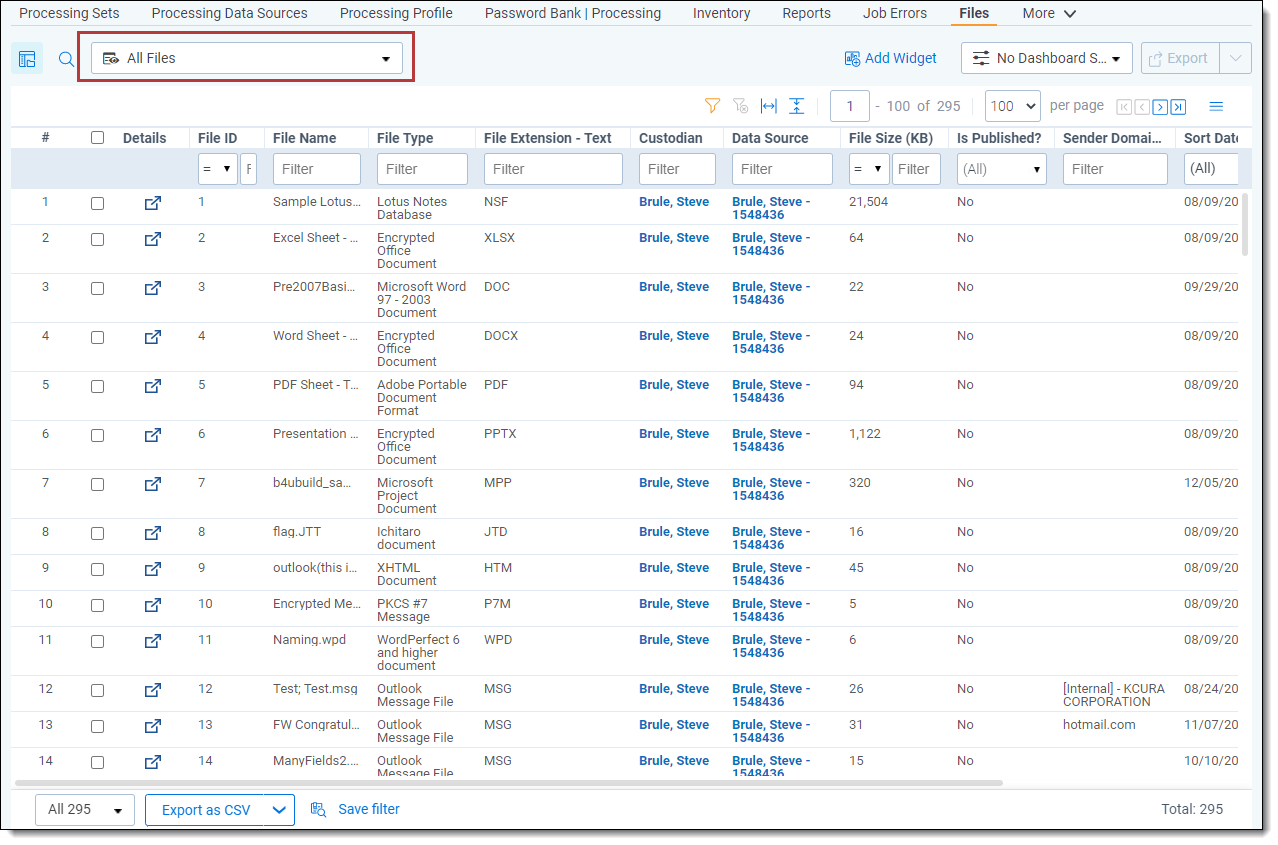
This view contains the following fields:
- Details - the details view of all fields, including compressed metadata, of the discovered file selected.
- File ID - the number value associated with the discovered file in the database.
- File Name - the original name of the discovered file.
- File Type - the file type of the discovered file.
- File Extension - Text - allows file extensions to be filtered by text.
- Custodian - the custodian associated with the discovered file.
- Data Source - the data source containing the discovered file.
- File Size (KB) - the size of the discovered file. To specify KB or MB, this field needs to be recreated as a fixed-length text field.
- Is Published - the yes/no value indicating if a discovered file is published.
- Sender Domain - the domain of the sender of an email.
- Sort Date - the date taken from the file's Sent Date, Received Date, and Last Modified Date fields in that order of precedence.
- Virtual Path - Text - the complete folder structure and path from the original folder or file chosen for processing to the discovered file.
Deleted Documents view
The Deleted Documents view contains the files you deleted from the Documents tab after the files were published.
(Click to expand)
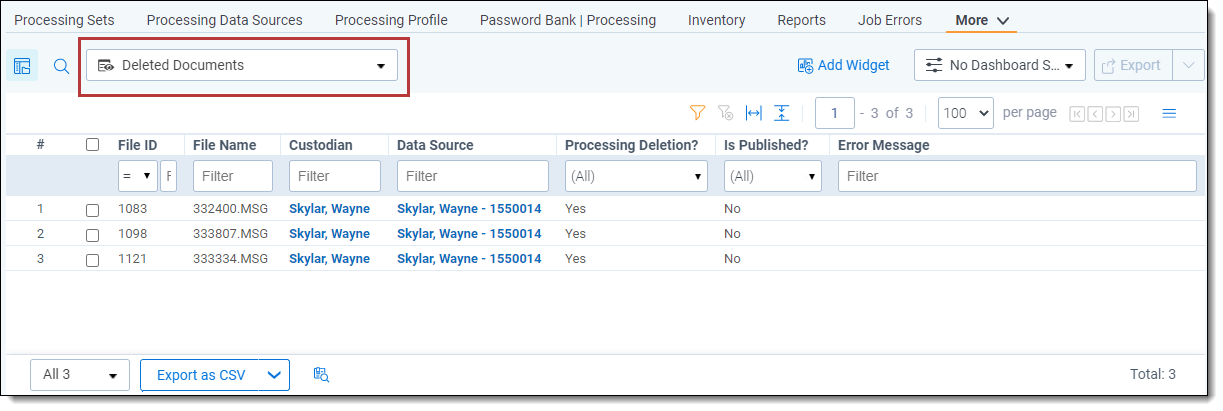
This view contains the following fields:
- File ID - the number value associated with the discovered file in the database.
- File Name - the original name of the discovered file.
- Custodian - the custodian associated with the discovered file.
- Data Source - the data source containing the discovered file.
- Processing Deletion? - the yes/no value indicating if a discovered file or partial family file is deleted.
- Is Published? - the yes/no value indicating if a discovered file is published.
- Error Message - the message that details the error, cause, and suggested resolution of the error prioritized by the following processing phases:
- Delete
- Publish
- Discover
- Text Extraction
Current Errored Files view
The Current Errored Files view contains all the documents that yielded errors in your workspace that currently have an Error Status value of Not Resolved. By default, this view does not contain files with an Error Status of Resolved, as those can be found in the All Errored Files view.
(Click to expand)
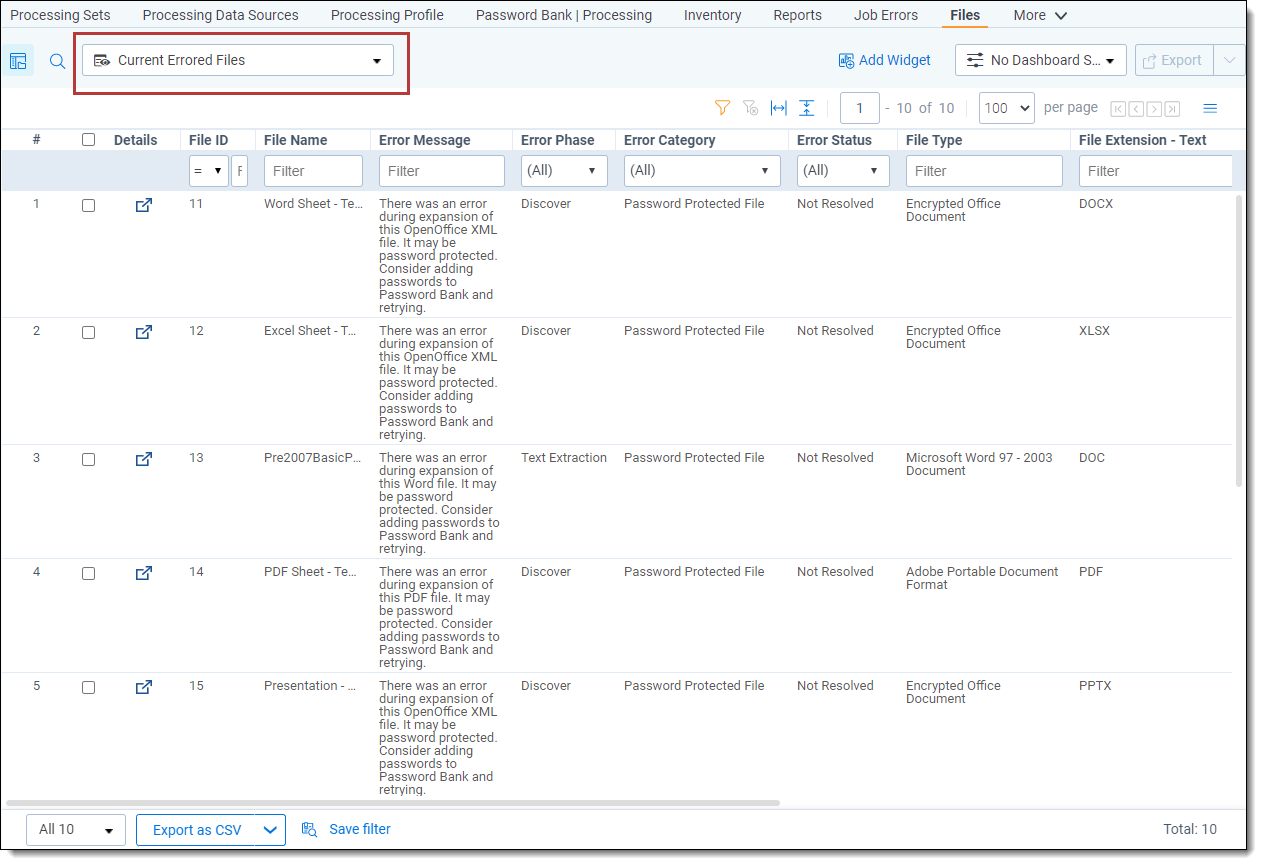
- Details - the details view of all fields, including compressed metadata, of the discovered file selected.
- File ID - the number value associated with the discovered file in the database.
- File Name - the original name of the discovered file.
- Error Message - the message that details the error, cause, and suggested resolution of the error. This field will display any of the following values, as dictated by the phases' precedence. For example, if a file has both Text Extraction and Publish errors associated with it, this field will display a value of Publish.
- Delete
- Publish
- Discover
- Text Extraction
- Error Phase - the phase of processing in which the error occurred. This field will display any of the following values, as dictated by the phases' precedence. For example, if a file has both Text Extraction and Publish errors associated with it, this field will display a value of Publish.
- Delete
- Publish
- Discover
- Text Extraction
- Error Category - provides insight into the nature of the errors that have occurred on your processed files. For details, see Error category list.
- Error Status - the current status of the error. The Current Errored Files view only displays files with an Error Status of Not Resolved.
- File Type - the file type of the discovered file.
- File Extension - Text - allows file extensions to be filtered by text.
- File Size (KB) - the size of the discovered file. To specify KB or MB, this field needs to be recreated as a fixed-length text field.
- Custodian - the custodian associated with the discovered file.
- Data Source - the data source containing the discovered file.
- Is Published - the yes/no value indicating if a discovered file is published.
All Errored Files view
The All Errored Files view contains all the documents that yielded errors in your workspace, including those with a current Error Status value of Resolved and Unresolved. These files are sorted by descending file size starting with the largest containers and ending with the smallest loose files.
(Click to expand)
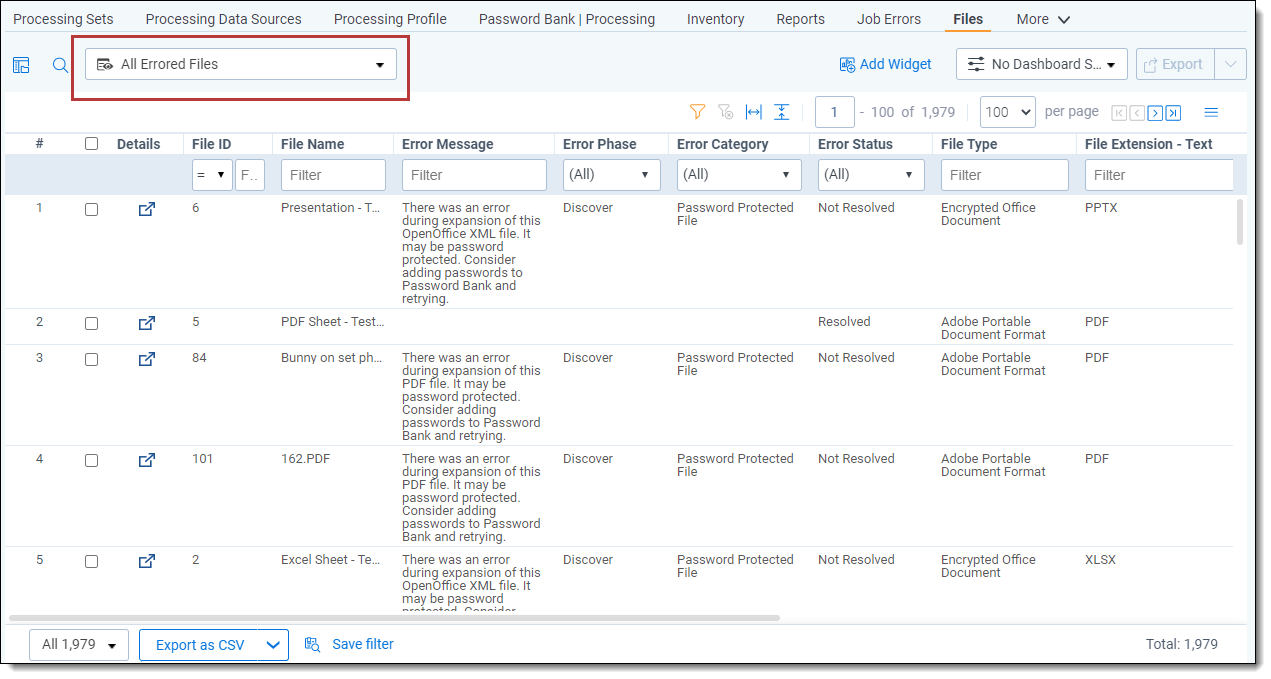
This view contains the following fields:
- Details - the details view of all fields, including compressed metadata, of the discovered file selected.
- File ID - the number value associated with the discovered file in the database.
- File Name - the original name of the discovered file.
- Error Message - the message that details the error, cause, and suggested resolution of the error. This field will display any of the following values, as dictated by the phases' precedence. For example, if a file has both Text Extraction and Publish errors associated with it, this field will display a value of Publish.
- Delete
- Publish
- Discover
- Text Extraction
- Error Phase - the phase of processing in which the error occurred. This field will display any of the following values, as dictated by the phases' precedence. For example, if a file has both Text Extraction and Publish errors associated with it, this field will display a value of Publish.
- Delete
- Publish
- Discover
- Text Extraction
- Error Status - the current status of the error. This field displays any of the following values, depending on the current state of the file:
- Ignored
- Resolved
- Resolving
- Not Resolved
- File Type - the file type of the discovered file.
- File Extension - Text - allows file extensions to be filtered by text.
- File Size (KB) - the size of the discovered file. To specify KB or MB, this field needs to be recreated as a fixed-length text field.
- Custodian - the custodian associated with the discovered file.
- Data Source - the data source containing the discovered file.
- Is Published - the yes/no value indicating if a discovered file is published.
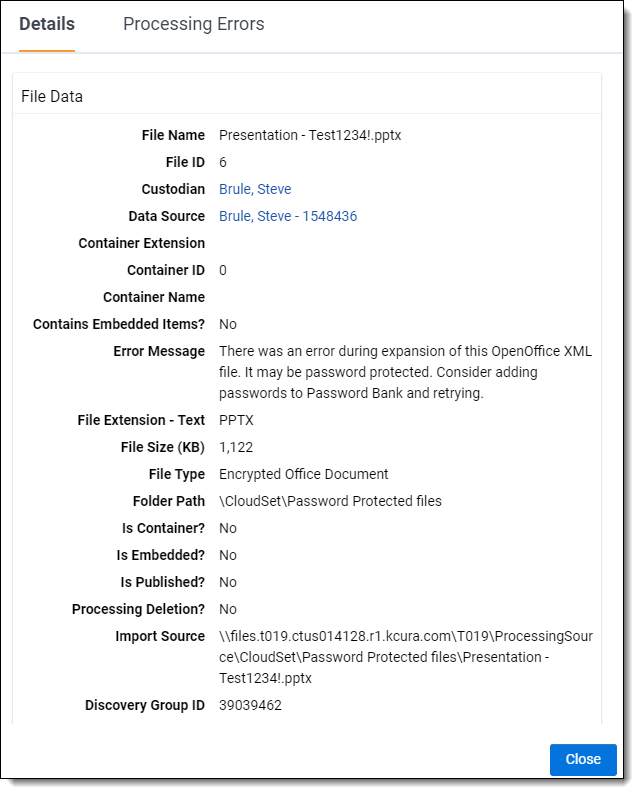
Details modal
You can open the Details modal of a file by clicking ![]() to see uncompressed file and content metadata not visible by default in the Files view.
to see uncompressed file and content metadata not visible by default in the Files view.
The Details modal provides you with supplemental information about errors that have occurred on records during discovery and publish.
(Click to expand)
You can also see a summary and history of all processing errors and retries in this modal. When you click the Processing Errors tab, you're presented with the following breakdown of the current errors and error history of the selected file:
(Click to expand)
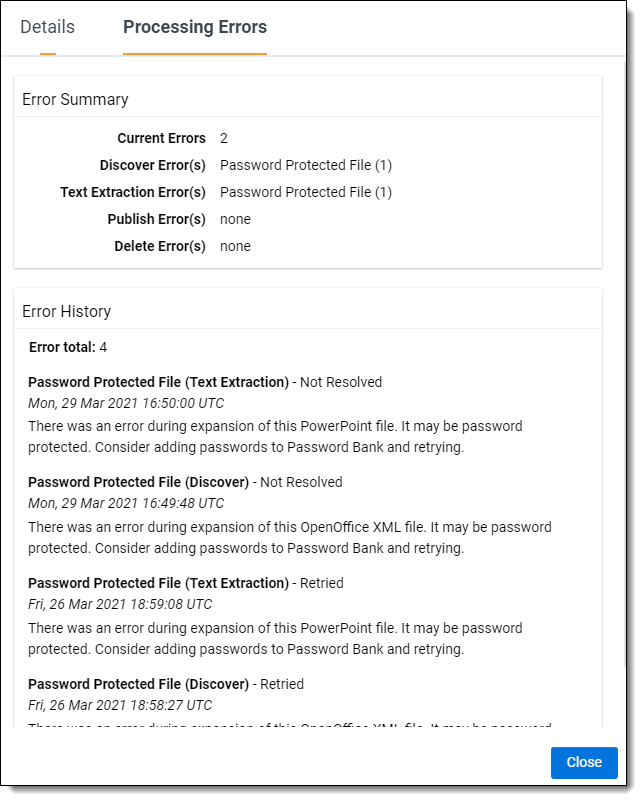
- The Error History section represents all errors that have ever occurred on a file. This acts as a timeline of the record’s errors, showing when they occurred, what they were about, and if any are still active. This includes errors resulting from retries of previous errors and contains category, phase, date/time, and message information. All times are kept in UTC format.
-
The Error Summary section displays a count of all active errors along with their associated category and phase. This is especially important when investigating errors relating to container files, as there can be many associated to the parent container during file extraction. This helps determine the level of impact the issue has as it may affect many files originating from it.
Retrying delete errors
Navigate to the Deleted Documents view to see a record of all deleted documents. The Processing Deletion? field is the yes/no indicator for deleted documents. You can filter by Error Message to see the errors that occurred during deletion. These errors can be retried using the Retry Delete mass operations option. Once deleted, these documents will be excluded from further processing operations (e.g., deduplication, retry, and republish) and the next duplicate will be published as the new master document, if available. To see a summary of master documents that have been replaced, see the Master Document Replacement Summary report in
(Click to expand)
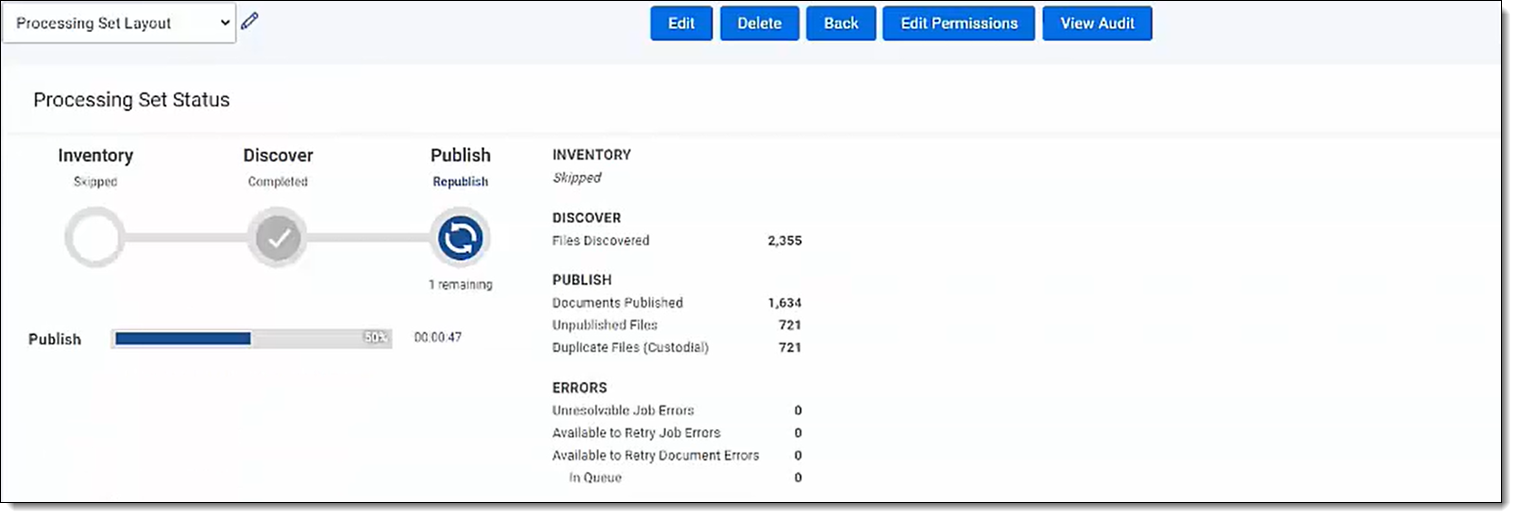
Republishing files from the Files tab
Note: The following information is specific to republishing files at the file level via the Files tab and is distinct from republishing files via the processing set console. For details on republishing via the processing set console, see Republishing a processing set on the Publishing files topic.
The Republish mass operation provides the ability to publish specific documents on a more granular level compared to the processing set page. For example, you can select specific files and re-publish only that subset. In case only a few members of a family are selected, then this mass operation will automatically republish the whole family of documents.
Republish will overlay all metadata fields mapped at the time you started the operation. If fields are unmapped, Relativity will not remove the data from the field that was already published. The Extracted Text and Native file fields will be overwritten if they are different than the initially published document.
Navigate to the All Files view to see a record of all discovered files and filter to published files via the Is Published? field published. These files can be republished at the file level using the Republish mass operation.
(Click to expand)
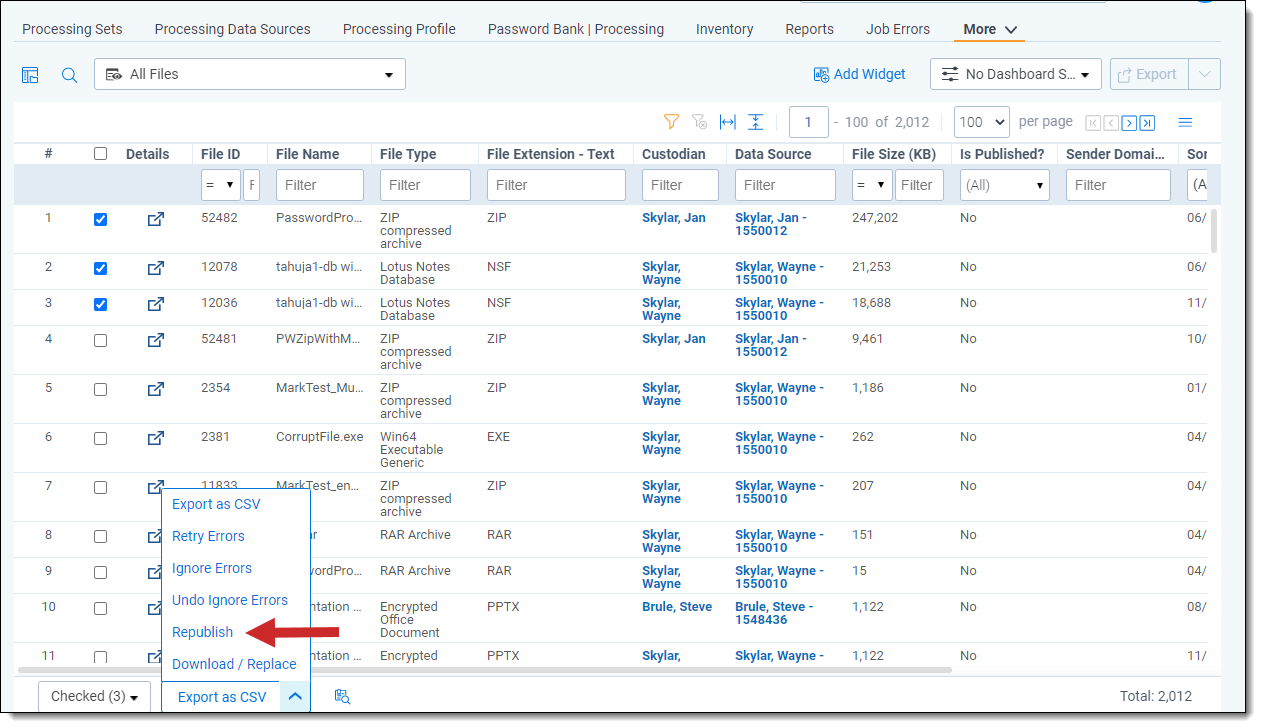
When you click Republish, you're presented with a confirmation modal containing the following information about the job you're about to submit:
- Selected republish count of eligible files
- Total number of files to be republished, including families
- Total number of mapped fields
- Number of documents per batch when importing documents during processing
Note: If you've selected files ineligible for republish, the confirmation message will reflect this by stating that there are 0 files to be republished. Ineligible files include files from unpublished processing sets or data sources, containers (e.g., PST, ZIP), duplicate files, and files where the Processing Deletion? field status is Yes.
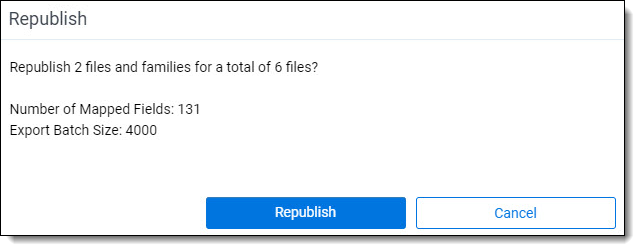
If you've selected eligible files, click Republish to proceed or Cancel to return to the All Files view.
Note: Once you republish, you will be unable to cancel this job.
(Click to expand)
Common use cases for using the Republish mass operation
The following are common situations in which you would opt to use the Republish mass operation:
-
Additional metadata fields were mapped after the initial publish of the processing set/data source completed. For example, you did not map the File Name field during the initial publish, which resulted in no metadata being populated for the documents. Now, you can map the File Name fields, go to the Files tab, filter for that data source, select the returned files and republish them, which will result the File name field getting populated.
-
Files that did not get published because of document or job level publish errors.
-
Newly discovered files came from a retry discovery operation after the initial publish on the set. After the initial publish completes, you can still retry discovery errors, which could result in more files to be discovered. You can select unpublished files and republish only that subset.
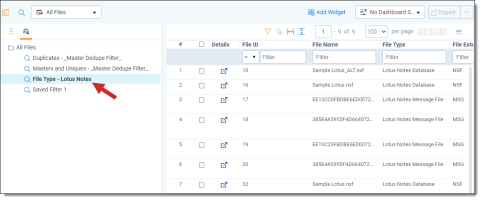
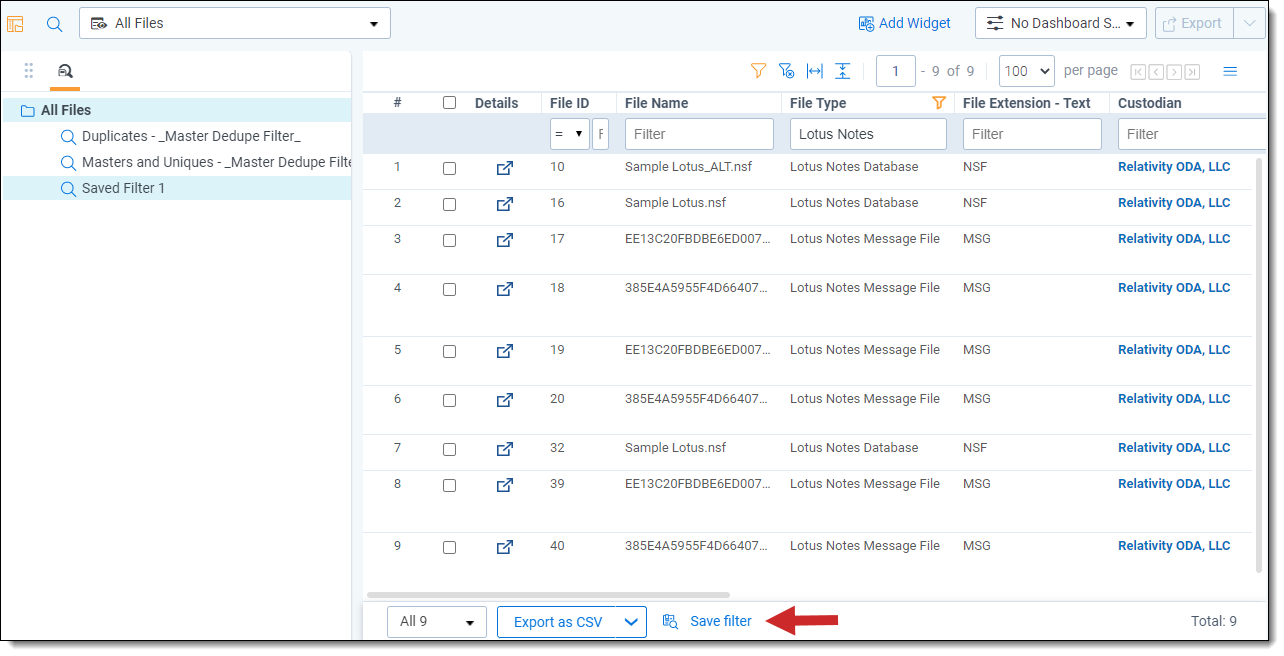
Saved filters
You can save any filters you set on any of the views in the Files tab and reuse them in future workflows. To do this:
-
Filter on any of the fields in the view and click Save Filters at the bottom of the view.
-
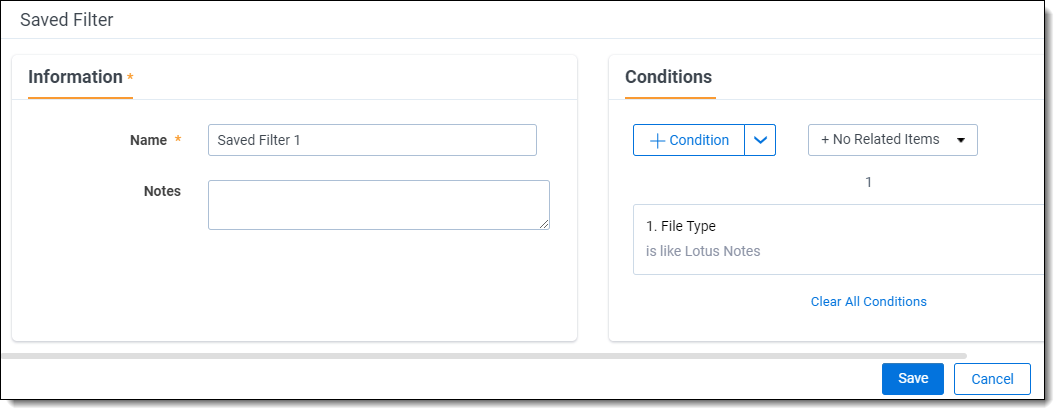
In the Saved Filter modal complete following fields and click Save.
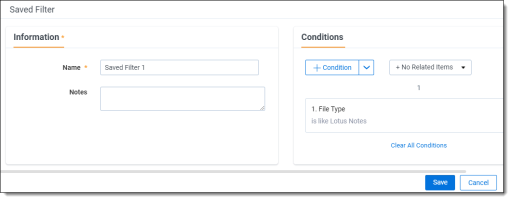
- Name - the name you want these saved filters to appear under in the saved filters browser.
- Notes - any notes you want to enter to clarify the purpose of these saved filters.
- Conditions -
a display of the filter conditions you already set on each field in the view you were previously working in. For example, if you'd just filtered for Lotus Notes files on the File Type field, that filter is displayed. Here, you can start over by clear the conditions you already set, or you can add more conditions by clicking + Conditions. Doing this brings up the Add Condition - Select Field modal, in which you can select additional fields.

Once you select the additional fields you want to add to the saved filters set, specify the conditions you want to apply to those fields and click Apply.
The new field(s) and conditions are then visible in the Saved Filter modal and you can click Save to further refine the documents returned by this filter set.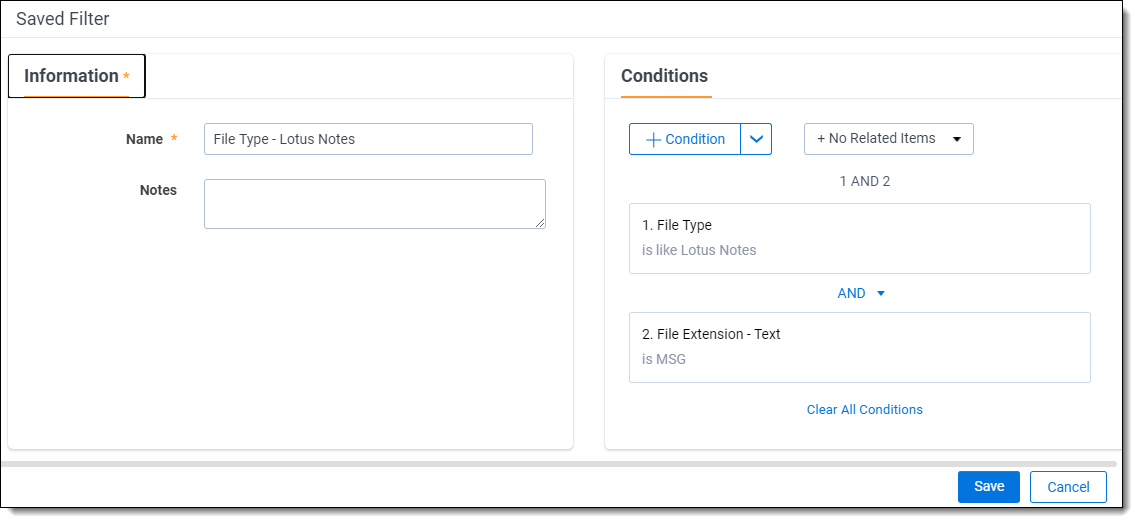
-
Once you save the filter set, return to the saved filters pane and confirm that the new set has been added. You can now use this set whenever you want to locate these specific documents.
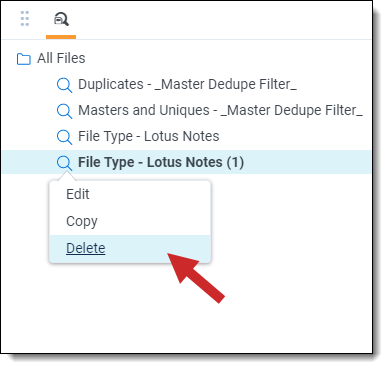
Right-click options
You can right-click on any saved filter set in the saved filters pane, and choose to Edit, Copy, or Delete it.
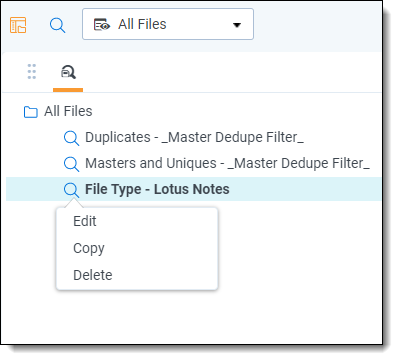
Edit
Clicking Edit takes you to the Saved Filter modal to add, remove, or modify any fields previously set.
(Click to expand)
Copy
To make a copy of an existing filter set, right-click and select Copy.
(Click to expand)
-
This is useful for situations in which you want to retain most of the fields and conditions in an existing filter set, but not all of them. Copying that filter set allows you to quickly make small changes to it and save it as a new set without having to build a new one from scratch. When you select Copy, the new set appears with the same name and a (1) added to the end of it. You can then edit this copied set to give it a new name and different conditions in the Saved Filter modal.
Delete
To remove a filter set from the saved filter browser entirely, right-click and select Delete .
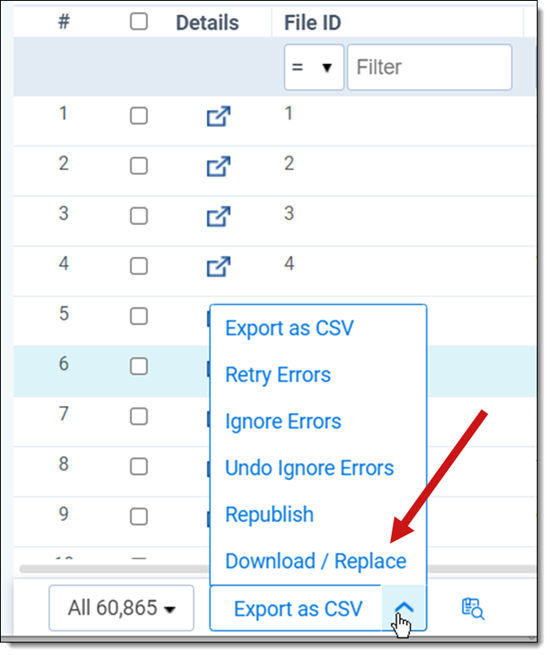
Download / Replace
Download / Replace provides the ability to download a file to your local machine for investigation. It will also provide the ability to replace and retry an original file with a new version that has been fixed during error remediation. You can only replace and retry files with errors of a status of Not Resolved.
To perform the Download / Replace mass action, perform the following steps:
- To take action on a specific file, select it, and then select the Download / Replace mass action.
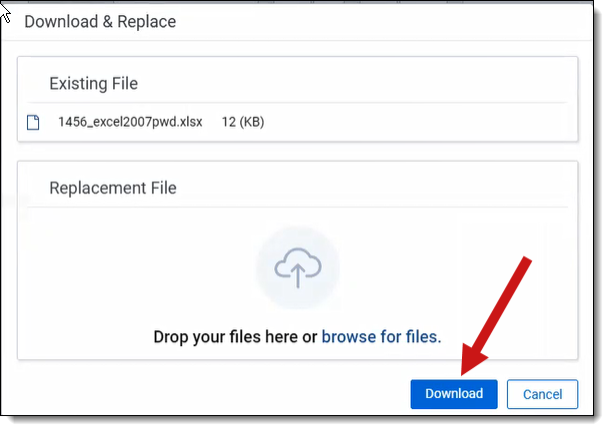
- The Download & Replace dialog box opens allowing you to browse for or drop a replacement file.
- Once you select or browse and drop the replacement file, click Download.
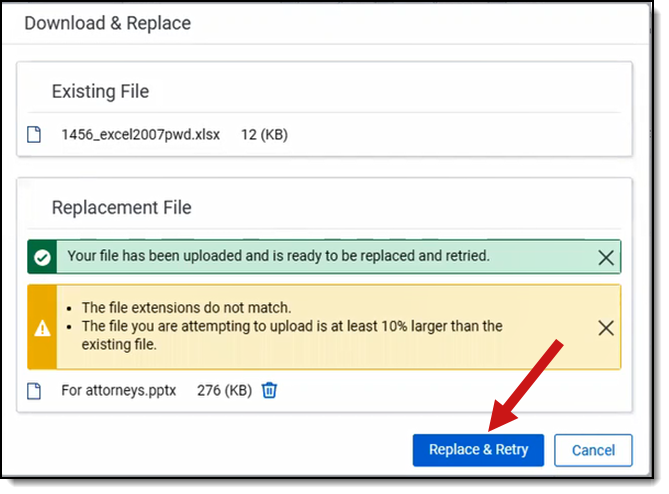
- Once the file is downloaded, resolve the error, and drag the resolved file back into the Download & Replace modal. A message displays that the file is ready for replace and retry. If the file extensions do not match and/or if the new file is larger than the original, you can still proceed with the replace and retry action.
-
Click Replace & Retry.
- To see if the action was successful, you can check the Error History by going into the Details modal. If the retry was successful, the error will display a status of Resolved.
Note: If you select multiple files, a Download and Replace error displays because this action can only be performed on one file at a time.